Table of Contents
Advertisement
Available languages
Available languages
Quick Links
Item #1000 507 197, 665-090
Model #73601, 73656
CUL Model #56-ATR
USE AND CARE GUIDE
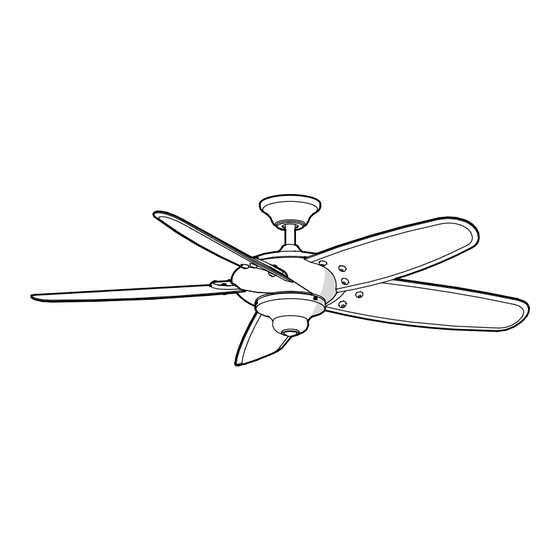
ALTURA 56-INCH CEILING FAN
Questions, problems, missing parts? Before returning to the store,
call Home Decorators Collection Customer Service
8 a.m. - 7 p.m., EST, Monday-Friday, 9 a.m. - 6 p.m., EST, Saturday.
1-800-986-3460
HOMEDEPOT.CA
THANK YOU
We appreciate the trust and confidence you have placed in Home Decorators Collection through the purchase of this ceiling fan. We strive
to continually create quality products designed to enhance your home. Visit us online to see our full line of products available for your home
improvement needs. Thank you for choosing Home Decorators Collection!
Advertisement
Chapters
Table of Contents

Related Manuals for Home Decorators Collection ALTURA 73601


Summary of Contents for Home Decorators Collection ALTURA 73601
- Page 1 THANK YOU We appreciate the trust and confidence you have placed in Home Decorators Collection through the purchase of this ceiling fan. We strive to continually create quality products designed to enhance your home. Visit us online to see our full line of products available for your home...
-
Page 2: Table Of Contents
Table of Contents Table of Contents ..............2 Assembly ................7 Safety Information ............... 2 Operation ................12 Warranty ................3 Care and Cleaning ............. 14 Pre-Installation ..............3 Troubleshooting ..............14 Installation ................6 Safety Information To reduce the risk of electric shock, ensure the electricity has WARNING: To reduce the risk of personal injury, been turned off at the circuit breaker or fuse box before you do not bend the blade brackets (also referred to as... -
Page 3: Warranty
A certain amount of “wobble” is normal and should not be considered a defect. Servicing performed by unauthorized persons shall render the warranty invalid. There is no other express warranty. Home Decorators Collection hereby disclaims any and all warranties, including but not limited to those of merchantability and fitness for a particular purpose to the extent permitted by law. - Page 4 Pre-installation (continued) HARDWARE INCLUDED NOTE: Hardware not shown to actual size. Part Description Quantity Part Description Quantity Blade attachment screws Locking pin Plastic wire connecting nut Balancing kit Hanger pin Decorative nut Extra Mounting Screws...
- Page 5 Pre-installation (continued) PACKAGE CONTENTS Part Description Quantity Part Description Quantity Slide-on mounting bracket Decorative motor collar cover (inside canopy) Blade Ball/downrod assembly Switch cup adaptor Canopy with canopy ring attached Remote control (battery included) Fan-motor assembly Switch cup (receiver included) IMPORTANT: This product and/or components are governed by one or more of the following U.S.
-
Page 6: Installation
Installation MOUNTING OPTIONS WARNING: To reduce the risk of fire, electric shock, NOTE: You may need a longer downrod to maintain or personal injury, mount the fan to an outlet box proper blade clearance when installing on a steep, sloped marked acceptable for fan support using the screws ceiling. - Page 7 Assembly - Standard Ceiling Mount Preparing for mounting Routing the wires □ □ Remove the canopy ring (L) from the canopy (C) by turning Route the wires exiting the top of the fan motor (D) into the ring to the right until it unlocks. the decorative motor collar cover (F) and through the □...
- Page 8 Assembly - Hanging the Fan Attaching the fan to the electrical Hanging the fan □ WARNING: To reduce the risk of fire, electric shock, or other Carefully lift the fan motor assembly (D) up to the slide-on personal injury, mount the fan to an outlet box or supporting mounting bracket (A).
-
Page 9: Assembly
Assembly - Hanging the Fan (continued) Making the electrical connection WARNING: Each wire nut supplied with this fan is designed to accept up to one 12-gauge house wire and two wires from the fan. If you have larger than 12-gauge house wiring or more than one house wire to connect to the fan wiring, consult an electrician for the proper size wire nuts to use. - Page 10 Assembly - Hanging the Fan (continued) Mounting the fan Attaching the fan blades WARNING: When using the standard ball/downrod mounting, the □ Attach blade (G) to blade bracket (J) using the decorative tab in the ring at the bottom of the mounting bracket must rest in nuts (FF) and blade attachment screws (AA) provided.
- Page 11 Assembly - Attaching the accessories Attaching the switch cup adaptor Attaching the switch cup □ Remove one screw (QQ) from the black bracket below the fan motor assembly (D). Loosen, but do not remove the CAUTION: To reduce the risk of electric shock, disconnect other two screws (QQ).
- Page 12 Operating Your Fan and Remote Control Remote Control - Your fan is equipped with a remote control to operate the speed and lights of your new ceiling fan. For more information on how to install the remote control, see the remote control instruction along with the remote control components.
-
Page 13: Operation
Operating Your Fan and Remote Control Learning process Remote control operation NOTE: This remote is equipped with 16 code combinations. To Should you desire to use another remote control unit with your prevent possible interference from or to other remote units, new fan, install one using the steps below: such as garage door openers, car alarms, or security systems, □... -
Page 14: Care And Cleaning
Care and Cleaning WARNING: Make sure the power is off before cleaning your fan. □ Because of the fan’s natural movement, some connections may become loose. Check the support connections, brackets, and blade attachments twice a year. Make sure they are secure. It is not necessary to remove the fan from the ceiling. □... - Page 15 Questions, problems, missing parts? Before returning to the store, call Home Depot Customer Service 8 a.m. - 7 p.m., EST, Monday-Friday, 9 a.m. - 6 p.m., EST, Saturday. 1-800-986-3460 HOMEDEPOT.CA Retain this manual for future use.
- Page 16 MERCI Nous vous remercions d’avoir fait confiance à Home Decorators Collection en achetant ce ventilateur de plafond. Nous nous efforçons en permanence de créer des produits de qualité conçus pour perfectionner votre maison. Vous pouvez visiter notre site en ligne pour consulter notre gamme...
- Page 17 Table des matières Table des matières .............. 2 Assemblage ................. 7 Consignes de sécurité ............2 Utilisation ................12 Garantie ................3 Entretien et nettoyage ............14 Pré-installation..............3 Dépannage ................. 14 Installation ................6 Consignes de sécurité AVERTISSEMENT : Pour réduire le risque de Pour réduire le risque d’électrocution, assurez-vous que le blessures corporelles, ne pliez pas les supports de courant est coupé...
-
Page 18: Garantie
Les réparations effectuées par des personnes non autorisées rendront cette garantie caduque. Il n’existe aucune autre garantie expresse. Par la présente, Home Decorators Collection décline toute garantie y compris, mais sans s’y limiter, celles qui ont trait à la qualité marchande et d’adéquation à un usage particulier, selon les limites prévues par la loi. - Page 19 Pré-installation (suite) QUINCAILLERIE FOURNIE REMARQUE : Les pièces de quincaillerie ne sont pas illustrées à la grandeur nature. Pièce Description Quantité Pièce Description Quantité Vis de fixation des pales Goupille de verrouillage Capuchon de connexion en plastique Nécessaire d'équilibrage Goupille de suspension Écrou décoratif Vis de montage supplémentaires...
- Page 20 Pré-installation (suite) CONTENU DE L'EMBALLAGE Pièce Description Quantité Pièce Description Quantité Support de fixation à glisser Couvercle décoratif du collet (à l'intérieur de la coupelle) du moteur Ensemble boule/tige de suspension Pale Coupelle avec anneau de coupelle Adaptateur de la boîte de branchement pré-installé...
-
Page 21: Installation
Installation OPTIONS D'INSTALLATION AVERTISSEMENT : Pour réduire les risques d'incendie, REMARQUE : Une tige de suspension plus longue peut de choc électrique ou de blessure, fixez le ventilateur s'avérer nécessaire pour maintenir une distance correcte à une boîte de sortie de courant portant la mention entre les pales et le plafond, lors d'une installation sur capable de supporter un ventilateur, au moyen des un plafond présentant une forte pente. - Page 22 Assemblage – Installation normale au plafond Préparation à l'installation Acheminement des câbles □ □ Retirez l’anneau de coupelle (L) de la coupelle (C) en tournant Faites passer les fils sortant du dessus du moteur du l'anneau vers la droite jusqu’à ce qu’il soit déverrouillé. ventilateur (D) par le couvercle décoratif du collet du □...
- Page 23 Assemblage – Suspension du ventilateur Montage du ventilateur sur la Suspension du ventilateur boîte électrique □ AVERTISSEMENT : Pour réduire les risques d'incendie, de choc Soulevez avec précaution le moteur du ventilateur (D) électrique ou de blessure, fixez le ventilateur à une boîte de jusqu'au support de fixation à...
-
Page 24: Assemblage
Assemblage – Suspension du ventilateur (suite) Connexions électriques AVERTISSEMENT : Chaque capuchon de connexion fourni avec ce ventilateur est conçu pour accepter un fil de câblage de la maison de calibre 12 et deux fils en provenance du ventilateur. Si le calibre du fil de câblage de la maison est supérieur à... - Page 25 Assemblage – Suspension du ventilateur (suite) Installation du ventilateur Installation des pales du ventilateur AVERTISSEMENT : Si la méthode d'installation normale avec la □ Fixez la pale (G) au support de pale (J) à l'aide des écrous boule et la tige de suspension est utilisée, la languette de l'anneau décoratifs (FF) et des vis de fixation de pale (AA) fournies.
- Page 26 Assemblage – Installation des accessoires Montage l'adaptateur de la boîte Montage de la boîte de branchement de branchement □ Retirez une vis du support noir situé sous le moteur du ATTENTION : Pour réduire le risque de choc électrique, ventilateur (D). Desserrez mais ne retirez pas les deux débranchez le circuit d’alimentation électrique du autres vis (QQ).
-
Page 27: Utilisation
Utilisation du ventilateur et de la télécommande Télécommande - Le ventilateur est muni d'une télécommande pour contrôler la vitesse et le luminaire de votre nouveau ventilateur. Pour de plus amples renseignements sur la façon d'installer la télécommande, consultez les instructions de la télécommande ainsi que des pièces de la télécommande. - Page 28 Utilisation du ventilateur et de la télécommande Apprentissage Utilisation de la télécommande REMARQUE : Cette télécommande est munie de 16 Si vous souhaitez utiliser un autre dispositif de télécommande avec votre combinaisons de code. Afin d'empêcher toute interférence nouveau ventilateur, installez-en un en procédant comme suit : provenant ou vers d'autres dispositifs de télécommande □...
-
Page 29: Entretien Et Nettoyage
Entretien et nettoyage AVERTISSEMENT : Assurez-vous que l’alimentation en courant électrique est coupée avant de nettoyer le ventilateur. □ En raison du mouvement naturel du ventilateur, certains raccords peuvent se desserrer. Vérifiez les raccords de support, les brides et les fixations des pales deux fois par an. Vérifiez qu’ils sont solidement fixés. Il n’est pas nécessaire d'enlever le ventilateur du plafond. □... - Page 30 Questions, problèmes, pièces manquantes? Avant de retourner au magasin, appelez le service à la clientèle de Home Depot entre 8 h et 19 h, HNE, du lundi au vendredi et entre 9 h et 18 h, HNE, le samedi. 1 800 986-3460 HOMEDEPOT.CA Conservez ce guide pour un usage ultérieur.
Need help?
Do you have a question about the ALTURA 73601 and is the answer not in the manual?
Questions and answers