
Related Manuals for Rohde & Schwarz Scope Rider RTH


Summary of Contents for Rohde & Schwarz Scope Rider RTH
- Page 1 ® R&S Scope Rider RTH Handheld Oscilloscope Getting Started (=J?Ë2) 1326156102 Version 10...
- Page 2 R&S ® is a registered trademark of Rohde & Schwarz GmbH & Co. KG. Trade names are trademarks of the owners. ® 1326.1561.02 | Version 10 | R&S Scope Rider RTH Throughout this document, R&S ® is indicated as R&S.
-
Page 3: Table Of Contents
® Contents R&S Scope Rider RTH Contents 1 Safety and regulatory information........5 1.1 Safety instructions................5 1.2 Warning messages in the documentation........10 1.3 Where to find key documents on Rohde & Schwarz....... 11 1.4 Korea certification class A..............11 1.5 Regulatory information.............. - Page 4 ® Contents R&S Scope Rider RTH 5 Operating the instrument............34 5.1 Connecting probes................34 5.2 Connecting test leads (R&S RTH1002)..........35 5.3 Accessing the functionality............... 36 5.3.1 Using the touchscreen................36 5.3.2 Using the navigation wheel..............38 5.3.3 Using front panel keys................42 5.4 Displaying an unknown signal............
-
Page 5: Safety And Regulatory Information
The printed "Safety Instruc- ® tions" for "R&S Scope Rider RTH" are delivered with the product. ● Throughout the documentation, safety instructions are provided when you need to take care during setup or operation. - Page 6 ® Safety and regulatory information R&S Scope Rider RTH Safety instructions Using the product requires specialists or specially trained personnel. These users also need sound knowledge of at least one of the languages in which the user interfaces and the product documentation are available.
- Page 7 ® Safety and regulatory information R&S Scope Rider RTH Safety instructions Handling batteries safely The product contains exchangeable or built-in lithium polymer or lithium ion cells or batteries. The use of the word battery in the following always means all types.
- Page 8 ® Safety and regulatory information R&S Scope Rider RTH Safety instructions Connecting to power If you connect the product to an external power supply, use the one delivered with the product or recommended in the product documentation. The external power supply must conform to the country-specific regulations.
- Page 9 ® Safety and regulatory information R&S Scope Rider RTH Safety instructions ● Do not use the instrument if the instrument casing, the display or any probe or accessory are damaged. If you detect or suspect any damage, have the instrument or accessory inspected by qualified service personnel.
-
Page 10: Warning Messages In The Documentation
® Safety and regulatory information R&S Scope Rider RTH Warning messages in the documentation Checking the product for damage Check the product regularly to ensure that it is undamaged. If you have dropped the product or exposed it to excessive mechanical stress, always check the prod- uct. -
Page 11: Where To Find Key Documents On Rohde & Schwarz
® Safety and regulatory information R&S Scope Rider RTH Korea certification class A CAUTION Potentially hazardous situation. Could result in minor or moderate injury if not avoided. NOTICE Potential risks of damage. Could result in damage to the supported product or to other property. -
Page 12: Regulatory Information
® Safety and regulatory information R&S Scope Rider RTH Regulatory information Regulatory information Part 15 of the FCC and RSS-210 of IC Rules This device complies with Part 15 of the FCC Rules and with Industry Canada licence-exempt RSS standard(s). Operation is subject to the following two condi- tions: ●... - Page 13 ® Safety and regulatory information R&S Scope Rider RTH Regulatory information Article 14 ● The low power radio-frequency devices shall not influence aircraft security and interfere legal communications; If found, the user shall cease operating immediately until no interference is achieved.
-
Page 14: Preface
® Preface R&S Scope Rider RTH Main specifications Preface Key features The R&S RTH is the perfect multipurpose tool for the lab and in the field. Out- standing key features are: ● Full isolation of all channels and interfaces ● CAT IV 600 V / CAT III 1000 V safety rating ●... - Page 15 ® Preface R&S Scope Rider RTH Main specifications Input channels ● R&S RTH1002: 2 oscilloscope channels, 1 multimeter ● R&S RTH1004: 4 oscilloscope channels Maximum input voltage ● At BNC inputs: CAT IV 300 V ● With probe R&S RT-ZI10 or R&S RT-ZI11: CAT IV 600 V, CAT III 1000 V ●...
- Page 16 ® Preface R&S Scope Rider RTH Main specifications ● Offset Offset range depends on input sensitivity: – Input sensitivity ≥ 40 V/div: 0 – Input sensitivity ≥ 1 V/div to ≤ 20 V/div: ±200 V – Input sensitivity ≤ 500 mV/div: ±4 V Horizontal system ●...
- Page 17 ® Preface R&S Scope Rider RTH Main specifications – Measurements: voltage: DC, AC, AC+DC, resistance, continuity test, diode test, capacitance, temperature (with PT 100 temperature probe), fre- quency, current (with current clamp or shunt) ● Protocol trigger and decode (optional) ●...
-
Page 18: Input Isolation
® Preface R&S Scope Rider RTH Input isolation IP rating ● IP51 in line with IEC 60529 Safety compliance ● IEC / EN / DIN EN 61010-1 ● IEC / EN / DIN EN 61010-2-030 ● IEC / EN / DIN EN 61010-2-033 (R&S RTH1002) ●... -
Page 19: Documentation Overview
® Preface R&S Scope Rider RTH Documentation overview Figure 2-1: Isolation scheme of the R&S RTH The input isolation has several advantages: ● You can measure independently floating signals simultaneously. ● The risk of causing a short circuit while measuring multiple signals is reduced substantially. - Page 20 ® Preface R&S Scope Rider RTH Documentation overview ● Getting Started The Getting Started manual provides the information needed to set up and start working with the instrument, and describes basic operations. A printed English version is included in the delivery.
-
Page 21: Preparing For Use
® Preparing for use R&S Scope Rider RTH Unpacking the instrument Preparing for use Here, you can find basic information about setting up the instrument for the first time or when changing the operating site. Read and observe the safety instruc- tions in Chapter 1.1, "Safety... -
Page 22: Handling The Battery
® Preparing for use R&S Scope Rider RTH Handling the battery Handling the battery Consider the following notes on proper handling of batteries: ● When delivered, the battery is in sleeping mode, which is kept as long as the battery is unpacked and unused. The sleeping mode allows for a longer stor- age time. - Page 23 ® Preparing for use R&S Scope Rider RTH Handling the battery 2. Fold out the tilt stand on the back of the instrument. 3. Screw open the battery cover. 4. CAUTION! Use only the specified Li-ion battery pack, which is delivered with the instrument.
-
Page 24: Powering On/Off
® Preparing for use R&S Scope Rider RTH Using the tilt stand Powering on/off ► Press the [Power] key to switch the instrument on or off. The key blinks and turns green after a few seconds. Table 3-1: Colors of the [Power] key... -
Page 25: Considerations For Test Setup
® Preparing for use R&S Scope Rider RTH Considerations for test setup Considerations for test setup Observe safety instructions, see "Performing measurements" on page 8. Cable selection and electromagnetic interference (EMI) Electromagnetic interference (EMI) can affect the measurement results. To suppress electromagnetic radiation during operation: ●... -
Page 26: Instrument Tour
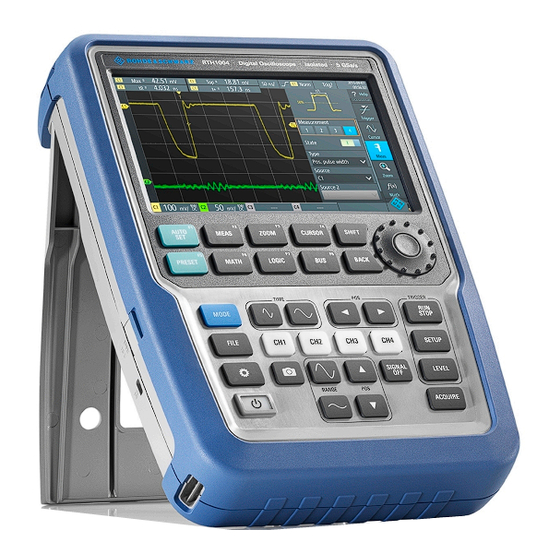
® Instrument tour R&S Scope Rider RTH Front view Instrument tour Front view Figure 4-1: Front panel of the R&S RTH1002 1 = Touch display 2 = Waveform setup with [AUTOSET], reset to default with [PRESET] 3 = Analysis functions... - Page 27 ® Instrument tour R&S Scope Rider RTH Front view 10 = Run/stop acquisition and trigger settings 11 = Acquisition settings 12 = Screenshot and documentation output 13 = Channels and vertical settings 14 = Multimeter measurements Figure 4-2: Front panel of the R&S RTH1004...
-
Page 28: Top View
® Instrument tour R&S Scope Rider RTH Top view 11 = Acquisition settings 12 = Screenshot and documentation output 13 = Channels and vertical settings For a description of the keys, see Chapter 5.3.3, "Using front panel keys", on page 42. - Page 29 ® Instrument tour R&S Scope Rider RTH Top view Shock hazards caused by high voltages Voltages higher than 30 V RMS or 42 V peak or 60 V DC are regarded as hazardous contact voltages. When working with hazardous contact vol- tages, use appropriate protection to avoid electrical shock and injuries: ●...
-
Page 30: Right View
® Instrument tour R&S Scope Rider RTH Right view Right view 1 = LAN 2 = USB type B for remote control 3 = Probe compensation 4 = USB type A for flash drive 5 = Logic probe connector Risk of injury or instrument damage Always close the lids of the communication ports and DC input when they are not in use. -
Page 31: Left View
® Instrument tour R&S Scope Rider RTH Left view Probe compensation Probe compensation terminal to support adjustment of passive probes to the oscilloscope channel. Logic probe connector Input for the logic probe R&S RT-ZL04. Logic analysis requires Mixed Signal option R&S RTH-B1, which includes the logic probe R&S RT-ZL04. -
Page 32: Rear View
® Instrument tour R&S Scope Rider RTH Display overview Rear view 1 = Tilt stand to fold out 2 = Thread hole M5 3 = Battery compartment Display overview In the most important modes scope, mask and XY, the display shows the follow- ing information. - Page 33 ® Instrument tour R&S Scope Rider RTH Display overview 1 = Measurement results, which depend on the mode and the selected measurement 2 = Time scale (horizontal scale, in s/division) 3 = Trigger type, trigger source and trigger mode 4 = Capture status 5 = Battery status and AC connectivity for battery charging;...
-
Page 34: Operating The Instrument
® Operating the instrument R&S Scope Rider RTH Connecting probes Operating the instrument Connecting probes 1. Connect one or more probes to the channel inputs at the top of the instru- ment. 2. To get the most accurate waveform display and best measurement results, remove all redundant connectors: power adapter, USB flash drive, DMM test leads and unused channels. -
Page 35: Connecting Test Leads (R&S Rth1002)
® Operating the instrument R&S Scope Rider RTH Connecting test leads (R&S RTH1002) 6. Switch off the test circuit. 7. Connect the probe to the DUT. 8. Switch on the test circuit. Connecting test leads (R&S RTH1002) The R&S RTH1002 has an integrated digital multimeter (DMM) and test leads for multimeter measurements. -
Page 36: Accessing The Functionality
® Operating the instrument R&S Scope Rider RTH Accessing the functionality 1. Connect the leads first to the DMM inputs at the top of the instrument, and then to the DUT. 2. To start meter measurements, press the [DMM] key. - Page 37 ® Operating the instrument R&S Scope Rider RTH Accessing the functionality Figure 5-3: Switch on or off (left) and select a parameter value (right) Figure 5-4: Enter a numerical value and unit Getting Started 1326.1561.02 ─ 10...
-
Page 38: Using The Navigation Wheel
® Operating the instrument R&S Scope Rider RTH Accessing the functionality 5.3.2 Using the navigation wheel In addition or alternatively to the touchscreen, you can use the wheel to control the R&S RTH. When using the wheel, always observe the position of the focus - the orange frame or other highlighting that marks the active object on the screen. - Page 39 ® Operating the instrument R&S Scope Rider RTH Accessing the functionality Figure 5-5: Open the menu and select a menu item Set numerical values using the wheel 1. Set the focus to the required setting, and press the wheel button once.
- Page 40 ® Operating the instrument R&S Scope Rider RTH Accessing the functionality Figure 5-6: Set numerical values using the wheel Data entry using wheel and keypad You can enter precise numerical values on the keypad. See also Figure 5-7. 1. Set the focus to the required setting, and press the wheel button twice.
- Page 41 ® Operating the instrument R&S Scope Rider RTH Accessing the functionality Figure 5-7: Enter a numerical value and unit in the keypad Getting Started 1326.1561.02 ─ 10...
-
Page 42: Using Front Panel Keys
® Operating the instrument R&S Scope Rider RTH Accessing the functionality The [SHIFT] button toggles the wheel focus in the keypad. If the focus is on the entry field, turning the wheel changes the value. If the focus is in the lower part, the wheel selects numbers and unit. - Page 43 ® Operating the instrument R&S Scope Rider RTH Accessing the functionality Press shortly Press and hold [SHIFT] opens a dialog to save and load Press and hold for 2 seconds instrument settings. to disable or enable the touchscreen. If a dialog or menu is open, [BACK] closes it. If the menu is closed, the key toggles the focus between the focused element in the diagram and the Menu button.
-
Page 44: Displaying An Unknown Signal
® Operating the instrument R&S Scope Rider RTH Displaying an unknown signal Press shortly Press and hold [SIGNAL OFF] switches off the focused waveform. [RUN STOP] starts and stops the acquisition. [SETUP] opens or closes the "Trigger" dialog to select the trigger type and adjust the trigger settings. -
Page 45: Selecting The Mode
® Operating the instrument R&S Scope Rider RTH Setting the date, time and language Selecting the mode A mode comprises all settings and functions that are needed to perform a mea- surement task. Selecting the mode is the first setup step. -
Page 46: Getting Information And Help
® Operating the instrument R&S Scope Rider RTH Getting information and help Set the date and time Set the display language Getting information and help In most dialogs, graphics explain the meaning of the selected setting. For further information, you can open the help, which provides functional description of the settings with links to the corresponding remote commands, and background infor- mation. -
Page 47: Displaying Help
® Operating the instrument R&S Scope Rider RTH Getting information and help 5.7.1 Displaying help ● "To open the help window" on page 47 ● "To show information on a setting" on page 47 ● "To close the help window"... -
Page 48: Using The Help Window
® Operating the instrument R&S Scope Rider RTH Getting information and help If you tap the switch or the entry field, you can adjust the setting without clos- ing the help window. To close the help window ► Tap the "Close" icon in the upper right corner of the help window, or press [BACK]. - Page 49 ® Operating the instrument R&S Scope Rider RTH Getting information and help ● Left and right arrows: browse the topics visited before: Left = back, right = for- ward. ● Magnifiers: increase or decrease the font. ● ×: closes the help window.
-
Page 50: Maintenance And Support
® Maintenance and support R&S Scope Rider RTH Information for technical support Maintenance and support The instrument does not need periodic maintenance. Only the cleaning of the instrument is essential. Cleaning How to clean the product is described in "Cleaning the product"... -
Page 51: Data Storage And Security
® Maintenance and support R&S Scope Rider RTH Transporting, storing and packing 6. Attach the report file to an email in which you describe the problem. Send the email to the customer support address for your region as listed in the internet. -
Page 52: Disposal
® Maintenance and support R&S Scope Rider RTH Disposal If you do not have the original packaging, use similar materials that provide the same level of protection. You can also contact your local Rohde & Schwarz ser- vice center for advice. -
Page 53: Contacting Customer Support
® Contacting customer support R&S Scope Rider RTH Contacting customer support Technical support – where and when you need it For quick, expert help with any Rohde & Schwarz product, contact our customer support center. A team of highly qualified engineers provides support and works with you to find a solution to your query on any aspect of the operation, program- ming or applications of Rohde &...
Need help?
Do you have a question about the Scope Rider RTH and is the answer not in the manual?
Questions and answers