
Related Manuals for Bimar LB-FS09R


Summary of Contents for Bimar LB-FS09R
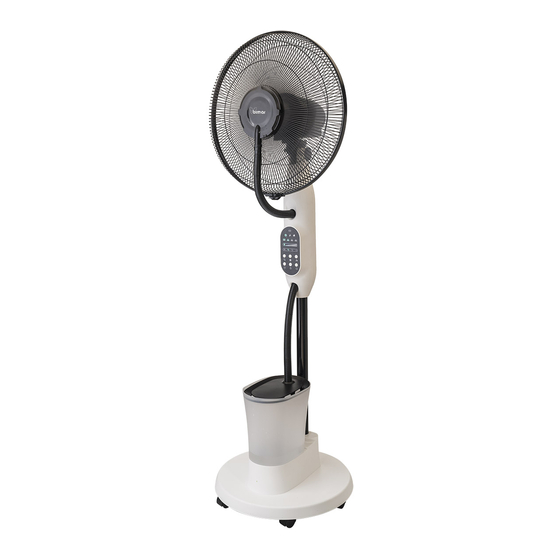
- Page 1 LIBRETTO ISTRUZIONI INSTRUCTION BOOKLET Ventilatore a piantana Ø 40cm, elettronico, nebulizzante e con telecomando Stand mist fan Ø 40cm, electronic and with remote control type VPN42 (mod.LB-FS09R) 1/28...
-
Page 2: Avvertenze Generali
Questo simbolo vi invita a leggere attentamente queste istruzioni prima dell’uso dell’apparecchio, ed eventualmente informare terzi, se necessario. Conservare il libretto per ulteriori consultazioni e per l’intera durata di vita dell’apparecchio. Se nella lettura di queste istruzioni d’uso alcune parti risultassero difficili nella comprensione o se sorgessero dubbi, prima di utilizzare il prodotto contattare l’azienda all’indirizzo scritto in ultima pagina. - Page 3 erroneo e irresponsabile e/o da riparazioni effettuate da personale non qualificato. Esempi di apparecchi per ambiente domestico sono apparecchi per tipiche funzioni domestiche, usati in ambito domestico, che possono essere utilizzati per tipiche funzioni domestiche anche da persone non esperte: - in negozi, uffici e altri luoghi di lavoro similari;...
- Page 4 mentali, o prive di esperienza o della necessaria conoscenza, purché sotto sorveglianza oppure dopo che le stesse abbiano ricevuto istruzioni relative all’uso sicuro dell’apparecchio e alla comprensione dei pericoli ad esso inerenti. I bambini non devono giocare con l’apparecchio. La pulizia e la manutenzione destinata ad essere effettuata dall’utilizzatore non deve essere effettuata da bambini senza sorveglianza.
- Page 5 • Non dirigere il getto di vapore verso oggetti o pareti. • Non inalare il vapore emesso. • Se il cavo di alimentazione è danneggiato, esso deve sostituito dal costruttore o dal suo servizio assistenza tecnica o comunque da una persona con qualifica similare, in modo da prevenire ogni rischio.
- Page 6 di pozzi. L’acqua non deve superare i 50°C. Nel caso di impurità o sporcizia nel serbatoio, risciacquarlo con cura sgocciolarlo e riporlo sull’apparecchio. Avvertenza: l’utilizzatore di questo apparecchio deve essere consapevole del fatto che livelli di umidità elevata potrebbero favorire la crescita di organismi biologici nell’ambiente. Avvertenza: microrganismi possono essere presenti nell'acqua o nell'ambiente in cui l'apparecchio viene utilizzato o immagazzinato, possono crescere nel serbatoio dell'acqua ed essere espulsi dal...
- Page 7 • Posizionare l’apparecchio su una su una superficie piana, orizzontale, e stabile, e collocarlo lontano - fonti di calore (ad es. fiamme libere, fornello gas, ecc.) - contenitori di liquidi (ad esempio, vasche da bagno, doccia, lavelli ecc.) per evitare schizzi d’acqua o che vi possa cadere (distanza minima 2 metri) - tessuti (tende, ecc.) o materiali volatili che possano ostruire la griglia di aspirazione;...
- Page 8 3. Assicurarsi che le 3 viti (C) sul fondo della base, siano serrate correttamente. Al termine dell’operato, verificare che base (inclusa di contrappeso) e colonna siano saldamente assemblati. 4. Svitare la vite fissaggio piantana (D). Effettuare le connessioni elettriche collegando i rispettivi connettori (E-F): (2 poli: femmina ↔...
- Page 9 dell’operato, verificare il tubo sia saldamente accoppiato e fissato Verificare che il tappo del serbatoio (15) sia correttamente inserito e posizionato nella propria sede (14) sul fondo della base. 8. Posizionare il serbatoio nella propria sede. Infilare il tubo vapore (13) dell’estremità inferiore nel foro coperchio del serbatoio fino in fondo.
- Page 10 Anello vapore Griglia anteriore Ghiera fissaggio ventola Elica Anello di chiusura griglie Ghiera fissaggio griglia Griglia posteriore Corpo motore Colonna 10. Serbatoio 11. Base 12. Ruote 13. Tubo vapore Prima di ogni utilizzo verificare che l’apparecchio sia in buono stato, che il cordone elettrico non sia danneggiato: se il cavo di alimentazione è...
- Page 11 velocità minima , si illuminano le prime tre lineette verticali di colore bianco velocità media , si illuminano: 3 lineette verticali di colore bianco +3 di colore verde velocità massima , si illuminano: 3 lineette verticali di colore bianco +3 di colore verde + 3 di colore rosso - Modalità: il ventilatore può...
- Page 12 - Nebulizzatore d’acqua: la temperatura dell’acqua non deve superare i 50°C. Assicurarsi sempre che il tappo di scarico acqua (13) sia correttamente inserito sulla propria sede. Nebulizzatore funziona solo se l’acqua è nel serbatoio: utilizzare solo acqua del rubinetto, distillata, senza l’aggiunta di alcun additivo (aromi o essenze).
-
Page 13: Pulizia E Manutenzione
Pannello comandi Telecomando Inclinazione verticale (alto-basso): allentare l’apposita vite e regolare impugnando il corpo motore e dirigendolo nella direzione desiderata; avvitare la vite per bloccare il corpo motore nella posizione desiderata. Inserire la spina nella presa di corrente, si sentirà un “bip” che indica che l’apparecchio è in stand- by, premere il tasto “... - Page 14 • Il serbatoio e la sede all’interno della base devono essere puliti periodicamente: l’acqua deve essere sempre svuotata, lavarli con acqua saponata e risciacquarli con cura, per evitare la formazione di sporco e la formazione di calcare. Per svuotare eventuali residui di acqua all’interno della sede del serbatoio, togliere il tappo.
-
Page 15: General Warnings
This symbol invites you to read these instructions carefully before using the appliance, and also to inform other users of them, if necessary. Store this booklet for future reference and for the entire lifetime of the device. If any parts of these instructions prove difficult to understand or if in doubt, contact the company at the address written on the last page before using the product. - Page 16 Examples of appliances for domestic use are those used for common domestic reasons, in domestic environments and that can be used by non-experts: - in shops, offices and other similar places of work; - in farming businesses or similar businesses; - by guests in hotels, motels and other residential type environments;...
- Page 17 • Do not use the appliance if it does not work properly or if it appears damaged; when in doubt, contact a qualified technician. • If the appliance is not being used, unplug it from the plug point. • Always unplug the appliance from the plug point before assembly, disassembly, filling or emptying the tank, and before cleaning the filters and the appliance.
-
Page 18: Installation
• Empty the tank and refill it every 72 hours. Before filling, clean it with cold tap water or with cleaning products, if required by the manufacturer. Remove and descale any deposits or films that have formed. • Warning: do not use the nebulizer without water. Only use demineralised or distilled water at room temperature. - Page 19 have the plug replaced with a suitable model by a qualified professional, who should ensure that the cable is appropriate for the power rating of the device. The use of adaptors or extensions is generally not advisable; if it is necessary to use them, they must comply with safety regulations and the total current (amps) must not be rated lower than the maximum current of the appliance.
- Page 20 3. Make sure the 3 screws (C) on the bottom of the base are tightened correctly. At the end of the work, check that the base (including counterweight) and column are firmly assembled. 4. Unscrew the pedestal fixing screw (D). Make the electrical connections by connecting the respective connectors (E-F), (2 poles: female ↔...
- Page 21 7. Check that the tank cap (15) is always correctly inserted and positioned in its seat (14) on the bottom of the base. 8.Place the tank in its seat. Insert the steam hose (13) of the lower end into the tank cover hole as far as it will go.
- Page 22 Steam ring Front grille Fan fixing ring Helix Grid closing ring Grid fixing ring Rear grille Engine body Column 10. Tank 11. Basic 12. Wheels 13. Steam hose Before each use, verify that the unit is in good condition, the electric cord is not damaged, if the power cord is damaged, it must be replaced by the manufacturer or a competent qualified electrician or a person with similar qualifications, in order to avoid any risk.
- Page 23 - Ventilation: the three speeds are selected by pressing the “O" button: the symbol corresponding to the selected speed will light up (X). Press the button repeatedly, with each press the speed varies: on the display (V): minimum speed, the first three white vertical lines light up medium speed, the following lights up: 3 white vertical lines + 3 green lines maximum speed, the following light up: 3 white vertical lines + 3 green lines + 3 red lines Mode: the fan can work both at a constant speed “Mode”...
- Page 24 Misting: the temperature of the water must never exceed 50°C. The mister works only when there is water in the tank: only use tap water, or distilled water, that does not contain any additives (perfumes or essences). Check that the tank cap is always correctly inserted and positioned in its seat on the bottom of the base.
- Page 25 Control Panel Remote control Vertical inclination (up-down): loosen the appropriate screw and adjust by holding the motor body and directing it in the desired direction; screw the screw to lock the motor body in the desired position. To operate the fan, plug it into a socket: you will hear a "beep" indicating that the appliance is the standby status;...
- Page 26 • The water tank and its space within the main body must be cleaned periodically: the water must be emptied, then wash with soapy water and rinse them with care, to avoid the formation of dirt and lime scale. To remove any water residue from the tank, unscrew the cap. Avoid the use of abrasive products that can damage the surface finish;...
- Page 27 è disciplinata e interpretata in base alle leggi applicabili vigenti nel Paese in cui il prodotto viene acquistato. Per i dettagli, consultare il Servizio clienti del proprio paese o il sito internet di Bimar (www.bimaritaly.it). La Ditta costruttrice declina ogni responsabilità...
- Page 28 For details, contact the Customer Support in your country or the Bimar website. (www.bimaritaly.it).The Manufacturer declines all responsibility for any direct or indirect harm to persons, pets or property consequent to failure to comply with all the provisions specified in the appliance instruction booklet and especially those regarding appliance maintenance, operation, installation or warnings.
Need help?
Do you have a question about the LB-FS09R and is the answer not in the manual?
Questions and answers
Perché il mio ventilatore non nebulizza più?