
Related Manuals for Bimar VSL1321


Summary of Contents for Bimar VSL1321
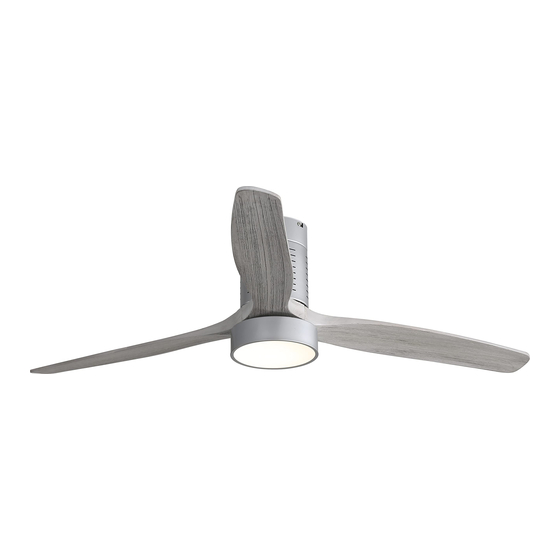
- Page 1 LIBRETTO ISTRUZIONI INSTRUCTION BOOKLET VENTILATORE DA SOFFITTO CEILING FAN type VSL1321 (mod. KBS-52245) 1/40...
-
Page 2: Avvertenze Generali
Questo simbolo vi invita a leggere attentamente queste istruzioni prima dell’uso dell’apparecchio, ed eventualmente informare terzi, se necessario. Conservare il libretto per ulteriori consultazioni e per l’intera durata di vita dell’apparecchio. Se nella lettura di queste istruzioni d’uso alcune parti risultassero difficili nella comprensione o se sorgessero dubbi, prima di utilizzare il prodotto contattare l’azienda all’indirizzo scritto in ultima pagina. - Page 3 dell’apparecchio. I bambini devono essere sorvegliati per sincerarsi che non giochino con l’apparecchio. Esempi di apparecchi per ambiente domestico sono apparecchi per tipiche funzioni domestiche, usati in ambito domestico, che possono essere utilizzati per tipiche funzioni domestiche anche da persone non esperte: - in negozi, uffici e altri luoghi di lavoro similari;...
- Page 4 Non usare l’apparecchio in presenza di sostanze o vapori infiammabili (alcool, insetticidi, benzine) o in ambienti particolarmente polverosi. Non posizionare oggetti sulle pale o entro la loro area di azione. Qualsiasi modifica venga apportata all'apparecchio o hai suoi elementi di fissaggio compromette la sicurezza e farà...
- Page 5 5/40...
-
Page 6: Installazione
INSTALLAZIONE L'installazione dell'apparecchio deve essere eseguita da personale professionalmente qualificato. Dopo aver tolto l’imballaggio, assicurarsi dell’integrità dell’apparecchio; in caso di dubbio non utilizzarlo e rivolgersi a personale professionalmente qualificato. Gli elementi d’imballaggio (sacchetti di plastica, polistirolo espanso, chiodi, ecc.) non devono essere lasciati alla portata di mano di bambini in quanto potenziali fonti di pericolo, ma vanno smaltiti secondo le norme vigenti negli appositi contenitori per la raccolta differenziata. - Page 7 Attenzione: ventilatore deve essere installato in modo che l’estremità inferiore sia ad una altezza di almeno 2,3m dal pavimento (vedi figura) Fissare la Staffa Di Fissaggio al soffitto seguendo queste indicazioni. Prima di forare il soffitto accertarsi di non danneggiare condotte interne e che i dispositivi di ancoraggio non compromettano la resistenza del soffitto.
- Page 8 Allentare 2 viti attigue in prossimità del bordo della staffa di fissaggio (1) e rimuovere le altre 2 viti: conservare queste ultime per il successivo fissaggio. Connettere l’impianto dell’abitazione e il motore al ricevitore del telecomando come illustrato nelle seguenti figure. Schema di collegamento ricevitore Agganciare il ventilatore alla staffa di sostegno tramite il gancio;...
- Page 9 Effettuare le connessioni elettriche rispettando le indicazioni riportate nello schema di collegamento. Per i collegamenti dei cavi utilizzare la morsettiera della piastra di fissagio rispettando le polarità. Collegare tutti i cavi di messa a terra giallo/verde al cavo di messa a terra dalla linea dell’abitazione.
- Page 10 Assemblaggio - fissaggio delle pale Installare la pala rispettando l’indicazione alto basso (vedi etichetta) e allineare i fori. Interporre la flangia metallica ed inserire le viti con la propria rosetta, serrare le viti per assicurare il bloccaggio. Eseguire l’operazione per ciascuna pala. Assemblaggio –...
- Page 11 Collegare il kit luce col motore accoppiando i connettori elettrici, inserirlo all’interno dell’involucro accomodando i fili e bloccarlo i propri magneti. Agganciare il paralume all’involucro e ruotare in senso antiorario per bloccarlo. PER AZIONARE IL VENTILATORE, PER PRIMA REGOLARE IN POS “ I “ (ACCESO) L’INTERRUTTORE A PARETE.
- Page 12 ①, ②, …⑥ Intensità. I tasti regolano la ventilazione (6 intensità): 1= velocità minima , 6= massima. Modalità: il ventilatore quando si accende parte dalla modalità normale cioè la ventilazione è costante all’intensità selezionata. Se viene premuto il tasto “ ”...
- Page 13 Assicurarsi che lo smartphone sia connesso alla stessa rete WiFi alla quale successivamente il dispositivo sarà associato, attivare anche la connessione del Bluetooth. Prima Installazione/Configurazione 1.1 Installare l’applicazione “BIMAR Live Smart” tramite Google Play (Android) o da AppStore (iOS), oppure scansionare il codice QR qui presente. Per Android Per iOS 1.2 Al termine dell’installazione, icona dell’applicazione...
- Page 14 Regolamento Europeo 2016/679, mentre se selezionate “ ” appare il Contratto di servizio di Bimar srl) - inserire il proprio indirizzo email (selezionare la nazione desiderata) - premere la scritta “Ottieni il codice di verifica”, aspettare qualche istante e successivamente inserire il codice ricevuto nella parte “Codice di verifica”...
- Page 15 15/40...
- Page 16 WI- connettere alla rete “Bimar Live Smart xxx” o “Smart Life xxx” e poi premere “connettere ora”. Nel caso le operazioni sopra descritte non procedano correttamente, necessità resettare il ventilatore, operando in questo modo: togliere l’alimentazione tramite l’interruttore magnetotermico, lasciare scollegato l’appareccchio 30 secondi.
- Page 17 Il dispositivo è compatibile con i controlli vocale di Amazon Alexa, Google Assistant. Aprire APP corrispondente/collegare la Skill (assicurarsi che l’account e password utilizzati corrispondano a quelli dell’applicazione “Bimar Live Smart” oppure “Smart Life”) e seguire le impostazioni. Google Home: alcuni comandi vocali base sono: “OK Google”...
- Page 18 Per attivare la modalità “Sleep”, premere il tasto sull’ icona “ ”: questa modalità riduce la ventilazione da una velocità a quella successiva inferiore fino alla velocità minima, ogni ciclo dura circa 90 minuti. Timer “ ”: spostare il cursore per selezionare il tempo desiderato: 1H, 2H, …8H al cui scadere il ventilatore si spegnerà.
-
Page 19: Pulizia E Manutenzione
PULIZIA E MANUTENZIONE Attenzione: prima di eseguire le normali operazioni di pulizia, spegnere completamente il ventilatore, disattivare l'alimentazione elettrica con l'interruttore onnipolare. Per la pulizia utilizzare un panno morbido, leggermente inumidito; non utilizzare prodotti abrasivi o corrosivi. Fare attenzione a non danneggiare l'apparecchio, le pale, i collegamenti elettrici, o compromettere i fissaggi. - Page 20 PROBLEMA CAUSA POSSIBILE RIMEDIO Apparecchio non Mancanza di corrente Controllare l’interruttore generale funziona dell’impianto o il collegamento elettrico sbagliato. Interruttore a parete è Premere l’interruttore parete in posizione 0 (spento). posizione “I”. Trasmettitore ricevitore non abbinati Premere il tasto “ ”per cinque secondi circa, la spia verde si illumina, udirete un segnale acustico “Beep”,...
-
Page 21: General Warnings
Please read these instructions carefully before using the appliance, and instruct other persons using it, too, when necessary. Keep booklet Hndy for further use. If when reading this instructions manual certain parts should remain difficult to understand, or if there is any confusion, contact the company indicated on the last page before using the product. - Page 22 This appliance is intended to be used in household and similar applications such as: staff kitchen in shops, offices and other working environments; farm houses by clients in hotels, motels and other residential type environments bed and breakfast type environments ...
- Page 23 23/40...
-
Page 24: Installation
INSTALLATION Installation must be performed by qualified personnel. After removing the packing materials, check the integrity of the appliance; if you are unsure, do not use it and ask for qualified professional help. The packing materials (plastic bags, polystyrene foam, nails, etc.) must be kept out the reach of children because they are potential sources of danger, but must be disposed of in accordance with regulations in the appropriate containers for recycling. - Page 25 Attention: The fan must be installed so that the blades are more than 2.3 m above the flooring level, as shown. Attach the Mounting Bracket to the ceiling following these instructions. Before drilling into the ceiling, make sure that you do will damage any internal ductwork and that the anchoring devices do not compromise the strength of the ceiling.
- Page 26 Loosen 2 adjacent screws near the edge of the mounting bracket (1) and remove the other 2 screws: keep these for subsequent fixing. Connect the house system and motor to the remote control receiver as shown in the following figures. Receiver connection diagram Attach the fan to the support bracket using the hook;...
- Page 27 Establish the electrical connections according to the indications given in the connection diagram. Use the terminal block on the mounting plate for cable connections, observing polarity. Connect all yellow/green ground wires to the ground wire from the house line. Make sure that no wires are outside the terminal block. Carefully push the wires into the box and insert the receiver, including the antenna cable.
- Page 28 Assembly - fastening the blades Install the blade according to the high-low indication (see label) and align the holes. Position the metal flange and insert the screws with their washers, tighten the screws to ensure locking. Repeat this operation for each blade. Assembly - fastening the light Install the lamp housing and secure with the screws provided.
- Page 29 Hook the lampshade onto the housing and rotate counterclockwise to lock it in place. TO OPERATE THE FAN, FIRST SET THE WALL SWITCH TO POSITION " I " (ON). Fan functions are controlled and adjusted with the included remote control or the app via smartphone or voice assistant (compatible with Amazon Alexa and Google Assistant).
- Page 30 ①, ②, …⑥ Intensity. The buttons adjust the ventilation (6 intensities): 1= minimum speed , 6= maximum speed. Mode: The fan starts in normal mode when switched on, i.e. ventilation is constant at the selected intensity. If the " " button is pressed, it switches to "Natural" mode: the ventilation alternates speeds in a schematic manner, as shown below, for example: “6”...
- Page 31 Make sure that the smartphone is connected to the wi-fi network to be used for the appliance. First Installation/Setup 1.1 Install the "BIMAR life Smart" App via Google Play (Android) or AppStore (iOS), or scan the QR code provided here.
- Page 32 enter your email address (select the desired country) click on the writing "Get the verification code", wait for a few seconds and then enter the code received in the "Verification code" part using your registration email address (possibly also check the Junk e-mail folder, if you don't receive it in the inbox folder). 1.4 Enter your personalized password and click “Done”.
- Page 33 33/40...
- Page 34 "Beep" fast and release the button. Access smartphone WI-FI settings and connect to the “Bimar Live Smart xxx” or “Smart Life xxx” network, then press "connect now". If the operations described above do not work properly, the fan must be reset as follows: switch off the power supply via the circuit breaker, and leave the appliance disconnected for 30 seconds.
- Page 35 The device is compatible with Amazon Alexa and Google Assistant voice controls. Open the corresponding App/connect the Skill (make sure that the account and password used are the same as those of the “Bimar Live Smart” app) and follow the settings. Google Home: some basic vocal commands are: “OK Google”...
- Page 36 Timer " ": move the cursor to select the desired time: 1H, 2H, ...8H after which the fan will turn off. The time (hour) corresponds to the time indicated on the button: 1H= 1 hour, 2H= 2 hours, 4H= 4 hours, 8H= 8 hours. The Timer is deactivated by pressing the "...
-
Page 37: Cleaning And Maintenance
CLEANING AND MAINTENANCE Attention: before normal cleaning operations, turn the fan off, turn the fan lamp off (if present), and disconnect from mains power by turning off the isolating switch ( pos. 0/OFF). For cleaning, use a soft, slightly damp cloth; do not use abrasive or corrosive products. - Page 38 PROBLEM POSSIBLE CAUSE SOLUTION Appliance No power Check the master switch or for completely off incorrect wiring. Wall switch is at position “0”, Position the wall switch at the “I”, off. Remote control Connect the receiver and the received not synchronise. remote control: Press the "ON"...
- Page 39 Prescrizioni relative alle informazioni/Information requirements Descrizione/Description Simbolo/ Valore/Value Unità/Unito Symbol Portata massima d’aria/Maximum fan flow 140.29 m³/min rate Potenza assorbita ventilatore/Fan 38.66 power input Valori di esercizio/Service value 3.63 (m³/min)/W Consumo elettrico modo 0.34 “attesa”/Standby power consumption Livello potenza sonora 44.4 dB(A) ventilatore/Fan sound power level...
- Page 40 Via G.Amendola, 16/18 25019 Sirmione (BS) – ITALY www.bimaritaly.it Servizio clienti: assistenza.privati@bimar-spa.it VSLL1321_I.B._22 40/40...
Need help?
Do you have a question about the VSL1321 and is the answer not in the manual?
Questions and answers