Table of Contents
Advertisement
Quick Links
Advertisement
Table of Contents

Related Manuals for thomann STAIRVILLE Fan-200 DMX


Summary of Contents for thomann STAIRVILLE Fan-200 DMX
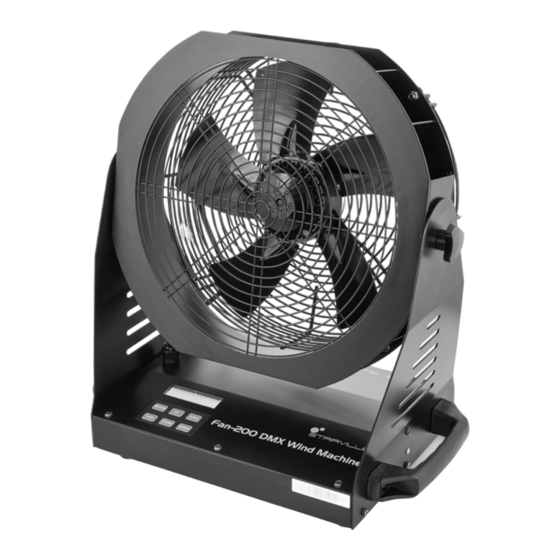
- Page 1 Fan-200 DMX Wind Machine...
- Page 2 Thomann GmbH Hans-Thomann-Straße 1 96138 Burgebrach Germany Telephone: +49 (0) 9546 9223-0 Internet: www.thomann.de 19.10.2023, ID: 376918 (V4)
-
Page 3: Table Of Contents
Table of contents Table of contents General information..........................5 1.1 Symbols and signal words....................... 5 Safety instructions............................. 7 Features............................... 10 Installation and starting up........................ 11 Connections and controls........................16 Operating..............................21 Technical specifications........................24 Plug and connection assignments....................26 Cleaning............................... 27 Protecting the environment...................... - Page 4 Fan-200 DMX Wind Machine...
-
Page 5: General Information
Our products and documentation are subject to a process of continuous development. They are therefore subject to change. Please refer to the latest version of the documentation, which is ready for download under www.thomann.de. 1.1 Symbols and signal words In this section you will find an overview of the meaning of symbols and signal words that are used in this document. - Page 6 General information Signal word Meaning DANGER! This combination of symbol and signal word indicates an immediate dangerous situation that will result in death or serious injury if it is not avoided. WARNING! This combination of symbol and signal word indicates a pos‐ sible dangerous situation that can result in death or serious injury if it is not avoided.
-
Page 7: Safety Instructions
Safety instructions Safety instructions Intended use This device is designed for generating an adjustable airflow in show applications. The device is designed for semi-professional and professional use and is not suitable for use in households. Use the device only as described in this user manual. Any other use or use under other oper‐ ating conditions is considered to be improper and may result in personal injury or property damage. - Page 8 Safety instructions DANGER! Danger to life due to electric current! A short circuit could lead to a fire hazard and risk of death. Always use proper ready-made insulated triple-core mains cable with a safety plug. Do not modify the mains cable or the plug. In case of isolation damage, disconnect immediately the power supply and arrange repair.
- Page 9 Safety instructions NOTICE! Damage to the device due to high voltages! The device can be damaged if it is operated with the incorrect voltage or if high voltage peaks occur. In the worst case, excess vol‐ tages can also cause a risk of injury and fires. Make sure that the voltage specification on the device matches the local power grid before plugging in the device.
-
Page 10: Features
Features Features Adjustable fan speed Adjustable inclination angle (180°) Control via DMX and via buttons and display on the unit Timer function 3 and 5-pin DMX connectors Lockable connectors (Power Twist) for self-supply and for supplying further devices Canned motor for use with foggers Omega brackets for truss mounting enclosed Power supply cable (Power Twist) included Fan-200 DMX... -
Page 11: Installation And Starting Up
Installation and starting up Installation and starting up Unpack and check carefully there is no transportation damage before using the unit. Keep the equipment packaging. To fully protect the product against vibration, dust and moisture during transportation or storage use the original packaging or your own packaging material suitable for transport or storage, respectively. - Page 12 Installation and starting up Mounting options WARNING! Risk of injury from falling devices that were inadequately secured! If devices are not properly secured during assembly, they can cause severe injury and considerable damage by falling. When installing and operating, make sure to follow the standards and regulations that apply in your country.
- Page 13 Installation and starting up The threads on the bottom are used for secure truss mounting of the device using omega brackets. Additionally secure the device by a safety cable against falling. A Threads for attaching Omega brackets. B Safety eyelet. Wiring Create all connections while the device is off.
- Page 14 Installation and starting up NOTICE! Data transfer errors due to improper wiring! If the DMX connections are wired incorrectly, this can cause errors during the data transfer. Do not connect the DMX input and output to audio devices, e.g. mixers or ampli‐ fiers.
- Page 15 Installation and starting up Connections in DMX mode Connect the DMX input of the device to the DMX output of a DMX controller or another DMX device. Connect the output of the first DMX device to the input of the second one, and so on to form a daisy chain.
-
Page 16: Connections And Controls
Connections and controls Connections and controls Front view ö Fan-200 DMX Wind Machine... - Page 17 Connections and controls 1 Operating panel with display 2 Locking screw for fixing the fan housing 3 Grab handle Fan-200 DMX Wind Machine...
- Page 18 Connections and controls Operating panel with display 000000000000000000 000000000000000000 & 4 Display 5 [FUNCTION] | Button for selecting the setting parameter 6 [UP] | Increases the displayed value by one 7 [DOWN] | Decreases the displayed value by one 8 [MANUAL] | Button for manual control of the fan 9 [VOLUME] | Button for adjusting the fan speed 10 [TIMER] | Button for activating TIMER mode Fan-200 DMX...
- Page 19 Connections and controls Rear panel ,-./01234 Fan-200 DMX Wind Machine...
- Page 20 Connections and controls 11 [POWER INPUT] | Lockable input socket (Power Twist) for the power supply 12 [POWER OUTPUT] | Lockable output socket (Power Twist) for powering other devices 13 [Fuse] | Fuse holder 14 [Voltage] | Main switch for turning the device on and off. 15 [DMX OUTPUT] | DMX output, designed as XLR chassis socket, 5-pin 16 [DMX INPUT] | DMX input, designed as XLR chassis plug, 5-pin 17 [DMX OUTPUT] | DMX output, designed as XLR chassis socket, 3-pin...
-
Page 21: Operating
Operating Operating To start up the device, connect it to the mains. The display shows consecutively ‘WELCOME’ , ~ 230V 50Hz’ . The device is then ready for use. ‘Version Vx.x’ and ‘AC Continuous operation Press repeatedly [FUNCTION] until the display shows ‘Volume’ . In this mode you can use the buttons [UP] and [DOWN] to adjust the fan speed in a range from ‘1’... - Page 22 Operating DMX operation In DMX mode, the device is controlled by a DMX controller. The following table shows the assignment of the three channels. Channel Function Value Fan speed 0% … 100% Interval between two operating 1m … 999m or 5s … 999s phases Operating phase duration 1m …...
- Page 23 Operating Timer-controlled operation, Press repeatedly [FUNCTION] to consecutively call the various setting parameters for timer- DMX operation controlled and DMX operation (see following table). Adjust the respective value using the but‐ tons [UP] and [DOWN] to adapt the values). Parameter Function ‘IntervalSet’...
-
Page 24: Technical Specifications
Technical specifications Technical specifications Inclination angle of fan housing 180° Air flow rate 34 m /min @ 2100 min Noise generation approx. 70 dB/1m Control DMX, buttons and display on the unit Number of DMX channels Input connections Power supply Lockable input socket (Power Twist) DMX control XLR chassis plug, 3-pin... - Page 25 Technical specifications Mounting options Hanging, standing Dimensions (W × H × D) 430 mm × 460 mm × 400 mm Weight 9.8 kg Ambient conditions Temperature range 0 °C…40 °C Relative humidity 20 %…80 % (non-condensing) Fan-200 DMX Wind Machine...
-
Page 26: Plug And Connection Assignments
Plug and connection assignments Plug and connection assignments Introduction This chapter will help you select the right cables and plugs to connect your valuable equip‐ ment so that a perfect light experience is guaranteed. Please take our tips, because especially in ‘Sound & Light’ caution is indicated: Even if a plug fits into a socket, the result of an incorrect connection may be a destroyed DMX controller, a short circuit or ‘just’... -
Page 27: Cleaning
Cleaning Cleaning Device components Clean the device components that are accessible from the outside regularly. The cleaning fre‐ quency depends on the operating environment: damp, smoky or particularly dirty environ‐ ments can cause greater accumulation of dirt on the device components. Clean with a dry soft cloth. -
Page 28: Protecting The Environment
Protecting the environment Protecting the environment Disposal of the packaging mate‐ rial For the transport and protective packaging, environmentally friendly materials have been chosen that can be supplied to normal recycling. Ensure that plastic bags, packaging, etc. are properly disposed of. Do not just dispose of these materials with your normal household waste, but make sure that they are collected for recycling. - Page 29 Notes Fan-200 DMX Wind Machine...
- Page 30 Notes Fan-200 DMX Wind Machine...
- Page 32 Musikhaus Thomann · Hans-Thomann-Straße 1 · 96138 Burgebrach · Germany · www.thomann.de...
Need help?
Do you have a question about the STAIRVILLE Fan-200 DMX and is the answer not in the manual?
Questions and answers