Bosch Professional GCM 10 Original Instructions Manual
Hide thumbs
Also See for Professional GCM 10:
- Original instructions manual (532 pages) ,
- Operating instructions manual (188 pages) ,
- Operating instructions manual (180 pages)
Advertisement
Available languages
Available languages
Quick Links
OBJ_BUCH-1247-001.book Page 1 Monday, May 10, 2010 10:21 AM
Robert Bosch GmbH
Power Tools Division
70745 Leinfelden-Echterdingen
Germany
www.bosch-pt.com
1 609 929 W96 (2010.05) PS / 98 XXX
GCM 10 Professional
en Original instructions
fr Notice originale
pt Manual original
tr Orijinal işletme talimat
ar
fa
Advertisement

Related Manuals for Bosch Professional GCM 10


Summary of Contents for Bosch Professional GCM 10
- Page 1 OBJ_BUCH-1247-001.book Page 1 Monday, May 10, 2010 10:21 AM Robert Bosch GmbH Power Tools Division 70745 Leinfelden-Echterdingen GCM 10 Professional Germany www.bosch-pt.com 1 609 929 W96 (2010.05) PS / 98 XXX en Original instructions fr Notice originale pt Manual original...
- Page 2 ........vÝ—U 1 609 929 W96 | (10/5/10) Bosch Power Tools...
- Page 3 OBJ_BUCH-1247-001.book Page 3 Monday, May 10, 2010 10:21 AM GCM 10 Professional Bosch Power Tools 1 609 929 W96 | (10/5/10)
- Page 4 OBJ_BUCH-1247-001.book Page 4 Monday, May 10, 2010 10:21 AM 1 609 929 W96 | (10/5/10) Bosch Power Tools...
- Page 5 OBJ_BUCH-1247-001.book Page 5 Monday, May 10, 2010 10:21 AM Bosch Power Tools 1 609 929 W96 | (10/5/10)
- Page 6 OBJ_BUCH-1247-001.book Page 6 Monday, May 10, 2010 10:21 AM 1 609 929 W96 | (10/5/10) Bosch Power Tools...
- Page 7 OBJ_BUCH-1247-001.book Page 7 Monday, May 10, 2010 10:21 AM Bosch Power Tools 1 609 929 W96 | (10/5/10)
- Page 8 OBJ_BUCH-1247-001.book Page 8 Monday, May 10, 2010 10:21 AM 1 609 929 W96 | (10/5/10) Bosch Power Tools...
- Page 9 Water entering a power tool or a key left attached to a rotating part of will increase the risk of electric shock. the power tool may result in personal inju- Bosch Power Tools 1 609 929 W96 | (10/5/10)
- Page 10 Greasy, oily handles are slippery eration. If damaged, have the power tool causing loss of control. repaired before use. Many accidents are caused by poorly maintained power tools. 1 609 929 W96 | (10/5/10) Bosch Power Tools...
- Page 11 Otherwise, the clearance of aged cable repaired only through an author- your hand to the rotating saw blade is too ised customer service agent for Bosch pow- small. er tools. Replace damaged extension Use the machine only for cutting the mate- cables.
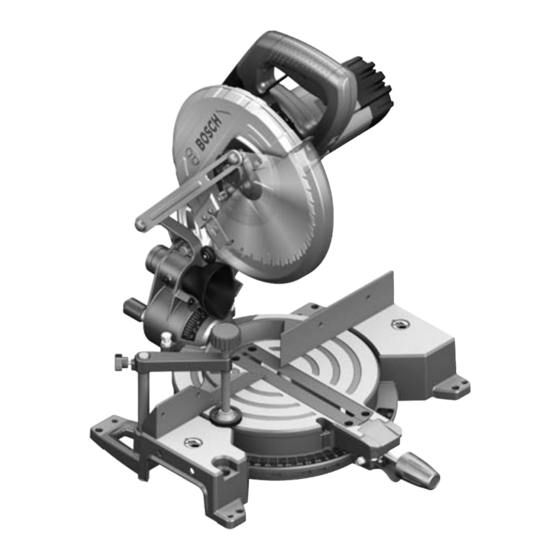
- Page 12 9 Lever for mitre angle adjustment board, as well as aluminium and plastic. (horizontal) 10 Angle indicator (horizontal) 11 Detents for standard mitre angles 12 Scale for mitre angle (horizontal) 1 609 929 W96 | (10/5/10) Bosch Power Tools...
- Page 13 EN 61029 and may be used to compare one tool with another. It may be used for a preliminary assessment of exposure. Bosch Power Tools 1 609 929 W96 | (10/5/10)
- Page 14 All parts must be properly mounted and all conditions fulfilled that ensure faultless operation. Damaged protective devices and parts must be immediately replaced by an authorised service centre. 1 609 929 W96 | (10/5/10) Bosch Power Tools...
- Page 15 Mounting to a Bosch Saw Stand Integrated Dust Extraction (see figure C) With the height-adjustable legs, Bosch GTA saw For basic dust collection, use the dust bag 21 stands provide firm support for the power tool provided.
- Page 16 The tool arm is now securely locked for trans- tion that the cutting direction of the teeth port. (arrow direction on the saw blade) corre- sponds with the direction of the arrow on the blade guard! 1 609 929 W96 | (10/5/10) Bosch Power Tools...
- Page 17 (0°) or to the stop fore sawing. Otherwise the saw blade can toward the left (45°). become wedged in the workpiece. – Retighten the clamping lever 19 again. Bosch Power Tools 1 609 929 W96 | (10/5/10)
- Page 18 This protects your body against possible kickback. – Keep hands, fingers and arms away from the rotating saw blade. – Do not cross your arms when operating the tool arm. 1 609 929 W96 | (10/5/10) Bosch Power Tools...
- Page 19 ... to the right ... to the left of ... to the right ... to the right workpiece is lo- of the cut the cut of the cut of the cut cated... Bosch Power Tools 1 609 929 W96 | (10/5/10)
- Page 20 36. specialty tools are required for this. The leg of the angle gauge must be flush with A Bosch after-sales service station will handle the fence over the complete length. this maintenance task quickly and reliably. Adjusting: (see figure P2) Aligning the Angle Indicator (Horizontally) –...
- Page 21 Checking: (see figure R1) centre for Bosch power tools. – Set an angle gauge to 45° and place it on the In all correspondence and spare parts order, saw table 6.
- Page 22 Fax: +353 (01) 4 66 68 88 Only for EC countries: Australia, New Zealand and Pacific Islands Do not dispose of power tools in- to household waste! Robert Bosch Australia Pty. Ltd. According the European Guideline Power Tools 2002/96/EC for Waste Electrical Locked Bag 66...
- Page 23 électrique. que les masques contre les poussières, les chaussures de sécurité antidérapan- tes, les casques ou les protections acous- tiques utilisés pour les conditions appro- priées réduiront les blessures des personnes. Bosch Power Tools 1 609 929 W96 | (10/5/10)
- Page 24 à arrêt et vice versa. Tout outil qui ne peut pas être commandé par l’interrup- teur est dangereux et il faut le faire répa- rer. 1 609 929 W96 | (10/5/10) Bosch Power Tools...
- Page 25 à travailler, ne se trouve sur la Service Après-Vente autorisé pour outillage électroportatifs Bosch. Remplacer un câble surface de travail. Les petits morceaux de de rallonge endommagé. Ceci est indispen- bois ou tout autre objet entrant en contact avec la lame de scie peut être projeté...
- Page 26 à celui de la broche porte- 30 mm outil (pas de jeu). N’utiliser ni raccords réducteurs ni adaptateurs. Zone dangereuse ! Si possible, maintenir les mains, doigts ou bras éloignés de cette zone. 1 609 929 W96 | (10/5/10) Bosch Power Tools...
- Page 27 12 Graduation pour angle d’onglet (horizontal) res. 13 Alésages pour le montage 14 Alésages pour serre-joint à serrage par vis 15 Poignées encastrées 16 Alésages pour étrier de rallonge Bosch Power Tools 1 609 929 W96 | (10/5/10)
- Page 28 : Entre- tien de l’outil électrique et des outils de travail, maintenir les mains chaudes, organisation des opérations de travail. 1 609 929 W96 | (10/5/10) Bosch Power Tools...
- Page 29 Sinon, la lame de scie peut Faites réparer ou remplacer les dispositifs de se coincer dans la pièce. protection et les parties endommagés par un atelier agréé. Bosch Power Tools 1 609 929 W96 | (10/5/10)
- Page 30 être obturée par la poussière, les copeaux ou les Montage sur une table de travail Bosch fragments de pièce à usiner. La table de travail GTA de Bosch permet un tra- – Arrêtez l’outil électroportatif et retirez la fi- vail stable avec l’outil électroportatif quelque che de la prise de courant.
- Page 31 – Appuyez sur le levier 1 et poussez vers le bas Maintenez le capot de protection à mouve- le capot de protection à mouvement pendu- ment pendulaire dans cette position. laire. Bosch Power Tools 1 609 929 W96 | (10/5/10)
- Page 32 électroportatif jusqu’à la bu- d’onglet souhaité. tée dans les alésages prévus 16. – Resserrez le bouton de blocage 8. – Serrez fermement les vis pour fixer les étriers de rallonge de manière sûre. 1 609 929 W96 | (10/5/10) Bosch Power Tools...
- Page 33 Ne travaillez pas des pièces déformées. La pièce doit toujours avoir un bord droit pour être pla- cée le long des butées. Les extrémités libres des pièces longues doi- vent être soutenues. Bosch Power Tools 1 609 929 W96 | (10/5/10)
- Page 34 – Répétez les étapes de travail de façon analo- gue pour la nouvelle plaque de gauche. 1 609 929 W96 | (10/5/10) Bosch Power Tools...
- Page 35 ... du côté gau- ... du côté ... du côté vailler terminée droit de la che de la droit de la droit de la se trouve ... coupe coupe coupe coupe Bosch Power Tools 1 609 929 W96 | (10/5/10)
- Page 36 également Pour ce faire, il faut de l’expérience et les outils pour la marque de 45°. spéciaux appropriés. Un atelier de Service Après-Vente Bosch autori- Ajustage de la butée sé effectue ce travail rapidement et de façon fia- ble.
- Page 37 – Mettez un gabarit d’angle sur 45° et posez-le sur la table de sciage 6. La colonne du gabarit d’angle doit affleurer la la- me de scie 36 sur toute la longueur. Bosch Power Tools 1 609 929 W96 | (10/5/10)
- Page 38 Si, malgré tous les soins apportés à la fabrica- www.bosch-pt.com tion et au contrôle de l’appareil, celui-ci présen- Les conseillers techniques Bosch sont à votre tait un défaut, la réparation ne doit être confiée disposition pour répondre à vos questions con- qu’à...
- Page 39 électroniques et sa mise en vigueur con- formément aux législations nationales, les outils électroportatifs dont on ne peut plus se servir doivent être isolés et suivre une voie de recycla- ge appropriée. Sous réserve de modifications. Bosch Power Tools 1 609 929 W96 | (10/5/10)
- Page 40 Não utilizar uma ficha de adaptação jun- ca, pode levar a lesões graves. to com ferramentas eléctricas protegi- das por ligação à terra. Fichas não modi- ficadas e tomadas apropriadas reduzem o risco de um choque eléctrico. 1 609 929 W96 | (10/5/10) Bosch Power Tools...
- Page 41 A utilização de uma aspira- samente tratadas e com cantos de corte ção de pó pode reduzir o perigo devido ao afiados emperram com menos frequência pó. e podem ser conduzidas com maior facili- dade. Bosch Power Tools 1 609 929 W96 | (10/5/10)
- Page 42 óleo e gordura. Punhos gorduro- nar o trabalho, antes que possa esfriar. A lâ- sos, são escorregadios e levam à perda de mina de serra torna-se extremamente quente controlo. durante o trabalho. 1 609 929 W96 | (10/5/10) Bosch Power Tools...
- Page 43 Jamais abandonar a ferramenta, antes que rado por um serviço pós-venda autorizado esta esteja completamente parada. Ferra- para ferramentas eléctricas Bosch. Substi- mentas de trabalho em funcionamento de tuir cabos de extensão danificados. Desta inércia podem causar lesões.
- Page 44 17 Sargento 18 Parafuso limitador para ângulo de meia-es- quadria de 45° (vertical) 19 Punho de aperto para qualquer ângulo de meia-esquadria (vertical) 20 Rolo de deslize 21 Saco de pó 1 609 929 W96 | (10/5/10) Bosch Power Tools...
- Page 45 Usar protecção auricular! Valores totais de vibração (soma dos vectores de três direcções) determinados conforme EN 61029: valor de emissão de vibrações a =3,0 m/s , in- certeza K =1,5 m/s Bosch Power Tools 1 609 929 W96 | (10/5/10)
- Page 46 – Manípulo de fixação 8 pulo de fixação 8 (fixação de todos tipos de ân- – Saco de pó 21 gulos de fixação horizontais). 1 609 929 W96 | (10/5/10) Bosch Power Tools...
- Page 47 Montagem a uma mesa de trabalho Bosch – Aguardar até que a lâmina de serra esteja As mesas de trabalho GTA da Bosch oferecem completamente parada. firmeza à ferramenta eléctrica, sobre qualquer – Verificar a causa do bloqueio e eliminá-la.
- Page 48 – Soltar o parafuso 32 com a chave de fenda em cruz fornecida 28, até também ser possí- vel deslocar a fixação da capa de protecção pendular completamente para trás. 1 609 929 W96 | (10/5/10) Bosch Power Tools...
- Page 49 16 previstos para tal. até o indicador de ângulo 10 indicar o ângulo de meia-esquadria desejado. – Apertar os parafusos para fixar o arco de – Reapertar o manípulo de fixação 8. alongamento. Bosch Power Tools 1 609 929 W96 | (10/5/10)
- Page 50 Não trabalhar peças empenadas. A peça a ser trabalhada deve sempre ter um lado recto para encostar no carril de esbarro. Apoiar ou escorar as extremidades de peças compridas. 1 609 929 W96 | (10/5/10) Bosch Power Tools...
- Page 51 – Colocar a ferramenta eléctrica na posição de trabalho. – Desatarraxar os parafusos 42 com a chave de fenda em cruz fornecido e retirar a placa de alimentação. – Colocar uma nova placa de alimentação. Bosch Power Tools 1 609 929 W96 | (10/5/10)
- Page 52 ... no lado di- ... no lado es- ... no lado di- ... no lado di- balhada se en- reito do corte querdo do reito do corte reito do corte contra ... corte 1 609 929 W96 | (10/5/10) Bosch Power Tools...
- Page 53 – Em seguida deverá controlar como seguran- tas especiais. ça, se o ajuste seleccionado também está Uma oficina de serviço pós-venda Bosch execu- correcto para a marcação de 45°. ta este trabalho de forma rápida e fiável. Alinhar o indicador de ângulo (horizontal)
- Page 54 – Ajustar um calibre angular em 45° e colocá- lo sobre a mesa de serra 6. O lado do calibre angular deve estar alinhado no comprimento completo com a lâmina de serra 1 609 929 W96 | (10/5/10) Bosch Power Tools...
- Page 55 A nossa equipa de consultores Bosch esclarece de serviço autorizada para ferramentas eléctri- com prazer todas as suas dúvidas a respeito da cas Bosch.
- Page 56 şalter üzerinde dururken taş rsan z ve alet n n. Bedeniniz toprakland ğ anda büyük aç kken fişi prize sokarsan z kazalara bir elektrik çarpma tehlikesi ortaya ç kar. neden olabilirsiniz. 1 609 929 W96 | (10/5/10) Bosch Power Tools...
- Page 57 Elektrikli el aleti çal ş rken hiçbir zaman kesme alan ndaki talaş art ğ ve benzerlerini temizlemeyin. Daima önce aletin kolunu boşa al n ve sonra elektrikli el aletini kapat n. Bosch Power Tools 1 609 929 W96 | (10/5/10)
- Page 58 Kabloyu düzenli aral klarla kontrol edin ve İşlenecek iş parças n daima s k biçimde hasar gören kablolar sadece Bosch tespit edin. S k şt r lmak için çok küçük olan Elektrikli El Aletleri için yetkili bir serviste iş...
- Page 59 Bu elektrikli el aletinin performans sert ve yumuşak ahşab n, yonga ve elyafl levhalar n, alüminyum ve plastik malzemenin kesilmesine göre tasarlanm şt r. Bosch Power Tools 1 609 929 W96 | (10/5/10)
- Page 60 Testere b çağ çap 32 Y ld z başl vida B çak gövdesi kal nl ğ 1,4–2,5 33 Mil kilitleme Delik çap 34 İç alt gen vida (6 mm), testere b çağ tespiti için 1 609 929 W96 | (10/5/10) Bosch Power Tools...
- Page 61 , iş aşamalar n n organize – Aletle birlikte teslim edilen bütün parçalar edilmesi. ambalaj ndan ç kar n. Elektrikli el aletindeki ve onunla birlikte teslim edilen aksesuardaki bütün ambalaj malzemesini al n. Bosch Power Tools 1 609 929 W96 | (10/5/10)
- Page 62 OBJ_BUCH-1247-001.book Page 62 Monday, May 10, 2010 10:21 AM 62 | Türkçe Devrilme emniyetinin tak lmas Bir Bosch çal şma masas na takma (Bak n z: Şekil A) Bosch GTA çal şma masalar ayarlanabilir Elektrikli el aletinin ilk kullan m ndan önce ayaklar sayesinde elektrikli al aletlerine her devrilme emniyetini 26 takmal s n z.
- Page 63 – Kola 1 bast r n ve pandül hareketli koruyucu Sadece üretici taraf ndan bu elektrikli el kapağ tekrar aşağ indirin. aletinde kullan lmas tavsiye edilen ve işlemek istediğiniz malzemeye uygun testere b çaklar kullan n. Bosch Power Tools 1 609 929 W96 | (10/5/10)
- Page 64 – Kolu 9 çekin ve kesme masas n 6 aç s k n. göstergesi 10 istediğiniz gönye aç s n gösterinceye kadar çevirin. – Tespit topuzunu 8 tekrar s k n. 1 609 929 W96 | (10/5/10) Bosch Power Tools...
- Page 65 Eğilmiş veya bükülmüş iş parçalar n işlemeyin. İş parças n n her zaman dayama ray na dayanabilecek düz bir kenar olmal d r. Uzun iş parçalar n n boşlukta kalan uçlar alttan beslenmeli veya desteklenmelidir. Bosch Power Tools 1 609 929 W96 | (10/5/10)
- Page 66 Kesme hatt nda iş parças , dayama ray ve kesme masas aras nda hiç aral k olmamal d r. Eğer gerekiyorsa özel tutma araçlar haz rlay n. 1 609 929 W96 | (10/5/10) Bosch Power Tools...
- Page 67 Haz r iş ... kesme ... kesme ... kesme ... kesme parças n n yerinin yerinin yerinin yerinin bulunduğu sağ nda solunda sağ nda sağ nda konum ... Bosch Power Tools 1 609 929 W96 | (10/5/10)
- Page 68 – Elektrikli el aletini taş ma konumuna getirin. – Kesme masas n 6 oluğa 11 kadar 0° için Bosch Müşteri Servisi bu işlemi h zl ve güvenilir çevirin. Kol 9 hissedilir biçimde oluğu biçimde yapar. kavramal d r.
- Page 69 Dikkatli biçimde yürütülen üretim ve test yöntemlerine rağmen elektrikli el aleti ar za Ayarlama: (Bak n z: Şekil R2) yapacak olursa, onar m Bosch elektrikli aletleri – Dayama vidas n n 18 kontra somununu için yetkili bir serviste yap lmal d r.
- Page 70 Demonte görünüşler ve yedek parçalara ait bilgileri şu adreste de bulabilirsiniz: www.bosch-pt.com Bosch müşteri servisi timi sat n alacağ n z ürü- nün özellikleri, bu ürünün kullan m ve ayar işlemleri hakk ndaki sorular n z ile yedek parça- lar na ait sorular n z memnuniyetle yan tland r r.
- Page 71 – – 30 x 254 2 608 640 451 ....– www.bosch-pt.com 2002/96/EG Bosch Power Tools 1 609 929 W96 | (10/5/10)
- Page 72 – – ° – – – – 45° – ° – ° ° – 45° – 90° – ° – – 45° – – 45° – – – – – – 1 609 929 W96 | (10/5/10) Bosch Power Tools...
- Page 73 – – 45° 0° 0° 0° 45° 45° 0° 0° 45° 45° – ° – ° – ° – Bosch Power Tools 1 609 929 W96 | (10/5/10)
- Page 74 0° 0° 89 x 57 59 x 89 0° 45° 120 x 38 85 x 58 45° 0° 76 x 38 76 x 38 45° 45° 45 x 170 89 0°/0° 1 609 929 W96 | (10/5/10) Bosch Power Tools...
- Page 75 – – – – – –2° – 47° – – – – – – 45° ° 18 27 – – ° 45° – ” “ 47° 47° – – – – Bosch Power Tools 1 609 929 W96 | (10/5/10)
- Page 76 76 | 36 Ø – – – – E3 – E1 – – EN 847-1 – – – – – – – – – – – 1 609 929 W96 | (10/5/10) Bosch Power Tools...
- Page 77 – – – – – – – – – – – – D2 – D1 – – – Bosch Power Tools 1 609 929 W96 | (10/5/10)
- Page 78 60/50 4 500 EPTA-Procedure 14,5 01/2003 240/230 – – 2,5 – 1,4 – – – – EN 61029 3 = K 3,0 = a EN 61029 1,5 = K EN 61029 1 609 929 W96 | (10/5/10) Bosch Power Tools...
- Page 79 0° – 47° 47° –2° +47° 45° Bosch Power Tools 1 609 929 W96 | (10/5/10)
- Page 80 80 | 30 mm 1 609 929 W96 | (10/5/10) Bosch Power Tools...
- Page 81 Bosch Power Tools 1 609 929 W96 | (10/5/10)
- Page 82 82 | ” “ 1 609 929 W96 | (10/5/10) Bosch Power Tools...
- Page 83 | 83 www.bosch-pt.com 2002/96/EG Bosch Power Tools 1 609 929 W96 | (10/5/10)
- Page 84 – 1 609 203 V36 ..– 254 x 30 mm 2 608 640 438 – 254 x 30 mm 2 608 640 451 1 609 929 W96 | (10/5/10) Bosch Power Tools...
- Page 85 – 0° 0° – 0° – – 0° 90° – – – 0° – – – – 13 mm 0° – 0° – – 0° – 0° – 0° – 45° Bosch Power Tools 1 609 929 W96 | (10/5/10)
- Page 86 86 | – – 45° 0° 0° 0° 45° 45° 0° 0° 45° 45° 1 609 929 W96 | (10/5/10) Bosch Power Tools...
- Page 87 – 57 x 89 89 x 59 0° 45° 38 x 120 58 x 85 45° 0° 38 x 76 38 x76 45° 45° 170 X 45 mm (0°/0°) :89 mm Bosch Power Tools 1 609 929 W96 | (10/5/10)
- Page 88 « 45° 0° 18 27 47° – 47° – – (0°) – (45°) – – 0° 15°; 22,5°, 15°; 22,5°, 30°, 45° 30°, 45° – – – – – – – 1 609 929 W96 | (10/5/10) Bosch Power Tools...
- Page 89 | 89 – – – – – – – – – – – – – – – – Bosch Power Tools 1 609 929 W96 | (10/5/10)
- Page 90 90 | – – – – – – EN 847-1 – – – – – – – Ø 36 mm – – 1 609 929 W96 | (10/5/10) Bosch Power Tools...
- Page 91 | 91 D2 – D1 – – – – – – – – Bosch Power Tools 1 609 929 W96 | (10/5/10)
- Page 92 [U] 230/240 V 1,4 – 2,5 – – – EN 61029 – – 102 dB(A) – K = 3 dB 115 dB(A) EN 61029 = 3,0 m/s K = 1,5 m/s 1 609 929 W96 | (10/5/10) Bosch Power Tools...
- Page 93 | 93 6 mm 45° 0° 6 mm 6 mm Bosch Power Tools 1 609 929 W96 | (10/5/10)
- Page 94 94 | 30 mm –47° –2° +47° 47° 1 609 929 W96 | (10/5/10) Bosch Power Tools...
- Page 95 | 95 » « Bosch Power Tools 1 609 929 W96 | (10/5/10)
- Page 96 96 | 1 609 929 W96 | (10/5/10) Bosch Power Tools...
- Page 97 | 97 » « Bosch Power Tools 1 609 929 W96 | (10/5/10)
Need help?
Do you have a question about the Professional GCM 10 and is the answer not in the manual?
Questions and answers