Senix BLVE12-M - Blower Vacuum Manual
- Operator's manual (15 pages) ,
- Operator's manual (48 pages)
Advertisement
SAFETY INSTRUCTIONS
SAFETY SYMBOLS

IMPORTANT SAFETY INSTRUCTIONS
When using an electrical appliance, basic precautions should always be followed, including the following: READ ALL INSTRUCTIONS BEFORE USING (THIS APPLIANCE)

To reduce the risk of fire, electric shock, or injury: Do not leave appliance (blower) when plugged in. Unplug from outlet when not in use and before servicing.
- Use extra care when cleaning on stairs.
- Do not use on wet surfaces.
- Do not allow to be used as a toy. Close attention is necessary when used by or near children.
- Use only as described in this manual. Use only manufacturer's recommended attachments.
- Keep hair, loose clothing, fingers and all body parts away from openings and moving parts.
- Do not use with a damaged plug. If the tool is not working as it should, or if it has been dropped, damaged, left outdoors, or dropped into water, return damaged, left outdoors, or dropped into water, return it to an authorized service center.
- When using in direct sunshine, keep out of water.
- Don't expose to rain when operating the machine.
- Store indoors. Do not expose to rain or water. Avoid direct sunshine.
WHEN USING (THIS APPLIANCE)
Do not unplug by pulling on cord. To unplug, grasp the plug, not the cord.
Turn off all controls before unplugging.
- Do not operate power tools in an explosive atmosphere, such as in the presence of flammable liquids, gases, or dust. Power tools create sparks that may ignite the dust or fumes.
- Never allow children to operate the equipment. Never allow adults to operate the equipment without proper allow adults to operate the equipment without proper instruction.
- Do not charge the unit outdoors.
- Wear heavy long pants, boots, and gloves. Avoid loose garments or jewelry that could get caught in moving parts of the machine or its motor.
- Do not force the tool. Use the correct tool for your application. The correct tool will work more efficiently and safely when it is used at the rate that it was designed to work at.
- Do not operate the equipment while barefoot or when wearing sandals or similar lightweight footwear.
- Wear protective footwear that will protect your feet and improve your footing on slippery surfaces.
- Secure long hair so it is above shoulder level to prevent entanglement in any moving parts.
- Keep firm footing and balance. Do not overreach. Overreaching can result in loss of balance.
- Do not allow children or untrained individuals to use this unit.
- Do not use the tool if the switch does not turn it on or off. Any tool that cannot be controlled with the switch is dangerous, and must be repaired.
- Keep all bystanders, children, and pets at least 50 ft (15 m) away.
- For household use only.
- Do not operate this unit when you are tired, ill, or under the influence of alcohol, drugs, or medication.
- Do not operate in poor lighting.
- Keep all parts of your body away from any moving parts and all hot surfaces of the unit.
- Do not put any object into openings. Do not use with any opening blocked. Keep openings free of dust, lint, hair, and anything that may reduce air flow.
- Check the work area before each use. Remove all objects that can be thrown or become entangled in objects that can be thrown or become entangled in the machine, such as rocks, broken glass, nails, wire, or string.
- Use only identical manufacturer's replacement parts and accessories. Use of any other parts may create a hazard or cause product damage.
CHILD SAFETY
Tragic accidents can occur if the operator is not aware of the presence of children.
- Keep children out of the working area and under the watchful care of a responsible adult.
- Do not allow children under the age of 14 to operate this blower. Children who are 14 years of age and older must read and understand the operating instructions and safety rules in this manual and must be trained and supervised by a parent.
- Stay alert and turn the blower off if a child or any other person enters the working area.
- Use extreme care when approaching blind corners, doorways, shrubs, trees, or other objects that may obscure your view of a child who may run into the path of the blower.
WARNING (PROPOSITION 65)
Some dust created by power sanding, sawing, grinding, drilling, and other construction activities contains drilling, and other construction activities contains chemicals known to cause cancer, birth defects or other reproductive harm. Some examples of these chemicals are:
- Lead from lead-based paints
- Crystalline silica from bricks and cement and other masonry products, and
- Arsenic and chromium from chemically treated lumber.
Your risk of exposure to these chemicals varies depending on how often you do this type of work. To reduce your exposure to these chemicals, work in a well-ventilated area, and work with approved safety equipment, such as dust masks that are specially designed to filter out microscopic particles.
ELECTRICAL SAFETY
Do not permit fingers to touch the terminals of plug when installing or removing the extension cord from the plug.
- Double insulated tools are equipped with a polarized plug (one blade is wider than the other and will require the use of a polarized extension cord. The Pole Saw's plug will fit into a polarized extension cord only one way. If the plug does not fit fully into the extension cord, reverse the plug. If the plug still does not fit, obtain a correct polarized extension cord. A polarized extension cord will require the use of a polarized wall outlet. This plug will fit into the polarized wall outlet only one way. If the plug does not fit fully into the wall outlet, reverse the plug. If the plug still does not fit, contact a qualified electrician to install the proper outlet. Do not change or alter the equipment plug, extension cord receptacle, or extension cord plug in any way.
- Double insulation eliminates the need for the three-wire grounded power cord and grounded power supply system. Applicable only to Class II (double-insulated) tools.
- Ground fault circuit interrupter (GFCI) protection should be provided on the circuit(s) or outlet(s) to be used for the blower. Receptacles are available having built-in GFCI protection and may be used for this measure of safety.
- To prevent electric shock, use only with an extension cord suitable for outdoor use, such as SW-A, SOW-A, STW-A, STOW-A, SJW-A, SJOW-A, SJTW-A, or SJTOW-A. Before use, check that the extension cord is in good condition. When using an extension cord, make sure to use one heavy enough to carry the current your product will draw. For lengths less than 50 ft (15 m), a No.14 AWG (or greater) extension cord should be used. An undersized cord will cause a drop in line voltage resulting in loss of power and overheating.
- Use a proper extension cord. ONLY use cords listed by underwriters Laboratories (UL). Other extension cords can cause a drop in line voltage, resulting in a loss of power and overheating of tool. For this tool an AWG (American Wire Gauge) size of a least 14-gauge is recommended for an extension cord of 25-ft. or less in length. Use 12-gauge for an extension cord of 50-ft. Extension cords 100-ft. or longer are not recommended. Remember, a smaller wire gauge size has greater capacity than a larger number (14-gauge wire has more capacity than 16-gauge wire; 12-gauge wire has more capacity than 14-gauge). When in doubt use the smaller number.
Minimum gauge for extension cords

Ampere Rating

To prevent the appliance cord from disconnecting from the extension cord during operation, make a knot with the two cords as shown below.
Securing extension cord


Keep the extension cord clear of the work area. Position the cord so that it will not get caught on bushes, hedges, tree trunks, lawnmowers or other obstructions while you are working with the blower vacuum.
- To reduce the risk of electric shock, this appliance has a polarized plug (i.e. one blade is wider than the other). Use this appliance only with a polarized UL-, CSA- or ETL rated extension cord for outdoor, all-weather use. The appliance plug will fit into a polarized extension cord only one way.
If the appliance plug does not fit fully into the extension cord, reverse the plug. If the plug still does not fit, obtain a correct polarized extension cord. A polarized extension cord will require the use of a polarized wall outlet. The extension cord plug will fit into the polarized wall outlet only one way. If the plug does not fit fully into the wall outlet, reverse the plug. If the plug still does not fit, contact a qualified electrician to install the proper wall outlet. Do not modify the appliance plug, extension cord receptacle or extension cord plug in any way.
To reduce the risk of personal injury due to a loose electrical connection between the appliance's plug and extension cord, firmly and fully attach the appliance plug to the extension cord. Periodically check the connection while operating to ensure it is fully attached. Do not use an extension cord that provides a loose connection. A loose connection may result in overheating, fire, and increases the risk of a burning. Maintain Appliance With Care – Inspect extension cords periodically and replace if damaged.
Do not abuse the cord. Never pull the blower by the cord or yank the cord to disconnect it from the receptacle. Keep the cord away from heat, oil, and sharp edges.
SAVE THESE INSTRUCTIONS
SPECIFICATIONS
| Model | BLVE12-M |
| Rated Voltage | 120V~60Hz |
| Rated Current | 12A |
| Motor Type | Universal Motor |
| No Load Speed | 14000 /min |
| Max Air Speed | 179 MPH |
| Max Air Volume | 420 CFM |
| Mulch Ratio | 14:1 |
| Bag Capacity | 1.24 Bushel |
| Weight | 8.2lbs (3.72kg) |
COMPONENT LOCATION
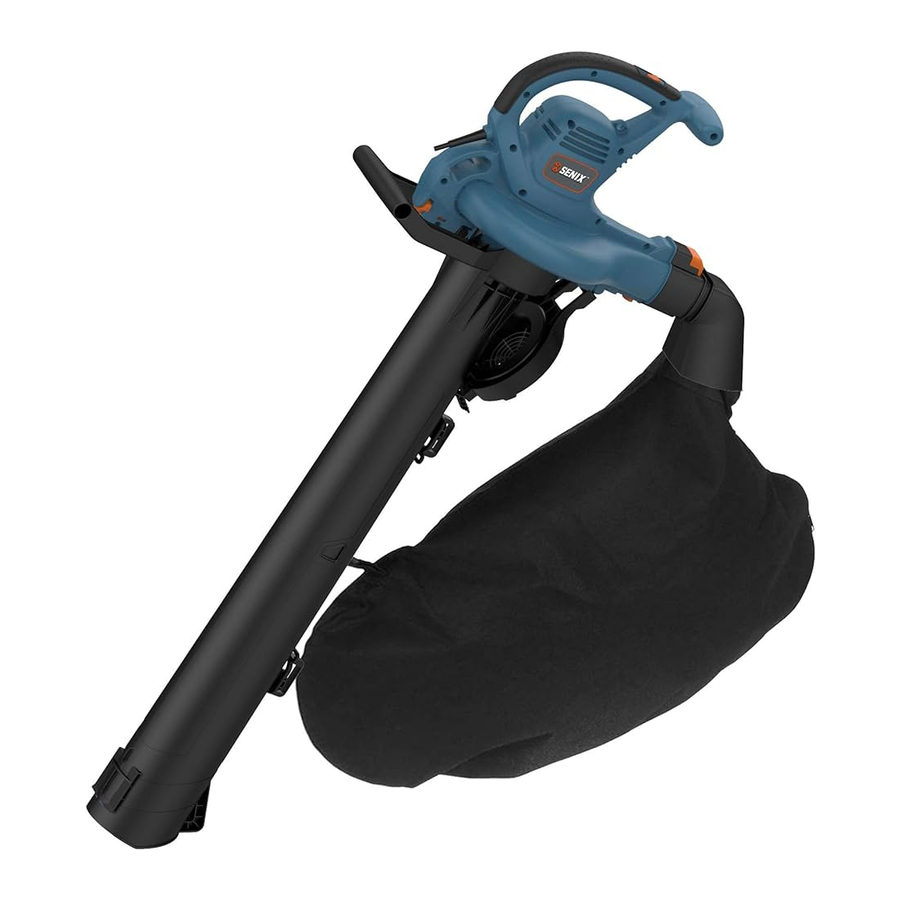
KNOW YOUR Blower/Vacuum/Mulcher

- Handle
- ON/OFF switch
- Auxiliary handle
- Plug
- Lock knob
- Vacuum inlet cover
- Blower tube
- Blower concentrator nozzle

- Auxiliary handle
- Front vacuum/mulcher tube
- Rear vacuum/mulcher tube
- Collective bag
ASSEMBLY
Read the ENTIRE IMPORTANT SAFETY INFORMATION section at the beginning of this manual including all text under subheading therein before set up or use of this product.
ASSEMBLE AS A BLOWER
- Slide the blower tube forward until the notched area on the blower housing clicks into the slot on the on the blower housing clicks into the slot on the blower tube.
- Insert the concentrator nozzle onto the end of the blower tube until it locks into position (Fig. 1).

![warning]() NOTE: The concentrator nozzle is used to increase air flow in tight areas (i e around flower beds, under decks, etc.).
NOTE: The concentrator nozzle is used to increase air flow in tight areas (i e around flower beds, under decks, etc.). - Before using the blower function, rotate the lock knob to lock the cover in place (The indicator will be on the far right position, Fig. 2).

- To remove the blower tube, turn the ON/OFF power switch to the OFF (O) position and disconnect the tool from the power supply (Fig. 3).


- Press the tube release button and remove the blower tube (Fig. 4).


ASSEMBLE AS A VACUUM/MULCHER
- Slide the front and rear vacuum/mulcher tubes together until the lock button engages (Fig. 5). together until the lock button engages (Fig. 5).

- Rotate the lock knob to unlock the cover (The indicator is on the far left position, Fig. 6).

- With the blower tube removed, insert the "hooked" Side end of the mulcher tube into the rear clip on the unit. Rotate the lock knob to close the front tube (The indicator is on the far right position, Fig. 7).

- Make the inter cover hook the hook of the rear tube (Fig. 8).
- Insert the collection bag adaptor into the blower air outlet until the collection bag is securely fastened (Fig. 9), then make the bag hook the strap holder on the two sides of the tube (Fig. 10).

- To remove the collective bag, release the bag from the strap holder on the two sides of the tube, and simply press the tube release button to remove the bag (Fig. 11).

- To remove the vacuum/mulcher tube assembly, release the inter cover from the hook of the tube, rotate the lock knob to unlock, then remove the tube assembly from its housing (Fig. 12).

![warning]() NOTE: It may be necessary to remove the blower tube or vacuum/mulcher tubes to clear a blocked tube or impeller.
NOTE: It may be necessary to remove the blower tube or vacuum/mulcher tubes to clear a blocked tube or impeller. - Make sure to disconnect the unit from the power supply before attempting to clear any obstructions. The indicator of the lock knob must be entered into black area first, then the machine can be running (Fig 13).


OPERATION
Read the ENTIRE IMPORTANT SAFETY INFORMATION section at the beginning of this manual including all text under subheading therein before set up or use of this product.
CONNECTING TO A POWER SOURCE
- Secure the extension cord to the motor housing using the cord retainer located at the rear of the blower. Securing the extension cord in this manner prevents accidental removal of the electrical cord during accidental removal of the electrical cord during operation (Fig. 14).

- Plug the female end of the electrical cord into the receptacle at the back of the unit.

STARTING AND STOPPING
- To start the electric blower/vacuum/mulcher, slide the ON/OFF switch to position (1),This unit is equipped with one speed settings (1 ) (Fig. 15).

- To stop the unit, slide the ON/OFF switch to position (0) (Fig. 15).

OPERATING TIPS
Use the blower/vacuum/mulcher only in daylight or good artificial light.
- When using the blower vac, plant your feet firmly on the ground and place one hand on the unit handle and the other hand on the auxiliary handle.
- Wear personal protective equipment during your work session. This includes boots, safety glasses/goggles, ear defenders, long pants and a long-sleeve shirt.
- When using the unit as mulcher, make sure the bag is properly installed and zipped closed.
- Make sure the blower tube nozzle is not directed at anybody or any loose debris before starting the unit.
- Verify that the unit is in good working condition. Make sure the tubes and guards are in place and secure.
- Ensure that the vacuum/mulch inlet cover is completely closed and locked.
- Keep a firm grip on both the front and rear handle or grips.
- To reduce the risk of hearing loss associated with sound level(s), hearing protection is required.
- Use the shoulder strap when using the unit as a mulcher.
- Operate power equipment only at reasonable hours — not early in the morning or late at night when people might be disturbed. Comply with times listed in local ordinances. Usual recommendations are 9:00 am to 5:00 pm, Monday through Saturday.
- To reduce noise levels, limit the number of pieces of power equipment used at any one time and operate power equipment used at any one time and operate power blowers at the lowest possible speed setting necessary to do the job.
- Use rakes and brooms to loosen debris before blowing.
- In dusty conditions, slightly dampen surfaces.
- Conserve water by using power blowers instead of hoses for many lawn and garden applications, including areas such as gutters, screens, patios, grills, porches and gardens.
- Blow debris into a safe, open area away from children, pets, open windows or freshly washed cars.
- Clean up after using leaf blowers and other lawn equipment. Dispose of debris appropriately.
To avoid serious personal injury, wear ear defenders, goggles or safety glasses at all times when operating this unit. Wear a face mask or dust mask in dusty this unit. Wear a face mask or dust mask in dusty locations.
To prevent serious personal injury or damage to the unit, make sure the blower tube or the mulcher tubes and the bag are in place before operating the unit.
AIR VENTS
Never cover air vents. Keep them free from obstructions and debris. They must always remain clear for proper motor cooling.
|To avoid serious personal injury, do not wear loose fitting clothing or articles such as scarves, strings, chains, ties, etc., that could get drawn into the air vents. To make sure long hair does not get drawn into the air vents, tie back long hair.
BLOWER MODE
Hold the blower firmly with one hand on the main handle and the other hand on the auxiliary handle. Sweep from side to side with the nozzle several inches above the ground or floor (Fig. 16)

Slowly advance the unit, keeping the accumulated pile of debris in front of you. Most dry blowing operations are better suited to low speeds rather than high speeds. High speed blowing is best for moving heavier items like large debris or gravel.
VACUUM/MUCHER MODE
- Once you have blown the debris/leaves into a pile, you can convert to vacuum mode to collect the debris.
- With a firm hold on the vac, and use a sweeping action to collect light debris. The debris will flow into the bag. Items such as small leaves and twigs will be mulched as they pass through the fan housing. For longer bag life and increased performance, empty the longer bag life and increased performance, empty the bag frequently bag frequently (Fig. 17).


- As the bag fills, suction power will decrease. When this happens, turn the power switch to the OFF (0) position and unplug the unit from the power supply. Remove the bag and empty the debris.
- To remove the bag, press the tube release button (Fig. 11). To empty, hold the plastic handle and grab the nylon handle on the underside of the bag. Turn the bag upside down and shake out any debris leaves.
Never remove the collection bag without first turning the power switch to the OFF (0) position and unplugging the unit from the main power source.
Do not use in vacuum/mulcher mode without the vacuum tubes and collection bag in place.
CLEARING A BLOCKED TUBE/IMPELLER
To avoid serious personal injury, be sure the unit is OFF and unplugged before clearing the impeller.
To avoid serious personal injury, always wear gloves to protect yourself from the impeller blades or other sharp objects.
During the vacuuming process, certain objects such as cloth, rope or large diameter sticks may obstruct the fan and block the motor. A thermal protection device, which is built into the blower vac, will cut off the electricity to the motor to prevent damage from overheating. In the event an obstruction occurs and power is curtailed:
- Slide the ON/OFF switch down to the OFF (0) position until the unit comes to a complete stop.
- Unplug the unit.
- Remove the blower tube or vacuum/mulcher tubes and the bag.
- Using protective gloves, carefully remove the material blocking the tube or impeller. Inspect the blades to ensure no damage has occurred. Rotate the impeller blades by hand to ensure the blockage is completely cleared.
- Reinstall the blower tube or vacuum/mulcher tubes and the bag.
- Wait 3 minutes for the motor to cool.
- Plug the unit back into the power supply and turn the ON/OFF switch to ON (1). The blower vac will resume normal function.
MAINTENANCE
Read the ENTIRE IMPORTANT SAFETY INFORMATION section at the beginning of this manual including all text under subheading therein before maintenance this product.
Normal maintenance, replacement or repair of emission control devices and systems may be performed by any qualified repair establishment or individual with original or equivalent parts. Warranty and recall repairs must be performed by an authorized service center; please contact customer service for assistance.
Disconnect the extension cord before performing any maintenance task..
If the extension cord is plugged into the appliance, someone could accidentally turn on the unit while you are performing maintenance on it, which could result in serious personal injury.
CLEANING
To avoid serious personal injury, always turn the unit off and unplug it before cleaning or servicing.
Use a small brush to clean the outside of the unit. Do not use strong detergents, household cleaners that contain aromatic oils (e.g. pine and lemon) or harsh solvents such as kerosene as these substances can damage the plastic housing or the handles. Wipe off any moisture with a soft, dry cloth.
- Empty the bag after each use to avoid deterioration and obstructing air flow, which will reduce the performance of the mulcher. performance of the mulcher.
- Wear eye protection and a dust mask. Clean the bag as needed. Turn the bag inside out after initial emptying and vigorously shake out dust and debris.
- Wash the bag once a year, or more often if needed.
Follow the steps below:- Remove the bag.
- Turn the bag inside out.
- Hang it up.
- Hose it down thoroughly.
- Leave it hanging to dry.
- Turn the bag right-side up and reinstall.
STORAGE
Examine the extension cord thoroughly for signs of excess wear or damage. If it is worn or damaged, replace it immediately.
Disconnect the extension cord from the electric blower/ vacuum/mulcher before storing. Store the cord with the electric blower/vacuum/mulcher indoors in a clean, dry and locked location out of the reach of children and animals.
 NOTE: Devices for retaining extension cords are commercially available should you wish to purchase one.
PARTS
EXPLODED VIEW

| No. | Part # | Description | Qty• |
| 1 | 202041000012 | Flat Nose | 1 |
| 2 | 202054000039 | Blowpipe | 1 |
| 3 | 199068000012 | Dust Bag Assembly | 1 |
| 3-1 | 202030001729 | Shroud | 1 |
| 3-2 | 202999001785 | U type male terminal block | 1 |
| 3-3 | 202154000009 | Bend Tube | 1 |
| 3-4 | 299010000031 | Dust Bag | 1 |
| 4 | 199049000033 | Duct Components | 1 |
| 4-1 | 202024002548 | Handle | 1 |
| 4-2 | 202155000033 | Blowpipe | 1 |
| 5 | 202155000034 | Blowpipe | 1 |
For replacement parts, email: parts@SENIXtools.com.
TROUBLESHOOTING
Always unplug the power cord before performing any adjustments, maintenance or repairs to your electric blower vac.
| SYMPTOM | POSSIBLE CAUSE | RECOMMENDED ACTIONS |
| Unit will not blow or mulch |
|
|
| Unit will not start |
|
|
NOTICE: As the equipment owner, you are responsible for the performance of the required maintenance listed in the Maintenance section. It is recommended that you retain all receipts covering maintenance on your equipment. Neglecting or failing to perform the required maintenance may increase emissions, decrease fuel efficiency, degrade performance, cause irreversible engine damage and/or void your warranty.
Documents / Resources
References

Download manual
Here you can download full pdf version of manual, it may contain additional safety instructions, warranty information, FCC rules, etc.
Advertisement


Need help?
Do you have a question about the BLVE12-M and is the answer not in the manual?
Questions and answers