Table of Contents
Advertisement
Quick Links
TWO-ZONE AIR FRYER
USER MANUAL
MAD861D8ADKL
Warning notices: Before using this product, please read this manual carefully and keep it for future reference.
The design and specifications are subject to change without prior notice for product improvement.
Consult with your dealer or manufacturer for details.
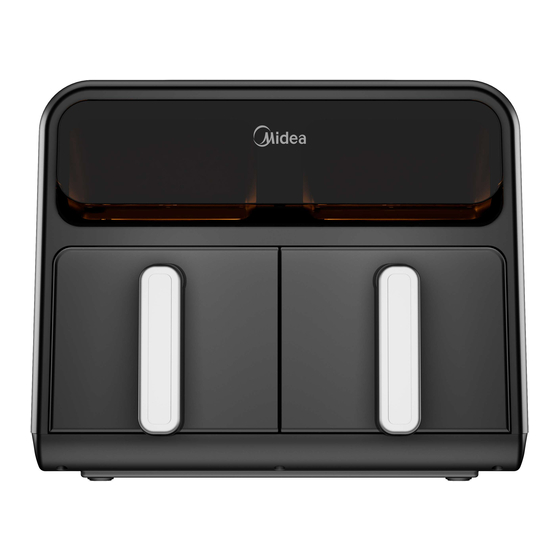
The diagram above is just for reference. Please take the appearance of the actual product as the standard.
Advertisement
Table of Contents

Subscribe to Our Youtube Channel
Related Manuals for Midea MAD861D8ADKL


Summary of Contents for Midea MAD861D8ADKL
- Page 1 TWO-ZONE AIR FRYER USER MANUAL MAD861D8ADKL Warning notices: Before using this product, please read this manual carefully and keep it for future reference. The design and specifications are subject to change without prior notice for product improvement. Consult with your dealer or manufacturer for details.
-
Page 2: Table Of Contents
THANK YOU LETTER Thank you for choosing Midea! Before using your new Midea product, please read this manual thoroughly to ensure that you know how to operate the features and functions that your new appliance offers in a safe way. - Page 3 IMPORTANT SAFEGUARDS Intended Use The following safety guidelines are intended to prevent unforeseen risks or damage from unsafe or incorrect operation of the appliance. Please check the packaging and appliance on arrival to make sure everything is intact to ensure safe operation. If you find any damage, please contact the retailer or dealer.
- Page 4 DO NOT use any accessories or attachments not ● authorized by MIDEA. The use of attachments not recommended by the manufacturer may cause injury, fire or electric shock. For household countertop use only. DO NOT use ●...
- Page 5 DO NOT use appliance for anything other than intended ● use. DO NOT attempt to repair, replace, alter, or modify ● components of the appliance. This may cause electric shock, fire and/or injury, and will void the warranty. DO NOT tamper with any of the safety mechanisms. ●...
- Page 6 WARNING The appliance's outer surfaces may become hot during ● use. DO NOT touch hot surfaces. Only use the air fryer basket handle to lift and carry the air fryer basket. Wear proper hand protection when handling hot components. Extreme caution must be used when moving the appliance.
- Page 7 DO NOT put food in the drip tray. ● DO NOT dish wash the drip tray. ● When in operation, hot air is released through the air ● outlets. Keep your hands and face at a safe distance from the vents and take extreme caution when removing the accessories from the appliance.
- Page 8 metal foil. This will cause overheating of the oven. IMPORTANT SAFEGUARDS PLUG & CORD This appliance has a polarized plug (one blade is wider ● than the other). To reduce the risk of electric shock, this plug is intended to fit into a polarized outlet only one way.
- Page 9 Read this manual carefully and completely and retain for ● future reference. Failure to adhere to safety instructions may result in serious injury or damage. To avoid injury, read and understand the instructions in ● this user manual before attempting to use this appliance. The failure to follow any of the important safeguards ●...
-
Page 10: Specifications
SPECIFICATIONS Product Model MAD861D8ADKL Voltage 120V~ Frequency 60Hz Rated Power 1650W Capacity 8.4QT How To Find The Model Name And Serial Number Both the model name and serial number can be found on the rating label that is located on the bottom of the air fryer. -
Page 11: Product Overview
PRODUCT OVERVIEW Parts and Accessories Before using your new air fryer, make sure that all parts and accessories are included. Control panel Window Right cavity Left cavity Grill tray Grill tray Left basket Right basket Air Vent Power cord storage wrap... -
Page 12: Operating Instructions
OPERATING INSTRUCTIONS Control Panel Name Description • Any of the 9 functions can be used in the the left or right basket to cook a large variety of meals. The Functions temperature and time can be adjusted for each function. •... - Page 13 Name Description • The sync finish function will make both baskets finish cooking at the same time. After programming both baskets, touch to start cooking. The cavity SYNC FINISH with less cook time will display “HoLd” until both cavities have the same remaining cook time. •...
- Page 14 Display Messages Message Description • While programming, the display will show the set cook time. While cooking, the display will show the remaining cook time. • The display shows the set temperature. • Cooking is complete and the left or right basket can be removed.
- Page 15 Left Cavity Cooking 1. Place the Grill tray into the basket and evenly place food onto the Grill tray. 2. Insert the left basket into the left cavity. 3. Plug the air fryer into an appropriate power outlet and the air fryer will now be in standby mode.
- Page 16 6. During the cooking process, if you want to adjust the temperature or time, first touch , and then touch 7. When the cooking cycle is complete, the left digital screen displays END, the unit beeps five times, and all other indicator lights turn off. Touch to enter standby mode.
- Page 17 Right Cavity Cooking 1. Place the Grill tray into the basket and evenly place food onto the Grill tray. 2. Insert the right basket into the right cavity. 3. Plug the air fryer into an appropriate power outlet and the air fryer will now be in standby mode.
- Page 18 6. During the cooking process, if you want to adjust the temperature or time, first touch , and then touch 7. When the cooking cycle is complete, the left digital screen displays END, the unit beeps five times, and all other indicator lights turn off. Touch to enter standby mode.
- Page 19 Two-Zone Cavity Cooking 1. Place the Grill tray into the basket and evenly place food onto the Grill tray. 2. Insert left basket into the left cavity and right basket into the right cavity. 3. Plug the air fryer into an appropriate power outlet and the air fryer will now be in standby mode.
- Page 20 6. To synchronize cooking settings for both cavities: Step 1: Set the first cavity to your desired cooking settings. Note: don't touch for this cavity. Step 2: On the other cavity touch to activate the controls. Step 3: Touch to copy the cooking settings to the other cavity. Step 4: Touch on either cavity to start an individual cavity cycle or touch to start both cavities simultaneously.
- Page 21 Cooking • These cooking options give your meals all the rich and crispy flavor of deep frying with with little to no oil. • The default time and temps are a starting point that you can experiment with to get the results you like best.
- Page 22 Tips • Always place food evenly on the crisper plate and grill tray for best cooking results. • Overlapping food may result in uneven cooking performance. • To increase crispiness, small amounts of oil can be sprayed or brushed onto the food before cooking.
-
Page 23: Cleaning And Maintenance
CLEANING AND MAINTENANCE • Clean the basket, crisper plate and grill tray after each use. • Always unplug the air fryer and let it cool to room temperature before cleaning. Never use harsh chemical detergents, scouring pads, or powders on any of the parts or components. -
Page 24: Troubleshooting 2
TROUBLESHOOTING This section summarizes the most common problems you may encounter while operating the unit. If the solution listed does not resolve the issue, contact the Midea Customer Service Center. Problem Cause Solution Pull out the frying bucket and • Frying basket isn't assembled... - Page 25 Problem Possible Reasons Solutions Food • Food not placed in an even For best cooking performance, layer place food in an even layer with no undercooked overlapping. See COOKING. Clean the interior and exterior of windows after each use. See •...
-
Page 26: Year Limited Warranty
Please note that failure to complete and submit this form does not diminish your warranty. In the event of a warranty period claim, question, comments or if service is required for this product, please contact the Customer Service Center: customerserviceusa@midea.com 1-866-646-4332... -
Page 27: Trademarks, Copyrights And Legal Statement
Midea may constitute trademark infringement or unfair competition in violation of relevant laws. This manual is created by Midea and Midea reserves all copyrights thereof. No entity or individual may use, duplicate, modify, distribute in whole or in part this manual, or bundle or sell with other products without the prior written consent of Midea. -
Page 28: Data Protection Notice
European Economic Area. Further information are provided on request. You can contact our Data Protection Officer via MideaDPO@midea.com. To exercise your rights such as right to object your personal date being processed for direct marketing purposes, please contact us via... - Page 29 2022...
Need help?
Do you have a question about the MAD861D8ADKL and is the answer not in the manual?
Questions and answers