Table of Contents
Advertisement
Available languages
Available languages
Quick Links
AIR FRYER
USER MANUAL
MF-CY75A2
RACCOLTA DI CARTA
Warning notices: Before using this product, please read this manual carefully and keep it for future reference.
The design and specifications are subject to change without prior notice for product improvement.
Consult with your dealer or manufacturer for details.
The diagram above is just for reference. Please take the appearance of the actual product as the standard.
Advertisement
Table of Contents

Related Manuals for Midea MF-CY75A2


Summary of Contents for Midea MF-CY75A2
- Page 1 AIR FRYER USER MANUAL MF-CY75A2 RACCOLTA DI CARTA Warning notices: Before using this product, please read this manual carefully and keep it for future reference. The design and specifications are subject to change without prior notice for product improvement. Consult with your dealer or manufacturer for details.
-
Page 3: Safety Instructions
SAFETY INSTRUCTIONS Intended Use The following safety guidelines are intended to prevent unforeseen risks or damage from unsafe or incorrect operation of the appliance. Please check the packaging and appliance on arrival to make sure everything is intact to ensure safe operation. If you find any damage, please contact the retailer or dealer. - Page 4 Caution • This appliance is not intended for use by persons (including children younger 8) with reduced physical, sensory or mental capabilities, or lack of experience and knowledge, unless they have been given supervision or instruction concerning the use of appliance by a person responsible for their safety.
- Page 5 • Do not place the appliance against a wall or against other appliances. Leave at least 10cm free space on the back and sides and 10cm free space above the appliance. Do not place anything on top of the appliance. •...
- Page 6 Warning • Never immerse the housing, which contains electrical components and the heating elements, in water nor rinse under the tap. • Do not let any water or other liquid enter the appliance to prevent electric shock. • Always put the ingredients to be fried in the basket, to prevent it from coming into contact with the heating elements.
-
Page 7: Specifications
SPECIFICATIONS Product Model MF-CY75A2 Voltage 220-240V~ Frequency 50/60Hz Host Rated Power 1400-1650W... -
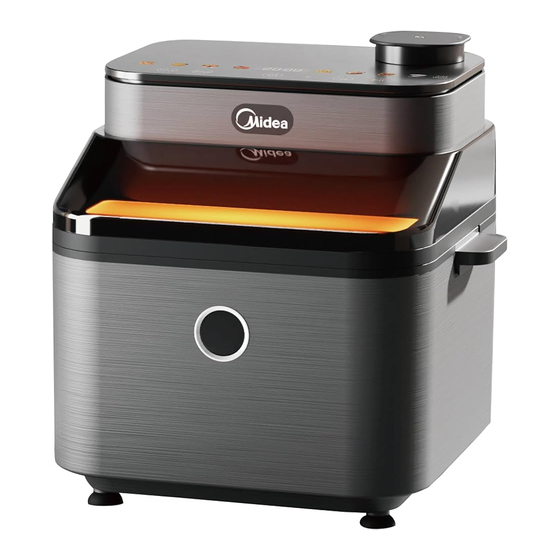
Page 8: Product Overview
PRODUCT OVERVIEW Component Name Water tank Visible window Moisture spray head Splatter cover Opening button Base Crisper plate Air fryer basket... -
Page 9: Operation Steps
QUICK START GUIDE Operation Steps 1 After the power is turned on, the Air fryer enters the standby state, and the screen display as shown in the figure. If there’s no operation for 2 minutes, the appliance enters the screen off state. Touch the button to re-enter the standby mode when the screen is OFF. - Page 10 4 When the appliance is halfway through the set time, the appliance buzzer beeps 5 times, while the display interface shows “ Turn Food ” to indicate the flip-over, then pull out the frying bucket, hold the bucket handle, gently shake the bucket to turn the ingredients, and then use chopsticks to pull it apart and continue baking evenly until the cooking is ended.
-
Page 11: Operation Part
OPERATION INSTRUCTIONS Operation Part Juicy/Crispy menu Crispy menu You can choose Juicy You can choose or Crispy flavor Crispy roast taste Juicy key Start/Suspend Short press to start or pause,long press to cancel Menu Crispy key Used to switch menu functions Reduce time or Increase time or temperature... -
Page 12: Quick Start
Quick Start (Cooking the sweet potatoes as an example; the following appliance pictures are for Quick Start reference only. Please refer to the actual product.) 1 The appliance should be placed steadily on a flat table so that the power cord has sufficient length to be plugged into an outlet, and the air around the appliance should be kept flowing and not close to flammable objects. - Page 13 3 After placing the basket into the air fryer and closing the top lid, the function you want, and the press click to select the menu and start the appliance to begin working. Function Selection Interface Product Working Interface Tips: 1.
- Page 14 5 When the appliance beeps and the cooking is complete, remove the basket carefully and use chopsticks or a jig to take out the food. Juicy Flavor Quick Start (Cooking “chicken wings” as an example; the following appliance pictures are for Quick Start reference only.
- Page 15 Product Working Interface Tips: 1. To prevent the pump from blocking due to the use of tap water over a long period of time, please fill the water tank with purified when selecting the Tender Roast function. 2.The appliance is provided with safety protection unit, through which, the appliance cannot be started and the “C4”...
-
Page 16: Cleaning And Maintenance
Caution Do not touch the basket and crisper plate with your hands as they are hot at the end of baking. Precautions • Do not use non-heat resistant containers such as plastic or paper to carry food into the air fryer. •... -
Page 17: Troubleshooting
TROUBLESHOOTING Problem Cause Solution The appliance is not plugged Put the mains plug in an ● earthed wall socket. Turn the timer knob to the The air fryer does You have not set thetimer. required preparation time to ● not work switch on the appliance. - Page 18 Problem Cause Solution When you fry greasy ingredi- ents in the air fryer, a large amount of oil will leak into the pan. The oil produces white You are preparing greasy ● White smoke ingredients. smoke and the pan may heat comes out of the up more than usual.
- Page 19 Midea may constitute trademark infringement or unfair competition in violation of relevant laws. This manual is created by Midea and Midea reserves all copyrights thereof. No entity or individual may use, duplicate, modify, distribute in whole or in part this manual, or bundle or sell with other products without the prior written consent of Midea.
-
Page 20: Disposal And Recycling
DISPOSAL AND RECYCLING Important Instructions For Environment Compliance with the WEEE Directive and Disposing of the Waster Product: This product complies with EU WEEE Directive (2012/19/EU). This product bears a classification symbol for waster electrical and electronic equipment (WEEE). This symbol indicates that this product shall not be disposed with other household wastes at the end of its service life. - Page 21 European Economic Area. Further information are provided on request. You can contact our Data Protection Officer via MideaDPO@midea.com. To exercise your rights such as right to object your personal date being processed for direct marketing purposes, please contact us via...
- Page 23 LETTERA DI RINGRAZIAMENTO Grazie per aver scelto Midea! Prima di utilizzare il nuovo prodotto Midea, leggere attentamente questo manuale per assicurarsi di sapere come utilizzare le caratteristiche e le funzioni offerte dal nuovo apparecchio in modo sicuro. INDICE LETTERA DI RINGRAZIAMENTO...
-
Page 24: Istruzioni Di Sicurezza
ISTRUZIONI DI SICUREZZA Destinazione d'uso Le seguenti linee guida sulla sicurezza hanno lo scopo di prevenire rischi imprevisti o danni derivanti da un funzionamento non sicuro o non corretto dell'apparecchio. Si prega di controllare l'imballaggio e l'apparecchio all'arrivo per assicurarsi che tutto sia intatto per garantire un funzionamento sicuro. - Page 25 Precauzione Questo apparecchio non è destinato all'uso da parte di persone (compresi i bambini di età inferiore agli 8 anni) con ridotte capacità fisiche, sensoriali o mentali, o mancanza di esperienza e conoscenza, a meno che non siano supervisionate o istruite sull'uso dell'apparecchio da una persona responsabile della loro sicurezza.
- Page 26 timer esterno o a un sistema di controllo remoto sepa- rato per evitare situazioni pericolose. materiali combustibili come una tovaglia o una tenda. contro altri apparecchi. Lasciare almeno 10 cm di spazio libero sul retro e sui lati e 10 cm di spazio libero sopra l'apparecchio.
- Page 27 Avvertenza componenti elettrici e gli elementi riscaldanti, in acqua né risciacquare sotto il rubinetto. nell'apparecchio per evitare scosse elettriche. per evitare che entri in contatto con gli elementi riscaldanti. Value Value Unit Unit mentre l'apparecchio è in funzione. causare un rischio di incendio. funzione.
- Page 28 SPECIFICHE Modello del prodotto MF-CY75A2 220-240V~ Tensione Frequenza 50/60Hz Potenza Nominale dell'Host 1400-1650W...
-
Page 29: Panoramica Del Prodotto
PANORAMICA DEL PRODOTTO Nome del Componente Serbatoio dell'acqua Finestra visibile Testa di spruzzatura Coperchio splatter dell'umidità Pulsante di apertura Base Griglia Cestello friggitrice ad aria... -
Page 30: Guida Rapida
GUIDA RAPIDA Fasi operative 1 Dopo l'accensione, la friggitrice ad aria entra nello stato di standby e lo schermo viene visualizzato come mostrato nella figura. Se non viene eseguito alcun funzionamento per 2 minuti, l'accessorio entra nello stato di spegnimento dello schermo. Toccare il pulsante per rientrare in modalità... - Page 31 4 Quando l'apparecchio è a metà del tempo impostato, il segnalatore acustico dell'apparecchio emetterà un segnale acustico 5 volte, mentre l'interfaccia del display mostrerà "Gira il Cibo" per indicare il capovolgimento, quindi estrarre il secchio di frittura, tenere premuto il manico del secchio, scuotere delicatamente il secchio per girare gli ingredienti, quindi utilizzare le pinze per separarlo e continuare a cuocere uniformemente fino al termine della cottura.
-
Page 32: Istruzioni Per L'uso
ISTRUZIONI PER L'USO Parte operativa Menù succoso/croccante Menù Croccante Puoi scegliere la Puoi scegliere la modalità succoso o modalità barbeque croccante croccante Aggiungi acqua Succoso Succoso Croccante Tasto succoso Avvio/sospensione Premere brevemente per mettere in pausa, premere a lungo per annullare Croccante Menü-Taste... -
Page 33: Avvio Rapido
Avvio rapido (Cucinare le patate dolci come esempio; le seguenti immagini dell'apparecchio sono solo per riferimento per l’Avvio Rapido. Si prega di fare riferimento al prodotto reale.) 1 L'apparecchio deve essere posizionato saldamente su un tavolo piano in modo che il cavo di alimentazione abbia una lunghezza su ciente per essere collegato a una presa e l'aria intorno all'apparecchio deve essere mantenuta scorrevole e non vicino a oggetti infiammabili. - Page 34 3 Dopo aver inserito il cestello nella friggitrice ad aria e chiuso il coperchio superiore, la funzione desiderata, quindi fare clic su per selezionare il menù e avviare l'apparecchio per iniziare a funzionare. Aggiungi acqua Succoso Croccante Interfaccia di selezione delle funzioni Aggiungi acqua Succoso...
- Page 35 5 Quando l'apparecchio emette un segnale acustico e la cottura è completa, rimuovere con attenzione il cestello e utilizzare le pinze per estrarre il cibo. Avvio rapido del sapore succoso (Cucinare "ali di pollo" come esempio; le seguenti immagini dell'apparecchio sono solo per riferimento per l’Avvio Rapido.
- Page 36 Aggiungi acqua Succoso Croccante Interfaccia del prodotto in funizione Suggerimenti: 1. Per evitare che la pompa si blocchi a causa dell'uso di acqua di rubinetto per un lungo periodo di tempo, riempire il serbatoio dell'acqua con purificato quando si seleziona la funzione Tender Roast.
- Page 37 Attenzione Non toccare il cestello e la griglia con le mani poiché sono calde alla fine della cottura. Precauzioni • Non utilizzare contenitori non resistenti al calore come plastica o carta per trasportare il cibo nella friggitrice ad aria. • Non utilizzare piatti o coperchi in vetro o ceramica (ma può essere utilizzato per ricette fredde come lo yogurt).
-
Page 38: Risoluzione Dei Problemi
RISOLUZIONE DEI PROBLEMI Problema Possibile causa Soluzione L'apparecchio non è collegato Inserire la spina di rete in una presa alla rete elettrica. di corrente con messa a terra. La friggitrice ad Ruotare la manopola del timer Il timer non è stato impostato. aria non funziona sul tempo di preparazione necessario per accendere... - Page 39 Possibile causa Soluzione Problema Quando si friggono gli ingredienti grassi nella friggitrice ad aria, una grande quantità di olio si disperde nel recipiente. Si stanno preparando L'olio produce fumo bianco e il ingredienti grassi. recipiente può riscaldarsi più del Dall'apparecchio solito.
- Page 40 Questo manuale è creato da Midea e Midea si riserva tutti i diritti d'autore. Nessun ente o individuo può utilizzare, duplicare, modificare, distribuire in tutto o in parte il presente Midea.
-
Page 41: Smaltimento E Riciclo
SMALTIMENTO E RICICLO Istruzioni importanti per l'ambiente Conformità alla direttiva RAEE e smaltimento del prodotto Waster: Questo prodotto è conforme alla direttiva EU 2012/19/EU. Questo prodotto reca un simbolo di classificazione per apparecchiature elettriche ed elettroniche di scarto Questo simbolo indica che il prodotto non deve essere smaltito con altri rifiuti domestici alla fine della sua vita utile. - Page 42 Spazio economico europeo. Ulteriori informazioni sono disponibili su richiesta. Puoi contattare il nostro Responsabile della protezione dei dati all'indirizzo MideaDPO@midea.com. Per esercitare i tuoi diritti, come il diritto di opporti al trattamento dei tuoi dati personali per scopi di marketing diretto, ti preghiamo di contattarci tramite MideaDPO@midea.com.
Need help?
Do you have a question about the MF-CY75A2 and is the answer not in the manual?
Questions and answers