Table of Contents
Advertisement
Quick Links
Advertisement
Table of Contents

Related Manuals for Vantron VT-SBC-RK66


Summary of Contents for Vantron VT-SBC-RK66
- Page 1 Vantron | Embedded in your success, Embedded in your better life World-leading provider of embedded/IoT products and solutions VT-SBC-RK66 Single Board Computer User Manual Version: 1.4 © Vantron Technology, Inc. All rights reserved. VT-MITX-APL | User Manual www.vantrontech.com...
- Page 2 Feb. 24, 2022 V1.1 Replaced the connector pictures Aug. 9, 2022 V1.2 Added the software debugging instructions Dec. 16, 2022 V1.3 Updated Android system manual Mar. 17, 2023 V1.4 Added Debian system manual Jul. 21, 2023 VT-SBC-RK66 | User Manual www.vantrontech.com...
-
Page 3: Table Of Contents
ADB Setup on the Windows host ................... 26 App Installation via ADB Commands................28 3.4.1 Prerequisites ........................28 3.4.2 App installation ......................29 Image Flashing on a Windows Host ................30 3.5.1 Prerequisites ........................30 3.5.2 Driver installation ......................30 VT-SBC-RK66 | User Manual www.vantrontech.com... - Page 4 Driver Installation ......................45 4.3.3 Image flashing ........................ 48 Serial Ports ........................49 4G module ........................50 Ethernet ......................... 51 USB ..........................51 CHAPTER 5 DISPOSAL AND WARRANTY ..................52 Disposal .......................... 53 Warranty ........................54 VT-SBC-RK66 | User Manual www.vantrontech.com...
-
Page 5: Foreword
Under no circumstances shall any part of this user manual be copied, reproduced, translated, or sold. This manual is not intended to be altered or used for other purposes unless otherwise permitted in writing by Vantron. Vantron reserves the right of all publicly released copies of this manual. - Page 6 Email: sales@vantrontech.com Symbology This manual uses the following signs to prompt users to pay special attention to relevant information. Caution for latent damage to system or harm to personnel Attention to important information or regulations VT-SBC-RK66 | User Manual www.vantrontech.com...
- Page 7 The use or placement of the operation tools shall comply with the code of practice of such tools to avoid short circuit of the Product. • Cut off the power before inspection of the Product to avoid human injury or product damage. VT-SBC-RK66 | User Manual www.vantrontech.com...
- Page 8 Clean with a damp cloth • Do not try to clean exposed electronic components unless with a dust collector • Power off and contact Vantron technical support engineer in case of the following faults: • The Product is damaged •...
-
Page 9: Chapter 1 Introduction
Vantron | Embedded in your success, Embedded in your better life World-leading provider of embedded/IoT products and solutions CHAPTER 1 INTRODUCTION VT-SBC-RK66 | User Manual www.vantrontech.com... -
Page 10: Product Overview
World-leading provider of embedded/IoT products and solutions 1.1 Product Overview VT-SBC-RK66 multi-functional single board computer is running the latest Android 11 operating system. The high-performance board is GMS certified to enable customers to have unimpeded access to Google mobile services. -
Page 11: Specifications
12V/24V 3A DC (±5%), 1 x 3 x 3.81mm Mechanical Dimensions 155 x 105 x 16.4mm Operating: 0℃~+60℃ Temperature Storage: -40℃~+85℃ Environment Operating: RH 5%~95% Humidity Condition Storage: RH 5%~95% Certification ESD: ±4KV (Contact) and ±8KV (Air) VT-SBC-RK66 | User Manual www.vantrontech.com... -
Page 12: Operating System
RAM, storage capacity, and other configurations of the Board. 1.7 Environmental Specifications VT-SBC-RK66 works at a temperature ranging from 0℃ to +60℃ and at relative humidity of 5%-95% for non-condensing purpose. VT-SBC-RK66 | User Manual... -
Page 13: Chapter 2 Hardware And Pin Assignment
Vantron | Embedded in your success, Embedded in your better life World-leading provider of embedded/IoT products and solutions CHAPTER 2 HARDWARE AND PIN ASSIGNMENT VT-SBC-RK66 | User Manual www.vantrontech.com... -
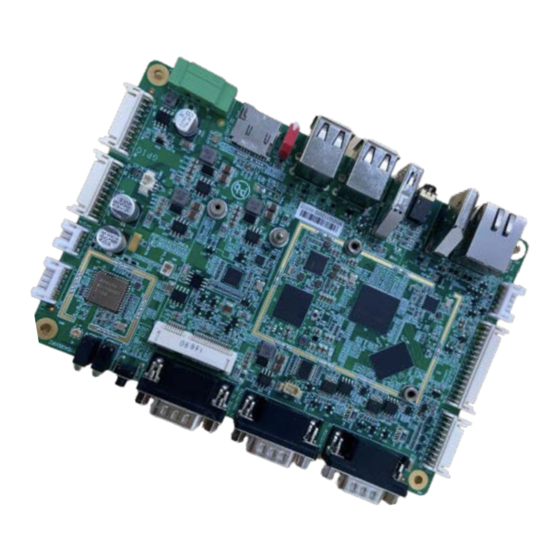
Page 14: Product Layout
The board I/Os will be described in detail in 2.4 Connectors and Jumpers following the sequencing numbers provided here. 2.2 Memory VT-SBC-RK66 is equipped with a 4 GB RAM. 2.3 Identification of Pin 1 Unless otherwise stated, pin 1 of a connector is seated on a square pad that is different from the round pads used for other pins. -
Page 15: Connectors And Jumpers
2.4.1 Power terminal (1) VT-SBC-RK66 implements a terminal block (1 × 3, 3.81mm, 10A) which is designed to connect to a 12V/24V DC (12V 3A recommended) power supply with over-voltage protection and over-current protection. Since the terminal block also provides backlight power supply, please take the input voltage of the backlight into consideration when selecting the power supply. -
Page 16: Edp (4)
| Embedded in your success, Embedded in your better life World-leading provider of embedded/IoT products and solutions 2.4.4 eDP (4) VT-SBC-RK66 implements a 4-lane eDP connector (2 × 10 × 2.0mm) to connect an external screen via an extension cable. eDP pinout description:... -
Page 17: Backlight Connector 1 (5)
Ground Ground 2.4.6 MIPI DSI/LVDS (6) VT-SBC-RK66 implements a dual-channel 8-lane MIPI DSI connector (2 × 16 × 2.0mm) to connect an external screen via an extension cable. The connector has 4 lanes multiplexed to LVDS. MIPI DSI/LVDS pinout description:... - Page 18 LVDS/MIPI_DSI Differential Lane 1 + LVDS_MIPI0_DN0 LVDS/MIPI_DSI Differential Lane 0 - LVDS_MIPI0_DP0 LVDS/MIPI_DSI Differential Lane 0 + Digital Ground Digital Ground LVDS_PWR Power Supply Digital Ground Power Supply LVDS_PWR Power Supply LVDS_PWR Digital Ground Digital Ground VT-SBC-RK66 | User Manual www.vantrontech.com...
-
Page 19: Backlight Connector 2 (7)
Ground Ground 2.4.8 MIPI CSI (8) VT-SBC-RK66 implements a MIPI CSI connector (2 × 10 × 2.0mm) for connecting HD cameras via an extension cable. Please refer to the next page for the pinout description of the connector. VT-SBC-RK66 | User Manual... -
Page 20: Audio Jack (9)
Reset control signal VCC1V8_DVP 1.8V IO power CAM_PWN Power down control signal VCC1V5_DVP 1.5V Core power VCC2V8_DVP 2.8V Analog power 2.4.9 Audio jack (9) VT-SBC-RK66 provides a 3.5mm 4-pole combo audio jack supporting headphone and microphone. VT-SBC-RK66 | User Manual www.vantrontech.com... -
Page 21: Speaker Connector (10)
| Embedded in your success, Embedded in your better life World-leading provider of embedded/IoT products and solutions 2.4.10 Speaker connector (10) VT-SBC-RK66 provides an L/R speaker (1 × 4 × 2.0mm) that allows connection of a 5W/8Ω speaker. Pinout description:... -
Page 22: Rs232/Rs485 (12)
3-pin RS232 pinout description: Name Description RXDB RS232_RXD TXDB RS232_TXD Ground 2.4.12 RS232/RS485 (12) VT-SBC-RK66 also provides two DB9 RS232/RS485 multiplex connectors (uart0 and uart7), and users can configure the connectors based on needs. RS232/RS485 RS232/RS485 (uart0) (uart7) RS232/RS485 pinout description: Name Description... -
Page 23: Usb 2.0 (13)
The pinout of the USB 3.0 interface is in line with the pin assignment of standard USB 3.0 (Type-A) interface. 2.4.15 GPIO (15) VT-SBC-RK66 provides 8 GPIOs (2 × 10 × 2.0mm) to allow connection of peripherals or control certain electronic components. Please refer to the next page for the pinout description of the connector. -
Page 24: Mini Pcie (16)
DC 3.3V general purpose input output 2.4.16 Mini PCIe (16) VT-SBC-RK66 provides a mini PCIe socket for user expansion to connect a 4G/LTE module. Please refer to the next page for the pinout description of the socket. VT-SBC-RK66 | User Manual... - Page 25 SIM card power supply Ground PCIe_UIM_DATA SIM card data interface PCIe_UIM_CLK SIM card clock PCIe_UIM_RST SIM card reset Ground PCIe_UIM_VPP SIM card power supply programming Ground Ground PCIE_3V3 3.3V power supply for 4G module Ground Ground Ground VT-SBC-RK66 | User Manual www.vantrontech.com...
-
Page 26: Reset Button (17)
PCIE_3V3 3.3V power supply for 4G module 2.4.17 Reset button (17) There is a pinhole reset button on VT-SBC-RK66 for restarting the board upon a short press. 2.4.18 LED indicators (18) VT-SBC-RK66 provides four LED indicators with functions listed below:... -
Page 27: Micro Sd & Micro Sim Slots (19)
2.4.19 Micro SD & Micro SIM slots (19) VT-SBC-RK66 provides a Micro SD card slot that supports a storage device of up to 128GB. The SIM card slot supports SIM card hot plugging. The 4G LTE module of the Board is AT&T and Verizon pre-certified, and you may consult your sales executive for the module name before applying a SIM card from the carrier. -
Page 28: Chapter 3 Android System Manual
Vantron | Embedded in your success, Embedded in your better life World-leading provider of embedded/IoT products and solutions CHAPTER 3 ANDROID SYSTEM MANUAL VT-SBC-RK66 | User Manual www.vantrontech.com... -
Page 29: Time And Date Setup
World-leading provider of embedded/IoT products and solutions This chapter briefs on the settings and common use of the interfaces in the Android system. Please connect a mouse, a keyboard and a monitor to VT-SBC-RK66 for smooth operation. 3.1 Time and Date Setup Please confirm if the system time is correct after first bootup. -
Page 30: Enable Developer Options
3.2 Enable Developer Options To enable Developer options of VT-SBC-RK66, follow the steps below: 1. Connect VT-SBC-RK66 to a mouse, a keyboard, and a monitor for easier operations; 2. Click Settings > About <Tablet> in sequence; 3. Navigate to the bottom and locate Build number, and click it consecutively for at least 7 times until you see a prompt indicating you are now a developer;... - Page 31 5. Click in sequence Advanced > Environment Variables > System Variables > Path > Edit, and click New in the pop-up; 6. Paste the path of the Android folder, and click OK one by one to confirm and exit; VT-SBC-RK66 | User Manual www.vantrontech.com...
-
Page 32: App Installation Via Adb Commands
All tools to be used for the installation are available in the software release package provided by Vantron. You can install the apps as long as the Android SDK Platform Tools are installed and accessible on the host computer. The Windows environment is used for illustration in the following section. -
Page 33: App Installation
In step 4 shown above, you can drag the .apk file from the local directory to the command line to replace the <App path> you typed in manually. VT-SBC-RK66 | User Manual www.vantrontech.com... -
Page 34: Image Flashing On A Windows Host
World-leading provider of embedded/IoT products and solutions 3.5 Image Flashing on a Windows Host Whenever a new image is available, Vantron will provide a release package consisting of all the tools/files necessary so that you can flash the image as needed. This section briefs on the image flashing on a Windows host. - Page 35 World-leading provider of embedded/IoT products and solutions 4. A pop-up will appear in a second suggesting the driver is installed; 5. Open the directory of the upgrade tool (path: \SW\AndroidTool\RKDevTool_Release_ vxxx\RKDevTool); 6. Double click RKDevTool.exe to open the upgrade window; VT-SBC-RK66 | User Manual www.vantrontech.com...
- Page 36 | Embedded in your success, Embedded in your better life World-leading provider of embedded/IoT products and solutions 7. Connect VT-SBC-RK66 to the Windows host with the USB Type-A to Type-A cable; 8. Press “Win + R” and input cmd in the dialog box to open the command prompt;...
-
Page 37: Image Flashing
3. Click the Upgrade button (next to the Firmware button), and the Board will start to download the image and upgrade; 4. When the upgrade finishes, the Board will reboot automatically. VT-SBC-RK66 | User Manual www.vantrontech.com... -
Page 38: Serial Ports
| Embedded in your success, Embedded in your better life World-leading provider of embedded/IoT products and solutions 3.6 Serial Ports VT-SBC-RK66 offers two RS232 connectors (uart4 and uart5) and two RS232/RS485 connectors (uart0 and uart7) for serial communication. To test if the serial ports function properly: 1. -
Page 39: Gpio
# echo 0 > sys/van-misc/uart7_mode // uart7 RS485 mode 3.7 GPIO VT-SBC-RK66 provides 8 GPIOs, starting from GPIO0 to GPIO7. GPIO0 to GPIO7 correspond to GPIO104, GPIO107, GPIO108, GPIO109, GPIO110, GPIO111, GPIO112, and GPIO113 in the software system, respectively. Please refer to 2.4.15 for the pinout description of the GPIOs. -
Page 40: User Indicator Control
Follow the same way to set the levels of the remaining GPIOs. 3.8 User Indicator Control There is a user-defined LED indicator on VT-SBC-RK66 (refer to 2.4.18 for details), users can use the following command line to enable and disable the indicator. -
Page 41: Chapter 4 Debian System Manual
Vantron | Embedded in your success, Embedded in your better life World-leading provider of embedded/IoT products and solutions CHAPTER 4 DEBIAN SYSTEM MANUAL VT-SBC-RK66 | User Manual www.vantrontech.com... -
Page 42: About The System
World-leading provider of embedded/IoT products and solutions This chapter briefs on the settings and common use of the Interfaces in the Debian system. Please connect a mouse, a keyboard and a monitor to VT-SBC-RK66 for smooth operation. About the System Debian is a Linux distribution and the Device was built by Debian GNU/Linux 10 operating system. -
Page 43: System Settings
Network settings: You can connect to Ethernet/Wi-Fi/VPN, or create/edit the ° connection ° Bluetooth settings: To pair and set up the Bluetooth devices ° System time ° Screen lock Power icon ° VT-SBC-RK66 | User Manual www.vantrontech.com... -
Page 44: Language Setup
5. Input sudo su in the terminal to switch to the root mode; 6. Run the following command to check the language currently used by the system; # env | grep LANG LANG= zh_CN.UTF-8 // the system language is simplified Chinese VT-SBC-RK66 | User Manual www.vantrontech.com... - Page 45 9. Use the up and down arrows on the keyboard to move to the target locale (en_US.UTF-8); 10. Press “Space” in front of the target locale to select the language; 11. Move down to the current locale (zh_CN.UTF-8) and press “Space” to uncheck the current language; VT-SBC-RK66 | User Manual www.vantrontech.com...
-
Page 46: Time And Date Setup
4.2.2 Time and date setup Please confirm if the system time is correct after first bootup. To change the system time: 1. Click the Debian icon > Preference > Time and Date to open the Time and Date settings; VT-SBC-RK66 | User Manual www.vantrontech.com... - Page 47 | Embedded in your success, Embedded in your better life World-leading provider of embedded/IoT products and solutions 2. Click Unlock and enter the password (vantron) before editing; 3. Click Time zone and select the correct one for the Device from the list;...
-
Page 48: Network Configuration
Connection Information: 4. To edit the network configurations, you can right click the network icon and select Edit Connections, then select a connection and click the cog icon to edit the settings. VT-SBC-RK66 | User Manual www.vantrontech.com... -
Page 49: Image Flashing On A Windows Host
World-leading provider of embedded/IoT products and solutions Image Flashing on a Windows Host Whenever a new image is available, Vantron will provide a release package consisting of all the tools/files necessary so that you can flash the image as needed. This section briefs on the image flashing on a Windows host. - Page 50 World-leading provider of embedded/IoT products and solutions 4. A pop-up will appear in a second suggesting the driver is installed; 5. Return to the release package and open the directory of the upgrade tool (path: \RKDevTool_Release\ RKDevTool.exe); VT-SBC-RK66 | User Manual www.vantrontech.com...
- Page 51 6. Double click RKDevTool.exe to open the upgrade window; 7. Connect VT-SBC-RK66 to the Windows host with the USB Type-A to Type-A cable; 8. Press “Win + R” and input cmd in the dialog box to open the command prompt;...
-
Page 52: Image Flashing
3. Click the Upgrade button (next to the Firmware button), and the Device will start to download the image and upgrade; 4. When the upgrade finishes, the Device will reboot automatically. VT-SBC-RK66 | User Manual www.vantrontech.com... -
Page 53: Serial Ports
World-leading provider of embedded/IoT products and solutions Serial Ports VT-SBC-RK66 offers two RS232 connectors (uart4 and uart5) and two RS232/RS485 connectors (uart0 and uart7) for serial communication. The ports are mapped as /dev/ttyS0, /dev/ttyS4, /dev/ttyS5, and /dev/ttyS7 respectively in the system. -
Page 54: Module
World-leading provider of embedded/IoT products and solutions 4G module VT-SBC-RK66 integrates an automatic dial-up script. The dial-up fails when there is no SIM card in the slot, yest the normal operation of the Device will not be impacted. Before using the cellular communication, please remember to insert the activated SIM card into the SIM slot and install the 4G antennas before power up. -
Page 55: Ethernet
World-leading provider of embedded/IoT products and solutions Ethernet VT-SBC-RK66 is configured to connect to Internet once it connects to a live Ethernet. 1. Connect the RJ45 Ethernet jack of the Device to network; 2. Use the ifconfig command to check the information of the network card (eth0 in this case);... -
Page 56: Chapter 5 Disposal And Warranty
Vantron | Embedded in your success, Embedded in your better life World-leading provider of embedded/IoT products and solutions CHAPTER 5 DISPOSAL AND WARRANTY VT-SBC-RK66 | User Manual www.vantrontech.com... -
Page 57: Disposal
& electronic waste recycling/disposal center. Proper disposal of this sort of waste helps avoid harm and adverse effect upon surroundings and people’s health. Please contact local organizations or recycling/disposal center for more recycling/disposal methods of related products. VT-SBC-RK66 | User Manual www.vantrontech.com... -
Page 58: Warranty
CUSTOMER’s location and no Product so inspected shall be returned to VANTRON unless the cause for the rejection or defect is determined to be the responsibility of VANTRON. VANTRON shall in turn provide the CUSTOMER turnaround shipment on defective Product within fourteen (14) working days upon its receipt at VANTRON.
Need help?
Do you have a question about the VT-SBC-RK66 and is the answer not in the manual?
Questions and answers