Table of Contents
Advertisement
Quick Links
Advertisement
Table of Contents

Related Manuals for Gtech GT Series


Summary of Contents for Gtech GT Series
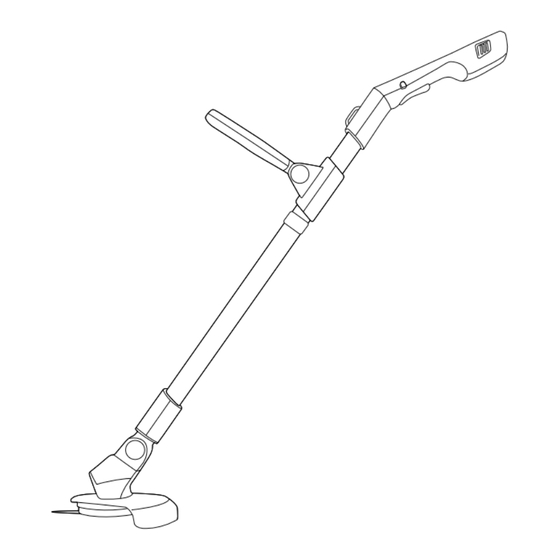
- Page 1 Cordless Grass Trimmer GT Series OPERATING MANUAL...
-
Page 2: Important Safeguards
IMPORTANT SAFEGUARDS: IMPORTANT: READ ALL INSTRUCTIONS BEFORE USE. RETAIN INSTRUCTIONS FOR FUTURE REFERENCE. WARNING: Basic safety precautions should always be observed when using an electrical appliance to reduce the risk of fire, electrical shock or serious injury. Do not use in rain or leave outdoors whilst raining. Personal Safety: clothing or jewellery and keep hair, clothing and gloves away from moving parts. -
Page 3: Electrical Safety
• Never modify the trimmer in any way. before charging. • Never fit metal cutting blades. • Use only with the battery pack supplied. • Leaks from battery cells can occur under extreme conditions. If the liquid gets on Electrical safety: your skin wash immediately with soap •... -
Page 4: Operation
Operation Service: • Keep supply and extension cords away • Do not use the trimmer if the switch from cutting means. does not turn it on or off. Any power • Wear eye protection and stout shoes at tool that cannot be controlled by all times while operating the machine. - Page 5 Warning Label Descriptions Do not use in rain or leave General hazard outdoors whilst raining. safety alert. Read instruction Measured sound power level: 90.5dB(A) K=3dB(A) manual before use Guaranteed sound power level: 94dB(A) Note: Measured noise values determined according to 2000/14 EC amended by 2005/88/EC Wear eye protection Wear hearing protection when using this...
-
Page 6: What's In The Box
Thank you for choosing Gtech “Welcome to the Gtech family. I started Gtech to create sensible, easy to use products that do a great job, and hope you get many years of trouble-free performance from your new product.” Nick Grey –... - Page 7 Assembly There is a third clip underneath the shroud,in the centre. Attach the shroud first. Align both clips on the shroud to the holes on the trimmer head and simultaneously push them into place. Assemble the two parts of the handle. When Insert the body pole into the grass trimmer the pole is fully inserted, the button (1) will pop head, ensuring it is the right way up.
- Page 8 Operation Push the green button and rotate the head to Insert the battery which will click into place. the required angle. Release the button and ensure the head clicks Push the green button and rotate the handle to into a locked position. the required angle.
- Page 9 Changing to edge trimming mode Firmly grip the main unit and rotate the head 180 The head only rotates in one direction. WARNING: To reduce risk of personal injury, ensure the trimmer is switched off and the blade has stopped before adjusting the cutting head. WARNING: Ensure the cutting head is securely locked in position before starting the trimmer.
- Page 10 Using your Grass Trimmer Hold the trimmer away from your body using both hands and stand on a solid and secure surface. Using to trim grass Using to edge Firmly grip both handles, move slowly and Firmly grip both handles with the head steadily using a side to side sweeping motion.
- Page 11 Harness The harness can be used to Attach the clip to the loop on The clip can be used for bear the load of the product. the of the handle and clip the quick and easy release of the The sling passes over your head harness to this.
-
Page 12: Removing The Battery For Charging
Removing the battery for charging Press both buttons at the same time and pull to remove the battery. Checking the battery charge status 100% - 30% - 60% -10% - 1% Figures are approximate. Press the button to check how much The number of lit LEDs shows the charge. -
Page 13: Charging The Battery
Charging the battery Connect the charger to the battery where Plug the charger into an ordinary plug socket. indicated. hours While charging the LEDs will progressively The battery can be charged from flat in 4 pulse until all four are lit. hours. -
Page 14: Product Care
• Store in a secure, dry place, out of reach of children. Do not expose to moisture. PLEASE NOTE: If the product needs to be repaired or replaced only use replacement parts supplied by the manufacturer. Spare parts can be purchased from Grey Technology Ltd: tel : 01905 345 891 www.gtech.co.uk... -
Page 15: Troubleshooting
If these initial tips do not solve your problem we please visit our support area where you can find troubleshooting help including online manuals, FAQs and how-to-videos, as well as genuine spares and replacement parts compatible with your product. Visit: www.gtech.co.uk/support Online Live chat support support@gtech.co.uk... - Page 16 GRASS TRIMMER TECHNICAL SPECIFICATION Cutting width 23cm No load speed 9000min Battery 18V DC 2000mAh Li-ion Charging period 4 hours Battery charger output 21.6V 0.5A 10.8W Battery charger input 100-240V 50/60Hz Measure sound power level, L 90.5 dB(A) K = 3dB(A) Guaranteed sound power level, LwA,d 94dB(A) Weight...
- Page 17 Environmental and Product Recycling symbol indicates that this product is covered by legislation for waste electrical and electronic products (EN2012/19/EU) When the product has reached the end of its life please do not dispose of it with general household waste. Consider the environment and take it to a recognised recycling facility. The product contains a Li-Ion battery which should not be disposed of with general household waste.
-
Page 18: Warranty Registration
XXXXX~ WWYY~ 00~0000000 If you purchased directly from Gtech your details are already registered and your 2 year warranty will start automatically. If you purchased from an authorised Gtech retailer, please register your warranty within 3 months and you will need to provide proof of purchase to support any claim against your warranty. -
Page 19: Ec Declaration Of Conformity
EC Declaration of Conformity We, manufacturer/importer Grey Technology Ltd Brindley Road Warndon Worcester WR4 9FB declare that the product GT4.0 Cordless Grass Trimmer complies with the essential health and safety requirements of the following directives: 2014/30/EU - EMC Directive. 2006/42/EC - Machinery Directive 2000/14/EC amended by 2005/88/EC... - Page 20 Grey Technology Limited Brindley Road, Warndon, Worcester WR4 9FB, UK email: support@gtech.co.uk telephone: 08000 308 794 www.gtech.co.uk...
Need help?
Do you have a question about the GT Series and is the answer not in the manual?
Questions and answers