
Related Manuals for POOLiN EOC565


Summary of Contents for POOLiN EOC565
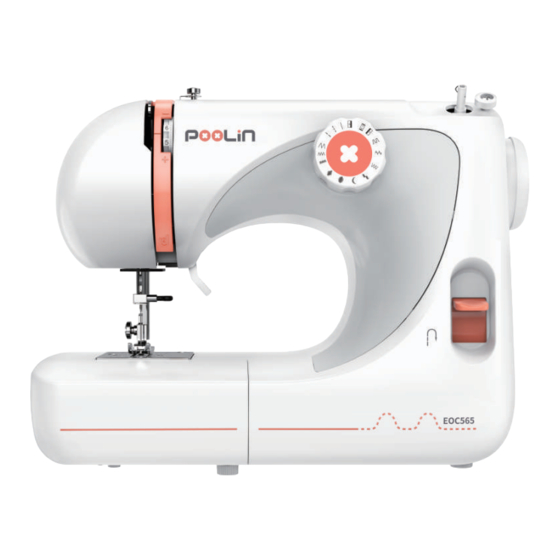
- Page 1 Instruction Manual EOC565 Sewing Machine Please read this manual carefully before using to ensure the device is used safely and effectively...
- Page 2 IMPORTANT SAFETY INSTRUCTIONS When using an electrical appliance, basic safety precautions should always be followed, including the following. Read all instructions before using this sewing machine. DANGER To reduce the risk of electric shock: 1. D o not allow to be used as a toy. Close attention is necessary when this sewing machine is used by or near children.
-
Page 3: Table Of Contents
Part I Sewing Machine Identification Identification …………………………………………………………………………………………………1 Accessories…………………………………………………………………………………………………1 Part II Preparation for Sewing Connecting power supply……………………………………………………………………………………2 Reserve sewing………………………………………………………………………………………………2 Presser foot lifter…………… ………… ………………………… ……………………………… ………………2 Changing presser foot ……………………………… …………… ……………………………………………3 Auxiliary box …………………………………………………………………………………………………3 Stitch selector and indication …………………………………………………………………………………3 Replacement of needle…………………………………… … ………………………… …… ………………4 Needle, Thread and Fabric Chart ……………………………………………………………………………4 Winding bobbin …………………………………………………... -
Page 4: Part I Sewing Machine Identification
Part I Sewing Machine Identification Identification 1. Reverse stitch lever 2. Stitch selector 3. Bobbin winding stopper 4. Bobbin winding pin 5. Bobbin winding thread guide 6. Take-up lever 7. Thread guide 8. Thread tension dial 9. Presser foot 10. Needle 11. -
Page 5: Part Ii Preparation For Sewing
Part II Preparation for Sewing Connecting power supply Power plug Power switch Power supply Sewing machine plug Before connecting power supply, check the voltage indicated in the machine for consistency with the voltage of the to-be-connected power supply. 1. Set power switch at “OFF” 2. -
Page 6: Changing Presser Foot
Changing presser foot Foot release level Recess Foot holder snaps Be sure needle is in the up position. Raise presser foot lever. Snap-on presser foot 1. Raise foot release lever to remove the foot. 2. Place the desired foot on the needle plate aligning needle holes. -
Page 7: Replacement Of Needle
Replacement of needle 1. Turn off power switch, rotate hand wheel to lift the needle to the highest point and to lower the presser. Counterclockwise rotate needle set screw to take out needle. 2. Insert the new needle into needle fixing hole with its flat face backwards, upwards push the needle as far as possible and finally clockwise tighten set screw. -
Page 8: Winding Bobbin
Winding bobbin 1. Removing bobbin case Remove the accessories box from the machine. Raise the needle to its highest position by turning hand wheel manually towards you. Bobbin access cover Hold cop latch of the bobbin case and take out the bobbin case from shuttle race. - Page 9 3. Winding bobbin 1. After outwards pulling the hand wheel to release clutch, during winding bobbin the needle will be impossible to move. Pull out the spool holder on back of machine, place \felt pads and insert the doubling spindle into spool holder with thread direction shown in diagram.
-
Page 10: Inserting Bobbin Into Bobbin Case
Inserting bobbin into bobbin case 1. Hold the bobbin in your right hand with the thread running clockwise. 2. Insert the bobbin into the case with about 10 cm of thread showing outside the case. 3. Pull the thread through the slit in the case and then underneath the flat tension spring. -
Page 11: Treading The Top Thread
Threading the top thread 1. Place the top thread in spool holder, with direction shown in diagram. Rotate the hand wheel to lift the take-up to the highest position. Lift the presser. 2. Move the top thread round cross thread carrier. Cross thread carrier 3. -
Page 12: Picking Up Bobbin Thread
Picking up bobbin thread 1. Raise the presser foot lever. Holding needle thread loosely by your left hand, turn hand wheel towards you by your right hand until the needle comes to its highest position. Top thread 2. Lightly pull up the top thread, and pick up bobbin thread, Bobbin thread which will appear through the needle plate slot. -
Page 13: Adjusting Top Thread Tension
Adjusting top thread tension 1. Balance of top tension The tension is well balanced when these two threads ‘lock’ in the middle of layers of fabric you are sewing. Top thread Bobbin thread Top side of fabric Under side of fabric Rotate the thread tension dial to adjust top tension Decrease tension Increase tension... -
Page 14: Part Iii Basic Stitch
Part III Basic Stitch Straight stitch Selection of stitch A, B, C Thread tension dial Presser Z-presser Starting sewing Lift the presser, place the fabric beneath presser and align it with the guide on needle plate, place the needle on the sewing start position, pull the top thread and bottom thread to back, lower the presser, press the pedal controller and start sewing along the guide. -
Page 15: Basic Z-Stitch
Basic Z-stitch Selection of stitch D, E, F Thread tension dial Presser Z-presser Z-stitch is one of common stitches and is used for stitching button, lock-stitching button hole, overlocking and decorative seam. Overlocking stitch Selection of stitch Thread tension dial Presser Z-presser Use it for abutting and bluff finish of any fabric, start sewing from... -
Page 16: Blind Stitch
Blind stitch Selection of stitch L or M Thread tension dial Presser Z-presser For easy-loosing thick fabric, overlock the raw edge, as shown in the diagram, fold the fabric and leave 0.7 cm allowance at margin. Place the fabric on the machine and make the needle just pass through left of folded portion of the fabric. -
Page 17: Part V Buttonhole Stitching
Part V Buttonhole stitching Buttonhole stitching Selection of stitch Thread tension dial Presser Buttonhole stitching presser Starting sewing 1.Fix buttonhole stitching presser, mark the buttonhole length on the fabric, place the fabric beneath presser with the buttonhole mark to the operator, move slide A on the presser to the operator, align mark C at the slide top with the beginning mark B and lower the presser. -
Page 18: Part Vi Caring For Your Machine
Part Caring for your machine Note: Before the following operation, please withdraw the power plug from socket. Cleaning feed dog Take out needle and presser, remove screws from needle plate with screw driver and take out the needle plate. Brush out dust and cotton flock from feed dog and replace needle plate. -
Page 19: Changing Light Bulb
Troubleshooting Trouble Causes Solution 1. Improper top threading. 2. Excessively tight top tension. 3. Blunt or bend needle. Check or thread the top 4. Improper fixing of needle. Top thread thread again. 5. At start of sewing, top thread and bottom thread are not broken Check or change the correctly fixed beneath the presser. - Page 20 Trouble Causes Solution 1. Excessively tight top tension. Adjust tension of top Crease stitch 2. Improper top threading. thread. 3. Excessively thick top thread for the used fabric. Unsmooth feed 1. Feed dog is wound by thread. Clean the presser foot. Check the power connector.
- Page 21 Meaning of crossed –out wheeled dustbin: Do not dispose of electrical appliances as unsorted municipal waste, use separate collection facilities. Contact you local government for information regarding the collection systems available. If electrical appliances are disposed of in landfills or dumps, hazardous substances can leak into the groundwater and get into the food chain, damaging your health and well-being.
- Page 22 MAKE SEWING EASIER REACH EMBROIDERY CLOSER Richword(Wuxi)Supply Chain Management Co.,Ltd . (+86)0510 83380568 poolinservice@richword.com Room 1601,Jianghai West Road,Liangxi District, Wuxi City,Jiangsu Province,China...
Need help?
Do you have a question about the EOC565 and is the answer not in the manual?
Questions and answers