Advertisement
Quick Links
Advertisement

Subscribe to Our Youtube Channel
Related Manuals for POOLiN EOC05


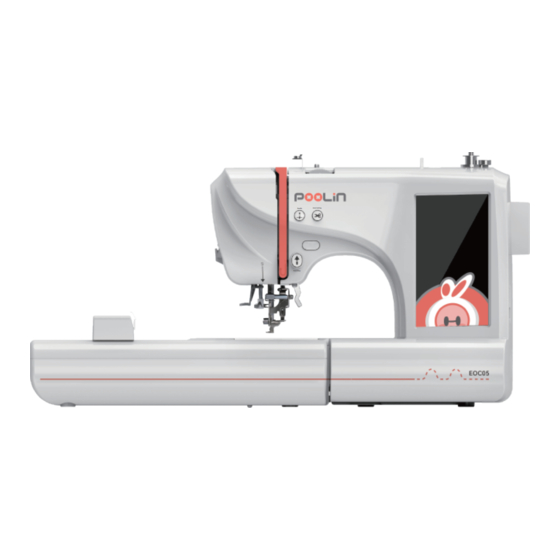
Summary of Contents for POOLiN EOC05
- Page 1 Welcome To Use Your POOLIN EOC05 Embroidery Machine I t is re c om m en d ed f or beginner s t o t est ac co rdi ng to t he op e r a t io n al in s truc ti on f i r st , and feel f ree t o cont ac t us if y ou hav e any quest ions .
-
Page 2: Check The Accessories
Check the accessories Embroidery Spool Pin Cap Seam Ripper Mini Slotted Needles The bobbin*3 presser foot Screwdriver (on the machine) Wrench Tweezers Stylus Scissprs Hoop 100*235 Hoop 100*100 Shuttle Race Cover Bobbin cover*2 Power cable User manual An envelope Reminder: There are teaching videos in the USB, please according to the instructions of the quick guide to view the videos to set up the machine, please check the video named "1. - Page 3 Check the bobbin Tips:Please be sure to install the bobbin in the direction indicated by the arrow. Please check the video named” 2. Install the bobbin”.
-
Page 4: Threading The Machine
Threading the machine Tips: Be sure to lift the presser foot before threading. Please check the video named” 3. Threading”. -
Page 5: Automatic Needle Threader
Automatic needleth reader Tips: Be sure to lift the presser foot before threading. Please check the video named” 3. Threading”. -
Page 6: Install The Frame
Install the frame Tips: 1.Before installation, please loosen the screws to install the embroidery frame. 2.Stabilizer must be added under the fabric. 3.Clamp the fabric and stabilizer in the embroidery frame, tighten the screws, and gently pull the fabric to flatten it. 4.Please check the video named “4. - Page 7 Start up Poolin EOC05 is divided into three parts: Pattern——Config——Embroidery. Power Switch...
- Page 8 Choose the pattern Current Pattern Please check the videos named:”5. choose the patterns”. ——As a beginner, we recommend that you choose a solid color pattern from our built-in patterns to do a embroidery test first.
- Page 9 Config the pattern You can adjust the pattern on this interface. Frame Selection Color Selection Choose the color you want to embroider. Select the appropriate embroidery frame. Please check the videos named:”5. edit the patterns”.
- Page 10 Embroider the pattern After the above operations, you can start embroidery work on this page. Ready Rehearsal the Pattern Frame Click the button to confirm the embroidery range. Click “ready”button. Put down the presser foot and click the start button on the machine to start embroidery. Please check the videos named:”5.
- Page 11 I f y ou enc ount er any problems , you c an chec k t he u ser ma nu a l o r f e el fr ee t o c ont ac t us at any t im e. poolinservice@richword.com +8618900636028 Poolin Users Group https://www.facebook.com/profile.php?id=100073186299060...
Need help?
Do you have a question about the EOC05 and is the answer not in the manual?
Questions and answers
Какую программу скачивать, для poolin eco05 не могу найти где она есть