
Related Manuals for Yolink YS7105-UC


Summary of Contents for Yolink YS7105-UC
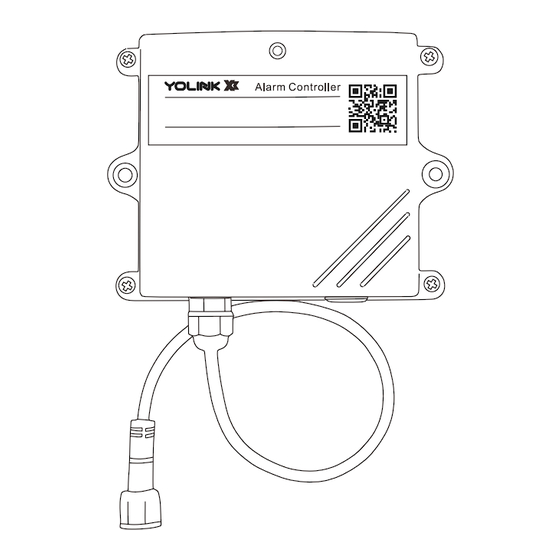
- Page 1 Recommended with: Siren Horn Alarm Controller YS7105-UC Installa on & User Guide Rev 1.0...
- Page 2 Thank you for purchasing YoLink products and for entrus ng us with your smart home needs! Your 100% sa sfac on is our goal. If you experience any problems with se ng up your new YoLink X3 Alarm Controller, please give us a chance to assist you, before returning your purchase.
-
Page 3: Table Of Contents
Introduc on ······························································································ 2 · Set Up ····································································································· · 4 · · Installa on ······························································································ · 6 · · Using the YoLink App ·················································································11 YoLink Control ···························································································19 Maintenance ······················································································· ····23 · Specifica ons ····················································································· ·····26 · Troubleshoo ng ················································································· ·····29 ·... -
Page 4: In The Box
A. In the Box Box 1 A. Alarm Controller B. Quick Start Guide Box 2 (Op onal Accessory) A. Siren Horn... -
Page 5: Introduc On
B. Introduc on The YoLink X3 Alarm Controller is a smart device that can control a 12 VDC siren horn, m a x i m u m 4 0 0 m A ( r e s i s v e ) a l a r m d e v i c e s r e m o t e l y w i t h t h e Y o L i n k app on your smartphone or tablet or using the SET bu on on the device. - Page 6 Connec ng to Cloud Slow Blinking Green Upda ng Fast Blinking Green Establishing Connec on with YoLink System (YoLink Control) Blinking Red Once Silence the siren horn or device is connected to the cloud and is func oning normally Fast Blinking Red...
- Page 7 C. Set Up C-1. Set Up - First-Time YoLink Users (Exis ng users proceed to C-2. Add Device, next page) Download the YoLink app through Apple App Store or Google Play Store (Search in Apple iPhone or tablet that is iOS 9.0...
- Page 8 C-2. Add Device Ta p “ ” b u o n , t h e n s c a n Q R C o d e o n t h e d e v i c e . F o l l o w t h e s t e p s t o a d d t h e d e v i c e You must press “Bind Device”...
- Page 9 D. Installa on D-1. Diagram Moun ng Base Cable Joint...
- Page 10 D-2. Tools Required 1. Tools may be Required A. Phillips screwdriver B. Pencil C. Drill 2. Screws D. Tapping screw for Controller (M4, 2pcs) E. Tapping screw for Siren Horn (M6, 3pcs) Wall screws not included...
- Page 11 D-3. Mount the alarm controller and the siren horn Mount the alarm controller and the siren horn to the wall with screws (not included) appropriate for the moun ng surface...
- Page 12 D-4. Connect the Siren Horn to the Controller Cable Joint...
- Page 13 D-5. Test the Controller and Siren Horn Test the controller several mes by pressing the SET bu on and confirm the siren horn ac vates and silences properly. Then, use the YoLink app to vate and ence the siren horn...
-
Page 14: Using The Yolink App
E. Using the YoLink App E-1. Device page Details - Tap to go to Details page(refer to page 17) Connec on Status of Alarm Controller and Hub Current Ba ery level - Shown red if replacement is required Real- me Status of Alarm Controller:... - Page 15 Current Ba ery Level - Shown red if replacement is required m. Firmware Version - “#### ready now” indicates a new update is available (refer to page n. Remove Device From Current Account - Tap to delete the device from your YoLink account...
- Page 16 When mo on is detected (by a YoLink Mo on Sensor, sold separately) When a water leak is detected (by a YoLink Water Leak Sensor, sold separately) When a door or window is opened/closed/le open (detected by a YoLink Door Sensor, sold separately) Pressing an associated control bu on on a YoLink fob (sold separately) E-3-2.
- Page 17 E-3-3. Note Devices configured in an automa on or YoLink Control can automa cally ac vate the siren horn/alarm device (see YoLink Control on page 24 and Automa ons on page 20) When the Alarm Controller is configured in the Alarm Strategy se ngs, alerts from devices can...
- Page 18 E-4. Automa on (Set Up Rules For “If This Then Do That”) T h e m o s t p o p u l a r u s e f o r o u r A l a r m C o n t r o l l e r i s t o a c v a t e t h e a l a r m a u t o m a c a l l y i n t h e r e s p o n s e t o e v e n t s s u c h a s d o o r h a s b e e n o p e n e d , m o o n h a s b e e n d e t e c t e d ;...
- Page 19 b. Add an automa on b-1 Edit name b-2 Edit trigger b-3 Edit behavior (You must have at least one ac on device, or you cannot set a behavior) b-4 Edit when (Set a me range for the automa on (always or during specific days or mes) b-5 Tap to save the se ngs Swipe Le...
- Page 20 E-5. Alarm Strategy Set up rules to ac vate alarm when a device alert is detected (such as Water Leak Sensor, Mo on Sensor, etc.). Follow instruc ons below to enable Device Alert first Tap “ ” in the upper le corner to go to My Profile Go to Se ngs >...
- Page 21 E-6. Voice Assistants Connect YoLink with third-party voice assistants to control (turn on or turn off ) or monitor the status of your devices through voice commands Tap “ ” in the upper le corner to go to My Profile Go to Se ngs >...
-
Page 22: Yolink Control
D2D, YoLink devices can be controlled without the Hub or an internet connec on. (Use of YoLink Control-D2D is op onal; you can use the Automa on feature in the app OR use YoLink Control-D2D, but YoLink Control-D2D offers the benefit of opera on without the Hub or internet connec on.) - Page 23 M o r e a d v a n c e d s e q u e n c e s , controlling mul ple outputs (e.g. ac vate siren horn or alarm device when the door is le open) are available via the YoLink app...
- Page 24 F-1. Pairing To co nfi g u re yo u r Wate r L e a k a. SET Bu on Sensor as a controller, Press and (5-10 seconds) h o l d t h e S E T b u o n fo r 5 - 1 0 s e co n d s u n l t h e L E D q u i c k l y blinks green, then, release the bu on...
- Page 25 F-2. Unpairing A t t h e W a t e r L e a k S e n s o r (controller), press and hold the SET bu on for 10-15 seconds un l the LED quickly blinks green, then red, then, release the bu on A t t h e A l a r m C o n t r o l l e r (responder), press and hold the...
-
Page 26: Maintenance
G. Maintenance G-1. Firmware Update To ensure our customers have the best user experience, we highly recommend you update to the newest version firmware when an update is available In “Firmware”, if a new version is listed as available (#### ready now), click it to start the firmware update process You may use your device during the update as it is performed in the background. - Page 27 Factory reset will erase all of your se ngs and restore it to factory defaults. A er the factory reset, your device will remain in your Yolink account Hold the SET bu on for 20-25 seconds un l the status light blinks red and green alternately,...
- Page 28 This product adopts Li-SOCl Non-rechargeable ba ery and super pulse ba ery capacitor, the model is ER34615 and SPC1550 , the voltage is 3.6V, the ba ery capacity is 19000mah, please purchase from the official website of YoLink (www.yosmart.com). Loosen the four screws on the...
- Page 29 H. Specifica ons H-1. Alarm Controller Ba ery: Device Current Draw: ≤ 160mA (on, not connected to the siren horn), ≤ 90uA (standby) Output Voltage: 12V DC Output Current: ≤ 400mA (Resis ve) IP Ra ng: IP65 (fully dust tight and is completely protected against solid objects.
- Page 30 Dimensions: Unit: inches (millimeters) 1.65 (42) 4.57 (116) 1.18 (30) FRONT BOTTOM SIDE...
- Page 31 H-2. Siren Horn Working Voltage: 12V DC Device Current Draw: ≤ 500mA (on), 0mA (standby) 110 dB (@0.3m) Siren Volume: Alarm Dura on: Maximum 30 minutes per alarm me Dimensions: 4.06 x 3.90 x 2.56 inches (103 x 99 x 65 millimeters) (L x W x D) Connec on Cable Length: ~ 29.5inches (750millimeters) Environment: Working Temperature: -4°F - 140°F (-20°C - 60°C)
-
Page 32: Troubleshoo
I. Troubleshoo ng Symptom: 1. Device is offline - If controller is not connected to the cloud, press the SET bu on on Outdoor Siren Alarm Controller once - If Hub is offline, reconnect the Hub to the Internet and press the SET bu on on Outdoor Siren Alarm Controller once - If Hub is not on, power on the Hub again and press the SET bu on on Outdoor Siren Alarm Controller once... -
Page 33: Warning
J. Warning P l e a s e i n s t a l l , o p e ra t e a n d m a i n t a i n t h e A l a r m C o n t ro l l e r o n l y a s o u t l i n e d i n t h i s m a n u a l . - Page 34 If your Alarm Co ntroller does get dirty, please clean it by wiping it down with a clean, dr y cloth. Do no t use strong chemicals or detergents, which may discolo r or damage the ex terio r and/or damage the electro nics, voiding the warranty Do not install or use this device where it will be subjected to physical impacts and/or strong vibra on.
-
Page 35: Customer Service & Warranty
If you have any difficul es installing or using YoLink products, please contact our Customer Service department during business hours: US Live Tech Support: 1-949-825-5958 M-F 9am - 5pm PST Email: service@yosmart.com YoSmart Inc. 15375 Barranca Parkway, Ste G-105 Irvine, CA 92618... - Page 36 FCC Statement This equipment has been tested and found to comply with the limits for a Class B digital device, pursuant to part 15 of the FCC Rules. These limits are designed to provide reasonable protec on against harmful interference in a residen al installa on. This equipment generates, uses and can radiate radio frequency energy and, if not installed and used in accordance with the instruc ons, may cause harmful interference to radio communica ons.
- Page 37 Note: The manufacturer is not responsible for any radio or TV interference caused by unauthorized modifica ons to this equipment. Such modifica ons could void the user’s authority to operate the equipment. FCC RF Radia on Exposure Statement This equipment complies with FCC RF radia on exposure limits set forth for an uncontrolled environment.
Need help?
Do you have a question about the YS7105-UC and is the answer not in the manual?
Questions and answers