Table of Contents
Advertisement
Quick Links
Advertisement
Table of Contents

Related Manuals for CIARRA CAS75913E


Summary of Contents for CIARRA CAS75913E
- Page 1 Model Number: CAS75913E CAB75913E www.ciarraappliances.com...
- Page 3 Dear customer: Thank you so much for your purchase, please read this instruction manual carefully before installation & use. If you have any question, please contact us at: info@ciarraappliances.com E-mail:...
-
Page 4: Table Of Contents
CONTENTS Safety------------------------------------------- 3-4 Specifications--------------------------------------5 Before Using the Range Hood----------------------6 Prepare for Installation ----------------------------7 Installation--------------------------------------8-12 Install the Hood-------------------------------------------8-11 Carbon Filter Installation------------------------------------12 Operation----------------------------------------- 13 Cleaning and Maintenance --------------------14-16 Grease Filter------------------------------------------------14 Carbon Filter -----------------------------------------------14 Stainless Steel Cleaning ------------------------------------14 Painted Finish Cleaning-------------------------------------14 LED Replacement----------------------------------------15-16 Troubleshooting-----------------------------------17 Environmental Protection -------------------------18... -
Page 5: Safety
Safety WARNING TO REDUCE THE RISK OF FIRE, ELECTRIC SHOCK, OR INJURY TO PERSONS, OBSERVE THE FOLLOWING: Use this unit only in the manner intended by the manufacturer. If you have questions, contact the manufacturer at the address or telephone number listed in the warranty. - Page 6 Safety WARNING TO REDUCE THE RISK OF INJURY TO PERSONS IN THE EVENT OF A RANGE TOP GREASE FIRE, OBSERVE THE FOLLOWING*: SMOTHER FLAMES with a close-fitting lid, cookie sheet or metal tray, then turn off the burner. BE CAREFUL TO PREVENT BURNS.
-
Page 7: Specifications
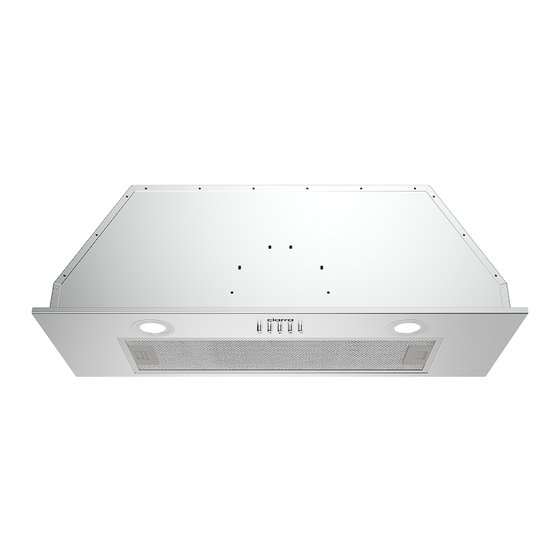
Specifications Voltage 110V-120V/60Hz Power of Motor 1 x 200W Power of lamps 2x 3W 29.53*11.02*9.53(inchs) Appliance Dimension (W x D x H) Note: The manufacturer reserves the right to change any technological improvement or modification without prior notice. -
Page 8: Before Using The Range Hood
Before Using the Range Hood CAUTION: Before proceeding to the installation, check If items are missing or damaged, contact the manufacturer. Observe all governing codes and ordinances. Have a qualified technician install the range hood. It is the installer’s responsibility to comply with installation clearances specified on the model/serial rating plate. -
Page 9: Prepare For Installation
Prepare for Installation Prepare for Installation: a) Ventilation Mode Recirculation Mode: Recirculating with carbon filter (required), the smells and odors can be filtered and vented through the top vented hole and the exhaust pipe is not required. Extraction Mode: You can install the 59" long and 6" diameter aluminum exhaust pipe for extracting. -
Page 10: Installation
Installation Install the Hood(Extraction): Remove all protective poly film from the hood and/or parts. 2) Recommend installation height: 25.6"~29.5" above the cooktop for best extraction. Required height over gas hob: 29.5"; Required height over electric hob: 25.6". 25.6" 29.5"... - Page 11 Installation Install the Hood(VENT OUTSIDE): 1) If present, remove all protective poly film from the hood and/ or parts. 2) Below is the 1:1 installation diagram: 19.99" 14.17" 3) Drill holes on the corresponding positions in the cabinet according to the below picture.
- Page 12 Installation 4) Remove the grease filter, press the lock and pull it downward. 5) Loosen the two screws of the front panel, pull down the front panel and pull out the lamp line.Open the power protection cover and disconnect the plug. 6) Remove the front panel.
- Page 13 Installation 7) Put the range hood into the cabinet that have been drilled holes, then fix the range hood on the cabinet by 8 pcs of 0.16*0.79 screws. 8) Insert the plug of LED light into the power protection box and close the cover.
-
Page 14: Carbon Filter Installation
Installation Carbon Filter Installation(Recirculation): Carbon filter can be used to trap odors. In order to install the carbon filter, the grease filter should be detached first. Press the lock and pull it down. 2. Place the carbon filter into the unit and turn it in the clockwise direction to lock it in place. -
Page 15: Operation
Operation Always turn your hood on before you begin cooking to establish an air flow in the kitchen. Let the blower run for a few minutes to clear the air after you turn off the range. This will help keep the whole kitchen cleaner and fresher. Mechanical Push button Operate the hood as follows: Off button... -
Page 16: Cleaning And Maintenance
Cleaning and Maintenance Proper maintenance of the Range Hood will assure proper performance of the unit. Before cleaning unit, unplug or disconnect the range hood from the power supply. GREASE FILTERS The grease filters should be cleaned frequently. Can be cleaned in dishwasher under high temperature without using any detergent. -
Page 17: Led Replacement
Cleaning and Maintenance LED REPLACEMENT Circular LED lamp: CAUTION: Before cleaning or repairing and replacing accessories, please make sure to shut down the power before operation, so as to avoid electric shock, damage to human body and even endanger life safety! Turn off the hood and unplug the power outlet. - Page 18 Cleaning and Maintenance 3. Open the power protection cover, pull out the plug and replace the corresponding model of the LED lamp. 4. Turn the power on and test all blower and light functions to ensure they are operating properly. Insert the new LED light gently into the light socket, please make sure you aim at the grooves on the lighting panel when installing.
-
Page 19: Troubleshooting
Light is damaged panel and locate the wire Lights are with clip behind the light not working housing. The light wire terminal is Reset the connection loose If problem persists after the above checks, please contact CIARRA Customer Care Centre for assistance. -
Page 20: Environmental Protection
Environmental Protection Waste electrical products should not be disposed of with household waste. Please recycle where facilities exist. Check with your Local Authority or retailer for recycling advice. By ensuring this product is disposed of correctly, you will help prevent potential negative consequences for the environment and human health, which could otherwise be caused by inappropriate waste handling of this product.
Need help?
Do you have a question about the CAS75913E and is the answer not in the manual?
Questions and answers