Dantherm HCH5 MKII Service Instructions Manual
Hide thumbs
Also See for HCH5 MKII:
- Installation and service manual (140 pages) ,
- User manual (93 pages)

Related Manuals for Dantherm HCH5 MKII


Summary of Contents for Dantherm HCH5 MKII
- Page 1 Original user and service instructions HCH5 MKII/HCH8 MKII | en | *115656* 115656 Rev. 1.0 · 2023-W15...
-
Page 3: Table Of Contents
USER MANUAL Table of contents Table of contents Introduction ................4 Overview . -
Page 4: Introduction
Manual The part number of this manual is 115656. The unit HCH5 MKII/HCH8 MKII is designed to supply dwellings with fresh and filtered air and Intended use is connected to an air duct system for this purpose. The heat from the extract air is transferred to the supply air inside the unit, without mixing the two airflows. - Page 5 Introduction: Overview The following abbreviations are used in this manual: Abbreviations in this manual Abbrevi- Description ation Outside air inlet into the unit Supply air from the unit into the dwelling Extract air from the dwelling into the unit Extract air from the unit ISO Coarse Standard air filter according to ISO 16890;...
-
Page 6: Symbols Used In The Operating Instructions
Introduction: Symbols used in the operating instructions Symbols used in the operating instructions In these operating instructions, particularly important text passages are highlighted with sig- nal words and symbols that are described below. Signal words DANGER ...indicates a hazard which, if not avoided, will result in death or serious injury. WARNING ...indicates a hazard which, if not avoided, could result in death or serious injury. -
Page 7: User Manual
USER MANUAL Overview: Introduction USER MANUAL Overview Introduction Target group This part of the manual is intended for the users of the product. All instructions described in the Installation and Service Manual for Professionals must be carried out by trained techni- cians. -
Page 8: Operation
USER MANUAL Operation: Overview Operation Overview DANGER Danger to life due to exhaust gases! When using open fireplaces in combination with this unit, negative pressure may arise inside the dwelling. The exhaust gases produced at the fireplace will be carried into the dwelling and can endanger your life. -
Page 9: Standard Operating Modes
Selecting one of the 11 week programs (10 preset programs + one customisable program in the PC tool) can only be achieved via the Dantherm app, the HRC3 remote control or the PC tool. For more information on the weekly programmes, please refer to the chapter "Week programs of the time switch". -
Page 10: Temporary Operating Modes (Override)
You can change the setpoints for the minimum outdoor temperature (Tmin, default setting: 15 °C) and max. indoor temperature (Tmax, default setting: 24 °C) via the PC tool or the Dantherm HRC3 remote control. If the conditions for automatic bypass are met, the open status of the damper is indicated by the continuous illumination of the corresponding LED. - Page 11 USER MANUAL Operation: Temporary operating modes (override) In summer mode, the supply air fan is stopped so that only the extract air fan is operating. In Summer mode this case, the fresh air supply is ensured by opening windows, doors, etc. INFORMATION The summer mode is automatically deactivated once the outdoor temperature drops below 14 °C.
-
Page 12: Week Programs Of The Time Switch
USER MANUAL Operation: Week programs of the time switch Week programs of the time switch The following illustrations indicate the preset fan stages for one day (0 to 24 h) in the respect- ive programs. Each of the programs offers two settings: •... - Page 13 USER MANUAL Operation: Week programs of the time switch Program 6 2 2 2 2 2 2 2 2 2 2 2 2 2 2 Weekdays 1 1 1 1 1 1 1 1 2 2 2 2 2 2 2 2 2 2 2 Weekend 1 1 1 1 1 1 1 1 1 1 1 1 1...
-
Page 14: Maintenance And Care
USER MANUAL Maintenance and care: Week programs of the time switch Maintenance and care Preventive maintenance activities are required at regular intervals to ensure efficient and op- timal operation without unwanted failure and to ensure an expected service life of at least 10 years. - Page 15 USER MANUAL Maintenance and care: 6. Insert the clean filters into the unit. Ensure that the filters are inserted the right way round. The arrows on the filter must point in the direction of the airflow. Fig. 3: Inserting and checking the filter for correct installation direction 7.
-
Page 16: Installation And Service Manual For Professionals
It is essential to be familiar with the correct operating procedure of the residential ventilation Safety system and all safety measures. Dantherm accepts no liability for operational failures or per- precautions sonal injury resulting from the failure to comply with safety measures. -
Page 17: Product Description
The following parts are included in the scope of delivery: Scope of Delivery • 1 x unit HCH5 MKII/HCH8 MKII • 1 x additional material consisting of: – 1 x manual – 1 x set of labels, data sheets etc. -
Page 18: General Description
INSTALLATION AND SERVICE MANUAL FOR PROFESSIONALS Product description: General description General description The residential ventilation unit HCH5 MKII/HCH8 MKII is designed to supply dwellings with Introduction fresh and filtered air. The heat from the extract air is transferred to the supply air inside the unit without mixing the two airflows. - Page 19 INSTALLATION AND SERVICE MANUAL FOR PROFESSIONALS Product description: General description The figure below illustrates the airflows inside the unit. Airflows Fig. 7: Airflows in the HCH5 MKII/HCH8 MKII Item Designation Description Outside air (T1) The outside air that enters the heat exchanger is heated by the ex- tract air (3) from the house.
-
Page 20: Components Description
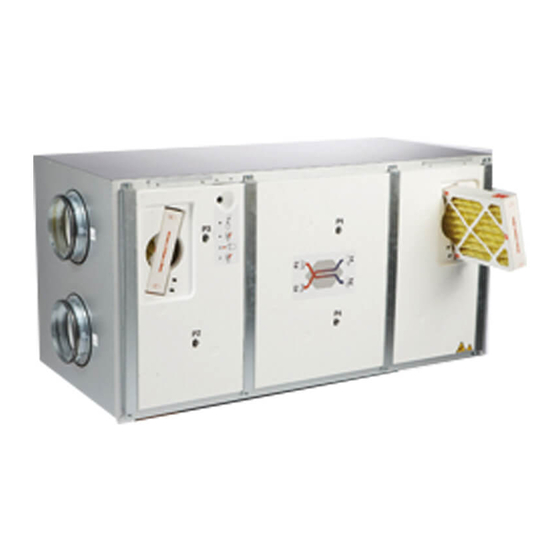
INSTALLATION AND SERVICE MANUAL FOR PROFESSIONALS Product description: Components description Components description The individual components of the units included in the standard scope of delivery are de- scribed in this section. Cabinet The outer parts of the cabinet are made of aluzinc sheet metal. To add accessories or replace components, the front cover must be removed. -
Page 21: Accessories
An internal preheating coil is available for the HCH5 MKII. For the HCH8 MKII, the pre- heating coil must be mounted externally in the outside air duct. - Page 22 INSTALLATION AND SERVICE MANUAL FOR PROFESSIONALS Product description: Accessories Wired remote A wired remote control HCP 11 (without display) can be connected to the unit if the control unit is difficult to reach due to the location of the unit. The remote control provides the same control (HCP 11) functions as the control unit.
-
Page 23: Special Operating Modes
INSTALLATION AND SERVICE MANUAL FOR PROFESSIONALS Product description: Special operating modes Special operating modes In this section, the operation of the system under special conditions is described. For details on the standard operating modes, please refer to page 9. Preheating (with If a preheating coil is installed, the unit can additionally heat the outdoor air (T1) electrically to reduce the risk of frost and increase the supply air temperature. - Page 24 INSTALLATION AND SERVICE MANUAL FOR PROFESSIONALS Product description: Special operating modes Alternative If there is a fireplace in the house, the alternative defrosting procedure is selected via the PC tool and will trigger the following steps: defrosting procedure • The speed of the supply air fan and exhaust air fan decreases slowly until the minimum speed is reached.
-
Page 25: Description Of The Components Of The Control Unit
Smart- sensors T1–T4 phone Ethernet router with DHCP Exhaust air fan Supply air fan HAC2 FPC (accessories) Dantherm main PCB Air quality sensor (VOC) HCP 11 on MODBUS (wired remote control) Humidity sensor (RH %) 2 digital inputs High/low fan speed, etc. - Page 26 Ethernet: LAN connection MODBUS MODBUS RTU is used for internal communication between the unit (main PCB) and Dantherm accessories (HAC, FPC or HCP11). Modbus RTU is connected via the RS485 port. INFORMATION An external Building Management System (BMS) cannot be connected as Modbus RTU via the RS485 connection or via Dantherm accessories (HAC, FPC, or HCP11).
-
Page 27: Installation
• The dimensioning of the air ducts and silencers must be in accordance with the national standards and guidelines of the applicable building law. For any kind of support and guidance, please contact your Dantherm distributor. • Noise and vibration of the unit to the air ducts must be minimised. This can be achieved by installing silencers on both the supply and extract air sides. -
Page 28: Access To The Main Pcb
INSTALLATION AND SERVICE MANUAL FOR PROFESSIONALS Installation: Access to the main PCB Access to the main PCB DANGER Risk of electric shock! You can be severely injured by an electric shock. • Always disconnect the unit from the mains by removing the mains plug from the socket before opening the unit! There are three different ways to access the main PCB: •... - Page 29 INSTALLATION AND SERVICE MANUAL FOR PROFESSIONALS Installation: Access to the main PCB 1. Loosen the three magnets on the bottom of the unit and remove the front cover. Option 3 Fig. 20: Removing the front cover 2. Loosen the screws of the 4 crossbars (1). Remove the 4 crossbars. Remove the EPS front cover (2).
-
Page 30: Assembly
The warranty does not cover any damage to the unit/parts of the dwelling/the insulation caused by accumulated snow/water in the ducts. INFORMATION To assemble and install Dantherm accessories, follow the instructions supplied with the ac- cessories. Please proceed as follows to mount the unit: 1. - Page 31 5. Place the unit on the construction and make sure that it is levelled as shown. Fig. 28: Setting up the unit INFORMATION The condensate drain hose is not included in the scope of delivery. Dantherm recommends the use of a flexible, corrugated polypropylene drain hose (also used for washing machines and dishwashers).
- Page 32 Make sure that the drain and drain pipe are always completely frost- proof. A frozen condensate drain hose can cause damage. If you cannot make sure that the hose connection and condensate drain hose are frost-proof, Dantherm recommends placing a heating cable around the condensate drain hose. For more information, please refer to the accessories list in the "Accessories"...
- Page 33 11. Connect the air ducts. Make sure that the connection lugs are bent as shown. Then slide the air ducts onto the NPU coupling connections and secure the air ducts with the con- nection lugs. Information: Dantherm recommends using insulated, flexible pipes for connection to connectors/couplings to facilitate connection and to dampen noise and vibration.
-
Page 34: Initial Start-Up And Calibration
INSTALLATION AND SERVICE MANUAL FOR PROFESSIONALS Installation: Initial start-up and calibration Initial start-up and calibration To control the humidity level and to achieve the right comfort level, it is important to regulate the amount of supply air entering the house and the amount of exhaust air being discharged from the house. - Page 35 INSTALLATION AND SERVICE MANUAL FOR PROFESSIONALS Installation: Initial start-up and calibration 1. Remove the front panel. Calibration on the unit Fig. 34: Removing the front panel 2. Check the filter cover plates (1) for correct fit. The cover plates must fit tightly with the soft side facing the filter.
- Page 36 INSTALLATION AND SERVICE MANUAL FOR PROFESSIONALS Installation: Initial start-up and calibration 7. Read out and note the pressure drop Δp inside the heat exchanger that is required for a desired volume flow from the airflow diagram. The pressure drop Δp is located on the unit.
- Page 37 INSTALLATION AND SERVICE MANUAL FOR PROFESSIONALS Installation: Initial start-up and calibration 12. Push the needles completely through the rubber cover of P1 and P2. Fig. 38: Pressure measurement P1–P2 13. Follow the instructions in the PC tool and adjust the speed of the supply air fan until the ΔPa measuring device indicates the noted pressure drop.
-
Page 38: Maintenance And Troubleshooting
INSTALLATION AND SERVICE MANUAL FOR PROFESSIONALS Maintenance and troubleshooting: General maintenance instructions Maintenance and troubleshooting General maintenance instructions To ensure that the unit always meets the technical requirements, preventive maintenance activities have to be carried out at specified intervals. This can prevent breakdowns and ineffi- cient operation and maximise the service life of the unit, i.e. -
Page 39: Cleaning The Interior Of The Unit
INSTALLATION AND SERVICE MANUAL FOR PROFESSIONALS Maintenance and troubleshooting: Cleaning the interior of the unit Cleaning the interior of the unit Every two years, the unit must be opened to check and clean some components. Opening the unit 1. Loosen the three magnets on the bottom of the unit and remove the front cover. Fig. 39: Removing the front cover 2. - Page 40 INSTALLATION AND SERVICE MANUAL FOR PROFESSIONALS Maintenance and troubleshooting: Cleaning the interior of the unit 4. Pull out the upper fan cabinet by hand (3). Fig. 41: Removing the bar for the drip tray and fan cabinet 5. Carefully clean the fan blades with compressed air or a brush through the opening on the underside of the fan cabinet.
- Page 41 INSTALLATION AND SERVICE MANUAL FOR PROFESSIONALS Maintenance and troubleshooting: Cleaning the interior of the unit ü The filter, fan housing, bypass and heat exchanger have been removed from the unit. Cleaning the air ducts and interior 1. Inspect the inner surfaces and the connections of the air ducts for dirt. 2.
-
Page 42: Troubleshooting
Maintenance and troubleshooting: Troubleshooting Troubleshooting In this section you will get to know how to detect and correct possible operating errors. Dantherm strongly recommends to connect a remote control to the unit for operation in or- der to perform proper troubleshooting. Error signals... - Page 43 INSTALLATION AND SERVICE MANUAL FOR PROFESSIONALS Maintenance and troubleshooting: Troubleshooting After any inspection or repair carried out due to potential errors, the unit can be reset by Resetting errors disconnecting the unit from the 230 V AC supply and then reconnecting it. This way, the control unit is reset.
- Page 44 INSTALLATION AND SERVICE MANUAL FOR PROFESSIONALS Maintenance and troubleshooting: Troubleshooting Error Fault Potential cause Action required Reset code Bypass damper Switch position A: by- Check whether bypass is Automatic reset does not close pass is closed, but sup- activated in PC tool when efficiency is as expected ply air temperature is high enough for...
- Page 45 INSTALLATION AND SERVICE MANUAL FOR PROFESSIONALS Maintenance and troubleshooting: Troubleshooting Error Fault Potential cause Action required Reset code Supply air tem- Temperature sensors Mount temperature Automatic reset if perature are not mounted cor- sensor(s) correctly the temperature is sensor (T2) rectly within the normal range for 30 seconds Resistance in one of Replace temperature...
- Page 46 INSTALLATION AND SERVICE MANUAL FOR PROFESSIONALS Maintenance and troubleshooting: Troubleshooting Error Fault Potential cause Action required Reset code Supply air tem- Low temperatures Ensure that all ventilated Manual reset by perat- from unheated rooms rooms are heated pressing the alarm ure < +5 °C button on the mem- Alternatively, close the air brane keyboard op-...
- Page 47 INSTALLATION AND SERVICE MANUAL FOR PROFESSIONALS Maintenance and troubleshooting: Troubleshooting Error Fault Potential cause Action required Reset code Fire alarm Fire or smoke sensor Check for smoke or fire The alarm display Fire protection connected to this input can be reset by Check if sensor and con- thermostat con- is active...
-
Page 48: Annex
INSTALLATION AND SERVICE MANUAL FOR PROFESSIONALS Annex: Technical data Annex Technical data TECHNICAL DATA Abbr. Unit HCH5 MKII HCH8 MKII Max. flow rate at 100 Pa 100Pa Max. nominal flow rate at max.nom 100 Pa Operating range passive VPHI 99 to 220 135 to 340 house at 100 Pa... -
Page 49: Cabinet Dimensions
INSTALLATION AND SERVICE MANUAL FOR PROFESSIONALS Annex: Cabinet dimensions TECHNICAL DATA Abbr. Unit HCH5 MKII HCH8 MKII ELECTRICAL SPECIFICATIONS Electrical voltage Max. power consumption 170/1570 246/2096 (without/with preheater) Frequency Protection type (IP) * It is recommended to use a preheating coil at outdoor temperatures below -3 °C to ensure balanced ventilation. -
Page 50: Main Pcb With Connections
INSTALLATION AND SERVICE MANUAL FOR PROFESSIONALS Annex: Main PCB with connections Main PCB with connections Fig. 45: Main PCB with connections... -
Page 51: Spare Parts
INSTALLATION AND SERVICE MANUAL FOR PROFESSIONALS Annex: Spare parts Spare parts If spare parts are required, please visit Dantherm's online shop: shop.dantherm.com... -
Page 52: Declaration Of Conformity (Eu)
INSTALLATION AND SERVICE MANUAL FOR PROFESSIONALS Annex: Declaration of conformity (EU) Declaration of conformity (EU) Dantherm A/S, Marienlystvej 65, DK – 7800 Skive, hereby declares that the unit mentioned be- low: No.: 352426 and 352427 Type:HCH5 MKII/HCH8 MKII (all variants included) – complies with the following directives:... - Page 53 INSTALLATION AND SERVICE MANUAL FOR PROFESSIONALS Annex: Declaration of conformity (UKCA) Declaration of conformity (UKCA) Dantherm, Marienlystvej 65, DK-7800 Skive, declares that the units mentioned below: Item no.: 352426 Type: HCH5 MKII/HCH8 MKII (all variants included) – confirm with the following directives: UK SI 2016 No.
- Page 56 Marienlystvej 65 7800 Skive Denmark www.danthermgroup.com Dantherm can accept no responsibility for possible errors and changes (en) Der tages forbehold for trykfejl og ændringer (da) Irrtümer und Änderungen vorbehalten (de) Dantherm n’assume aucune responsabilité pour erreurs et modifications éventuelles (fr)
Need help?
Do you have a question about the HCH5 MKII and is the answer not in the manual?
Questions and answers