Table of Contents
Advertisement
Available languages
Available languages
Quick Links
Manuale
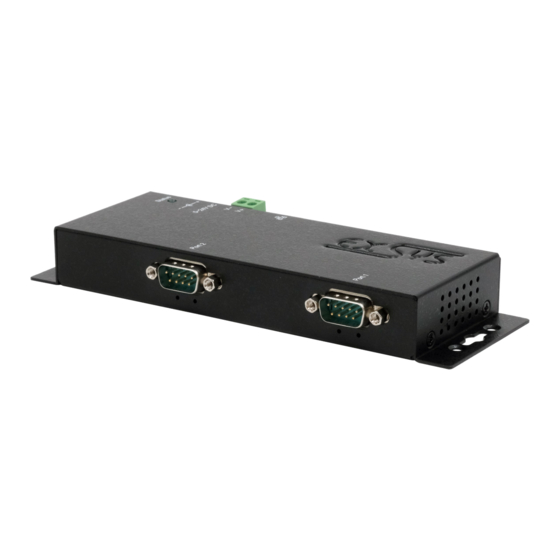
EX-6122-2
Dispositivo Server seriale 2x RS-232/422/485
Serial Device Server 2x RS-232/422/485
Germania:
EXSYS Vertriebs GmbH
Industriestraße 8
61449 Steinbach
www.exsys.de
Svizzera:
EXSYS Vertriebs GmbH
Dübendorfstrasse 17
8602 Wangen
www.exsys.ch
Italia
EXSYS ITALIA Srl
Via Belvedere, 45/B
22100 Como (CO)
www.exsys.it
Vers. 1.0 / 01.06.23
Manual
Advertisement
Table of Contents

Subscribe to Our Youtube Channel
Related Manuals for Exsys EX-6122-2


Summary of Contents for Exsys EX-6122-2
- Page 1 Manuale EX-6122-2 Dispositivo Server seriale 2x RS-232/422/485 Serial Device Server 2x RS-232/422/485 Germania: EXSYS Vertriebs GmbH Industriestraße 8 61449 Steinbach www.exsys.de Svizzera: EXSYS Vertriebs GmbH Dübendorfstrasse 17 8602 Wangen www.exsys.ch Italia EXSYS ITALIA Srl Via Belvedere, 45/B 22100 Como (CO) www.exsys.it...
-
Page 2: Table Of Contents
Server Settings 26-30 Server Settings via web browser 26-27 Direct connection via Socket Port (Peer-to-Peer-Modus) 28-29 System Management Settings via SDS Administrator UDP and TCP ports Cleaning Technical Information Technical Drawing © Copyright 2023 by EXSYS Vertriebs GmbH. All rights reserved... -
Page 3: Descrizione
Modbus RTU. Per garantire la compatibilità con i dispositivi seriali legacy che eseguono il software applicativo della porta COM esistente, EX-6122-2 fornisce una porta COM virtuale (VCOM) che migra perfettamente l'applicazione seriale senza modificare il software. -
Page 4: Struttura, Attacchi & Led
Lampeggiante: l'interfaccia seriale sta inviando dati Verde (Destro) Spento: l'interfaccia seriale non invia dati RXD LED Lampeggiante: l'interfaccia seriale sta ricevendo dati Verde (Sinistro) Spento: l'interfaccia seriale non riceve dati © Copyright 2023 by EXSYS Vertriebs GmbH. All rights reserved... -
Page 5: Attacchi
DB 9M (RS-485 2-Fili): Seriale 9 Pin D-SUB (RS-485 2-Fili) Segnale Segnale Segnale DATA-(A) GROUND DATA+(B) (Power) Ethernet: Connettore RJ45 12345678 Segnale Segnale Segnale BI_DA+ BI_DC+ BI_DD+ BI_DA- BI_DC- BI_DD- BI_DB+ BI_DB- © Copyright 2023 by EXSYS Vertriebs GmbH. All rights reserved... -
Page 6: Installazione Hardware
. Se qualcosa non è chiaro, fare riferimento alle istruzioni per l'uso del proprio computer. Installa l’EX-6122-2 a parete o su una guida DIN da 35 mm utilizzando il kit guida DIN opzionale. - Page 7 Modificare questa impostazione solo se +5V sono effettivamente necessari per la periferica. Per le normali applicazioni i ponticelli non devono essere modificati (posizione DIS), altrimenti i vostri dispositivi verranno danneggiati! © Copyright 2023 by EXSYS Vertriebs GmbH. All rights reserved...
-
Page 8: Configurazione Del Device Server
Se conosci l'indirizzo IP assegnato dal server DHCP, puoi inserirlo direttamente nel browser ed effettuare il login al dispositivo. Il software di amministrazione EXSYS Serial Device Server (SDS) è disponibile per il download sul sito Web EXSYS: www.exsys.de; www.exsys.ch oppure www.exsys.it... -
Page 9: Amministratore Del Server Del Dispositivo Seriale Sds
Italiano 6. SDS Serial Device Server Administrator L'EX-6122-2 viene fornito in modalità DHCP e richiede un indirizzo IP per la configurazione. Per impostazione predefinita, il server del dispositivo riceve automaticamente un indirizzo IP da un server DHCP (ad esempio il router). Per determinare l'indirizzo IP, è necessario installare il software EXSYS SDS Administrator (vedere pagina 8 per il download). - Page 10 Se modifichi le impostazioni, devi aggiornarle anche nel server del dispositivo per garantirne la coerenza. Per fare ciò, è una buona idea accedere all'utilità di configurazione del server del dispositivo, apportare le modifiche necessarie alle impostazioni e quindi tornare per aggiungerle automaticamente. © Copyright 2023 by EXSYS Vertriebs GmbH. All rights reserved...
-
Page 11: Impostazioni Del Server
Se conosci l'indirizzo IP assegnato dal server DHCP, puoi inserirlo direttamente nel browser ed effettuare il login al dispositivo. Nella finestra seguente è possibile configurare il server del dispositivo per la propria applicazione. Accettare le impostazioni facendo clic su Salva modifiche. © Copyright 2023 by EXSYS Vertriebs GmbH. All rights reserved... - Page 12 Reindirizza senza problemi le comunicazioni tramite le porte COM virtuali in Windows per migliorare la connettività e il controllo. Descrizione: Assegna descrizioni univoche a ciascun dispositivo seriale per semplificare l'identificazione e la gestione. © Copyright 2023 by EXSYS Vertriebs GmbH. All rights reserved...
-
Page 13: Connessione Diretta Tramite Porta Socket (Modalità Peer-To-Peer)
Il server TCP attende le connessioni in entrata (Listen) su una porta socket definita. È possibile definire una porta socket per ciascuna interfaccia seriale. Accettare le impostazioni facendo clic su Salva modifiche (Save Changes). © Copyright 2023 by EXSYS Vertriebs GmbH. All rights reserved... -
Page 14: Gestione Del Sistema
Questa funzionalità è particolarmente utile se desideri duplicare le impostazioni per altri server di dispositivi. © Copyright 2023 by EXSYS Vertriebs GmbH. All rights reserved... -
Page 15: Impostazioni Tramite Amministratore Sds
(impostazione di fabbrica: admin). Nella finestra seguente è possibile effettuare le stesse impostazioni del menu di configurazione basato sul web. Per applicare le modifiche fare clic su Invia. © Copyright 2023 by EXSYS Vertriebs GmbH. All rights reserved... -
Page 16: Porte Udp E Tcp
Nella zona dei collegamenti, assicurarsi che non rimangano fibre del panno nella presa. Non utilizzare in nessun caso un panno umido o bagnato per la pulizia! © Copyright 2023 by EXSYS Vertriebs GmbH. All rights reserved... -
Page 17: Dati Tecnici
Da -20° a 75° Celsius Dal 5% al 95% Umidità Rel. : Classe di protezione: IP30 Alimentazione: +5V-24V / PoE Dimensione: 179.0 x 59.5 x 23.0 mm Peso: 296g 11. Dati Tecnici © Copyright 2023 by EXSYS Vertriebs GmbH. All rights reserved... -
Page 18: Description
Supports 5V over serial Connector IEEE802.3af PoE-PD: Can be powered by Ethernet cable Certificates 2. Extent of delivery Before you integrate the EX-6122-2 into your network, you should first check the contents of the delivery: • EX-6122-2 • Power Supply (12V/3A) •... -
Page 19: Layout, Connections & Led's
Off: The Serial Port is not sending out any data RXD LED Blinking: The Serial Port is receiving data Green (left) Off: The Serial Port is not receiving any data © Copyright 2023 by EXSYS Vertriebs GmbH. All rights reserved... -
Page 20: Connections
DB 9M (RS-485 2-wire): Serial 9 Pin D-SUB Connector (RS-485 2-wire) Signal Signal Signal DATA-(A) GROUND DATA+(B) (Power) Ethernet: RJ45 Port 12345678 Signal Signal Signal BI_DA+ BI_DC+ BI_DD+ BI_DA- BI_DC- BI_DD- BI_DB+ BI_DB- © Copyright 2023 by EXSYS Vertriebs GmbH. All rights reserved... -
Page 21: Hardware Installation
4. Hardware Installation Please follow the installation instructions below. As there are major differences between PCs, we can only give you general instructions on how to connect the EX-6122-2 . If anything is unclear, please refer to your computer system's user manual. - Page 22 Caution! Only change this setting if +5V is really needed for the peripheral device. For normal applications, do not change the jumpers (position DIS), otherwise your equipment will be damaged! © Copyright 2023 by EXSYS Vertriebs GmbH. All rights reserved...
-
Page 23: Configuration Of The Device Server
RS232 Configuration: • Install the EXSYS Serial Device Server (SDS) Administrator utility (download, see below) as administrator (right click, "Run as administrator"). Then restart the computer. • Once you have connected the server (see the next pages for details), you can access the device via the "Open in Browser"... -
Page 24: Sds Serial Device Server Administrator
EX-6122-2 6. SDS Serial Device Server Administrator The EX-6122-2 is in DHCP mode at delivery and requires an IP address for configuration. By default, the Device Server automatically obtains an IP address from a DHCP server (e.g. your router). To determine the IP address, the EXSYS SDS Administrator utility must be installed (download, see page 20). - Page 25 Device Server to ensure consistency. To do this, it is recommended that you go to your Device Server's configuration utility, make the necessary changes to the settings, and then return to have them added automatically. © Copyright 2023 by EXSYS Vertriebs GmbH. All rights reserved...
-
Page 26: Server Settings
In the following window you can configure the Device Server for your application. After finishing the necessary changes, click Save Changes to apply them. © Copyright 2023 by EXSYS Vertriebs GmbH. All rights reserved... - Page 27 Configure the virtual COM port: Seamlessly redirect communication through Windows virtual COM ports to improve connectivity and control. • Description: Assign unique descriptions to each serial device to simplify identification and management. © Copyright 2023 by EXSYS Vertriebs GmbH. All rights reserved...
-
Page 28: Direct Connection Via Socket Port (Peer-To-Peer-Modus)
Configuration TCP Server: The TCP server listens for incoming connections on a defined socket port. A socket port can be defined for each serial port. Apply the settings by clicking Save Changes. © Copyright 2023 by EXSYS Vertriebs GmbH. All rights reserved... -
Page 29: System Management
Users can change the required settings in the exported settings file using a text editor and then import the changes to update the settings. This feature is particularly useful when duplicating settings for other Device Servers. © Copyright 2023 by EXSYS Vertriebs GmbH. All rights reserved... -
Page 30: Settings Via Sds Administrator
Configure in App. In the login window, enter the password (default: admin). In the following window you can make the same settings as in the web-based configuration menu. Click Submit to apply the changes. © Copyright 2023 by EXSYS Vertriebs GmbH. All rights reserved... -
Page 31: Udp And Tcp Ports
In the area of the connections, please make sure that no fibers of the cloth are left in the socket. Attention! Never use a moist or wet cloth for cleaning! © Copyright 2023 by EXSYS Vertriebs GmbH. All rights reserved... -
Page 32: Technical Information
Operating Temperature: Storage Temperature: -4° to 167° Fahrenheit Rel. Humidity: 5% to 95%, non-condensing Protection Class: IP30 Power: +5V-24V Size: 179.0 x 59.5 x 23.0 mm Weight: 296g 11. Technical Drawing © Copyright 2023 by EXSYS Vertriebs GmbH. All rights reserved...
Need help?
Do you have a question about the EX-6122-2 and is the answer not in the manual?
Questions and answers