Advertisement
Advertisement
Table of Contents

Related Manuals for HFCL io ion4le


Summary of Contents for HFCL io ion4le
- Page 1 Quick Start Guide Unlicensed Band Radio High Capacity Radio ion4le/ion4le_ext...
- Page 2 ANYWHERE EVERYWHERE...
- Page 3 Introduction Thank you for purchasing our Unlicensed Band Radio (UBR).IO enterprise/carrier grade P2P/P2mP solution is designed to serve highly critical enterprise applications in unlicensed 5 GHz spectrum for short-range and long-range links. Packaging Content 2X2 UBR (Qty: 1) Mounting Kit Pole Clamp (Qty:1), L Plate (Qty:1), U bolt (Qty:1), SEMS Screw (Qty:4), Hex Nuts (Qty:4)
-
Page 4: Product Specifications
Product Specifications Peak Throughput Up to 700 Mbps Aggregate UL/DL Throughput (aggregate) Radio Mode Modulation Upto 256 QAM Channel Bandwidth 10/20/40/80 MHz Wireless QoS 802.11e WMM Wireless Security WPA, WPA2 and 128-bit AES PSK with hardware acceleration Power Supply IEEE 802.3af/at PoE Power Consumption (Max) <15W (max) Antenna Type... -
Page 5: Product Overview
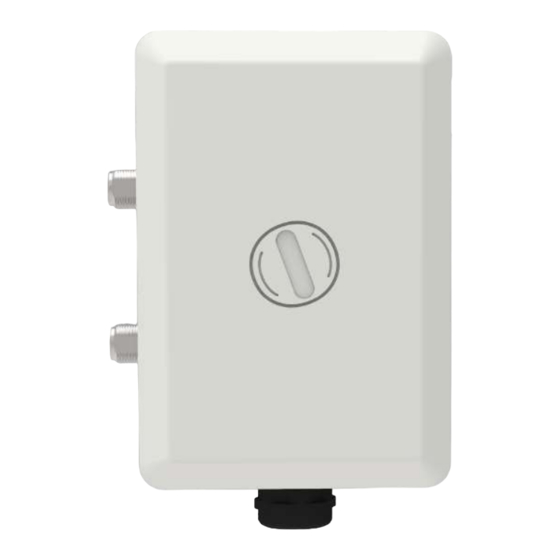
Product Overview LAN + PoE Port (with gland) Power up the device using PoE adaptor and a regular Ethernet Cable N Type Connectors Earthing Point... -
Page 6: Installation & Setup
Installation Set-up The 2x2 UBR has four threaded holes on its rear side specifically designed for affixing the mounting bracket. This mounting bracket is designed to facilitate easy pole mounting by utilizing its components. Align L Plate with the holes at the back of UBR and use provided SEMS screws to fix it. - Page 7 Pass the U-bolt along with the hex nuts through the pole clamp, as depicted in the image below.
- Page 8 Secure the U-bolt firmly to affix it onto the pole by tightening the hex nuts, as demonstrated in the image below.
- Page 9 Attaching External Antennas Dish Antenna Attach the UBR to an external dish antenna using an RF cable, as illustrated in the image below.
- Page 10 RF cable, as illustrated in the image below. To avoid the water ingress, give “Drip Loop” in the cable, as illustrated below. Drip Loop Drip Loop HFCL cannot be held liable for any WARNING: damages incurred during the process.
- Page 11 Getting the UBR Online Step 1: Power up the device and configure the UBR Follow the steps mentioned below and connect UBR to a network Connect an Ethernet cable to your laptop/computer. Connect the opposite end of the Ethernet cable to the data port on the PoE adapter.
- Page 12 The default static IP address for 2x2 UBR is set to “192.168.1.1” A login screen will appear. Enter the default login credential details: User- admin, Password- HFcl!@23#ion Refer our user manual on our website io.hfcl.com for detailed information to configure UBR.
- Page 13 Step 2: Check the LED status STATUS LED COLOR Green LED Green color notifies the user that the device is powered ON (Power Indication) Single Blink: -1 to -50 dBm Double Blink: -51 to -60 dBm Blue LED Triple Blink: Lesser than -60 dBm (RSSI/Link Indication) NOTE: If link is down, then link LED will be in continuous OFF State.
-
Page 14: Safety Precautions
Safety Precautions Observe the following safety precautions to avoid damage to the UBR Do not power the device during installation Do not subject the device to high temperatures Keep away from high voltage cables Do not power off the unit in the middle of an upgrade process The gland should be ground facing all the time Make sure the earthing wire is connected properly to the earthing point... - Page 15 | io.hfcl.com Contact Us: 8, Commercial Complex, Masjid Moth, Greater Kailash-II, New Delhi- 110048 HFCL Limited All Rights Reserved. HFCL and io by HFCL are trademarks or registered trademarks of HFCL Ltd. Specifications are subject to change without notice.
Need help?
Do you have a question about the io ion4le and is the answer not in the manual?
Questions and answers