Table of Contents
Advertisement
Quick Links
Advertisement
Table of Contents

Related Manuals for thomann STAIRVILLE SonicPulse LED Bar 05


Summary of Contents for thomann STAIRVILLE SonicPulse LED Bar 05
- Page 1 SonicPulse LED Bar 05, SonicPulse LED Bar 10 LED Bar...
- Page 2 Thomann GmbH Hans-Thomann-Straße 1 96138 Burgebrach Germany Telephone: +49 (0) 9546 9223-0 Internet: www.thomann.de 15.05.2024, ID: 580867, 580868 (V2)
-
Page 3: Table Of Contents
Table of contents Table of contents General information..........................6 1.1 Symbols and signal words....................... 6 Safety instructions............................. 9 Features............................... 13 Installation..............................14 Starting up..............................18 Connections and controls........................20 Operation..............................23 7.1 Starting the device........................... 23 7.2 Main menu............................23 7.2.1 Automatic programme....................... - Page 4 Table of contents 7.3.3 Behaviour on DMX control failure ..................30 7.3.4 Key lock ............................31 7.3.5 Reset to factory default setting....................31 7.3.6 System information........................32 7.4 RDM functions........................... 32 7.5 Menu overview..........................34 7.6 Functions in 4-channel DMX mode................... 35 7.7 Functions in 5-channel DMX mode...................
- Page 5 SonicPulse LED Bar 05, SonicPulse LED Bar 10 LED Bar...
-
Page 6: General Information
Our products and documentation are subject to a process of continuous development. They are therefore subject to change. Please refer to the latest version of the documentation, which is ready for download under www.thomann.de. 1.1 Symbols and signal words In this section you will find an overview of the meaning of symbols and signal words that are used in this document. - Page 7 General information Signal word Meaning DANGER! This combination of symbol and signal word indicates an immediate dangerous situation that will result in death or serious injury if it is not avoided. WARNING! This combination of symbol and signal word indicates a pos‐ sible dangerous situation that can result in death or serious injury if it is not avoided.
- Page 8 General information Warning signs Type of danger Warning – danger zone. SonicPulse LED Bar 05, SonicPulse LED Bar 10 LED Bar...
-
Page 9: Safety Instructions
Safety instructions Safety instructions Intended use This device is intended for use as an electronic lighting effect by means of LED technology. The device is designed for professional use only and is not suitable for use in households. Use the device only as described in this user manual. - Page 10 Safety instructions DANGER! Danger to life due to electric current! Within the device there are areas where high voltages may be present. Never remove any covers. There are no user-serviceable parts inside. Do not use the device when covers, safety equipment or optical components are missing or damaged. DANGER! Danger to life due to electric current! A short circuit could lead to a fire hazard and risk of death.
- Page 11 Safety instructions NOTICE! Damage to the device if operated in unsuitable ambient conditions! The device can be damaged if it is operated in unsuitable ambient conditions. Only operate the device indoors within the ambient conditions specified in the “Technical specifications” chapter of this user manual. Avoid operating it in environments with direct sun‐ light, heavy dirt and strong vibrations.
- Page 12 Safety instructions NOTICE! Risk of fire due to incorrect polarity! Incorrectly inserted batteries may cause fires and destroy the device and the batteries. Observe the markings on the batteries and on the device. Ensure that proper polarity is observed when inserting batteries. NOTICE! Possible damage due to leaking batteries! Batteries can leak and cause permanent damage to the device.
-
Page 13: Features
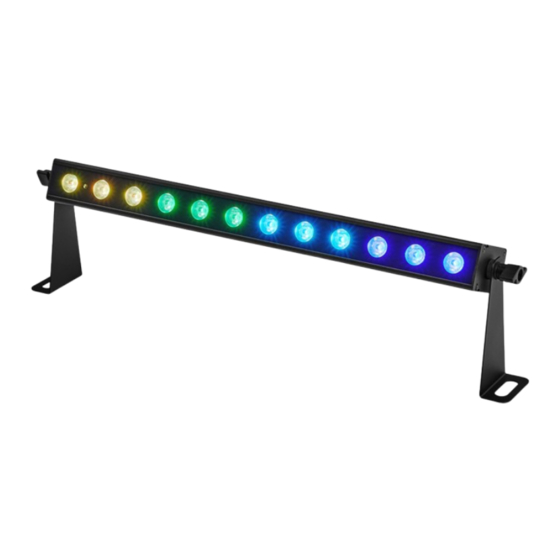
Features Features The LED bar is particularly suitable for professional lighting tasks, for example at events, on rock stages, and in theatres and musicals. It is characterized by low power consumption and a long service life. Special features of the device: SonicPulse LED Bar 05: 24 ×... -
Page 14: Installation
Installation Installation Unpack and check carefully there is no transportation damage before using the unit. Keep the equipment packaging. To fully protect the product against vibration, dust and moisture during transportation or storage use the original packaging or your own packaging material suitable for transport or storage, respectively. - Page 15 Installation NOTICE! Risk of overheating and fire due to inadequate distance and bad ventilation! If the distance between the light source and the illuminated surface is too short or the device is badly ventilated, the device can overheat and cause fires. Make sure that illuminated surfaces are more than 2 m away.
- Page 16 Installation NOTICE! Data transfer errors due to improper wiring! If the DMX connections are wired incorrectly, this can cause errors during the data transfer. Do not connect the DMX input and output to audio devices, e.g. mixers or ampli‐ fiers. Use special DMX cables for the wiring instead of normal microphone cables.
- Page 17 Installation Inserting the battery into the Push the lock of the battery holder towards the centre of the housing and pull out the battery remote control holder like a drawer. Insert the batteries. The battery is correct if the positive pole points to the housing base of the remote control.
-
Page 18: Starting Up
Starting up Starting up Create all connections while the device is off. Use the shortest possible high-quality cables for all connections. Take care when running the cables to prevent tripping hazards. Connections in DMX mode Connect the DMX input of the device to the DMX output of a DMX controller or another DMX device. - Page 19 Starting up DMX indicator If the indicator is flashing in “DMX” mode, no DMX signal is being received. The DMX controller may not be on, or the wiring may be incorrect. If the indicator lights up permanently, the device is receiving a valid DMX signal. Connections in master/slave When you configure a group of devices in master/slave mode, the first unit will control the mode...
-
Page 20: Connections And Controls
Connections and controls Connections and controls ö $ % & ö PUSH SonicPulse LED Bar 05, SonicPulse LED Bar 10 LED Bar... - Page 21 Connections and controls 1 Locking screw for the mounting bracket 2 Mounting bracket 3 [T1A/250V] | Fuse holder 4 [Power In] | Lockable input socket (Power Twist) for connection to mains power 5 [DMX In] | DMX input, designed as XLR panel plug, 3-pin 6 Built-in microphone for sound control 7 Display 8 [Mode] | Activates the main menu and toggles between menu items...
- Page 22 Connections and controls Infrared remote control 1 [AUTO] | Activates “Automatic” mode. ö 2 [ON/OFF] | Turns the device on and off. 3 [SOUND] | Activates “Sound control” mode. Set the sensitivity of the built-in microphone with [+] and [–]. 4 [+] | Increases the set value.
-
Page 23: Operation
Operation Operation 7.1 Starting the device Connect the device to the mains to start operation. After a few seconds, the display indicates that a reset is in progress. The device is now operational. 7.2 Main menu Press [Mode] to activate the main menu and switch between menu items. Press [Up] or [Down] to change the respectively displayed value. -
Page 24: Automatic Programme
Operation 7.2.1 Automatic programme Automatic mode can only be activated if the device is operating in stand-alone mode or as master in a master/slave combination. This setting is only relevant if the device is not con‐ trolled via DMX. Press [Mode] repeatedly until the display shows ‘Auto’ . Confirm with [Setup]. Selecting an automatic pro‐... -
Page 25: Pre-Programmed Automatic Show
Operation 7.2.2 Pre-programmed automatic show A pre-programmed automatic show can only be activated if the device is operating in stand- alone mode or as master in a master/slave combination. This setting is only relevant if the device is not controlled via DMX. Press [Mode] repeatedly until the display shows ‘Pr.XX’... -
Page 26: Dmx Mode
Operation 7.2.3 DMX mode This setting is only relevant when the device is controlled via DMX. Press [Mode] repeatedly until the display shows ‘d---’ . Confirm with [Setup]. Press [Up] or [Down] to select a DMX address between ‘d.001’ and ‘d.512’ . Confirm with [Setup]. -
Page 27: Master/Slave" Mode
Operation 7.2.4 “Master/slave” mode This setting is only relevant if the device is serving as slave in a master/slave configuration and is not controlled via DMX. Press [Mode] repeatedly until the display shows ‘Slav’ . Confirm with [Setup]. Press [Up] or [Down] to select ‘Yes’ (master/slave enabled) or ‘No’ (master/slave disa‐ bled). -
Page 28: Sound Control
Operation 7.2.6 Sound control In this mode, the device follows the rhythm of the background music or sounds detected by the built-in microphone. Press [Mode] repeatedly until the display shows ‘Soud’ . Confirm with [Setup]. Setting an automatic show Press [Up] or [Down] to select the required automatic show (display ‘SO.01’ … ‘SO.25’ ). Confirm with [Setup]. -
Page 29: Settings
Operation 7.3 Settings 7.3.1 Setting the dimmer curve Press [Mode] repeatedly until the display shows ‘Set’ . Confirm with [Setup]. Press [Up] or [Down] repeatedly until the display shows ‘Cur’ . Confirm with [Setup]. Press [Up] or [Down] to choose a dimmer curve. Confirm with [Setup]. The following dimmer curves are available: Menu level 3 Function... -
Page 30: Pixel Rotation
Operation 7.3.2 Pixel rotation Press [Mode] repeatedly until the display shows ‘Set’ . Confirm with [Setup]. Press [Up] or [Down] repeatedly until the display shows ‘Pi.dI’ . Confirm with [Setup]. Press [Up] or [Down] to choose between ‘NOR’ (normal) and ‘Inv’ (rotated). Confirm with [Setup]. -
Page 31: Key Lock
Operation 7.3.4 Key lock Press [Mode] repeatedly until the display shows ‘Set’ . Confirm with [Setup]. Press [Up] or [Down] repeatedly until the display shows ‘Lock’ . Confirm with [Setup]. Press [Up] or [Down] to choose ‘On’ (key lock activated) or ‘Off’ (key lock deactivated). Confirm with [Setup]. -
Page 32: System Information
Operation 7.3.6 System information Press [Mode] repeatedly until the display shows ‘Info’ . Confirm with [Setup]. Press [Up] or [Down] repeatedly until the display shows ‘Ver’ . Confirm with [Setup]. ð The display shows the current version number of the device. Press [Up] or [Down] repeatedly until the display shows ‘Life’... - Page 33 Operation Parameter ID Detection com‐ Sent command Received mand command DISC_UNIQUE_BRANCH DISC_MUTE DISC_UN_MUTE DEVICE_INFO SOFTWARE_VERSION_LABEL DMX_START_ADDRESS IDENTIFY_DEVICE SUPPORTED_PARAMETERS DMX_PERSONALITY DMX_PERSONALITY_DESCRIPTION RESET_DEVICE FACTORY_DEFAULTS SonicPulse LED Bar 05, SonicPulse LED Bar 10 LED Bar...
-
Page 34: Menu Overview
Operation 7.5 Menu overview Auto d--- Slav AU.01 Pr.01 Co.00 FS.00 d.000 4.ch SP.01 FS.00 5.ch AU.03 SP.99 FS.99 Co.39 FS.99 d.512 Pr.02 SP.01 FS.00 6.ch FL81 11.ch Pr.24 SP.99 FS.99 23.ch/39.ch FL81 Colr Soud Info r.000 SO.01 SU.00 Cu-1 Cu-4 Life r.255... -
Page 35: Functions In 4-Channel Dmx Mode
Operation 7.6 Functions in 4-channel DMX mode Channel Value Function 0…255 Intensity (0% to 100%) of the red LEDs 0…255 Intensity (0% to 100%) of the green LEDs 0…255 Intensity (0% to 100%) of the blue LEDs 0…255 Intensity (0% to 100%) of the white LEDs SonicPulse LED Bar 05, SonicPulse LED Bar 10 LED Bar... -
Page 36: Functions In 5-Channel Dmx Mode
Operation 7.7 Functions in 5-channel DMX mode Channel Value Function 0…255 Dimmer (0% to 100%) for all LEDs 0…127 Sound control 128…255 Pre-programmed automatic show Function depending on setting of channel 2, if channel 2 = 128…255 0…15 No function 16…25 Colour change 1 26…35... - Page 37 Operation Channel Value Function 106…115 Colour transition 7 116…125 Colour transition 8 126…135 Colour transition 9 136…145 Colour transition 10 146…155 Colour transition 11 156…165 Colour transition 12 166…175 Colour transition 4 176…185 Colour transition 5 186…195 Colour transition 6 196…205 Colour transition 7 206…215...
- Page 38 Operation Channel Value Function 0…5 No function 6…15 Sound mode 1 16…25 Sound mode 2 26…35 Sound mode 3 36…45 Sound mode 4 46…55 Sound mode 5 66…65 Sound mode 6 66…75 Sound mode 7 76…85 Sound mode 8 86…95 Sound mode 9 96…105 Sound mode 10...
- Page 39 Operation Channel Value Function 156…165 Sound mode 16 166…175 Sound mode 17 176…185 Sound mode 18 186…195 Sound mode 19 196…205 Sound mode 20 206…215 Sound mode 21 216…225 Sound mode 22 226…235 Sound mode 23 236…245 Sound mode 24 246…255 Sound mode 25 Function depending on setting of channel 2...
-
Page 40: Functions In 6-Channel Dmx Mode
Operation 7.8 Functions in 6-channel DMX mode Channel Value Function 0…255 Dimmer (0% to 100%) for all LEDs Strobe 0…10 No function 11…255 Linear flashing (strobe), increasing speed 0…255 Intensity (0% to 100%) of the red LEDs 0…255 Intensity (0% to 100%) of the green LEDs 0…255 Intensity (0% to 100%) of the blue LEDs 0…255... -
Page 41: Functions In 11-Channel Dmx Mode
Operation 7.9 Functions in 11-channel DMX mode Channel Value Function 0…255 Dimmer (0% to 100%) for all LEDs Strobe 0…10 No function 11…255 Linear flashing (strobe), increasing speed 0…63 RGBW colour change 64…127 Colour presets 128…191 Pre-programmed automatic show 192…255 Sound control Colour selection 0…21... - Page 42 Operation Channel Value Function 46…51 Colour 5 (R255, G170, B000, W000) 52…57 Colour 6 (R255, G210, B000, W000) 58…63 Colour 7 (R255, G255, B000, W000) 64…69 Colour 8 (R200, G255, B000, W000) 70…75 Colour 9 (R160, G255, B000, W000) 76…81 Colour 10 (R110, G255, B000, W000) 82…87 Colour 11 (R070, G255, B000, W000)
- Page 43 Operation Channel Value Function 142…147 Colour 21 (R020, G000, B255, W000) 148…153 Colour 22 (R050, G000, B255, W000) 154…159 Colour 23 (R080, G000, B255, W000) 160…165 Colour 24 (R130, G000, B255, W000) 166…171 Colour 25 (R180, G000, B255, W000) 172…177 Colour 26 (R225, G000, B255, W000) 178…183 Colour 27 (R255, G000, B255, W000)
- Page 44 Operation Channel Value Function 238…243 Colour 37 (R000, G000, B255, W255) 244…249 Colour 38 (R000, G000, B100, W255) 250…255 Colour 39 (R000, G000, B050, W255) Function depending on setting of channel 3, if channel 3 = 128…191 0…15 No function 16…25 Colour change 1 26…35...
- Page 45 Operation Channel Value Function 126…135 Colour transition 9 136…145 Colour transition 10 146…155 Colour transition 11 156…165 Colour transition 12 166…175 Colour transition 4 176…185 Colour transition 5 186…195 Colour transition 6 196…205 Colour transition 7 206…215 Colour transition 8 216…225 Colour transition 9 226…235...
- Page 46 Operation Channel Value Function 16…25 Sound mode 2 26…35 Sound mode 3 36…45 Sound mode 4 46…55 Sound mode 5 66…65 Sound mode 6 66…75 Sound mode 7 76…85 Sound mode 8 86…95 Sound mode 9 96…105 Sound mode 10 106…115 Sound mode 11 116…125...
- Page 47 Operation Channel Value Function 176…185 Sound mode 18 186…195 Sound mode 19 196…205 Sound mode 20 206…215 Sound mode 21 216…225 Sound mode 22 226…235 Sound mode 23 236…245 Sound mode 24 246…255 Sound mode 25 Function depending on setting of channel 3 Channel 3 = 128…191 0…255 Playback speed of the pre-programmed automatic show increasing...
- Page 48 Operation Channel Value Function 0…255 Intensity (0% to 100%) of the blue LEDs 0…255 Intensity (0% to 100%) of the white LEDs SonicPulse LED Bar 05, SonicPulse LED Bar 10 LED Bar...
-
Page 49: Functions In 23-Channel Dmx Mode (Item No 580868)
Operation 7.10 Functions in 23-channel DMX mode (item no 580868) Channel Value Function 0…255 Dimmer (0% to 100%) for all LEDs Strobe 0…10 No function 11…255 Linear flashing (strobe), increasing speed 0…63 RGBW colour change 64…127 Colour presets 128…191 Pre-programmed automatic show 192…255 Sound control Colour selection... - Page 50 Operation Channel Value Function 46…51 Colour 5 (R255, G170, B000, W000) 52…57 Colour 6 (R255, G210, B000, W000) 58…63 Colour 7 (R255, G255, B000, W000) 64…69 Colour 8 (R200, G255, B000, W000) 70…75 Colour 9 (R160, G255, B000, W000) 76…81 Colour 10 (R110, G255, B000, W000) 82…87 Colour 11 (R070, G255, B000, W000)
- Page 51 Operation Channel Value Function 142…147 Colour 21 (R020, G000, B255, W000) 148…153 Colour 22 (R050, G000, B255, W000) 154…159 Colour 23 (R080, G000, B255, W000) 160…165 Colour 24 (R130, G000, B255, W000) 166…171 Colour 25 (R180, G000, B255, W000) 172…177 Colour 26 (R225, G000, B255, W000) 178…183 Colour 27 (R255, G000, B255, W000)
- Page 52 Operation Channel Value Function 238…243 Colour 37 (R000, G000, B255, W255) 244…249 Colour 38 (R000, G000, B100, W255) 250…255 Colour 39 (R000, G000, B050, W255) Function depending on setting of channel 3, if channel 3 = 128…191 0…15 No function 16…25 Colour change 1 26…35...
- Page 53 Operation Channel Value Function 126…135 Colour transition 9 136…145 Colour transition 10 146…155 Colour transition 11 156…165 Colour transition 12 166…175 Colour transition 4 176…185 Colour transition 5 186…195 Colour transition 6 196…205 Colour transition 7 206…215 Colour transition 8 216…225 Colour transition 9 226…235...
- Page 54 Operation Channel Value Function 16…25 Sound mode 2 26…35 Sound mode 3 36…45 Sound mode 4 46…55 Sound mode 5 66…65 Sound mode 6 66…75 Sound mode 7 76…85 Sound mode 8 86…95 Sound mode 9 96…105 Sound mode 10 106…115 Sound mode 11 116…125...
- Page 55 Operation Channel Value Function 176…185 Sound mode 18 186…195 Sound mode 19 196…205 Sound mode 20 206…215 Sound mode 21 216…225 Sound mode 22 226…235 Sound mode 23 236…245 Sound mode 24 246…255 Sound mode 25 Function depending on setting of channel 3 Channel 3 = 128…191 0…255 Playback speed of the pre-programmed automatic show increasing...
- Page 56 Operation Channel Value Function 0…255 Intensity (0% to 100%) of the white LEDs in segment 1 0…255 Intensity (0% to 100%) of the red LEDs in segment 2 0…255 Intensity (0% to 100%) of the green LEDs in segment 2 0…255 Intensity (0% to 100%) of the blue LEDs in segment 2 0…255...
-
Page 57: Functions In 39-Channel Dmx Mode (Item No 580867)
Operation 7.11 Functions in 39-channel DMX mode (item no 580867) Channel Value Function 0…255 Dimmer (0% to 100%) for all LEDs Strobe 0…10 No function 11…255 Linear flashing (strobe), increasing speed 0…63 RGBW colour change 64…127 Colour presets 128…191 Pre-programmed automatic show 192…255 Sound control Colour selection... - Page 58 Operation Channel Value Function 46…51 Colour 5 (R255, G170, B000, W000) 52…57 Colour 6 (R255, G210, B000, W000) 58…63 Colour 7 (R255, G255, B000, W000) 64…69 Colour 8 (R200, G255, B000, W000) 70…75 Colour 9 (R160, G255, B000, W000) 76…81 Colour 10 (R110, G255, B000, W000) 82…87 Colour 11 (R070, G255, B000, W000)
- Page 59 Operation Channel Value Function 142…147 Colour 21 (R020, G000, B255, W000) 148…153 Colour 22 (R050, G000, B255, W000) 154…159 Colour 23 (R080, G000, B255, W000) 160…165 Colour 24 (R130, G000, B255, W000) 166…171 Colour 25 (R180, G000, B255, W000) 172…177 Colour 26 (R225, G000, B255, W000) 178…183 Colour 27 (R255, G000, B255, W000)
- Page 60 Operation Channel Value Function 238…243 Colour 37 (R000, G000, B255, W255) 244…249 Colour 38 (R000, G000, B100, W255) 250…255 Colour 39 (R000, G000, B050, W255) Function depending on setting of channel 3, if channel 3 = 128…191 0…15 No function 16…25 Colour change 1 26…35...
- Page 61 Operation Channel Value Function 126…135 Colour transition 9 136…145 Colour transition 10 146…155 Colour transition 11 156…165 Colour transition 12 166…175 Colour transition 4 176…185 Colour transition 5 186…195 Colour transition 6 196…205 Colour transition 7 206…215 Colour transition 8 216…225 Colour transition 9 226…235...
- Page 62 Operation Channel Value Function 16…25 Sound mode 2 26…35 Sound mode 3 36…45 Sound mode 4 46…55 Sound mode 5 66…65 Sound mode 6 66…75 Sound mode 7 76…85 Sound mode 8 86…95 Sound mode 9 96…105 Sound mode 10 106…115 Sound mode 11 116…125...
- Page 63 Operation Channel Value Function 176…185 Sound mode 18 186…195 Sound mode 19 196…205 Sound mode 20 206…215 Sound mode 21 216…225 Sound mode 22 226…235 Sound mode 23 236…245 Sound mode 24 246…255 Sound mode 25 Function depending on setting of channel 3 Channel 3 = 128…191 0…255 Playback speed of the pre-programmed automatic show increasing...
- Page 64 Operation Channel Value Function 0…255 Intensity (0% to 100%) of the white LEDs in segment 1 0…255 Intensity (0% to 100%) of the red LEDs in segment 2 0…255 Intensity (0% to 100%) of the green LEDs in segment 2 0…255 Intensity (0% to 100%) of the blue LEDs in segment 2 0…255...
- Page 65 Operation Channel Value Function 0…255 Intensity (0% to 100%) of the white LEDs in segment 5 0…255 Intensity (0% to 100%) of the red LEDs in segment 6 0…255 Intensity (0% to 100%) of the green LEDs in segment 6 0…255 Intensity (0% to 100%) of the blue LEDs in segment 6 0…255...
-
Page 66: Technical Specifications
Technical specifications Technical specifications SonicPulse LED Bar 10 (item no. 580867) 1075 mm 48 mm 1000 mm 65 mm Light source 24 × RGBWW LED, 2 W each (3 LEDs in each of the eight segments) Light source properties Colour temperature 3000 K Optical properties Beam angle... - Page 67 Technical specifications Input connections Power supply Lockable input socket (Power Twist) DMX control XLR panel socket, 3-pin Output connections Power supply for further devices Lockable output socket (Power Twist) Output current, max.: 6 A DMX control XLR panel socket, 3-pin Power consumption 29 W Supply voltage...
- Page 68 Technical specifications SonicPulse LED Bar 05 (item no. 580868) 572 mm 48 mm 510 mm 65 mm Light source 12 × RGBWW LED, 2 W each (3 LEDs in each of the four segments) Light source properties Colour temperature 3000 K Optical properties Beam angle 10°...
- Page 69 Technical specifications Output connections Power supply for further devices Lockable output socket (Power Twist) Output current, max.: 6 A DMX control XLR panel socket, 3-pin Power consumption 29 W Supply voltage 100 - 240 V 50/60 Hz Fuse 5 mm × 20 mm, 1 A, 250 V, slow blow Battery remote control Lithium-ion button cell CR2025, 3 V International Protection Rating...
- Page 70 Technical specifications Further information Suitable for outdoor use LED type x-in-1 Fanless Remote control Included Wireless DMX Separately controllable LEDs Housing colour Black SonicPulse LED Bar 05, SonicPulse LED Bar 10 LED Bar...
-
Page 71: Plug And Connection Assignments
Plug and connection assignments Plug and connection assignments Introduction This chapter will help you select the right cables and plugs to connect your valuable equip‐ ment so that a perfect light experience is guaranteed. Please take our tips, because especially in ‘Sound & Light’ caution is indicated: Even if a plug fits into a socket, the result of an incorrect connection may be a destroyed DMX controller, a short circuit or ‘just’... -
Page 72: Troubleshooting
Troubleshooting Troubleshooting NOTICE! Data transfer errors due to improper wiring! If the DMX connections are wired incorrectly, this can cause errors during the data transfer. Do not connect the DMX input and output to audio devices, e.g. mixers or ampli‐ fiers. - Page 73 DMX interface circuit. If the procedures recommended above do not succeed, please contact our Service Center. You can find the contact information at www.thomann.de. SonicPulse LED Bar 05, SonicPulse LED Bar 10 LED Bar...
-
Page 74: Cleaning
Cleaning Cleaning Optical lenses Clean the optical lenses, that are accessible from the outside, regularly in order to optimize the light output. The frequency of cleaning depends on the operating environment: wet, smoky or particularly dirty surroundings can cause more accumulation of dirt on the optics of the device. -
Page 75: Protecting The Environment
Protecting the environment Protecting the environment Disposal of the packing material Environmentally friendly materials have been chosen for the packaging. These materials can be sent for normal recycling. Ensure that plastic bags, packaging, etc. are disposed of in the proper manner. Do not dispose of these materials with your normal household waste, but make sure that they are collected for recycling. - Page 76 When disposing of the device, comply with the rules and regulations that apply in your country. You can also return your old device to Thomann GmbH at no charge. Check the current conditions on www.thomann.de.
- Page 77 Notes SonicPulse LED Bar 05, SonicPulse LED Bar 10 LED Bar...
- Page 78 Notes SonicPulse LED Bar 05, SonicPulse LED Bar 10 LED Bar...
- Page 80 Musikhaus Thomann · Hans-Thomann-Straße 1 · 96138 Burgebrach · Germany · www.thomann.de...
Need help?
Do you have a question about the STAIRVILLE SonicPulse LED Bar 05 and is the answer not in the manual?
Questions and answers