Advertisement
To users
Radioddity & Baofeng are dedicated to providing high performance and high stability radio communication products. This two-way radio is no exception. RD-5R is a genuine dual time slot digital DMR two-way radio with 1024 channels, dot matrix LCD display with full keypad, jointly developed and produced by Radioddity and Baofeng for the consumer market. Please read this manual carefully in order to fully enjoy all the included features and know how to maintain this unit.
Note: this is a slightly abbreviated version of the RD-5R manual, not every feature and function is detailed within these pages in order to keep the instructions simple and relevant to users of this radio, such as ham (amateur) radio hobbyists
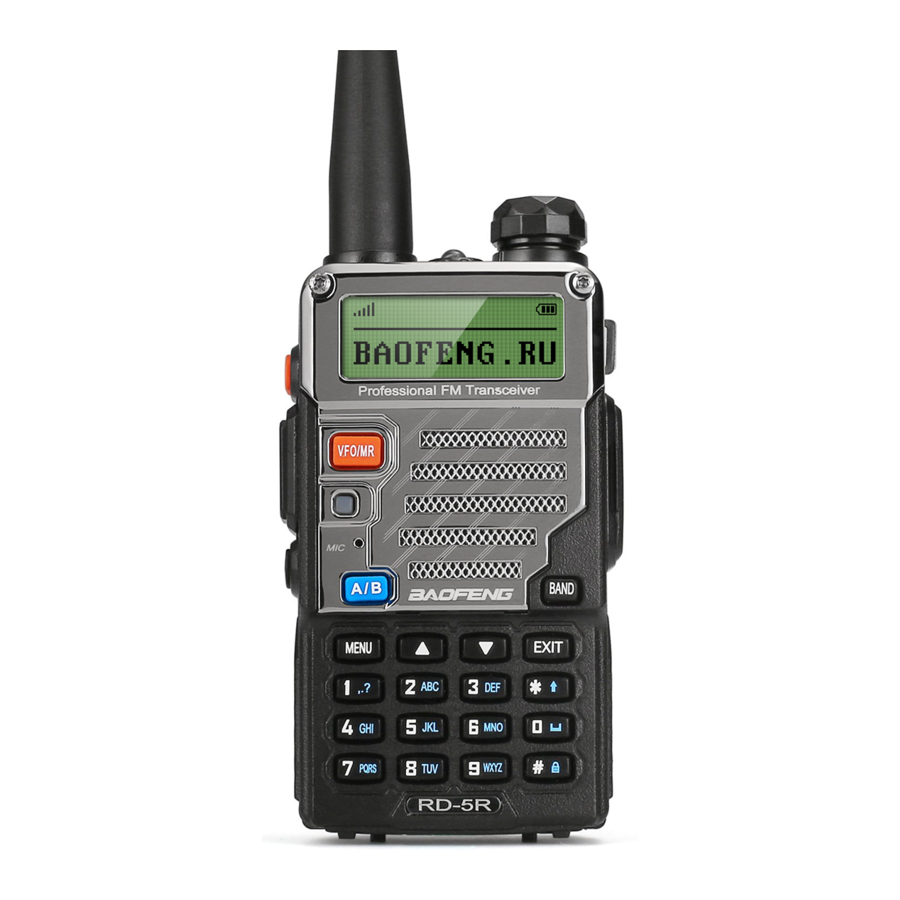
RD-5R user controls

- Antenna
- Flashlight
- Power switch / volume knob
- LCD screen
- CALL button (side button SKI, custom button 1)
- MONI button (side button SK2, custom button 2)
- PTT button (Transmit button)
- VFO/MR button (frequency mode / channel mode switching button)
- LED indicator
- Lanyard buckle
- Accessory interface (headset or programming interface)
- A/B button (AB pointer switch button)
- BAND button (band switching button)
- Number keypad
- Speaker
- Battery
- Electrode contacts
- Battery push button
Disclaimer
| [PTT] Transmit button | Switch between transmission and reception; when transmitting, press this button and speak to the micro hone; release the button to receive. |
| Side button 1 Defaults to [CALL] button | Press and hold it to enter the alarm mode, press and hold it again or press briefly to exit the alarm mode. If the current channel is digital and no alarm system is configured, the alarm function does not work. |
| During analog channel transmission, press and hold this button to transmit 1000Hz tone signalin | |
| Side button 2 Defaults to [MONI] button | Press to turn on the flashlight, press it again to make the flashlight flash, and press it again to tum off the flashlight. |
| Press and hold it to turn on the monitor function. | |
| [VFO/MR] button | Switches between VFO frequency, mode and channel mode. |
| During analog channel transmission, press and hold this button to transmit a 1450Hz tone burst. | |
| [A/B]button | Switches between the main and sub-channel or frequency, with the arrow pointing to the currently selected channel / frequency. |
| During analog channel transmission, press and hold this button to transmit a 1750Hz tone burst | |
| In SMS input interface, switch the cursor to revious line. | |
| When in CTCSS / DCS setting menus, selects between CTCSS or DCS. | |
| [BAND]button | Switch between UHF and VHF band when in VFO frequency mode. |
| During analog channel transmission, press and hold this button to transmit a 2100Hz tone burst. | |
| In Input Interface, switch the cursor to next line. | |
| In VFO frequency mode, this will swap band between VHF and UHF | |
| If within a menu, this button will exit completely out of the menu and return to VFO or channel | |
| 0-9 number buttons | Default: 0-9 |
| [0-9] code digits in DTMF function | |
| Select punctuation marks or letters in Pinyin input method. | |
| If numeric contact shortcut function is set, press and hold this button to jump to the corresponding contact. | |
| [MENU] button | Press to activate the menu mode, enter the menu and press again to select menu items. Press and hold to enter the radio settings. |
| Code digit A in DTMF function | |
| Move up; change the scanning direction while scanning | |
[ ] button ] button | Code digit B in DTMF function Move left in SMS editing interface |
| Adjust the frequency upwards in radio interface. | |
| Move down; change the scanning direction while scanning. | |
[ ] button ] button | Code word C in DTMF function Move right in SMS editing interface. |
| Adjust the frequency downwards in radio interface. | |
| [Exit] / [Clear] button | Clear the entered information in input state. Code digit D in DTMF function |
| In analog mode in main interface, press this button to tum on/off scrambling. | |
| [ * ]button | In digital mode in main interface, press this button to enter manual dial interface. |
| In VFO frequency mode, press and hold this button to start scanning. | |
| On an analogue repeater channel, this will swap transit & receive frequencies (repeater reverse) | |
| When in CTCSS / DCS setting menus, begins a search for any CTCSS or DCS tones being used. | |
| Press this button to clear the data in message editing box | |
| Code digit* in DTMF function | |
| [ # ] button | In the main interface, press this button to switch Between high and low power |
| Press and hold this button to turn on/off keypad lock | |
| Switch the input method in input method interface | |
| Code digit # in DTMF function |
Note: Some repeaters require an audible tone burst to be transmitted before using the repeater: press [PTT] + [CALL] to send IOOOHZ tone; press [PTT] + [VFO/MR] to send 1450HZ tone; press [PTT] + [A/B] to send 1750HZ tone; press [PTT] + [BAND] to send 2100HZ tone.
Programmable Buttons
In order to simplify operation, the two programmable buttons [SKI] and [SK2] can be programmed by your dealer as function shortcuts, as shown in the following table. For more information about each function, see the "Function and Operation" section.
| NO | Function | Purpose |
| 1 | None | No function is assigned to the preset button. |
| 2 | Prompt tone on\off | Quickly enable or disable all audible prompt tones. |
| 3 | Emergency mode on | Quickly establish an emergency call. This is the recommended option for the orange button |
| 4 | Emergency mode off | Quickly end an initiated emergency call. |
| 5 | Select high / low power | Quickly switch between high power and low power. |
| 6 | Monitor | Quickly turn on or off the monitor function. |
| 7 | Nuisance delete | Temporarily removes channels from the scan list if they cause a nuisance. |
| 8 | Push to talk 1 | Quickly make digital group calls, digital single call, call prompts, or send text messages (only for digital mode) via push to talk. ( This option is only available if the digital function is enabled on the device ) Push-to-talk 1 to push-to-talk 6 can be set. |
| 9 | Relay / offline | Quickly switch between repeater and talk-around modes |
| 10 | Scan on / off | Quickly turn the scan function on or off. Note: Scanning in double-wait mode will not work |
| 11 | Strict/ normal squelch | Quickly switch between strict squelch and normal squelch (only for analog mode). |
| 12 | Encryption on / off | Quickly tum on / off encryption for channel ( only for digital mode ). |
| 13 | VOX control on / off | Quickly tum on or off Voice Operated Transmit. |
| 14 | Zone switching | Quickly select the zone, allowing the user to switch between two areas ( zones ). |
| 15 | Battery power indication | Quickly display the battery charge state in volts |
| 16 | Individual operation | Quickly turn on or off individual operation function. |
| 17 | End call | Quickly end the phone call ( only for digital mode ). |
Note: Two different functions can be assigned to the same button: One for a short push of the button, one for a long push of the button
Status Indication
LCD Icons
The LCD screen is used to display all the working status of the two-way radio. The corresponding function icons are displayed on the screen during operation. The screen allows you to know the meaning of the icons and how to set the functions more quickly.
![]()
Description of LCD Icons
| Icon name | Icon | Description of product status |
| Signal strength icon |  | The more signal bars, the stronger the signal is |
| Transmission |  | The current channel transmits at high power |
| power icon |  | The current channel transmits at low power |
| Direct mode slot icon |  | The current channel is in double slot direct mode and slot 1 is active |
 | The current channel is in double slot direct mode and slot 2 is active | |
| Sub-audio icon |  | The current sub-audio is CTCSS |
 | The current sub-audio is CDCSS | |
| Speaker icon |  | Speaker is enabled, and reception is effective |
| Narrowband mode |  | Narrowband FM mode |
| Message icon |  | Receive a text message, or have an unread message |
| VOX icon |  | VOX has been turned on |
| Repeater shift |  | The current transmission frequency is the reception frequency plus a frequency offset for repeater operation |
 | The current transmission frequency is the reception frequency minus a frequency offset for repeater operation | |
 | No frequency offset | |
| Repeater reverse |  | The current receive frequency and the transmit frequency are reversed (if the reception sub-audio and transmission sub-audio are different, the sub-audio will also |
| Double-waiting icon |  | Double wait function active, allowing the two displayed frequencies to be monitored simultaneously |
| Scan icon |  | The scan is on and is in normal mode |
 | The scan stays on priority channel 1 | |
 | The scan stays on priority channel 2 | |
| Battery power icon |  | The more bars, the more battery power |
| Pointer icon |  | Currently pointing to the main digital mode; press AIB button to switch the main channel up and down. When double-waiting is turned on and works in digital sub-channel, the icon is |
 | urrently panting tot e man analog m e; press AIB button to switch the main channel up and down. When double-waiting is turned on and works in analog sub-channel, the icon is | |
| Channel number Icon | 001 | In channel mode, the current channel number is 001 (range 001-128) |
This product has LED indicators so you can see the current operating state: Red for transmit and green for receive.
Menu Navigation
Press the [MENU] button in digital mode or digital channel to enter the digital menu; press the [MENU] button in analog modem or analog channel to enter the analog menu. The menu structure is shown in the following figure, including all the menu items of this product. You can ask the dealer to configure the menu items. You need to first press the [MENU] button to enter the main menu, and then press the [ ] / [
] / [ ] button to navigate to desired submenu or option and press the [MENU] button to confirm and complete your setting. This document only describes the order of the menu items when the menu operation is introduced. For example, the path to the contact list is "Contacts -> Contact List". The menu has automatic reset function. If you do not do anything for the menu during preprogrammed time (configured by the dealer), the product will automatically return to the standby screen. You can ask the dealer to modify the auto reset time and cancel auto reset.
Menu list
| Level 1 men | Level 2 menu | Level 3 menu | Options | Description of settings | Remark |
| Contacts | Contacts | Contact list | Mew contacts | Mew the contact name and number | For digital mode only |
| Quick configuration | Configure number to the contact, select idle state to turn off shortcut configuration | ||||
| Delete contact | Delete current contact | ||||
| New contact | Enter number | xxxx | Enter the contact number, up to 16777214, press the MENU button to confirm or press EXIT to delete | ||
| Alias | Abcd | Enter the name; English and special characters There are 10 tones that can be selected. When the caller | |||
| Tone | OFF Tone 1-10 | chooses to enable the call prompt and the caller' s number is received, this tone will sound. This can be tumed off if it is not required. Send call prompt to a contact, which signals to the other party | |||
| Manual dial | Enter number | Call prompt | that you wish for them to call back directly Initiate radio detection to a contact without interfering with | ||
| Radio detection | each other to confirm whether the other party has their radio turned on Remotely activate the microphone of a contact, and monitor | ||||
| Remote monitoring | the voice and background sound of the other party. Send an activation command to a contact to resume normal | ||||
| Radio activation | use of the two-way radio. Send a remote inhibit command to a contact, so that the radio | ||||
| Radio remote inhibit | can' t be used normally. Remote inhibited two-way radio can be remotely monitored, but other functions can' t be used; it only allows re-writing frequency through CPS software or activating the radio through activation instructions | ||||
| Message | Inbox | Inbox | List xxxx | Unread  , read , read  ; press MENU to edit the contents, and press MENU again to reply / forward / delete ; press MENU to edit the contents, and press MENU again to reply / forward / delete | For digital mode only; host computer computer menu option can be configured |
| Delete all | Yes/No | Yes: Delete all; No: Do not delete | |||
| New message | Edit interface | English and special characters, press the # button to switch input method, and press MENU key to send / save / clear Press the MENU button to edit the content, and press MENU | |||
| Outbox | Outbox | List.. | again to retransmit I fomard I edit / delete Yes: Delete all; No: Do not delete | ||
| Delete all | Press the MENU button to edit the content, and press MENU | ||||
| Draft | Draft | List.. | again to transmit / edit / delete Yes: Delete all; No: Do not delete | ||
| Delete all | Press the MENU button to edit the content, and press MENU | ||||
| Quick text | List.. | again to transmit / save I clear Dialed single calls; press MENU to view / add to Contacts/ | |||
| Call logs | Outgoing | Outgoing | List.. | delete, enter alias and save in contact list Yes: Clear dialed list, No: Do not delete | For digital mode only; host computer menu option can be configured |
| Delete all | Answered single calls; press MENU to view / add to Contacts/ | ||||
| Answered | Answered | List.. | delete, enter alias and save in contact list Yes: Clear answered list, No: Do not delete | ||
| Delete all | Missed single calls; press MENU to view / add to Contacts/ | ||||
| Missed | Missed | List. | delete, enter alias and save in contact list Yes: Clear missed list, No: Do not delete | ||
| Delete all | Press the UP/DOWN button to select a contact name, then | ||||
| DTMF contact | List of contact names | press the PTT button to send the selected contact DTMF number wirelessly, and press the EXIT button to return | For analog mode only | ||
| Set | Radio set | CTCSS/DCS | CTCDC/DCS | Change both encoding and decoding of CTCSS together. Press [MENU] to enter "Sub-audio codec", press [A/B] to select digital sub-audio, press []\ [] to select digital subaudio code, press # to switch the positive phase (N) and negative phase (l).
| |
| R CDC/DCS | Change the decoding of sub audio for receive only. Setting method is same as above | ||||
| T CDC/DCS | Change the coding of sub audio for transmit only. Setting | ||||
| Squelch | 0-9 | Squelch can be set to 0—9,O is the lowest and squelch is alwa on; 9 is the dee est about -116dBm | Host computer menu option can be configured | ||
| TX power | Low | Low power transmission | Options can be configured | ||
| High | High power transmission | ||||
| Talkaround | ON | ON; Any transmit offset for repeater operation is temporarily i nored. | |||
| OFF | OFF | ||||
| Band | Narrow | Narrowband FM workin | For analog mode only | ||
| Wide | Wideband FM workin | ||||
| Busy lock | OFF | Transmit when the channel is occu ied | |||
| Carrier | PTT inhibit wh n th in | ||||
| QT / CC | PTT inhibited unless CTCSS / DCS / color code matches | ||||
| OFF | |||||
| TOT | Off or 15-495S | Alarm in 10 seconds before transmission, and prohibit transmission when the time is up; for example, when it is set to 60 seconds, alarm is sent for 10 seconds from the50th second and transmission is prohibited at the 60th second | Options can be configured | ||
| Vox | OFF | VOX is turned off; | |||
| ON | It is not necessary to press PTT when this option is on; you can speak to transmit directly; voice sensitivity can be set to 1—10via computer software, level 1 is the highest sensitivity level, and level 10 is the lowest sensitivity level | ||||
| Double Wait | OFF | Turn off dual standby, switch between main and sub channels or frequencies with the keypad; when the main channel is selected, the sub-channel can' t transmit or | |||
| ON | Receiver toggles between main channel and sub-channel in turn; once a signal is received you can press PTT to talk with the other party | ||||
| Encryption | OFF | Turn off encryption | Options can be configured; for digital | ||
| ON | Tum on encryption function, and the two sides must pair the key to make the call normally | ||||
| Power saving switch | OFF | Turn off power saving mode | Options can be configured | ||
| ON | Tum on the power saving mode; power saving ratio is 1 | ||||
| Beep | All tone | Options: Off/On. Turn off all tones when Off is selected, but do not include emergency alarm tone | |||
| Call permit | Options: Off / Digital / Analog/Both. Pressing the PTT button will sound a tone that prompts the user to start speaking.
| ||||
| Beep | Call permit (continued) |
| |||
| Key beep | Options: Off/On. There is no prompt tone when Off is selected | ||||
| Call end beep | Options: Off/On On: This feature will sound a prompt tone at the end of a received transmission. | ||||
| Backlight | Always on | Backlight remains on all the time | |||
| 5-15 sec | The backlight is automatically turned off after a set time delay | ||||
| Keypad lock | Manual | Press and hold # to lock, press and hold it again to unlock | |||
| 5/10/15 sec | Auto lock; lock automatically at set time; press and hold # to unlock | ||||
| Indicator | OFF | The front panel LED indicator (transmission, receiving, etc.) Is disabled | |||
| ON | Default option is on | ||||
| Passwd Lock | Enter password | Input correct password to enter the setup menu; the password can be configured via computer configuration software. Options: On or Off / Changes boot password
| |||
| Mode | CH no | The channel mode is displayed by channel number | |||
| CH Name | The channel mode is displayed by channel name | ||||
| CH Freq | The channel mode is displayed by frequency mode | ||||
| Screen | Picture | Display according to the picture provided by the customer | |||
| Character | Two lines, can be edited by host computer | ||||
| Language | English | English version, including menu, call tips, call logs and all other interfaces | |||
| Chinese | Simplified Chinese | ||||
| ANI SW | ON | When ANI (DTMF caller 'D) is tumed on, the caller ID is displayed when there is an incoming call | |||
| OFF | OFF | ||||
| DTMF side tone | OFF | When DTMF digits are sent, the unit does not make sound | |||
| ON | When DTMF digits are sent, the unit audibly sounds | ||||
| Scan resume | TO | Time mode scan; resume scanning in 5 seconds after signal is first found | |||
| CO | Carrier mode scan; wait for 5 seconds after the carrier disappears before resuming scanning | ||||
| SE | Search mode scan; halt scanning after signal is found | ||||
| PTT-ID | OFF | Do not send code when PTT is pressed | For analog mode only | ||
| BOT | Radio DTMF ID is sent at the beginning of transmission; ID can be set by the computer configuration software | ||||
| EOT | Radio DTMF ID is sent at the end of each transmission; ID can be set by the computer configuration software | ||||
| BOTH | Send ID when PTT is first pressed and when released | ||||
| PTT-LT | 100-1000ms | The delay time before automatic transmission | |||
| TX-A/B | Main Ch RX Ch | Determines whether the main channel or channel being received is the channel that is active for PTT in double wait mode. | |||
| Sign STE (Squelch tail elimination with CTCSS) | Freq | Standard CTCSS sub-audio signalling | For analog mode only | ||
| 120º | CTCSS, with 120º phase change on release of PTT for squelch tail elimination | ||||
| 180º | CTCSS, with 180º phase change on release of PTT for squelch tail elimination | ||||
| 240º | CTCSS, with 240º phase change on release of PTT for squelch tail elimination | ||||
| No sign STE (STE without CTCSS) | OFF | Tum off tail tone elimination | |||
| Freq | Analog without sub-audio signaling, release PTT to send sub-audio tail tone elimination signaling | ||||
| RPT-RL ( tail tone delay) | OFF | OFF | |||
| Radio ID | 12345678 | Digital mode displays the digital ID of the unit, up t016777214; analog mode displays the DTMF ID of the unit, up to 99999999; this option is read only | |||
| Dev. Info | Model info | The machine model | |||
| SIN | Unique alphanumeric character of the two-way radio | ||||
| CPS version | Reading and writing frequency software version | ||||
| Hardware version | Hardware circuit board version | ||||
| Firmware version | The software version of the internal hardware components of the two-way radio | ||||
| DSP version | DSP software version number of digital processing chip | ||||
| Programming time | The date and time of the last programming of the two-way radio | ||||
| Radio Cfg | Rx_Freq | Sets reception frequency; press * to clear all digits, press EXIT to delete digits one by one | |||
| Tx_Freq | Sets transmit frequency; press to clear all digits, press EXIT to delete digits one by one | ||||
| Ch_Name | To set channel name; press * to clear all, press EXIT to delete one letter at a time | ||||
| Color code | Options: 0—15optional Valid for digital mode only | For digital mode only | |||
| Slot | Options: 1—2optional Valid for digital mode only | ||||
| Shift Freq | 000000—50000K, the minimum step value is 5()K Sets the difference between transmit frequency and receive frequency in frequency mode. This setting is only active if Shift Dir is set to positive or negative | ||||
| Shift Dir | Options: Off / Positive / Negative
| ||||
| Freq Step | Options: 2.5K/5.OK/6.25K/10K/12.5K/25K/50K In the frequency mode, press [] / []to adjust the frequency value in steps; scanning steps in frequency mode | ||||
| Settings | Radio Cfg | Channel type | Options: Analog / Digital Switch between analog and digital modes in frequency mode | ||
| Zone | Zone name | A list of Zones that can support up to 250 Zones | |||
| Scan | On or Off | Switch on/off; scan function can be turned on only when the PC of current channel has configured the scan list; it also can be tumed on through the function button defined as "scan switch" | Host computer menu option can be configured | ||
| Scan list | Display the current scan list, which is read only |
Input Method
You can enter user aliases, numbers and text messages via the keypad. This product supports the English input method, Simplified Chinese Pinyin input method, and number input method.
Simplified Chinese Pinyin Input Method
- Press [#] to switch to Pinyin input method (LCD shows PY).
- Press number buttons to enter the pinyin, and the LCD shows the alternate pinyin and corresponding candidate Chinese characters.
- Press [
![]() ]/ [
]/ [![]() ] to select the desired pinyin
] to select the desired pinyin - Press the [MENU] button to move the highlight to the Chinese character area, and press [
![]() ]\ [
]\ [![]() ] to select the desired Chinese character.
] to select the desired Chinese character. - Press the [MENU] button to enter the selected Chinese character. Repeat the above steps to complete the input.
English Input Method
- Press [#] to switch to uppercase (LCD shows ABC) or lower case (LCD shows abc) English input method.
- Press the number buttons repeatedly until the desired letter appears. Repeat the above steps to complete the input.
Number Input Method
- Press [#]to switch to number input method (LCD shows 123).
- Press the number buttons to enter the corresponding number.
Input Special Characters
Press number button [I] to enter commonly used punctuation and special characters. To enter a space, press the [O] button.
Note: In the input text display area, press [] / [] to move the cursor left / right.
Basic Operation
Turning on\off
To turn on the power, turn the [Power switch / volume control] knob clockwise until you hear a "click". To turn off, turn the knob counterclockwise until you hear a "click"
Adjusting Volume
After turning on, turn the [Power switch / volume control] knob clockwise to increase the reception volume, and turn counter clockwise to reduce the reception volume.
Selecting Zone
A zone is a channel group in which you can include channels with the same attributes (such as call type, digital mode and analog mode), which makes it easy for you to manage existing channels. The unit supports up to 250 Zones, and each Zone contains up to 16 channels. You can select a Zone in two ways:
- Select from the menu: After entering the "Zone" menu, press [
![]() ] / [
] / [![]() ] to select the desired Zone, and then press [MENU] to switch to the selected Zone.
] to select the desired Zone, and then press [MENU] to switch to the selected Zone. - Select through the programming button: If the dealer has set the [Zone switch] shortcut, you can press the shortcut to switch to the desired Zone.
Selecting Channel, User ID & Call Group ID
Press [VFO/MR] to switch to MR (channel) mode, and press [ ] / [ ] to select the desired channel, user alias or ID, or call group alias or ID.
Setting Frequency Manually
In the standby interface, press [VFO/MR] to switch to VFO (frequency) mode, in which you can perform operations such as inputting frequency manually and saving channels.
VFO Mode
VFO mode is the basic mode for changing the operating frequency. In the standby interface, press [VFO/MR] to switch to VFO mode, and press []/ [] to increase or decrease the frequency.
Quick Frequency Input
VFO mode is the basic mode for changing the operating frequency. In the standby interface, press [VFO/MR] to switch to VFO mode, and press [ ]\[ ] to increase or decrease the frequency.
- Press [VFO/MR] to switch to VFO mode.
- The frequency must be entered directly in VFO mode.
- Press the number buttons to [9]) to enter the desired frequency.
- After entering the frequency manually, press and hold the [PTT] button to call the contact of current frequency.
Digital - Analog Switching
Each channel of this product can be configured by the dealer as an analog channel or a digital channel. If the current region contains a digital channel and an analog channel, you can change the channel to an analog or digital.
Dual Mode Switch
Press [A/B] to switch the upper and lower pointers, and the solid pointer  points to the main channel. Dual-stage operation mode can be selected through the menu; the path is as follows:
Enter "Menu -> Set ->Radio Set -> Double Wait" (Off / On).
- When dual standby is "off', the machine operates in dual-stage single waiting mode. The machine only works on the channel or frequency indicated by the adjacent solid pointer, and the sub channel does not receive signal.
- When "Double Wait" is selected as on, the main channel and sub channel scan in turn. When a signal is received by one channel or frequency, the radio locks on to and receives that channel or frequency. If the signal is not on the main channel.
Note: As the dual waiting mode is in main channel and sub channel scanning states, DTMF, auto scan, individual operation and ARTS auxiliary function do not work.
Keypad Lock & Unlock
If the keypad isn't needed, you can lock into prevent misuse. You can lock or unlock the keypad in the following ways:
- Shortcut
Press and hold the [#] button to lock or unlock the keypad. - Menu selection
Enter "Menu -> Set ->Radio Set -> Keypad Lock", select "Manual" or "5 sec (or 10 sec, or 15 sec)" to lock it automatically after that period of time.
Note: keypad lock excludes the side buttons SKI, SK2 and PTT.
Call
Call icon
The following icons displayed on the LCD appear in the contact list or call log to indicate the ID type.
 Single call: In the contact list, it indicates the signed user alias (name) or ID (number).
 Group call: In the contact list, it indicates the group alias name) or ID (number).
 All call: In the contact list, it indicates the group alias (name) or ID (number).
Please keep the microphone about 2.5—5 cm from the mouth in order to ensure the best reception volume of the receiver's two-way radio.
Single call
Single call is a call from an individual two-way radio to another.
Initiate a Call
You can initiate a single call in the following ways. When the single call starts, the LCD screen displays  : The first line shows Single Call, the second line shows the contact alias, and the third line shows the single call number and the call icon
  .
.
Initiate a Call by Channel Switching In the standby interface, press [VFO/MR] to switch to channel mode, use the [] / [] buttons to select the channel, press and hold the [PTT] button to initiate single call.
Initiate a Call to Default Contact
On a digital channel, press and hold the [PTT] button to initiate a single call on the contact preset to that channel.
Note: You can ask the dealer to preset a contact for each digital channel. The contact can be a single call contact, or a group call or all call contact.
Initiate a Call through the "Contact list" or "Call log"
- Select "Contacts -> Contact List" or select "Call log" to enter the list of dialed / answered / missed calls.
- Use the [
![]() ] / [
] / [![]() ] buttons to select the single call contact you want to call.
] buttons to select the single call contact you want to call. - Press and hold the [PTT] button to initiate a single call.
Initiate a Call by Manual Dialing
- Select "Contact -> Manual Dial" to enter the dialing interface.
- Enter the single call number you want to call.
- Press and hold the [PTT] button to initiate a single call.
Note: When the product allows entry through numeric keypad, you can directly press the [*] button in the standby interface to enter the manual dialing interface, enter the single call number, and then press the [PTT] button to initiate a single call.
Receive and Reply to a Call
After receiving a single call, the LCD screen displays  : first line shows Single Call, the second line shows the contact alias and the third line shows the caller ID and the incoming call icon
  .
.
Press and hold the [PTT] button in the present time to send a callback. If a callback is not made, a missed call prompt is displayed to alert you.
Note:
- Select "Call log" to enter the dialed / answered / missed call list to view the call log.
- While viewing the call log, press and hold the [PTT] button to call back.
Group call
To initiate a call to a user group, the two-way radio must be configured with the call group talkgroup number. Initiate a Call You can initiate a group call in the following ways. When the group call starts, the LCD screen displays contact  : The first line shows Group Call, the second line shows the contact alias, and the third line shows the group call number and the call icon
  .
.
Initiate a Call by Channel Switching
In the standby interface, press [VFO/MR] to switch to channel mode, use the [ ] / [ ] buttons to select the channel, press the [ PTT ] button to initiate group call associated with the displayed channel.
All Call
All call is that a single two-way radio calls all two-way radios on the channel. It is widely used to publish important notices that require special attention from users
Initiate an All-Call
There are two ways to initiate all call: Initiate a call to an All-call preset if it is programmed as your default contact for the digital channel; or through the "Contact list". The specific method is same as "initiate group call "described above.
Note:
- You can initiate all call only when the dealer has enabled this function.
- You can't reply to the received all call.
- After receiving all call, if you switch to another channel, the radio stops receiving all call. During all call, you can't use the preprogrammed button until the call ends.
Analog Channel Call
To transmit on the analog channel, press and hold the [PTT] button and speak to the microphone. To receive, release the [PTT] button
DTMF Call
Initiate a Call:
- In analog mode, press and hold the [PTT] button and press the number buttons on the panel.
- Press the [MENU] button to select a contact, and press the [PTT] button to start DTMF call.
Receive a Call
If the channel has been configured by computer to have DTMF signaling mute, any calls will only be heard if the DTMF code word matches the personal ID code. You can make call with the other party in the reset time and the code word should be redecoded when the reset time is up.
PTT ID Call
Initiate a Call
In analog mode, you can configure the DTMF online code and offline code through host computer and enable online code and offline code for analog channel, or set by (MENU Set  9Radio Set 9PTT D). When the online code is enabled, the DTMF code is sent when you first press the [PTT] button, and the offline code is sent when the [PTT] button is released.
Time-out Timer
This feature prevents the user from occupying the channel for too long. If the continuous transmission time exceeds the time set by the dealer, the radio will stop transmission and sound an alarm. To stop the alarm tone, release the [PTT] button. To re-transmit, press and hold the [PTT] button again after a period of time (set by the dealer).
If the dealer sets the pre-alarm function, a pre-alarm prompt will be made before the time set by the timeout timer is up to tell you that the transmission will be disabled.
Note: This function is disabled in emergency alarm mode.
Busy Channel Lockout
This function can be enabled by computer configuration software to prevent interference with other users that are transmitting on the same channel. If you press and hold the [PTT] button while other users occupy the channel, the radio will beep and display "Transmission failed, sub-audio disabled" or "Transmission failed, color code disabled", prompting that transmission is disabled at this time. When the channel is idle, you can then press the [PTT] button to transmit.
Voice Control
Voice control refers that the voice can directly trigger PTT transmission: When the microphone detects that the voice reaches the level to trigger the voice-activated transmission, the two-way radio automatically transmits the voice, that is, the user does not have to press the [PTT] button during the call.
When the voice control is on, the LCD shows the icon  .
.
Turn onloff Voice Control
Press [Voice Control] shortcut to turn on/off the voice control function
You can also turn on/off voice control in "Settings ->Radio Settings -> Voice Control"
Note:
- Please adjust the voice gain level correctly according to the current environment and normal speaking volume, so as to avoid frequent accidental triggering (sensitivity too high) or difficult to trigger voice control (sensitivity too low).
- The sensitivity of voice control transmission can be modified by writing-frequency software, level 1 is the highest sensitivity level, and level 10 is the lowest sensitivity level.
Functions and Operation
Standby Interface
This feature allows you to quickly return to the previous menu or standby interface.
In the editing interface, press the [EXIT] button to exit the editing interface, and return to the previous menu. Press the [BAND] button in any menu interface to return directly to the standby interface
Manage Contacts
You can manage your contacts through the "Contacts" menu of this product.
Contact List
The contact list is used to save contact information and can store up to 256 records. You can access the "Contact list" from the "Contacts" menu, or press the [Contact list] shortcut to quickly access the "Contact list"
Extended Functions
You can do the following for a contact in the contact list (single call contacts only): call prompt, radio detection, remote monitor, radio activation, or radio Inhibit. See the "Manual Dialing" section below.
Edit Contact
You can modify the number and alias of a contact (single call contacts only) in the contact list.
View Contact
You can view the contact details.
Delete Contact
You can delete a contact (single call contacts only) in the contact list. The contact list must have at least two records, and you can't delete the default contact for the current channel.
New Contact
This menu allows you to create a new contact (single call contacts only) to the contact list. The alias and number of all contacts must be unique, and the range of entered contact number is 1-16776415.
Note:
- When entering a contact alias, you can press the button to toggle the input method.
- In addition to creating contacts through this menu, you can also save numbers in the call log to the contact list.
Manual Dialing
In the digital mode, press the "*" button to enter manual dialing, then you can manually enter a single call number, and press PTT to transmit; you can also enter a single call number, and press the [Menu] button to perform operations such as call prompt, radio detection, remote monitor, radio activation, and radio inhibit.
SMS
This product supports DMR data function, and allows sending and receiving messages; the maximum length of each message is 144 characters.
Edit and Send Messages
- Select "SMS ->Write SMS" to enter the SMS editing window.
- After editing the content, press the [MENU] button.
- Select Send (or Save, or Clear) and press the [MENU] button.
- Select the contact or enter the contact number manually.
- Press the [MENU] button to send the message, and the screen displays "Sending message. ". After sending successfully, the interface will prompt "Sent successfully" and return. If sending failed, it displays "Message sending failed" and returns. You can also use "Preset messages" to send, and forward the messages in inbox, outbox and drafts.
New Message
After entering this menu, you can edit a new message, which supports up to 144 characters. After editing, you can save the message directly to the drafts or send it to an individual or group.
Preset Message
This menu has messagespre-set by the dealer. This product supports up to 32 shortcut messages. You can choose a shortcut message to send directly, or edit the message and then send.
Inbox
This product will save the received message in the Inbox. Each message has a corresponding icon to indicate whether the message has been read.
 : Indicates aread message.
 : Indicates unread message.
This product can store up to 20 received messages. If the Inbox is full, the icon will be displayed on the LCD. If a new message is received, the earliest message will be overwritten automatically.
- You can perform the following operation for any message in the inbox: Reply, forward, details, and delete.
- If you want to delete all messages in the inbox, select "SMS -> Inbox -> Delete All".
Outbox
This product will save the sent messages in the Outbox. The sent messages are always placed at the top of the Outbox list. This product can store up to 16 sent messages. When the Outbox is full, no icon will be displayed on the LCD. If there is a new text message, the earliest message will be overwritten automatically.
- You can perform the following operation for any message in the Outbox: Re-send, forward, edit and delete.
- If you want to delete all messages in the Outbox, select "SMS ->Outbox -> Delete All".
Drafts
This product will save the edited messages in the drafts and support up to 20 draft messages. When the Drafts are full, if a new message is saved to the drafts, the earliest messages will be overwritten automatically.
You can perform the following operation for any message in the drafts: Send, edit, and delete
- When you send the message in the drafts, this product will save this message to the Outbox and delete it from the drafts.
- If you want to delete all messages in the drafts, select "SMS Drafts
Call Log
This product can store up to 10 recently dialed / answered/missed calls. When the call log is full, the earliest record is automatically overwritten if there is a new call log.
Operation method: You can enter the "Call log" menu via the [MENU] button, path: "Call log"; you can also quickly enter this menu via the [Call log] shortcut.
You can perform the following operation for any call log in the list:
- Press [PTT] to initiate a call, add to contact list, and delete.
- To delete all dialed / answered / missed call logs, select "Call Log ->Dialed / Answered/ Missed Calls -> Delete All".
Scanning
The scanning function helps you listen to the communication activity on other channels and comprehend the current activity of the relevant team members
NOTE: The scanning function must be used when dual waiting is disabled.
Method of operation
- You can select to turn on scanning through the "Scan" menu. Or press the [*] buttonin the standby interface to turn on scanning. Or if the "Auto Scan" feature is enabled for a channel, the two-way radio will automatically turn on scanning when switching to that channel.
- After the scan is turned on, the two-way radiowill scan according to the scan list set on the channel where the scan is on. The scanning process is as follows:
- When scanning, the icon
![]() is displayed on the screen, and the LED flashes slowly in orange.
is displayed on the screen, and the LED flashes slowly in orange. - When activity is scanned on a channel, the two-way radio will stay on the channel. If the scan stays on a non-priority channel, the icon
![]() is displayed on the screen. If the radio stays on priority channel 1 or 2, the icon
is displayed on the screen. If the radio stays on priority channel 1 or 2, the icon ![]() or
or ![]() is displayed.
is displayed.
If you do not need to listen to the activities on the channel, press the [Delete useless channel] shortcut to temporarily delete the channel when scanning stops.
If you want to continue to listen to the activities on the channel, press the [MONI] shortcut while scanning stops.
To exit scanning, press the [*] button again, or choose to turn off scanning in the "Scan" menu.
- When scanning, the icon
 is displayed on the screen, and the LED flashes slowly in orange.
 is displayed on the screen. If the radio stays on priority channel 1 or 2, the icon
  or
or Scan Settings
You can ask the dealer to create a scan list for each channel.
This product can add up to 16 scan lists. Each scan list contains up to 16 channels, either digital or analog. You can set the scan list as follows by using this menu path: Scan -> Scan list.
- Set priority channel
You can set the currently selected channel as a priority channel or a non-priority channel. If you want to focus on activities on a channel, set it as a priority channel. The priority channel is sampled more often than that of non-priority channel. You can set up to two priority channels in each scan list.
Sub-audio Scan
This product supports sub-audio scanning function. Operation path: In analog mode, press the [MENU] button -> Set ->Radio Set > CTCSS/DCS CTCSS/DCS ->press the [*] button to enable sub-audio CTCSS finder
High/Low Power Adjustment
This feature enables fast switching of high and low power. When the communication distance meets your needs, you can select low power to save power. Please select high power flow power does not allow you to communicate with other two-way radios farther away. Press the [#]button to switch the transmission power of the current channel between high and low.
Note: The power level of each channel needs to be set separately.
Talkaround
In case of a repeater failure or beyond the coverage of the repeater, but two stations are within communication range of each other, you can press [Talkaround] shortcut to switch or go to press [MENU] button -> Set ->Radio Set -> Talkaround -> On to enable direct communication between the two stations, bypassing the repeater. Follow this sequence a second time to disable Talkaround and enable communication through the repeater again.
Monitor
Turn on the "Monitor" function to adjust the signal reception match condition.
- Press and hold the [Monitor] shortcut to turn on this feature, and the LCD shows icon
![]() ; release the button to exit.
; release the button to exit.
 ; release the button to exit.
Squelch Level Adjustment
You can adjust the signal strength required to receive the signal by adjusting the noise level. In general, the higher the squelch level, the higher the required signal strength is. If it is set to "Normally on", the speaker will directly turn on to play the background sound, regardless of whether the decoding conditions are met.
Push-to-call
You can ask the dealer to set [Push-to-call] shortcut, and press the shortcut to initiate the corresponding operation. Specific operation categories are as follows:
Business on digital channels.
- For group call contacts, you can initiate a group call or send text message.
- For single call contacts, you can initiate single call, send textmessage, and initiate extended function. Extended functions include: call prompt, radio detection, remote monitor, activation, and remote inhibit.
Call prompt
In digital mode, you can send call prompt to a contact, and the other party can call back directly
- Initiate call prompt: Select single call contact (enter "Menu -> Contacts ->Press [
![]() ] \[
] \[![]() ] to select single call contact ->CaIl prompt"), or press the * button in the main interface to enter single call number, select "Call prompt", and press the[MENU] button to start;"Call prompts successful" displays if it is successful, and "Call prompt failed" displays if fails.
] to select single call contact ->CaIl prompt"), or press the * button in the main interface to enter single call number, select "Call prompt", and press the[MENU] button to start;"Call prompts successful" displays if it is successful, and "Call prompt failed" displays if fails. - Receive call prompt: After receiving the call prompt command, a tone rings (tone function is enabled for the caller's contact in the contact list) and stays in the display interface. Press [EXIT] to exit.
View Radio Info
View the information about this product, including: own number and radio model, serial number, CPS version, hardware version, firmware version, DSP version, and programming time.
- Menu path: Set ->Radio Info -> Radio ID
- Device info menu path: Set ->Radio Info -> Device Info.
CTCSS \ DCS
In analog channel, the speaker turns on only when the carrier wave and sub audio match in order to avoid receiving irrelevant call on the same frequency. Provide 51 sets of standard CTCSS (analog sub audio) and also support non-standard sub audio. Provides 108 sets of standard DCS (digital sub audio), and also support non-standard DCS. Sub-audio can be set via writing frequency software on the reception or transmission CTCSS/DCS of analog channel or via the "Set ->Radio Set -> CTCSS / DCS" path in the menu. If you require DCS codes, press the [A/B] button to select digital sub audio, press [ \\ ] to select digital sub audio code, press the # button to switch between positive phase (N) and negative phase (l).
- Press the [A/B]button to select regular CTCSS codes and press [
![]() \
\![]() ] to select analog sub audio frequency.
] to select analog sub audio frequency. - In CTCSS selection mode, press the * button to scan analog sub audio. DCS codes can not be scanned or found using this feature.
Configuring Two-way Radio
You can modify the frequency of current channel, channel name, color code, relay station time slot and other radio configuration information.
Configuration path: Enter "Settings ->Radio Configuration" menu, and select the appropriate configuration items.
- Frequency: Set the reception frequency and transmission frequency. Please use the frequency in the range of this product.
NOTE: The frequency will be modified according to the frequency range set on the writing frequency software. If the limit frequency range is exceeded, the LCD displays "Illegal reception frequency" or "Illegal transmission frequency", the modified value is invalid and returns.
- Color code: Color code can mark a system, and the terminals that communicate with each other must set the same color code.
Range: Integer from 0 to 15. - Relay time slot: Select the time slot for voice calls and data transmission.
NOTE: a non-repeater digital channel can be configured for dual capacity direct mode by computer configuration software. This mode supports parallel direct mode transmission of two two-way radios transmitting on 12.5KHz channel bandwidth. The radios in the same communication group must use the same time slot, and the group using slot 1 will not interfere with the group using slot 2.
Firmware Update
- Turn off the radio, and insert the programming cable;
- Press and hold the [Side button 1] and [Side button2] at the same time to turn on the radio, the green LED turns on, and the LCD screen is black, indicating that the radio has entered the upgrade mode;
- Start the upgrade software "Update.exe" on the computer; select the corresponding serial port;
- Click "Browse" to select the file to be upgraded (provided by the manufacturer), for example: DMR-5R-V1.1.1.sgl;
- Click "Download" and wait the download to complete.
Remember that the power mustn't be cut off during the update process, or else the SCM will be scrapped; - Unplug the programming cable, turn off the radio or reboot.

Do not cut off the power in the update process, or else the SCM will be scrapped
Initialize Defaults
In power off mode, press and hold the [Side button I] and the number button [I] to turn on the radio, and the LCD displays "Memory Reset?"; press the MENU button to enter initialization, and the LCD displays "Memory Reset..."; the initialization finishes after 10 seconds and the radio turns on normally. Press other buttons to exit the initialization interface and boot normally.
NOTE: The power mustn't be cut off in the initialization process, or else the initialization will fail.
Documents / ResourcesDownload manual
Here you can download full pdf version of manual, it may contain additional safety instructions, warranty information, FCC rules, etc.
Advertisement


Need help?
Do you have a question about the RD-5R and is the answer not in the manual?
Questions and answers