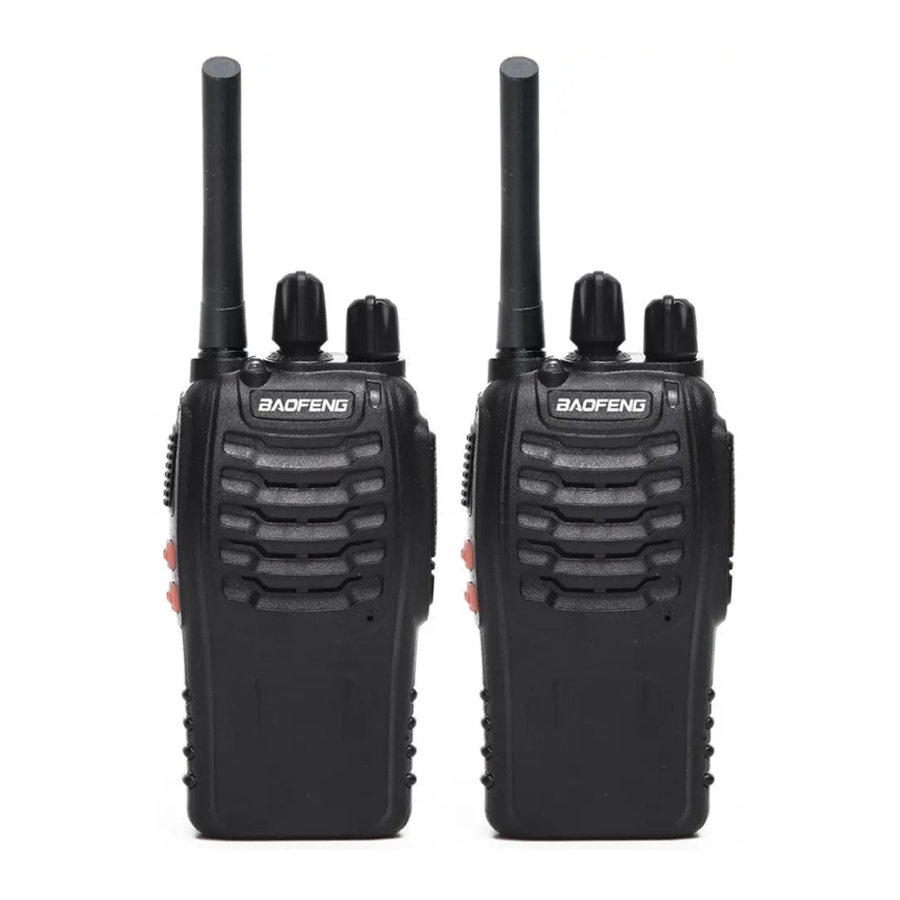
Baofeng BF-88A, BF-88E - Two Way Radio Manual
- User manual (3 pages) ,
- Programming manual (12 pages)
Advertisement
What's in the box
Thanks for choosing Baofeng two way radio. We recommend you to check the items listed in the following table before discarding the package box.

Note: The radio is compatible with other accessories which are available on:
https://www.radioddity.com/
- Speaker microphone
- Programming cable
- Earphone
Getting Familiar

Battery Maintenance

Please use Radioddity designated battery; other batteries can cause explosion
Note
- Do not short-circuit the battery terminals or dispose of in fire. Do not disassemble the battery by yourself
- Charge the battery between temperature 0°C and 45°C. The battery cannot be fully charged beyond this temperature range.
- Turn off the power when you charge the radio.
- Remove battery from charger when charging has completed.
- Replace battery when operating time becomes insufficiently low.
- Do not charge when the battery or the radios wet. Please dry it with a cloth before charging to avoid any danger.

If conductive metals, such as jewelry, keys or chains, contact the external charging contacts, damage or personal injury may occur.
Installing/Removing the battery
- Align the two grooves of battery and the guide rail on the back of aluminum shell ensuring full contact and in parallel, then push the battery up to the radio base along the rail on the back of aluminum shell, until the battery latch locks up.
- To remove battery, please make sure the radio is off, push the battery latch down, and make sure the radio and battery s on the releasing state, and then push the battery out from the radio.
Charging

How to use the USB desktop charger:
- Plug the USB connector into a suitable USB power source. LED will become GREEN indicating ready to commence the charging cycle.
- Place either the Radio (OFF) or just the battery into charger. Charger LED will show RED indicating the charging cycle has commenced.
- When the LED turns GREEN, charging has completed and the radio or battery should be removed from the desktop charger.
Note
- Before inserting the battery, it is abnormal if the charging indicator blinks
- Wait until the indicator is stable before placing battery in charger.
- When the battery is properly inserted, the indicator turns red and starts the charging process. If the indicator blinks, then the battery is damaged or the temperature is too high or too low
Installing external headset
Gently displace (do not remove) the speaker jack cover, insert the headset into the speaker jack
Basic operation
Quick Start Guide
- Carefully open the box and remove radio body, battery and antenna.
- Install battery in radio body until it clicks (be gentle!) (See specific directions in previous section)
- Install antenna into radio. (The antenna will smoothly screw into radio.) Do not force or cross threading may occur. Make sure, after about 10 turns, the antenna is fully seated and tight.
- Turn on power knob by twisting gently counter clockwise. The radio will respond with, "Open the radio, 1,"or whatever channel is selected by the taller selector.
- Select your desired channel, radio will respond with "One, Two, etc."
- Press the PTT and talk!
NOTE
The battery included with the radio generally has enough power in it to test your radio. You should fully charge the battery for optimal performance.
The BF-88A/E is a cost effective UHF-FM analog radio. It can communicate with any other brand of radio that is UHF-FM analog, but without spending an exorbitant amount of cash! You just need to make sure they are in the same channels/frequencies, and this can be simply checked by using the software. If they are not in the same frequency, just program via computer. (See the "Computer Programming "chapter)
Scan Function
When the radio is allowed to be scanned, which can be set by the software, you can press the Monitor key to turn on or turn off the scan. When the scan begins the indicators lights green, the radio will can scan automatically from channel 1 to 16 which is defined as scan added. When there is signal in the scanning channel, it will stop in that channel.
NOTE
Please note that scan is only available when there are two or more than two memory channels and two or more scan added channels.

Battery Save Function
This function can be set by the software.
By turning on this function the standby time can be much longer.

Busy Channel Lockout

You can turn on/off this function via software.
- If the current channel does not have CTCSS/DC, when there is a signal, TX prohibited when you press PTT.
- If the current channel does not have CTCSS/DCS, when there is signal which does not have CTCSS/DCS, TX prohibited when you press PTT.
- If the current channels does not have CTCSS/DCS, when there is signal which have CTCSS/DCS, the radio will transmit when you press PTT.
Wide/Narrow Bandwidth Setting
The default setting is wide band.

VOX
Speak to the microphone in normal voice to transmit, no need to press PTT switch, turn VOX on/off though the software.
- When VOX is on in your working channel:
Speak to the microphone directly, it will transmit automatically.
The radio stops transmitting when there is no voice, and waits for receiving. - When a headset with a microphone is used:
When VOX is on, you should VOX again for the radio to identify voice volume.
If the microphone is sensitive enough, the radio will start transmit.
If the microphone is not sensitive enough, the radio cannot collect your voice. Please adjust your voice volume to guarantee smooth communications.


Voice Prompt
- The voice prompt can be selected to "English/OFF" through the menu voice/Beep Tone of the "Optional Features" in the software. When choosing OFF, voice prompt turns off.

- Channel annunciation: You will get to know the working conditions of current channel which is being operated.
- Low battery alert: The radio will remind you when the battery capacity reaches the minimum operating voltage.

Low Battery Indication
When the radio is in transmitting or standby, if the battery capacity reaches the pre-determined low level, the indicator light blinks red, and a low battery alert tone will be heard. The indicating tone will be "Please change the battery". When the low battery alert occurs it cannot transmit, please change or charge the battery.

Squelch
The squelch level will determine the signal strength at which the radio speaker is turned on. If the squelch level is low, the background noise of the radio speakers will be higher, the corresponding communication range will be further, but the anti-interference ability will be weaker.
The default setting of squelch level is 5. You can adjust it through the menu "Squelch Level" in the software from level 0 to 9, and 0 is the lowest level.

Time-Out-Timer
Time-Out-Timer (TOT)
This feature provides a safety switch that limits transmission time to a programmed value. This will promote battery conservation by not allowing you to make excessively long transmissions, and in the event of a stuck PTT switch it can prevent interference to other users as well as battery depletion. If the transmitting time exceeds the TOT pre-set time, a beep will be heard and the radio will stop transmitting.

QT/DQT (CTCSS/DCS)
QT/DQT (CTCSS/ DCS) is the sub-audible signaling, to prevent the radio from receiving unwanted signals on the same frequency. When CTCSS/DCS is set, then within the communication range, you can only receive signals from the same frequency with the same QT/DQT setting. When the QT/DQT is off, you will get all the signals from the same frequency within the communication range


Side Key Custom Setting
(Monitor/Alarm)
You can custom the second side key as Monitor key or Alarm key by programming in the CPS software.
Click Edit > Function Setting, under "Side Key", you can activate 3 optional functions: "Off" means side key function is unavailable, "Monmome" means Monitor function, "Alarm" means Emergency Alarm function.

Monitor
This feature allows users to check whether a channel is clear before transmitting. If a frequency is in use, you can hear what is transmitting. It' s important to check the frequency and privacy code you intend to use and select clear frequencies to set your channels. It's also helpful to use the radio when receiving a weak signal. Press and hold MONI button, the indicator light will turn green which indicates the radio is receiving signal.
Emergency Alarm
Emergency Alarm is used to indicate an emergency situation. When press and hold the Alarm key, it makes a loud alarm so that other people will know you are in trouble. You can initiate an emergency call at any time, even if there is activity on the current channel.
Computer Programming
The Radio kit does not include a programming cable. To attain a PC cable please visit https://www.radioddity.com/
- Computer System Requirements
Operating System: Windows 98, Windows Me. Windows XP, Windows 7, Windows 8 and Windows 10
Hard Disk Space: at least 50MB of available
The minimum memory: 64M - Programming Cable
- USB programming cable - The driver needs to be installed before writing any frequencies.
- Find the corresponding driver of the system
- Click install and wait for the installation succeed.
- If you are using a serial cable a driver is not required. You can just plug in and use directly.
- USB programming cable - The driver needs to be installed before writing any frequencies.
- Software Download & Install
- Turn on computer, check if your computer system meets the requirements.
- Download the programming software on radioddity.com
- Install the programming software
- Connect your BF-88A/E with Computer
- USB (or serial) programming cable connects with the computer end.
- Connect the other end of the cable with your BF-88A/E.
- When the both ends have been connected, turn on your radio. Make sure it has enough power during the programming procedure.
Note
In some cases, the cable does not fully seat in a new radio. Make sure the cable is FULLY seated prior to transferring data.
- Read & Write Data via Software
- In the software menu, click Setup> Communication Port and select proper COM port (COM port may be located by using Windows Device Manager).
- In the menu, Select Program> Read from Radio> OK to read frequencies. This process takes a few seconds and progress in shown by a green progress bar in the software.
- Now you can edit any data and set all the functions that you want.
- To write you completed data file, select Program> Write to Radio> OK.
- If you have to program multiple BF-88A/E's you can repeat the above steps.
- If you have to program multiple walkie talkies, you can repeat the above steps.
FRS, GMRS,MURS and PMR446
You may be tempted to use FRS,GMRS, MURS (in the USA) or PMR 446 (in Europe) Frequencies. Do note however there are restrictions on these bands that make this transceiver illegal for use.
Trouble Shooting Guide
- When reading or writing frequency, I do not get a response or it reports a communication error?
- Check your programming cable to see if it is damaged.
- Check the connection of the programming cable and computer serial port.
- Check to find if the BF-88A/E battery level is low or depleted. If it is replace or charge the battery.
- Check the programming software is matched with the current model.
- Check if you turn ON your radio.
- Check that the proper software drivers are properly installed.
- When programming is done, why can't my two radios talk to each other?
- Make sure the two radios are on the same channel.
- Check the same channel is set to receive the same QT/DQT (CTCS / DCS).
- Check if the two radios' volume control level is high enough. Depress the MON button and adjust volume to comfortable levels.
- Check for proper installation of the antennas.
- Check range of the radios (Line of Sight).
- Other often seen problems
| Troubles | Solution |
The unit cannot turn on |
|
| The operating time becomes short, even the battery is fully charged | Replace the battery. |
| Unable to communicate with the transceivers of the same group |
|
The voice of another group can be heard | Change all QT/DOT of the group |
| Other radios cannot receive the TX signals or receive signalsin a low volume |
|
Noise is always heard | The distance is out of range Turn on the radio in shorter distance and try again |
Product Safety Guide
Operating Instructions
- Transmit no more than the rated duty factor of 50% of the time. To Transmit (Talk), push the Push To Talk (PTT) button to receive calls(listen), release the PTT button. Transmitting 50% of the time, or less, is important because the radio generates measurable RF energy exposure only when transmitting in terms of measuring for standards compliance.
- Transmit only when people outside the vehicle are at least the recommended minimum lateral distance away from a properly installed according to installation instructions, externally mounted antenna.
- When operating in front of the face, worn on the body, always place the radio in a Radioddity approved clip, holder, holster, case, or body harness for this product. Using approved body worn accessories is important because the use of Non-Radioddity approved accessories may result in exposure levels, which exceed the IEEE/ICNIRP occupational/controlled environment RF exposure limits.
- If you are not using a body worn accessory and are not using the radio in the intended use position, in front of the face or at the body in the PTT mode or alongside of the head in the phone mode, then ensure the antenna and the radio are kept 2.5 cm (one inch) from the body when transmitting. Keeping the radio at a proper distance is important because RF exposures decrease with increasing distance from the antenna.
Protect your hearing
- Use the lowest volume necessary to do your job.
- Turn up the volume only if you are in noisy surroundings.
- Turn down the volume before adding headset or earpiece.
- Limit the amount of time you use headsets or earpieces at high volume.
- When using the radio without a headset or earpiece, do not place the radio's speaker directly against your ear.
Note: Exposure to loud noises from any source for extended periods of time may temporarily or permanently affect your hearing. The louder the radio's volume, the less time is required before your hearing could be affected. Hearing damage from loud noise is sometimes undetectable at first and can have a cumulative effect.
Safety Operation
Forbidden
- Do not use charger outdoors or in moist environments, use only in dry locations/conditions.
- Do not disassemble the charger, which may result in risk of electrical shock or fire.
- Do not operate the charger if it has been broken or damaged in any way.
- Do not place a portable radio in the area over an air bag or in the air bag deployment area. The radio may be propelled with great force and cause serious injury to occupants of the vehicle when the air bag inflates.
To reduce risk
- Pull by the plug rather than the cord when disconnecting the charger.
- Unplug the charger from the AC outlet before attempting any maintenance or cleaning.
- Contact Radioddity for assistance regarding repairs and service.
Use of Communication Devices While Driving
- Always check the laws and regulations on the use of radios in the countries and areas where you drive.
- Give your full attention to driving and to the road.
- If available, use the hands-free facility.
- If driving conditions or regulations require it, pull off the road and park before making or answering a call.
Specifications
| General | |
| Model Number | BF-88A/88E |
| Frequency range | US:FRS EU:PMR |
| Channel Number | 16 |
| Working Voltage | DC 3.7V |
| Working Temperature | -10°C~+50°C |
| Antenna | High gain antenna |
| Antenna Impendence | 50Q |
| Working Mode | Simplex |
| Receiver | |
| Frequency range | US:FRS EU:PMR |
| Sensitivity | ≤ 0.2uV |
| Occupied Bandwidth | ≤ 16KHz. |
| Selectivity | ≥65dB |
| Intermediation | ≥ 55dB |
| Audio power | 1W |
| Audio distortion | ≤5% |
| Frequency Stability | 5ppm |
| Current | 80mA(when standby) 220mA(when working) |
| Audio response | +7~-12.5dB |
| Transmitter | |
| Frequency range | US:FRS EU:PMR |
| Output power | US:≤2W EU:≤0.5W |
| Modulation mode | 16KF Ø 3E |
| Spurious radiation | ≤7.5uW |
| Modulation noise | <-40dB |
| Modulation distortion | <5% |
| Frequency Stability | 5ppm |
| Maximum deviation | ≤ ± 5KHz |
| Current | ≤2300mA |
| Audio response(300-3000Hz) | +6.5~-14dB |
| Adjacent Ch. power | ≥ 65dB |
| Intermediation sensitivity | 8~12mv |
Note: Specifications will be revised without notice due to technical improvement. Thank you.
Safety Information
Please read the following brief instructions, non-compliance with these rules may improper use may cause danger and violate the law.
- Refer to local government regulations before using this radio, improper use may violate the law.
- Turn off the radio before getting close to combustible or hazardous area.
- Do not charge the battery in the combustible or hazardous area.
- Do not use the damaged antenna, which will easily get burnt while touching.
- Do not try to disassemble the radio, the maintenance work should be only done by technical expert.
- To avoid electromagnetic interference or electromagnetic compatibility, please turn off the radio in places where prohibit from using wireless equipment, such as hospital and other healthcare facilities.
- In the car with an airbag, do not put the radio within the scope of the airbag long deployment.
- Once the radio is smelly or smoky, please shut off its power immediately.
- Do not transmit for a long time due to possible heat build-up.
Visit Radioddity.com For Downloads And Help
FIND TUTORIALS, SUPPORT AND MORE
Radioddity.com

@Radiodity
support@radioddity.com
We do all of this to help you find the highest quality of radios, for low prices, with as little headache to the consumer as possible. If we are failing you in this promise in any way, let us know via email, support@radioddity.com.
Documents / Resources
References
![www.radioddity.com]() Radioddity | Choose Connectivity, Choose Radioddity
Radioddity | Choose Connectivity, Choose Radioddity![radioddity.com]() Radioddity | Choose Connectivity, Choose Radioddity
Radioddity | Choose Connectivity, Choose Radioddity
Download manual
Here you can download full pdf version of manual, it may contain additional safety instructions, warranty information, FCC rules, etc.
Advertisement


Need help?
Do you have a question about the BF-88A and is the answer not in the manual?
Questions and answers