Table of Contents
Advertisement
Quick Links
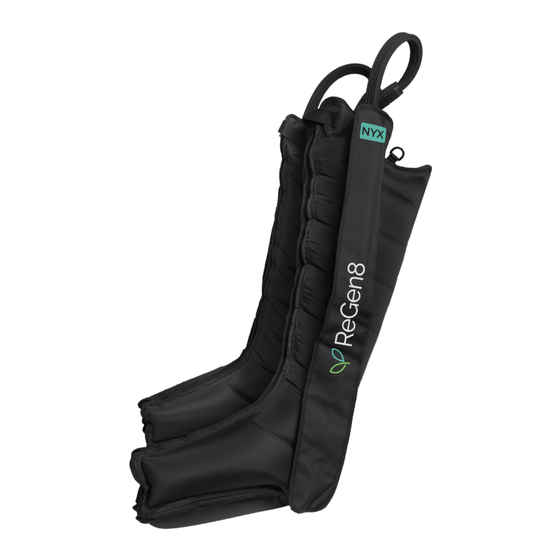
Regen8 Nyx 8-Chamber Compression
Recovery Boots (Medium, 160-175cm)
Product may vary slightly from the item pictured due to model upgrades.
Read all instructions carefully before using this product.
Retain this owner's manual for future reference.
NOTE:
This manual should not be used to guide your purchasing decision. Your product, and the contents inside its carton, may vary
from what is listed in this manual. This manual may also be subject to updates or changes. Updated manuals are available
through our website at
www.lifespanfitness.com.au
USER MANUAL
Find the
Digital Manual
Online
Advertisement
Table of Contents

Subscribe to Our Youtube Channel
Summary of Contents for Life Span Regen8 Nyx
- Page 1 Regen8 Nyx 8-Chamber Compression Recovery Boots (Medium, 160-175cm) USER MANUAL Find the Digital Manual Online Product may vary slightly from the item pictured due to model upgrades. Read all instructions carefully before using this product. Retain this owner’s manual for future reference.
-
Page 2: Table Of Contents
TABLE OF CONTENTS Overview ............03 II. -
Page 3: Overview
I. OVERVIEW 1.1 Introduction to Air Compression Massage Boots Product Name: Air Compression Massage Boots Product introduction: Air Pressure Massager Boots is mainly composed of main engine, One to two adapter, inflatable connecting pipe, Limb sleeve and the power adapter. 1.2 Introduction of Host Operating Display Panel Battery Level Display Time Display... -
Page 4: Installation And Use Instructions
II. INSTALLATION AND USE INSTRUCTIONS 2.1 Unpacking Inspection 1. Take out the products and accessories from the packaging boxes and count them according to the "list" in this manual 2. Check whether the products and accessories are damaged. NOTE: If you have any questions, please contact our customer service or agent immediately! 2.2 Operation Steps 1. - Page 5 6. Select Mode, Time, Press 6.1 Select Mode: Description: The pressure starts from the first chamber, and moves continuously from the 1st to MODE 1 1→2→3→4→5→6 6th chamber at the time, then circulates from the 1st chamber. Description: The pressure starts from the 1st chamber, and each time add one more chamber, to the 6th chamber, then all chambers are MODE 2...
- Page 6 6.2 Selection time: Press the time key to set the usage time, the setting range is adjustable for 10-90 minutes, the default time of starting the instrument is 30 minutes. 6.3 Selection of pressure: Pressure keys to set the cavity pressure, the setting range is 30 mmHg(3.997kPa)-260 mmHg (34.66 kPa) adjustable, boot default 60mmHg (7.999 kPa).
- Page 7 2.3 Lithium Battery Charging Function Charging operation Connect the power charger, one end is inserted into the power outlet, the other end is inserted into the power cord connection port of the host, at this time, the indicator light on the charger is red display, the instrument is charging state.
-
Page 8: Main Performance And Technical
III. MAIN PERFORMANCE AND TECHNICAL 1. Pressure range: The range of pressure is 30 mmHg(3.997kPa)- 260 mmHg (34.66 kPa) adjustable. Step 5 mmHg (0.666 kPa) , Start default 80mmHg (10.67 kPa). 2. Overvoltage protection: The maximun working pressure should not exceed 10% of the maximun pressure in 20s. -
Page 9: Precautions For Safe Use
V. PRECAUTIONS FOR SAFE USE 5.1 Warnings 1. The product shall not be flooded or wet. 2. When abnormal conditions occur in the use process, the use of the instrument must be stopped immediately. 3. Please use effectively grounded socket. 4. - Page 10 19. It is recommended to wear underwear and socks in order to avoid cross infection caused by many people using the same limb sleeve. 20. Do not disassemble, repair or alter the product by yourself, nor do you repair it by yourself. If you need repair, please contact our customer service or agent.
-
Page 11: Maintenance And Cleaning
VI. MAINTENANCE AND CLEANING 6.1 Maintenance 1. Inspect the instrument and accessories regularly. Whether there are cracks, deterioration, deformation and loose connection in the main engine and accessories of the product. If so, please contact our customer service or agent for replacement. 2. -
Page 12: Packing List
VIII. PACKING LIST The packing list is as follows: Packing List Quantity Main engine 1 PC The power adapter 1 PC Single to double adapter 1 PC Pneumatic connecting pipe 1 PC 2 PC Limb sleeve (arm sleeve) (optional accessories) 1 PC 2 PC Limb sleeve (leg sleeve) (optional accessories) -
Page 13: Warranty
IX. WARRANTY AUSTRALIAN CONSUMER LAW Many of our products come with a guarantee or warranty from the manufacturer. In addition, they come with guarantees that cannot be excluded under the Australian Consumer Law. You are entitled to a replacement or refund for a major failure and compensation for any other reasonably foreseeable loss or damage. - Page 16 WWW.LIFESPA NF ITN ES S.COM.AU...


Need help?
Do you have a question about the Regen8 Nyx and is the answer not in the manual?
Questions and answers