
Subscribe to Our Youtube Channel
Related Manuals for Lincoln Electric DIGISTEEL 355S


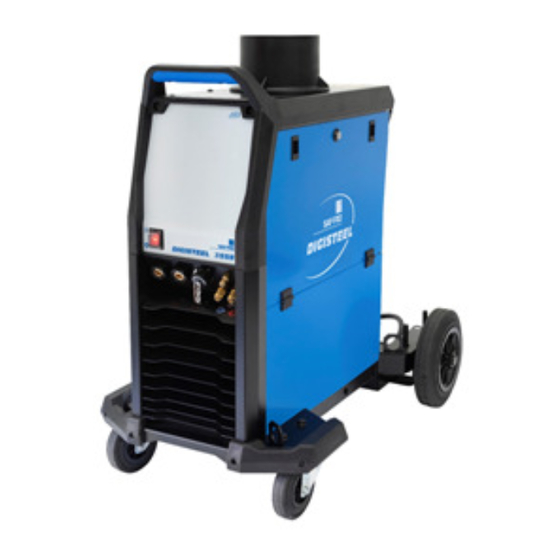
Summary of Contents for Lincoln Electric DIGISTEEL 355S
- Page 1 SVM 3124 Rev.00 07-2020 DIGISTEEL 355S - 425S - 505S For use with machines having code numbers: 50502, 50503, 50504 LINCOLN ELECTRIC EUROPE www.lincolnelectric.eu...
-
Page 2: Table Of Contents
INDEX OF CONTENTS TECHNICAL SPECIFICATIONS ............................1 SAFETY ................................... 4 INTRODUCTION ................................6 INSTALLATION AND OPERATOR INSTRUCTIONS ..................... 6 MAINTENANCE ................................12 DC BUS CAPACITOR DISCHARGE PROCEDURE ..................... 12 THERMAL PROTECTION ............................. 13 MAJOR COMPONENTS LOCATION ..........................13 THEORY OF OPERATION ............................14 TROUBLESHOOTING AND REPAIR SECTION ...................... -
Page 3: Technical Specifications
TECHNICAL SPECIFICATIONS NAME INDEX DIGISTEEL 355S W000404454 DIGISTEEL 425S W000404455 DIGISTEEL 505S W000404456 INPUT Input Voltage U EMC Class Frequency 355S 400V ± 15% 3-phase 50/60Hz 425S 505S Input Power at Rated Cycle Input Amperes I 1max 15 kVA @ 50% Duty Cycle... - Page 4 WELDING VOLTAGE REGULATION RANGE GMAW FCAW 15V÷ 33,5V 15V÷ 33,5V 355S 15V ÷ 37V 15V ÷ 37V 425S 15V ÷ 41V 15V ÷ 41V 505S RECOMMENDED INPUT CABLE AND FUSE SIZES Fuse Type: Time-Delay or Circuit Breaker Type D Power Lead 400V 4 Conductor, 2,5mm 355S...
- Page 5 This machine has been designed to operate in an industrial area. The operator must install and operate this equipment as described in this manual. If any electromagnetic disturbances are detected the operator must put in place corrective actions to eliminate these disturbances with, if necessary, assistance from Lincoln Electric. WARNING Provided that the public low voltage system impedance at the point of common coupling is lower than: 105 mΩ...
-
Page 6: Safety
Failure to follow the instructions in this manual could cause serious personal injury, loss of life, or damage to this equipment. Read and understand the following explanations of the warning symbols. Lincoln Electric is not responsible for damages caused by improper installation, improper care or abnormal operation. - Page 7 CYLINDER MAY EXPLODE IF DAMAGED: Use only compressed gas cylinders containing the correct shielding gas for the process used and properly operating regulators designed for the gas and pressure used. Always keep cylinders in an upright position securely chained to a fixed support. Do not move or transport gas cylinders with the protection cap removed.
-
Page 8: Introduction
INTRODUCTION DIGISTEEL 355S, 425S, 505S inverter sources have to DIGISTEEL 355S, 425S, 505S work with the water be connected with wire feeders WF 52D and WF 56D. cooler COOL ARC ® Signal from the power source will be displayed on wire feeders user interface. - Page 9 Output Connections Refer to points [2], [3] and [4] of the figures below. Controls and Operational Features Figure 2. Figure 1. 8. Supply Plug: for gas heater kit (see “Accessories Suggested” chapter). 1. Power Switch ON/OFF (I/O): Controls the input power.
- Page 10 17. Quick Connect Coupling: Coolant inlet Water Cooler Connection (supplies cool coolant to the torch/gun). DIGISTEEL 355S, 425S, 505S work with the water cooler COOL ARC ® 26 (see "Accessories Suggested" 18. Quick Connect Coupling: Coolant outlet chapter). (takes warm coolant from torch/gun).
- Page 11 Machine and Circuit Protection Transport & Lifting Power Source is protected against overheating, overload and accidental short-circuits. WARNING Falling equipment can cause injury and If the machine is overheated, the thermal protection damage to unit. circuit will decrease the output current to 0. This information will be shown by wire feeder user interface.
-
Page 12: Maintenance
• maintenances, it is recommended to contact the nearest pressure) airflow, remove the dust from the external Technical Service Center or Lincoln Electric. Repairs and case and from the cabinet inside. modifications performed by unauthorized service or If it is required, clean and tighten all weld terminals. -
Page 13: Dc Bus Capacitor Discharge Procedure
MAINTENANCE WARNING The capacitors are discharged by discharge resistors integrated into the main board in about 2 (two) minutes. Locate the terminals POS and NEG on the Input Rectifier Bridge, See Figure 1. Connect your multi-meter positive probe to POS ELECTRIC SHOCK can kill terminal point and your negative probe to NEG terminal and check the voltage. -
Page 14: Thermal Protection
15 minute period. If the fan is not turning or the air intake louvers were obstructed , then the power must be switched off and the fan problem or air obstruction must be corrected. MAJOR COMPONENTS LOCATION DIGISTEEL 355S, 425S,505 EMI Filter Supply Board... -
Page 15: Theory Of Operation
R: RED / CZERWONY W: WHITE / BIAŁY γ γ γ γ 2 2 2 2 (T1) γ γ γ γ 3 3 3 3 (L1) γ γ γ γ 1 1 1 1 (D1-D6) Above wiring diagram is related to DIGISTEEL 355S... - Page 16 γ γ γ γ 3 3 3 3 (L1) γ γ γ γ 1 1 1 1 (D1-D6) GENERAL DESCRIPTION The DIGISTEEL 355S, 425S, 505S are industrial EMI FILTER (Y051-1 for DIGISTEEL 355S; Y056- arc welding power sources which utilize three...
- Page 17 VOLTAGE SUPPLY BOARD Baffle Baffle Przegroda Przegroda RF14 Y051-1 Y045-2 Y046-1 RF12 X4-2 270B X4-1 KIT PODGRZEWACZA CO GAS HEATER KIT 400V, 50/60Hz 3+PE PŁYTA TYLNA RF13 REAR PANEL Baffle Przegroda Baffle Przegroda +15VDC X20-1 -15VDC X20-2 I OUT X20-3 127B GNDS X20-4...
- Page 18 γ γ γ γ 1 1 1 1 (D1-D6) (PWM) signals to the Inverter board IGBTs. CONTROL BOARD (Y057-1 for DIGISTEEL 355S; Y057-4 for DIGISTEEL 425S and The Control Board is supplied by 40VDC 505S) generated by the Voltage Supply Board...
- Page 19 INVERTER AND MAIN TRANSFORMER Baffle Baffle Przegroda Przegroda RF14 Y051-1 Y045-2 Y046-1 RF12 X4-2 270B X4-1 KIT PODGRZEWACZA CO GAS HEATER KIT 400V, 50/60Hz 3+PE PŁYTA TYLNA RF13 REAR PANEL Baffle Przegroda Baffle Przegroda +15VDC X20-1 -15VDC X20-2 I OUT X20-3 127B GNDS...
- Page 20 OVERLOAD PROTECTION Overload indicator on the front panel, will turn ON and the thermostat will prevent output current. DIGISTEEL 355S, 425S, 505S are electrically One PTC is also mounted on the output diodes protected from producing higher than normal heatsink to monitor the ambient temperature, if output current.
-
Page 21: Troubleshooting And Repair Section
TROUBLESHOOTING AND REPAIR SECTION How to use troubleshooting Guide Troubleshooting Guide Side panels removal and capacitor discharge procedure... - Page 22 HOW TO USE TROUBLESHOOTING GUIDE Service and repair should be performed by only Lincoln Electric Factory Trained Personnel. Unauthorized repairs performed on this equipment may result in danger to the technician and machine operator and will invalidate your factory warranty. For your safety and to avoid Electrical Shock, please observe all safety notes and precautions detailed throughout this manual.
- Page 23 WARNING 4. Test the machine to determine if the failure symptom has been corrected by the replacement PC board. NOTE: Allow the machine to heat up so that all ELECTRIC SHOCK can kill electrical components can reach their operating temperature. Have an electrician install and service this •...
- Page 24 TROUBLESHOOTING !! WARNING !! BEFORE CONNECT POWER SUPPLY, MAKE A CAREFUL VISUAL INSPECTION INSIDE THE MACHINE , CHECK ALL THE BOARDS AND HARNESSES. POSSIBLE AREAS OF RECOMMENDED COURSE PROBLEMS / SYMPTOMS CHECKS MISADJUSTMENT(S) OF ACTION • INPUT RECTIFIER BRIDGE • PERFORM THE INPUT IS IN SHORT CIRCUIT THE LINE CIRCUIT BREAKER •...
- Page 25 DISCHARGE PROCEDURE WARNING Service and repair should be performed only by Lincoln Electric factory trained personnel. Unauthorized repairs performed on this equipment may result in danger to the technician or machine operator and will invalidate your factory warranty. For your safety and to avoid electrical shock, please observe all safety notes and precautions detailed throughout this manual.
- Page 26 DIGISTEEL 355S, 425S,505S – SIDE PANELS COVER REMOVAL Figure 1 Necessary tool: Torx T25 wrench Procedure: 1. Turn ON/OFF switch to OFF position. 2. Disconnect Input Power from the machine ! 3. Remove the 4 screws (A) from the rear position of the left and right side panel. See Figure 1 4.
- Page 27 DISCHARGE PROCEDURE The capacitors are discharged by discharge WARNING resistors integrated into the main board in about 2 (two) minutes. Locate the terminals POS and NEG on the Input Rectifier bridge, See Figure 1. Connect your multi-meter positive probe to POS terminal point and your negative probe to NEG ELECTRIC SHOCK can kill terminal and check the voltage.
-
Page 28: Emi Filter Board Resistance Test
Local Lincoln Electric Service Department for electrical troubleshooting assistance before you proceed. ………………………………………………………………………………………………………………………….. TEST DESCRIPTION This test will determine if the EMI Filter Board (Y051-1 for DIGISTEEL 355S; Y056-1 for DIGISTEEL 425S and 505S) is good or defect. MATERIALS NEEDED Volt / Ohmmeter... - Page 29 EMI FILTER BOARD RESISTANCE TEST (continued) Y051-1 for DIGISTEEL 355S TEST PROCEDURE 1. Remove main input power to the DIGISTEEL 355S. 2. WARNING ! EMI filter is directly connected to the main line, be sure to have the plug removed from the mains ! 3.
- Page 30 EMI FILTER BOARD RESISTANCE TEST (continued) Y056-1 for DIGISTEEL 425S and 505S TEST PROCEDURE 1. Remove main input power to the and 505S DIGISTEEL 425S 2. WARNING ! EMI filter is directly connected to the main line, be sure to have the plug removed from the mains ! 3.
-
Page 31: Input Rectifier Bridge Resistance Test
If for any reason you do not understand the test procedures or are unable to perform the test/repairs safely, contact your Local Lincoln Electric Service Department for electrical troubleshooting assistance before you proceed. - Page 32 INPUT RECTIFIER BRIDGE RESISTANCE TEST (continued) TEST PROCEDURE 1. Remove main input power to the DIGISTEEL 355S, 425S, 505S 2. Perform the Discharge procedure 3. Disconnect the cables 104 and 105 from the POS and NEG rectifier bridge terminals 4. Using the Volt-Ohmmeter (diode test mode) check the Input Rectifier V1 (see Table tests 1)
-
Page 33: Inverter Board Resistance Test
If for any reason you do not understand the test procedures or are unable to perform the test/repairs safely, contact your Local Lincoln Electric Service Department for electrical troubleshooting assistance before you proceed. - Page 34 Q12 – Q11 Q6 – Q5 TEST PROCEDURE 1. Remove main input power to the DIGISTEEL 355S. 2. Perform the Discharge procedure 3. Without disconnect any cables check Inverter IGBT Q2,Q3,Q5,Q6,Q8,Q9,Q11 and Q12, using the Volt- Ohmmeter (diode test mode), following the Table tests 2 4.
- Page 35 INVERTER BOARD RESISTANCE TEST (continued) Y052-1 for DIGISTEEL 425S, 505S 4 IGBT modules located under the inverter printed circuit TEST PROCEDURE 1. Remove main input power to the DIGISTEEL 425S and 505S 2. Perform the Discharge procedure 3. Without disconnect any cables check Inverter IGBT Q1,Q2,Q4,Q5, using the Volt-Ohmmeter (diode test mode), following the Table tests 2 Q1,Q2,Q4,Q5 IGBT...
-
Page 36: Output Rectifier Modules Resistance Test
OUTPUT RECTIFIER MODULES RESISTANCE TEST WARNING Service and repair should be performed by only Lincoln Electric factory trained personnel. Unauthorized repairs performed on this equipment may result in danger to the technician or machine operator and will invalidate your factory warranty. For your safety and to avoid electrical shock, please observe all safety notes and precautions detailed throughout this manual. - Page 37 OUTPUT RECTIFIER MODULES RESISTANCE TEST (continued) Y046-1 for DIGISTEEL 355S TEST PROCEDURE 1. Remove main input power to the DIGISTEEL 355S 2. Perform the Discharge procedure 3. Locate the output diodes module on the right side of the machine 4. Visually check for burned or damaged components. If any components are physically damaged should be replaced.
- Page 38 OUTPUT RECTIFIER MODULES RESISTANCE TEST (continued) Y059-1 for DIGISTEEL 425S, 505S TEST PROCEDURE 1. Remove main input power to the DIGISTEEL 425S, 505S 2. Perform the Discharge procedure 3. Locate the output diodes module on the right side of the machine 4.
-
Page 39: Emi Filter Board Voltage Test
If for any reason you do not understand the test procedures or are unable to perform the test/repairs safely, contact your Local Lincoln Electric Service Department for electrical troubleshooting assistance before you proceed. - Page 40 1. Remove main input power to the DIGISTEEL 355S. 2. Follow the case removal procedure available in this Service Manual 3. Apply 400 Vac +/- 10% to the DIGISTEEL 355S. 4. WARNING! EMI filter is connected before the machine ON/OFF switch ! 5.
- Page 41 EMI FILTER BOARD VOLTAGE TEST (continued) Y056-1 for DIGISTEEL 425S, 505S TEST PROCEDURE Use always electrically insulate gloves during this test procedure 7. Remove main input power to the DIGISTEEL 425S, 505S. 8. Follow the case removal procedure available in this Service Manual 9.
-
Page 42: Voltage Supply Board Test
If for any reason you do not understand the test procedures or are unable to perform the test/repairs safely, contact your Local Lincoln Electric Service Department for electrical troubleshooting assistance before you proceed. - Page 43 1. Remove main input power to the DIGISTEEL 355S, 425S, 505S. 2. Follow the case removal procedure available in this Service Manual 3. Apply 400 Vac +/- 10% to the DIGISTEEL 355S, 425S, 505S. 4. Turn the machine mains switch to ON position 5.
-
Page 44: Control Board Voltage Test
If for any reason you do not understand the test procedures or are unable to perform the test/repairs safely, contact your Local Lincoln Electric Service Department for electrical troubleshooting assistance before you proceed. - Page 45 1. Remove main input power to the DIGISTEEL 355S, 425S, 505S. 2. Follow the case removal procedure available in this Service Manual 3. Apply 400 Vac +/- 10% to the DIGISTEEL 355S, 425S, 505S. 4. Turn the machine mains switch to ON position...
-
Page 46: Inverter Board Voltage Test
If for any reason you do not understand the test procedures or are unable to perform the test/repairs safely, contact your Local Lincoln Electric Service Department for electrical troubleshooting assistance before you proceed. - Page 47 1. Remove main input power to the DIGISTEEL 355S. 2. Follow the case removal procedure available in this Service Manual 3. Apply 400 Vac +/- 10% to the DIGISTEEL 355S. 4. Turn the machine mains switch to ON position 5. Follow the below tables tests...
- Page 48 INVERTER BOARD TEST (continued) Y052-1 for DIGISTEEL 425S, 505S JC22 TEST PROCEDURE Use always electrically insulate gloves during this test procedure 6. Remove main input power to the DIGISTEEL 425S, 505S. 7. Follow the case removal procedure available in this Service Manual 8.
-
Page 49: Disassembly Operations
Screwdriver type PH02 Torx T25 wrench 1. Remove main input power to the DIGISTEEL 355S, 425S, 505S 2. Open the left side panel of the machine following the case cover removal procedure. 3. WARNING! EMI filter is connected before the machine ON/OFF switch! Be sure to have disconnected the machine plug from the power supply. - Page 50 - Dow Corning 340 Heat Sink Compound - Torque wrench - PH02 screw driver 1. Remove main input power to the DIGISTEEL 355S, 425S, 505S. 2. Open the left side panel of the machine following the case cover removal procedure. 3. Perform the discharge procedure.
- Page 51 Necessary tools: - 7mm nut driver - PH02 screwdriver 1. Remove main input power to the DIGISTEEL 355S. 2. Open the left side panel of the machine following the case cover removal procedure. 3. Perform the Discharge procedure 4. Locate the inverter board. See Figure1.
- Page 52 DISASSEMBLY OPERATIONS INVERTER BOARD REMOVAL AND REPLACEMENT PROCEDURE Y052-1 for DIGISTEEL 425S, 505S JC21 & JC22 POS & NEG J25 & TA1 Figure 1 Figure 1a REMOVAL PROCEDURE Necessary tools: - Torx T25 - PH02 screwdriver 1. Remove main input power to the DIGISTEEL 425S, 505S. 2.
- Page 53 REMOVAL PROCEDURE Necessary tools: - PH02 screwdriver 1. Remove main input power to the DIGISTEEL 355S, 425S, 505S. 2. Open the left side panel of the machine following the case cover removal procedure. 3. Perform the Discharge procedure 4. Locate the EMI filter board. See Figure1.
- Page 54 REMOVAL PROCEDURE Necessary tools: - PH02 screwdriver 1. Remove main input power to the DIGISTEEL 355S, 425S, 505S. 2. Open the left side panel of the machine following the case cover removal procedure. 3. Perform the Discharge procedure 4. Locate the Voltage Supply board. See Figure1.
- Page 55 REMOVAL PROCEDURE Necessary tools: - PH02 screwdriver 1. Remove main input power to the DIGISTEEL 355S, 425S, 505S. 2. Open the left side panel of the machine following the case cover removal procedure. 3. Perform the Discharge procedure 4. Locate the Control board. See Figure1.
- Page 56 Necessary tools: - T25 Torx wrench - 13 mm wrench 1. Remove main input power to the DIGISTEEL 355S. 2. Open the right side panel of the machine following the case cover removal procedure. 3. Perform the Discharge procedure 4. Locate the Output Rectifier assembly. See Figure1.
- Page 57 DISASSEMBLY OPERATIONS OUTPUT BRIDGE ASSEMBLY REMOVAL AND REPLACEMENT PROCEDURE for DIGISTEEL 425S, 505S Figure 1 Figure 1a REMOVAL PROCEDURE Necessary tools: - T25 Torx wrench - 13 mm wrench 1. Remove main input power to the DIGISTEEL 425S, 505S. 2. Open the right side panel of the machine following the case cover removal procedure. 3.
-
Page 58: Retest After Repair
Should a machine under test be rejected for any reason requiring the removal of any mechanical part that could affect the machine’s electrical characteristics, or if any electrical components are repaired or replaced, the machine must be retested. Machine input and output DIGISTEEL 355S, 425S, 505S Model Input Voltage Input Current (A) -
Page 59: Calibration Procedure
CALIBRATION PROCEDURE This calibration has to be performed using the Feeder, either WF-52D or WF-56D, connected to the machine. Prepare the external reference ammeter (A) and voltmeter (V). Connect a load to output with A and V. Enter to Service Mode: on the feeder, push the right button (WF 52D) or right encoder (WF 56D) and switch machine on. -
Page 60: Electrical Schematics
ELECTRICAL SCHEMATICS Block Diagram: DIGISTEEL 355S... - Page 61 ELECTRICAL SCHEMATICS Block Diagram: DIGISTEEL 425S and 505S...
- Page 62 NOTE...
Need help?
Do you have a question about the DIGISTEEL 355S and is the answer not in the manual?
Questions and answers