
Related Manuals for Ecoplus SWBB-8.5H-B/P


Summary of Contents for Ecoplus SWBB-8.5H-B/P
- Page 1 AIR TO WATER CHILLER HEAT PUMP O P E R A T I O N & I N S T R U C T I O N M A N U A L MODEL: SWBB-8.5H-B/P SWBB-13.5H-B/P SWBB-13.5H-B/P-S SWBB-19.5H-B/P-S...
-
Page 2: Table Of Contents
CONTENTS ................ 1.To our customers ..............2.Product Introducing ................. 3.Specification 1)Technical data ............... 2)Casing size ................................4.Usage 1)Controller introduction ........................2)Wire Controller Operation ............... 3)Malfunction data ................Wiring diagram ..............Installation instructions ................1)Unit installation ..............2)Pipeline connecting ................. -
Page 3: To Our Customers
1.To our customers Dear Sir: In order to use this machine safely, please read this INTRUCTION MANUAL carefully before using and installation. Heat pump water heater is a professional machine, it may cause damage or hazard when wrong installed, it should be installed by a competent person in accordance with the relevant standards for the country of use. -
Page 4: Product Introducing
2.Product Introducing Product Introducing Safe and Reliable Unlike traditional electric water heater, heat pump water heater do not directly generate heat by electricity , it use less electricity to move heat from one place to another , electric circuit is separated from water circuit ,which is also not easy for electric shock, inflammable , explosion and poisoning ! Safer and more reliable! Highly efficient &... -
Page 5: Specification
3.Specification 1) Technical data SWBB-13.5H-B/P-S SWBB-8.5H-B/P SWBB-13.5H-B/P SWBB-19.5H-B/P-S Unit Model 13.0 13.0 18.0 Cooling Capacity 45000 28000 45000 62000 BTU/h 13.5 13.5 19.5 Heating Capacity 46000 29000 46000 67000 BTU/h cooling power Input Heating power Input 2.34 6.0/6.2 12.9/11.2 19.5/17.6 8.7/8.7... -
Page 6: Casing Size
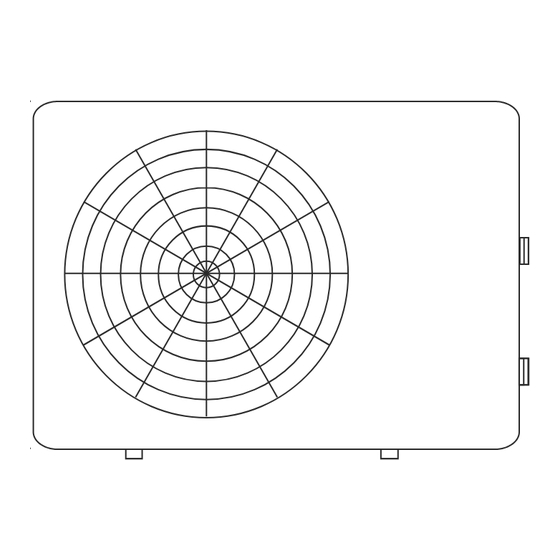
3.Specification 2) Casing size Model: SWBB-8.5H-B/P 1115 Model: SWBB-13.5H-B/P,SWBB-13.5H-B/P-S,SWBB-19.5H-B/P-S Electric wire hole Water outlet (1 inch) Top view Water inlet (1 inch) 1115 Front view Drainage (3/4 inch) -
Page 7: Usage
4.Usage 1) Controller introduction Cooling mode Heating mode Tank outlet temp Set point temp First timer Clock Timer on Timer off Timer on/ off sign Second timer MODE ON/OFF UP/DOWN TIMER 2) Wire Controller Operation Press button to turn on or turn off the unit. Press button to choose cooling or heating mode. - Page 8 4.Usage Press button once, to enter clock setting. Under stand by/start-up state, press button, when the place which shows hour is flashing, press to adjust the hour; press button again, when the place which shows minute is flashing, press to adjust the minute, then press button again, confirm the time setting.
-
Page 9: Malfunction Data
4.Usage Setting about S1,S2 & S3 switch S1 Switch---Second set point S2 Switch---Long distance demand for heating S3 Switch---Long distance demand for cooling Please refer to the wiring diagram for the location of above S1, S2 & S3 switch. 1)Heat pump turns on when S2 or S3 switch has well connected. While S2 or S3 has connected, suddenly press the off button on the LCD controller. -
Page 10: Wiring Diagram
5.Wiring diagram Applicable model: SWBB-8.5 H-B/P SWBB-13.5H-B/P AIR TO WATER CHILLER HEAT PUMP WIRING DIAGRAM Compressor Fan Motor YLW/GRN Water pump CONTACTOR 2 4-way Valve High Press Switch OUT1 OUT2 OUT3 OUT4 OUT5 OUT6 CN11 Low Press Switch Water flow Switch Contactor 1 Tank temp sensor Ambient temp sensor... -
Page 11: Installation Instructions
6.Installation instructions 1. Unit installation (1).Installation location Host unit Should be installed in a larger & well-ventilated place. 1 Installation location should ensure unhindered access outlet (inlet & outlet shown as below). 1 Install gutter or set up positions near the outfall, to facilitate the drainage. 1 The installation base or bracket should be steady, to ensure the smooth operation of running units. -
Page 12: Project Example
7.Installation instructions 2). Pipeline connecting Installation notes: Water drain pipes, overflow pipes should be installed next to the drainage inlets to facilitate drainage, vent valve should be installed on vent pipes. 1 Repair valve should be installed in front of the electromagnetic valve on the pipeline system, which is convenient for future repair. -
Page 13: Running Test And Operation
7.Running Test and operation High water level Low water level User Water Tank Constant Temp Controller Extra electric thermal controller Cycling pump (Inside) Discharge pipe Single valve Constant temp controller water flow meter Constant Temp Controller temp sensing controller inducting valve pause valve Y type filter Instant water supply system wiring... -
Page 14: Running Test
7.Installation instructions 2).Running test This running test must be performed by professional staff! 1 Overall test can be run if the entire system inspection is conformed to regulations. 1 Connected to power, start the heat pump, host unit delays three minutes then auto- start. -
Page 15: Maintenance
8.Maintenance Heat pump water heater is a high automatic equipment, please perform regular inspection termly. If the unit can be long-term and efficiently maintenance, the operating reliability and service life will have an unexpected increase. 1.The extra water filters should be cleaned regularly to ensure clean water quality of the system, and to avoid damage caused by dirty water filter blocking.
Need help?
Do you have a question about the SWBB-8.5H-B/P and is the answer not in the manual?
Questions and answers