
Related Manuals for Next generation JS72/E/2013 Series

Summary of Contents for Next generation JS72/E/2013 Series
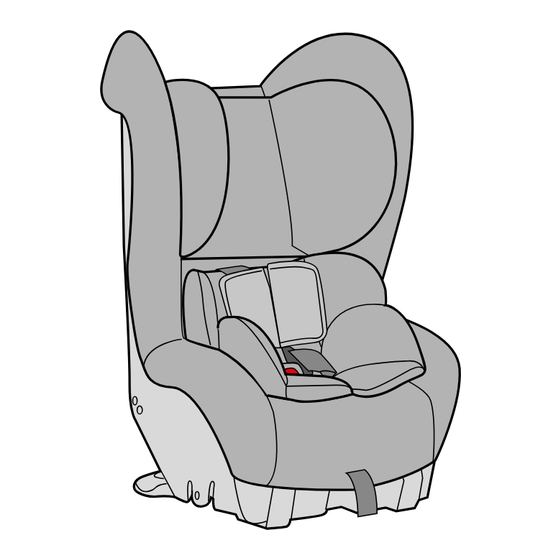
- Page 1 CONVERTIBLE CHILD RESTRAINT INSTRUCTION BOOK Series No.: JS72/E/2013 IMPORTANT: KEEP THIS BOOKLET IN THE PLACE PROVIDED ON THE CHILD RESTRAINT...
- Page 2 SEATBELT QUICK SETUP REARWARD FACING Engage PUSH Pull Pull Press and lengthen Attach...
- Page 3 SEATBELT QUICK SETUP REARWARD FACING Remove Pull Lift Unlock Adjust lock Re-thread Place child attach Remove slack Pull Adjust harness Store...
-
Page 4: Upright Mode
SEATBELT QUICK SETUP FORWARD FACING UPRIGHT MODE RECLINED MODE Feed through belt path Rotate and lock Rotate and lock PUSH Pull Engage Unlock Remove Adjust lock Detach straps... - Page 5 SEATBELT QUICK SETUP FORWARD FACING Pull Re-thread attach Press and lengthen Attach Re attach straps Remove slack Sit and harness child Pull Store Check...
- Page 6 INTRODUCTION To be used only in a rearward-facing position until the infant's shoulders either reach the lower shoulder height marker (approximately 12 months of age) or reach the middle height marker (approximately 2 to 3 years of age). Then to be used in a forward-facing position until the child's shoulders reach the upper shoulder height marker (approximately 4 years of age).
- Page 7 INTRODUCTION Magagamit lamang sa isang nakaharap sa likod na posisyon hanggang sa maabot ng balikat ng sanggol ang alinman sa ibabang marka ng taas ng balikat (humigit-kumulang 12 na buwang edad) o maabot ang panggitnang marka ng taas (humigit-kumulang 2-3 taong edad).
- Page 8 INTRODUCTION Να χρησιμοποιείται μόνο σε θέση στραμμένο προς τα πίσω μέχρι οι ώμοι του βρέφους είτε να φτάνουν στον κάτω δείκτη ύψους ώμου (περίπου 12 μηνών) είτε να φτάνουν στον μεσαίο δείκτη ύψους (περίπου 2 με 3 ετών). Κατόπιν να χρησιμοποιούνται σε θέση που να κοιτάζει...
- Page 9 INTRODUCTION के व ल पीछे की तरफ मु ँ ह किये हु य े स् थ िति मे ं तब तक प् र योग करे ं जबतक या तो शिशु का कन् ध ा कन् ध े के निचले भाग के चिन् ह तक न पहु ँ च जाए...
- Page 10 Carefully read all the instructions for installation in this book. If in doubt about the method of installation, consult Next Generation Nursery Products or agent, or a child restraint fitter or, in New Zealand, to consult the agent for the vehicle.
- Page 11 INDEX PAGE WARNINGS SHOULDER HEIGHT MARKERS & A GROWING CHILD SHOULDER HEIGHT MARKERS SHOULDER HEIGHT LABELS & THE NEXT STEP FOR BABY USE - REAR FACING FEATURES: REARWARD FACING HOW TO SET-UP SUITABLE FOR USE: REARWARD FACING HOW TO USE HOW TO INSTALL HOW TO REMOVE TODDLER USE - FORWARD FACING...
- Page 12 • Fit the restraint firmly to the car seat. • Fit the harness firmly to the child. • A loose restraint or harness is dangerous. • Supervision of children is needed because they may be able to undo the buckles and adjusters. •...
- Page 13 IMPORTANT : • TO BE USED WITH A LAP-SASH OR LAP ONLY SEATBELT IN THE BACK OF MOST CARS WITH FORWARD FACING SEATS. • This child restraint is not approved for use with any connectors that connect to the car's ISOFIX low anchorages.
-
Page 14: Shoulder Height Markers & A Growing Child
BETWEEN THESE MARKERS USE IN REAR FACING MODE BELOW EITHER OF THESE MARKERS Next Generation Nursery Products recommends that you keep your child in a rearward facing restraint for as long as possible until the middle shoulder height marker is reached. - Page 15 SHOULDER HEIGHT MARKERS & A GROWING CHILD Newborn (Rearward facing) Older Child (Rearward facing) Middle Shoulder Lower Shoulder Height Marker B Height Marker C Rearward Facing Turn to forward-facing when the child's shoulders reach the lower shoulder height Toddler Use (Forward Facing) marker or middle shoulder height marker.
-
Page 16: Shoulder Height Markers
At least approximately 12 months of age. Next Generation Nursery Products recommends to maintain rearward facing for as long as possible or until the shoulders reach... - Page 17 SHOULDER HEIGHT MARKERS & THE NEXT STEP Next type of restraint that can be used in the car for your child. When your child has outgrown this seat, you can use: • A convertible booster seat with integrated harness until approximately 4 years old and then as a booster seat with vehicle lap-sash seatbelt or seatbelt and compatible child harness until approx 6 to 8 years of age.
-
Page 18: Features: Rearward Facing
FEATURES: REARWARD FACING BABY USE REARWARD FACING (Harness strap not shown) 1. Padded cover for baby’s comfort (May vary in style) 2. Adjustable headrest 3. Shoulder Pads (if supplied) 4. Harness Tongues and Buckle (Red button) Harness Tongues 5. Stabilising Bar for Rearward Facing 6. - Page 19 FEATURES: REARWARD FACING BABY USE REARWARD FACING BABY USE REARWARD FACING Front of Vehicle 14. Vehicle Anchor Fitting 15. Vehicle lap-sash seatbelt 16. Blue REARWARD FACING BELT PATH label 19. Top Tether Adjustment Strap 17. Top Tether Storage Pocket 20. Adjustable Top Tether Strap 18.
- Page 20 SUITABLE FOR USE: REARWARD-FACING BABY USE REARWARD FACING Continue to use this child restraint in the rear facing mode until the child's shoulders reach the limit of the lower or middle shoulder height marker before turning the seat to face forward. A younger child's neck muscles may be unable to support their head thus the child should remain rear facing until the neck muscles can hold the head steady.
-
Page 21: How To Install
HOW TO INSTALL BABY USE REARWARD FACING PREPARING FOR INSTALLING INTO VEHICLE - REARWARD FACING Fully press Adjuster Button (A) while The restraint is normally packaged in the fully upright forward facing pulling Upper Anchorage Strap (B) mode. If you need to use it rearward facing you must first fully convert to lengthen. - Page 22 HOW TO INSTALL BABY USE REARWARD FACING INSTALLING INTO A VEHICLE WITH SEATBELT. (REARWARD FACING) A. Position restraint rearward facing in the chosen seating position in the car where a child restraint anchor fitting is installed. The restraint should be in contact with the vehicle seatback with the stabilising bar in position and latched.
- Page 23 HOW TO INSTALL BABY USE REARWARD FACING D. Fully lengthen seatbelt and feed between the comfort pad and the inner seat shell through seatbelt slot on each side. The REARWARD slots are labeled in blue- FACING BELT PATH. Feed seatbelt through slots.
- Page 24 HOW TO INSTALL BABY USE REARWARD FACING F. Replace the comfort pad and centre panel flap, ensure the harness buckle is repositioned through the panel, clip any plastic fasteners that retain the cover. For smaller babies replace the insert pad (if supplied). Do not use insert pad if the child's shoulders reach the lower shoulder height marker or the child no longer fits the insert.
- Page 25 HOW TO INSTALL BABY USE REARWARD FACING I. After the baby is fitted in to the harness remove Fully press Adjuster Button (1) while the remaining slack from the adjustable top tether pulling Upper Anchorage Strap (2) strap by pulling adjustment strap. (3) Roll up to lengthen.
- Page 26 HOW TO INSTALL BABY USE REARWARD FACING FITTING SUMMARY Top tether strap slack during harness fitting Hook Attachment Clip to Pull to remove some slack - do the car's anchor fitting. not over tighten when finally Pull sash portion of adjusted with the baby seatbelt to remove slack.
- Page 27 HOW TO INSTALL BABY USE REARWARD FACING IMPORTANT: If using an Extension Strap, positioning the attachment clip above the child may lead to injury in an accident therefore make sure that the attachment clip is not positioned in front of the vehicle seat. Use a shorter extension strap or no extension strap.
- Page 28 HOW TO INSTALL BABY USE REARWARD FACING ANGULAR ADJUSTMENT OF RESTRAINT Some vehicle seats have more rearward slope than others. If the angle of the seat causes the baby to be too upright for comfort, the angle may be altered by placing a firm packing between the seat and the underside of the base.
-
Page 29: How To Set Up
HOW TO SET-UP BABY USE REARWARD FACING INSTALLATION AND USE OF RESTRAINT Correct fitment of the harness is very important as it restrains the baby in the seat. The headrest must be in the correct position, the harness must fit firmly around the upper torso of the baby and be positioned so as to leave the baby's arms and legs free. -
Page 30: Rearward Facing
HOW TO SET-UP BABY USE REARWARD FACING REARWARD FACING ADJUSTING SHOULDER HARNESS STRAPS HEIGHT Always adjust the harness slot position as the child grows. If your child has reached the middle shoulder height marker then the restraint must be converted to Forward Facing mode (refer to Forward Facing section starting on page 38). - Page 31 HOW TO SET-UP BABY USE REARWARD FACING STEPS IN CHANGING SHOULDER STRAP SLOTS A. Remove the restraint from vehicle. Metal Cross B. At the rear of the restraint, remove one of the harness shoulder straps from Metal Strap Connector by slipping strap through open slot.
-
Page 32: How To Use
HOW TO USE BABY USE REARWARD FACING PLACING CHILD INTO RESTRAINT (REARWARD FACING) When positioning baby into the restraint make sure baby's back is fully supported onto the flat section and the baby's nappy area (bottom) is resting in the bottom curvature as shown. - Page 33 HOW TO USE BABY USE REARWARD FACING E. Place baby into child restraint lying on its back so that the buckle is between the baby’s legs. Ensure that baby’s arms and legs are free. Make sure baby is dressed to allow the Harness Buckle to be pulled up between baby’s legs e.g.
- Page 34 HOW TO USE BABY USE REARWARD FACING F. Fit either harness tongue into the harness buckle followed by the other tongue. A click is heard when the last tongue is fully engaged. Should the second tongue not engage - press the red button and reinsert the tongues. Ensure secure engagement by pulling harness straps.
- Page 35 HOW TO USE BABY USE REARWARD FACING H. Adjust the top tether strap by pulling adjustment strap to remove slack only. Ensure the strap is not so tight as to lift the seat or deform the headrest. Pull Adjustment Strap to remove slack Roll up excess strap and store in the pocket...
- Page 36 Make sure that nothing is obstructing harness straps and that child’s arms and legs are free with the straps in the correct location - see previous page. Do not use the restraint if straps do not tighten, contact Next Generation Nursery Products Pty Ltd Customer Service 1300 363 358.
-
Page 37: How To Remove
HOW TO REMOVE BABY USE REARWARD FACING REMOVE RESTRAINT FROM Fully press Adjuster Button (A) while pulling top tether strap (B) to lengthen. VEHICLE FITTED WITH SEATBELT AND TOP TETHER A. Disengage the vehicle seatbelt buckle. Remove seatbelt from the restraint belt paths. B. -
Page 38: Features: Forward Facing
FEATURES: FORWARD FACING TODDLER USE - FORWARD FACING (Harness strap not shown) 1. Padded cover for child’s comfort (May vary in style) 2. Adjustable headrest 3. Shoulder Pads (if supplied) 4. Harness Tongues and Buckle (Red button) Harness Tongues 5. Harness Adjustment Strap 6. - Page 39 FEATURES: FORWARD FACING TODDLER USE - FORWARD FACING Front of Vehicle FORWARD FACING BELT PATH 12. Yellow labels 13. Vehicle Lap-sash seatbelt 14. Car's Upper Anchorage Fitting 15. Attachment Clip 16. Top Tether Strap Adjuster 17. Top Tether Strap (shown with loose end stored in pocket).
- Page 40 SUITABLE FOR USE: FORWARD FACING TODDLER USE - FORWARD FACING Once the child's shoulders reach the lower or middle shoulder height marker, the seat may be changed to the forward-facing mode and used until the child's shoulders reach the upper shoulder height marker. The child should not sit forward-facing until their neck muscles are able to support their head.
- Page 41 HOW TO SET-UP TODDLER USE - FORWARD FACING UPRIGHT OR RECLINE POSITION Pull out to unlock To convert the restraint from Rearward Facing mode to Forward Facing mode: A. Remove the seat from the vehicle by disengaging the seatbelt and Top Tether.
- Page 42 HOW TO SET-UP TODDLER USE - FORWARD FACING PREPARING FOR INSTALLING INTO VEHICLE - FORWARD FACING The restraint is normally supplied in the fully upright forward Fully press Adjuster Button (A) while facing mode. If you need to use it rearward facing, refer to pulling Upper Anchorage Strap (B) rearward facing mode from page 18.
- Page 43 HOW TO SET-UP TODDLER USE - FORWARD FACING INSTALLING INTO VEHICLE - FORWARD FACING WITH SEATBELT A. Position the restraint in the car facing forward in the chosen seating position. There should be a child restraint anchorage fitting directly behind this seating position.
- Page 44 HOW TO INSTALL TODDLER USE - FORWARD FACING Attachment Clip F. Fit the top tether attachment clip to the car's anchor fitting as shown. Make sure to remove as many twists as possible from the Top Tether. Car's Anchor Fitting G.
- Page 45 HOW TO INSTALL TODDLER USE - FORWARD FACING FITTING SUMMARY Attachment Clip Car's Upper Front of Vehicle Anchorage Fitting Pull to remove slack, then store FORWARD-FACING the strap as shown Top Tether BELT PATH; Top tether strap Adjustment Strap marked in yellow. Top tether storage Pull to...
- Page 46 HOW TO USE TODDLER USE - FORWARD FACING HOW TO USE THE HEADREST First remove both harness straps (refer to page 48). Then rotate lever down to release headrest clamp (A). Slide the headrest up or down to suit the height of your child. In forward facing mode, move the headrest so that the bottom slots in the headrest line up with the top of the child's shoulders.
-
Page 47: Forward Facing
HOW TO USE TODDLER USE - FORWARD FACING FORWARD FACING ADJUSTING SHOULDER HARNESS STRAP HEIGHT Correct fitment of the harness is very important as it restrains the child in the restraint. The headrest must be in the correct position and the harness must fit firmly around upper torso of the child and be positioned so as to leave the child's arms and legs free. - Page 48 HOW TO USE TODDLER USE - FORWARD FACING STEPS IN CHANGING SHOULDER STRAP SLOTS A. Remove the restraint from vehicle, if not already removed. Metal Cross B. At the rear of the restraint, remove one of the harness shoulder straps from Metal Strap Connector by slipping strap through open slot.
- Page 49 HOW TO USE TODDLER USE - FORWARD FACING PLACING CHILD INTO RESTRAINT A. Check that the harness shoulder straps are in the Pull Straps correct position. Refer to page 47 for correct shoulder harness strap height and for setting up the harness.
- Page 50 Do not use the restraint if straps do not tighten, contact Next Generation Nursery Products Pull to remove slack Customer Service. Refer to back cover for contact from the harness details.
- Page 51 HOW TO REMOVE TODDLER USE - FORWARD FACING REMOVING CHILD FROM RESTRAINT A. Push and hold the harness adjustment button while pulling both shoulder harness straps to slacken harness. B. Press the red button on harness buckle, both harness tongues will be released. Insert tongues into tongue holders to hold straps away from the child.
-
Page 52: How To Install In An Aircraft
HOW TO INSTALL IN AN AIRCRAFT AIRCRAFT USE THIS RESTRAINT IS SUITABLE FOR USE ON AN AIRCRAFT WHEN INSTALLED AS DIRECTED. HOW TO INSTALL USING AIRCRAFT LAP BELT The child restraint must be used in accordance with the aircraft procedures, and any directions from the aircraft operator, pilot or crew. - Page 53 HOW TO INSTALL IN AN AIRCRAFT AIRCRAFT USE TO FIT THE CHILD RESTRAINT TO Store tether clip on elastic loop THE AIRCRAFT SEAT FORWARD FACING: A. Set the recline position to fully upright. Position the restraint in forward-facing mode and align centrally with the chosen seating position.
- Page 54 HOW TO INSTALL IN AN AIRCRAFT AIRCRAFT USE BELT PATH - FORWARD FACING C. Fully lengthen seatbelt. Thread the seatbelt into seatbelt path marker (lower yellow marker) as shown, ensuring that the seatbelt is behind the harness straps and below the hook as shown, on each side.
- Page 55 HOW TO INSTALL IN AN AIRCRAFT AIRCRAFT USE Aircraft label is located on the back of the restraint and demonstrates suitability for use on an aircraft.
-
Page 56: Care And Maintenance
D. Ensure the buckle is free of fluff, liquid or other matter that may enter the buckle slots. Clean the buckle if it is sluggish to engage. See next page. E. If any part of the restraint is cracked or broken, seek repair immediately - contact Next Generation Nursery Products Customer Service 1300 363 358 CLEANING CAR SEAT Use only mild soap and water to clean all metal and plastic parts of the restraint. -
Page 57: Buckle Operation
D. If you still cannot hear a strong audible click after engaging the second harness tongue, then repeat cleaning several times. If the harness buckle cannot be returned to its original working condition then contact Next Generation Nursery Products. Click E. Refit the harness buckle to the restraint with the red button facing out &... -
Page 58: To Remove Cover
CARE & MAINTENANCE COVER (STYLE MAY VARY) The restraint has a flame retardant cover which is removable for cleaning. Cleaning instructions are on the care label attached to the cover. If fluffy cover is fitted then washing cover prior to use will remove excess fluff. Drying the insert pad will take additional time as the impact foam will absorb moisture. - Page 59 CARE & MAINTENANCE TO REPLACE COVER 1. Align and fit trim cover over restraint starting at top. Attach elastic loops 2. Refit fabric overhang 3. Feed shoulder harness straps through each lap strap slot. 4. Feed crotch buckle through slot in cover. Feed cover over harness adjuster button and fit the cover at the lower part of the seat.
- Page 60 CARE & MAINTENANCE VERY IMPORTANT: Only replace the cover with Next Generation Nursery Products supplied replacement cover with identical shoulder height markers or a replacement cover meeting AS/NZS 8005.
-
Page 61: Accessories & Features
AS/NZS 8005 and is stated as suitable for use with this child restraint. The following instructions apply to accessories that may be supplied with this restraint at point of purchase. If not, a variety of Next Generation Nursery Products accessories are available from various retailers of Next Generation Nursery Products. - Page 62 ACCESSORIES & FEATURES Short Seat Protector SEAT PROTECTOR (if supplied) (where supplied) Place ribbed or pocket end of the seat protector on edge of car seat, smooth back toward seat join ('A') and fit in any excess into the join of the car's seat ('A'), or for the long seat protector lay up the back of the vehicle seat.
- Page 63 ACCESSORIES & FEATURES CUP HOLDER (If supplied) The cup holder can be fitted onto either side of the Raise the cover seat. here to expose A. Raise the cover and locate fixing slots in shell. fixing slots B. Clip cup holder into position, then re-fit cover. Ensure the cup holder and its contents cannot be crushed by the car door.
-
Page 64: Installation Of Car Anchor Fitting
INSTALLATION OF CAR ANCHOR FITTING Consult the vehicle owner’s handbook for location of anchorage fittings or anchorage points and the possible use of spacers. Some vehicles may have an anchorage fitted by the vehicle manufacturer. If anchorage points cannot be found refer to car manufacturer or local child restraint fitting station or traffic authority for optimum position of anchorage point and the use of spacers. - Page 65 INSTALLATION OF CAR ANCHOR FITTING Extension Strap distance to be measured. Length 300mm (Use Britax Safe-n-Sound part 0035). Front of Vehicle Length 600mm (Use Britax Safe-n-Sound part 0036). Available from all major child restraint retailers. 45° Measure distance from restraint upper anchorage attachment clip to the car anchor fitting.
- Page 66 INSTALLATION OF CAR ANCHOR FITTING IF THE CAR IS FITTED WITH CHILD RESTRAINT UPPER ANCHORAGE FITTING UPPER ANCHORAGE POINT Fig.1. Attachment Bolt Locate the upper anchorage point behind the rear seating Lock washer position. (Consult the car owners handbook for the location of the upper anchorage point).
- Page 67 INSTALLATION OF CAR ANCHOR FITTING ONLY USE A 5/16 UNC GRADE 5 BOLT. IF THE BOLT IS NOT THE NOTE: Marking on CORRECT LENGTH THE CAR MANUFACTURER’S HAND BOOK CAN the top of a Grade 5 PROVIDE ADVICE ON THE CORRECT LENGTH BOLT. Bolt.
-
Page 68: Travelling Tips
TRAVELLING TIPS SAFETY Never hold a baby in arms when riding in a motor vehicle. In this position the baby could be thrown against the dashboard, windscreen or other occupant and suffer serious injury or death. When riding in a motor vehicle never nurse a baby and use the same seat belt for both of you. In this position the baby or child could be crushed. -
Page 69: In Case Of Crash
IN CASE OF CRASH If your restraint has been involved in a severe crash, you should destroy the restraint even if no damage is visible. Some insurance companies offer vehicle insurance which covers or partially covers the replacement of your child restraint. Contact your insurance company for further details. Your insurance company may require you to keep the child restraint for assessment, but do not use the child restraint after a severe crash. - Page 70 NOTES...
- Page 71 NOTES...
-
Page 72: Customer Service
We reserve the right to alter this product without notice in our constant endeavor for improvement. The Hipod trademark and model names are the property of Next Generation Nursery Products Pty Ltd. This product is covered by Australian and Overseas patents and applications.
Need help?
Do you have a question about the JS72/E/2013 Series and is the answer not in the manual?
Questions and answers