Advertisement
Quick Links
Advertisement

Subscribe to Our Youtube Channel
Related Manuals for Snow Peak SD-828


Summary of Contents for Snow Peak SD-828
- Page 1 取扱説明書 : Ver 1.00 SD-828 ウィンゼル2...
- Page 2 この度は、 スノーピーク製品をお買い上げいただき、 誠にありがと う ございます。 本製品は、 キャ ンプ用テン トです。 安全にご使用いただ く ためにも下記の取扱説明書をよ く読んでから ご使用く だ さい。 また、 読み終わった後も大切 に保管して く ださい。 説明内容で理解出来ない点及び製品に不具合が確認された際には直ちに使用を中止し ご購入いただき ま した販売店様も し く は弊社ユーザーサービスまでお問い合わせ く だ さい。 セッ ト内容 セッ ト内容に設営時必要なペグは付属しません。 別途計14本を用意するこ とが必要です。 全長30cm以上、 も し く...
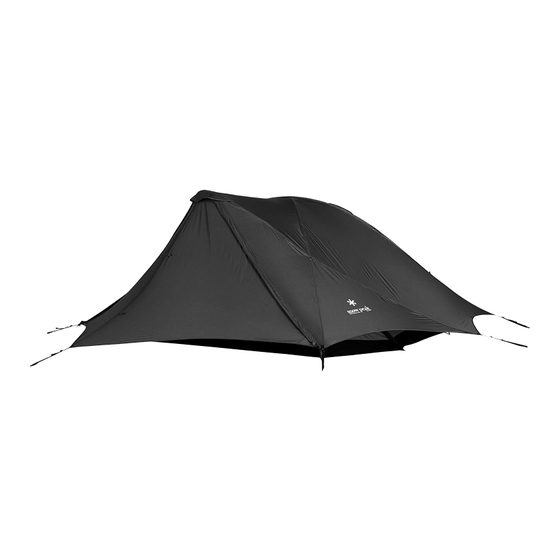
- Page 3 フライシート (跳ね上げ) フライシート (背面) ベンチレー シ ョ ン 拡張シー ト 後室 ドア ゴムバン ド インナーテント クロス フ レーム用ス リ ー ブ クロス フ レーム メ ッ シュパネル プラスチッ ク フ ッ ク ボ トム グロ メ ッ ト & ペグダウ ンテープ 前室フ...
- Page 4 警告 取扱いを誤った場合、 使用者が死亡または重傷を負う可能性がある こ と を示します。 ●ご使用の前に、 本製品を点検し各部に異常がないこ と を確認して く だ さ い。 異常が発見さ れた場合 は、 直ちに使用を中止 しお買い求めいただいた販売店様、 または弊社ユーザーサービス係に点検ま たは修理を依頼 して く だ さ い。 ●気象条件には常に細心の注意を払い、 風の強いと きや悪天候が予想さ れる と きは速やかにキ ャ ン プを中止 して安全な場所へ避難 して く だ さ い。 ●高温に加熱さ...
- Page 5 設営の手順 設営 ・ 撤収は以下の説明に従い、 繰り返し練習し、 実際のキ ャ ンプに備えて く だ さ い。 また、 付属品が全て揃ってい るか、 前もってご確認く だ さ い。 無理な設営 ・ 撤収は本体やポールの破損や事故の原因にな り ます。 本書を よ く お読 みにな り ご使用く だ さ い。 イ ンナーテン ト を平ら な場所に広げます。 ※テン ト本体の出入り口は2か所あ り ます。 ジッパー レス ドア パネルのある側が前室となり、...
- Page 6 前室フ レームを イ ンナーテン ト 両側のス リ ー ブに通 し、 ゆっ く り と送り込みます。 ス リ ー ブに 通 し終えた ら、 前室フ レーム の先端を グロ メ ッ トに差 し込 みます。 反対側の先端も同 様に差 し込みます。 各コーナーの ペグダウ ンテープ 本体に付いている プラスチッ ク フ ッ ク を それぞれ のフ...
- Page 7 前後ペグダウ ン し ま した ら、 ⑩と同様でベル トの長さ を調整 し、 フライ シー ト 残りの 6 ヶ所を番号順にペグダウ ン し ます。 フライ シー トの弛みを取る為に 調節テープを引き、 テンシ ョ ン をかけます。 ② ① ③ ※フライ シー トのペグダウ ン位置はフライ シー トの縫製線の延長線上にな り ます。 縫製線 縫製線 ①...
- Page 8 各ロープを一度緩めた後、 自在の位置でロープの 長さ を調節しながら210㎝ウイ ングポールを立ち上 げ 、 二 又 用9mロープと3 点で自立するように 210cmウイ ングポールの先端を フライ シー ト前室 の内側へ倒 して自立さ せます。 ※ロープの長さ が足りず、 無理にウイ ングポールを 立ち上げるとポールやフライ シー トの破損の原 横か ら見た図 因となり ます。 ロープに多少力が加わる程度に 調節 して く だ さ い。 緩み ロープの自在の位置を調節 し フライ シー トの稜線が 1割程度緩ま...
- Page 9 各コーナーに取り付け られたロープにある自在 の位置を調節 してテンシ ョ ン をかけて く だ さ い。 ※ロープの引き過ぎに注意 して く だ さ い。 強く 引 き過ぎている場合は、 その方向に大きなシワ が発生します。 シワの出るコーナーのロープ を緩めて、 全体のテンショ ンバランスを調整 して く だ さ い。 ※フライ シー トが緩んだ状態やシワが入った状 態で使用する と、 本来の機能が十分に発揮 さ れず、 風を大き く 受けて倒れた り、 雨が流れ ず溜ま...
- Page 10 ドアパネル上部と下部2か所の取り付け金具へ ドアパネル に付いているロープを取り付けて く だ さ い。 取り付け金具 ロープ ドアパネル左側縁を持って右側に引っ張って ドアを開けます。 右方向へ引っ張り ながら イ ンナーテン トに入り ま す。 ドアパネルを放すと ドアが自動的に閉ま り ます。 ※出入り する際に上下のロープやゴムロープに引っ掛か ら ないよ う十分ご注意く だ さ い。 ※この ドアパネルは完全に隙間な く 閉めるこ と ができ ません。 ドアパネルと イ ンナーテン ト間の隙間を気になる 方は裏側のメ...
- Page 11 撤収時の注意事項 ●十分に乾燥してから収納して く だ さい。 ●撤収は設営と逆の手順で行って く ださい。 イ ンナーテン ト内、 フライ シー ト内にものが入っていないこ と、 すべて のジッパーが閉じ られているこ と を確認してから作業を開始して く だ さい。 ●強風時は、 風が収まるのを待ってから撤収して く だ さい。 ●フ レームを グロメ ッ トから外す際にフ レームがハネ返るおそれがあ り ます。 フ レームが真っすぐになる まで手を離さ ないで く だ さい。 ●フ...
- Page 12 1.保証対象の場合 : 往復運賃並びに修理費は弊社にて負担いた し ま す。 2.保証対象以外の場合 : 往復運賃並びに修理費は、 お客様のご負担と さ せていただ き ま す。 スペック 対応人数 2名 SD-828 ウ ィ ンゼル 2 ○ 材質 : フライ シー ト/75Dポリ エステルタ フタ ・ PUコーティ ング耐水 ○ 圧3,000mmミ ニマム ・ テフロン撥水加工 ・ UVカ ッ ト加工、 イ ンナー...
- Page 13 Product Manual : Ver 1.00 SD-828 Winzeil 2...
- Page 14 Thank you for purchasing a Snow Peak product. This product is a tent for camping. For safety, read the following instruction manual before use. Please keep it safe for future reference. Finally, if you find anything that you do not understand in the description or any problems with the product, please stop use immediately and contact the retailer or Snow Peak Customer Service.
- Page 15 Fly sheet (flip-up) Fly sheet (back) Ventilation Expansion sheet Rubber band Back room door Inner tent Cross frame sleeve Cross frame Mesh panel Plastic hook Bottom Grommet and peg-down tape Vestibule frame sleeve Zipperless door panel Grommet and peg-down tape Structure of zipperless door panel Ring Rubber rope...
- Page 16 ●Before using the product, check each part for abnormalities. If there are abnormalities, take the product to the dealer or Snow Peak Customer Service for inspection or repair. ●Pay close attention to the weather. If extreme weather is in the forecast, pack up camp and evacuate to a safe place.
- Page 17 Instructions for Use Follow the instructions below to set up and disassemble. Practice set up before camping and check to ensure all the accessories are functioning. Excessive setup and tear down may damage the body or poles, potentially resulting in an accident. Please read this manual carefully before use. Spread the inner tent on a flat surface.
- Page 18 Slowly pass the vestibule frame through the sleeve on both sides of the inner tent. After passing the frame through the sleeve, insert one of the tips of the vestibule frame into the grommet. Insert the tip on the other side the same way.
- Page 19 After pegging down the front and back sides, adjust the length of the belts and peg down the remaining six locations of the fly sheet in the same way as ⑩ in the correct order. Pull the adjustment tape to remove any slacks in the fly sheet and apply tension. ②...
- Page 20 After slacking the ropes, erect the 210 cm wing pole while adjusting the length of each rope at the tensioner. Lean the tip of the 210 cm wing pole toward the inside of the vestibule so that the pole stands on its own, supported by the forked 9 m rope.
- Page 21 Adjust the position of the tensioner of the rope attached to each corner to apply tension. * Do not excessively pull the ropes. If any rope is pulled too strongly, a large wrinkle will form in that direction. Loosen the rope at the corner where a wrinkle is present to adjust the tension balance of the entire setup.
- Page 22 Attach the rope on the door panel to the two attachment fittings at the top and bottom of the door panel. Attachment fitting Rope Hold the left edge of the door panel, and then pull towards the right to open the door. Enter the inner tent while pulling the door panel.
- Page 23 Precautions for disassembly ●Please make sure that the product is sufficiently dry before storing it. ●For taking the setup apart, perform the procedure in reverse order. Before starting work, make sure that there is nothing left in the inner tent or fly sheet and that all zippers are closed. ●If the wind is strong, wait for it to subside before disassembling the shelter.
- Page 24 In other cases, Snow Peak will repair the product for an appropriate fee. The decision to repair or replace the product will be at our discretion. Snow Peak will not repair the product for any damage that occurred due to the following:1.Material deterioration caused by age.
Need help?
Do you have a question about the SD-828 and is the answer not in the manual?
Questions and answers