
Related Manuals for Snow Peak SD-651


Summary of Contents for Snow Peak SD-651
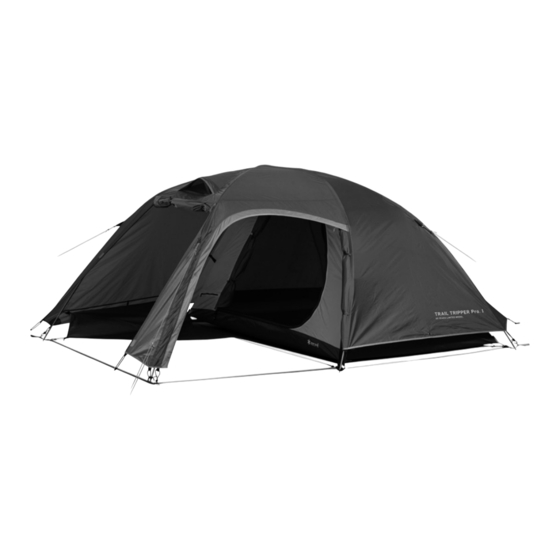
- Page 1 取扱説明書 Ver 1.00 SD-651 / SD-651-IV 65周年記念 トレイルトリッパーPro.1 / アイボリー 65周年記念 ト レイル ト リ ッパーPro.1 65周年記念 ト レイル ト リ ッパーPro.1アイボ リ ー...
- Page 2 この度は、 スノ ーピーク製品をお買い上げいただき、 誠にあり がと う ございます。 本製品は、 キャンプ用のテン トで す。 安全にご使用いただく ためにも下記の取扱説明書をよ く 読んでから ご使用く ださい。 また、 読み終わった後も 大切に保管してく ださい。 説明内容で理解出来ない点及び製品に不具合が確認された際には直ちに使用を中 止しご購入いただき ま した販売店様も し く は弊社ユーザーサービスまでお問い合わせく ださい。 セッ ト内容 ※ご使用の前に、 付属品が全て揃っているかを確認 して く だ さ い。 本体クロスフ レーム(×1) サイ...
- Page 3 安全上の注意事項 ご使用の前によ く 読んで予測さ れる事故を回避 し安全にご使用く だ さ い。 危険 明らかに生命にかかわる重大な事故が予測される行為を示します。 ●このテン トの素材は難燃性ではあ り ません。 テン ト内では燃焼式のラ ンタ ンやコンロ、 ヒーターな どの 熱源や、 マ ッ チ、 ローソク、 ライ ター、 タバコな どの裸火や炎は絶対に使用しないで く だ さ い。 限られた 空間での火気の使用は火災や酸欠、 一酸化中毒な どの恐れがあ り大変危険です。 ●テン ト内で燃料を保管 した り、 燃料を補給するな ど、 引火性のある ものを持ち込ま ないで く だ さ い。 警告...
- Page 4 各部の名称 ベンチレーター [フライ シー ト] 交点ハブ フロ ン ト ドアパネル [フ レーム/イ ンナー本体] イ ンナーテン ト 本体クロス フ レーム ゴムループ サイ ド ドア ボ トム サイ ドフ レーム ビルディ ングテープ グラ ン ド シー ト ペグループ 自在付ロープのフライシートへの取り付け、 ペグダウンの位置 2m ロープ 2m...
- Page 5 使用前の準備 1.シームグリップ剤による目止め ※本品に シームグ リ ッ プ剤は付属 していません。 ご使用の際は、 市販のシームグ リ ッ プ剤をお買い求め く だ さ い。 縫製部 分には シームテープによ る防水処理が施 してあ り ま すが、 フ ラ イ シー トのベンチ レー タ−部やフ ァ スナー部分、 ボ トム シー トの一部は、 製造の都合上ま たは構造上シームテープが施せない部分があ り ます。 通常の雨な ど は十分対応で き ます が、...
- Page 6 ビルディ ングテープに弛みが生じ ないよ う に、 ペグダウ ンループにペグ を通 し、 打ち込みます。 〔 図C〕 図C ※形状に歪みがないか確認して く だ さい。 フ レームを差し込んだ後にペグダウン位置を調整する と フ レームが 外れて跳ね返る こ と が有り危険です。 本体クロス フ レーム、 サイ ドフ レームA、 Bを伸ば し、 接続部分を しっかり連結 し ます。 ※フ レームの連結部分にすき間ができ ないよ う に、 しっかり と差 し込んで く だ さ い。 本体クロス...
- Page 7 サイ ドフ レームを取り付けます。 〔 図E〕 〈 b〜cの作業は片方ずつ行います。 〉 a) サイ ドフ レームAの両端を クロス フ レーム中間にある交点ハブに差 し込みます。 〔 図F〕 b) サイ ドフ レームBを交点ハブに取り付けたサイ ドフ レームAに連結 し ます。 〔 図G〕 c) サイ ドフ レームBの端部を、 前室/後室の中間にある ビルディ ングテープエン ドのグロ メ ッ トに差 し込みます。 〔図H〕...
- Page 8 ※下記7) →8) →9) の設営手順は、 9) →7) →8) の手順で も可能です。 収納時も同様にイ ンナーテン ト、 フラ イ シー ト ど ち ら か らの収納も可能です。 前室 ・ 後室の方向を確認 し フライ シー ト を被せます。 フライ シー トの内側についている、 ずれ防止のベルクロテープを フ レームに巻き付けて固定 し ます。 〔 図K〕 図 K 前室...
- Page 9 各張り綱を伸ば し、 ぺグ を打ち込みます。 〔 図P〕 P3の 「自在付ロープのフライ シー トへの取り付け、 ペグダウ ンの位置」 の図のよ う に各自在付ロープを フライ シ ー トに取り付けて引き、 ペグで固定 してか らテンシ ョ ン をかけて く だ さ い。 ※ロープは引き過ぎますと フライ シー トに負担がかかり破損する恐れがあ り ます。 引き過ぎにご注意く だ さ い。 図P 張り綱の自在を引き、...
- Page 10 撤収 ・ 収納時の注意事項 ●十分に乾燥 してか ら収納 して く だ さ い。 ●強風時は、 風が収ま るのを待ってか ら撤収 して く だ さ い。 ●イ ンナールーム を取り付けた場合や、 別のテン ト/タープ等を併用 していた場合は、 必ずイ ンナールームや併用 して いた製品を本体か ら取り はず してか ら撤収をは じめて く だ さ い。 ●テン トの中に何も入っていないこ と、 すべてのパネルや窓部のファスナーが閉ま っている こ と を確認 してか ら撤収を は...
- Page 11 ●樹液が付着 して しま う と きれいに除去する こ とはでき ません。 樹液が垂れそ う な木の下を避けて設営 して く だ さ い。 溶剤な どによ り無理に除去する と生地やコーティ ング を傷めます。 ●次回の使用に備え、 ロープやペグな どの付属品も含め、 上記の通り十分に保守、 点検を して く だ さ い。 ●使用する際にフ レームが折れて しま った場合は、 応急処置と して速やかに付属のリペアパイ プをあて、 ビニール テープで固定するか、...
- Page 12 スペック 材質: フライ シー ト/75Dポリエステルリ ッ プス ト ッ プ ・ 対応人数 1名 ○ ○ PUコーティ ング耐水圧1,800mmミ ニマム ・ テフロン撥 水加工 ・ UVカ ッ ト加工、 イ ンナーウ ォ ール/ 68Dポリ エ ステルリ ッ プス ト ッ プ、 ボ トム/ 300Dポリエステルオッ クス ・ PUコーティ ング耐水圧10,000mmミ ニマム、 グラ ン...
- Page 13 Instruction Manual : Ver 1.00 SD-651 / SD-651-IV 65th Anniversary Trail Tripper 1 Pro. in Gray / Ivory 65th Anniversary Trail Tripper 1 Pro. in Gray 65th Anniversary Trail Tripper 1 Pro. in Ivory...
- Page 14 Thank you for purchasing a Snow Peak product. This product is a tent for camping. For safety, read the following instruction manual before use. Please keep it safe for future reference. Finally, if you find anything that you do not understand in the description or any problems with the product, please stop use immediately and contact the retailer or Snow Peak Customer Service.
- Page 15 Safety Precautions Before use please read thoroughly to ensure safety and to avoid accidents. DANGER Misuse could easily result in a serious accident or death. ●The tent’s material is not flame-proof. Therefore, do not use combustion-based heat sources such as lanterns, stoves, heaters, or open flames such as matches, candles, lighters, or cigarettes inside the tent.
- Page 16 Name of the Parts Ventilator [Fly] Crossover Hub Front Door Panel [Frame / inner tent] Inner Tent Cross Frame Rubber Loop Side Door Bottom Side Frame Building Tape Ground sheet Peg Loop How to attach Rope with Rope Tensioner on the Fly and Peg-down position Loop Approximately 90 °...
- Page 17 Preparations Before Use 1. Sealing with Seam Sealer *Seam sealer is not included in this product. When using, please purchase seam sealant from local outdoor gear retailer. A waterproofing treatment with seam taping has been applied to the stitching of the tent. However, the ventilator and fasteners on the Fly and a part of the bottom sheet cannot be treated with the seam tape due to their inherent design.
- Page 18 Pass the peg through the pegging loop and drive it into the ground, ensuring that there is no slack in the building tape. [Figure C] Figure C * Check that the shape is correct. Adjusting the peg location after insertion into the frame is dangerous, as the frame could become detached and recoil.
- Page 19 Attach the side frames. [Figure E] (Carry out steps b to c one side at a time.) a) Insert both ends of side frame A into the crossover hubs in the center of the cross frame. [Figure F] b) After attaching side frame A to the crossover hubs, connect each side frame B to side frame A. [Figure G] c) Insert the end of each side frame B into the grommets on the building tape in between the vestibule and back room.
- Page 20 * Steps 7, 8, and 9 can also be done in the following order: 9, 7, then 8. When storing, either the inner tent or fly sheet can be stored first. Confirm the direction of the vestibule and back room, and then attach the fly sheet. Wrap the slip-prevention Velcro tape attached to the inside of the fly sheet to the frame to secure it in place.
- Page 21 * When attaching the supplied hooking cords to a motorcycle or other solid object, remain aware of the weather and surrounding environment, so that the object does not tip over. Snow Peak is not responsible for any damage to the tent or any attached objects.
- Page 22 Maintenance & Storage ●Before using a product that has been in storage for a long time, check each part for abnormalities. If there are abnormalities, take the product to the retailer or contact Snow Peak Customer Service for inspection or repair.
- Page 23 Peak Customer Service. If there are apparent defects in the product's manufacturing, the defective product will be repaired or exchanged free of charge. In other cases, Snow Peak will repair the product for an appropriate fee. The decision to repair or replace the product will be at our discretion. Snow Peak will not repair the product for any damage that occurred due to the following: 1.
- Page 24 ● Weight: 4.9kg(10.8lbs) 130cm 300cm (inside dimensions 110 cm) Snow Peak USA, Inc. Snow Peak, Inc. 404 NW 23rd Avenue, Portland, Oregon 97210, USA 456, Nakanohara, Sanjo-Shi, Niigata 955-0147 Japan Tel. +1 (503) 461-0781 / Instagram. @snowpeakusa Tel. +81 256-46-5858 / Fax. +81 256-46-5860 Email.
Need help?
Do you have a question about the SD-651 and is the answer not in the manual?
Questions and answers