
Related Manuals for Burson Soloist Voyager V-220


Summary of Contents for Burson Soloist Voyager V-220
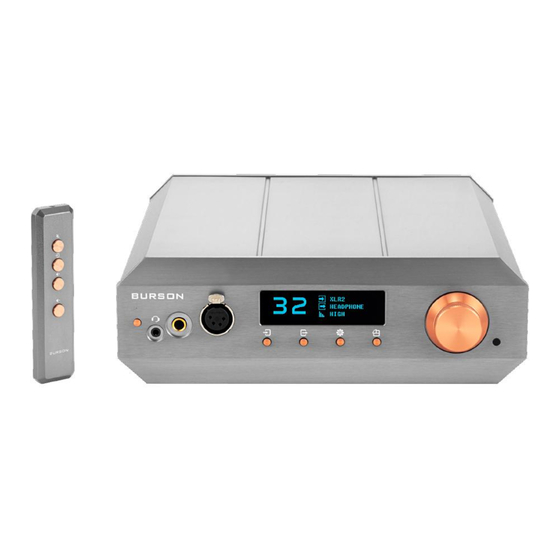
- Page 1 Burson Soloist Voyager (V-220) Headphone Amplifier / Pre Amplifier User Manual Register for warranty Ref. page 8 for details...
-
Page 2: Our Philosophy
After carefully unpacking your Burson Soloist Voyager, inspect for any shipping damage and call your dealer immediately if any is found. Do not plug your Burson Soloist Voyager into any outlet if you find shipping damage. Please save all packing materials so the unit can be easily and safely shipped if the need arises. -
Page 3: Basic Setup
Basic Setup XLR to RCA Output: To achieve an ideal sonic Soloist, the XLR outputs of the Soloist Voyager are direct coupling. ie. It has no coupling capacitors or transformers in the audio signal path. However, direct coupling outputs are NOT compatible with off-the-shelf XLR to RCA adaptors like the ones showing below. - Page 4 Therefore, please only use the custom-made, Burson-marked XLR-RCA adapter we have provided in our accessories box to connect the XLR outputs of our products to any downstream amplifiers with RCA inputs.
- Page 5 Connections...
-
Page 6: Menu Items
Additional choices can be made using the scroll and select function of the Volume dial. ● Press the Menu button to remember the setting and escape from the Menu. Opamp Rolling To enhance the performance of your Burson device by upgrading the opamp, kindly adhere to the following three simple steps:... - Page 7 Step 1: Prior to changing opamps, ensure that the amplifier is not powered. Safely disconnect the power cable from the back of the unit before proceeding to open the device and make any modifications to its internal circuitry board. Step 2: It is crucial to note that Dual and Single opamps are distinct and cannot be interchanged. Please refer to the provided layout diagram to determine the number and type of opamps required for your specific machine configuration.
- Page 8 For instance, if your I/V stage currently contains two NE5532 dual opamps and you intend to upgrade them to Burson duals, it is recommended that both NE5532 opamps be replaced at once. This approach ensures the safest and...
- Page 9 Silent Power Module Rolling Upgrading the SP modules enhances the performance of Burson products even further. The table below shows our variety of SP modules: When upgrading SP modules, please refer to our diagram or take photos of the default modules so you know where each module should be placed.
-
Page 10: Maintenance
Chipset Noise Spec Output Model 10Hz to 100kHz) Voltage LT1963 40µVRMS +15V SP1-15P LT3015 30µVRMS -15V SP1-15N LT1963 40µVRMS SP1-05P LT1963 40µVRMS +3.3V SP1-03P LT3045 0.8µVRMS +15V SP2-15P LT3094 0.8µVRMS -15V SP2-15N LT3045 0.8µVRMS SP2-05P LT3045 0.8µVRMS +3.3V SP2-03P Fail-safes If the fan is disconnected from the motherboard, if the fan fails or if the top cover of the Soloist is removed, then the Soloist will automatically go into sleep mode. -
Page 11: Free Warranty Extension
To select the Source - Rotate the Volume dial until the desired input is shown and press inwards to Select. Free Warranty Extension All Burson Audio products are covered by 24 months + 12 months of warranty (See conditions below). https://www.bursonaudio.com/warranty/. Warranty Conditions... - Page 12 Warranty Registration...
Need help?
Do you have a question about the Soloist Voyager V-220 and is the answer not in the manual?
Questions and answers