Baxi Power Installation Manual
Condensing gas boiler
Hide thumbs
Also See for Power:
- Setting instructions manual (48 pages) ,
- User manual (24 pages) ,
- User manual
Table of Contents
Advertisement
Quick Links
Advertisement
Table of Contents

Related Manuals for Baxi Power


Summary of Contents for Baxi Power
- Page 1 Power Condensing gas boiler Installation Manual 7643482-001-06 2018/02...
-
Page 3: Table Of Contents
CONTENTS Safety instructions General safety instructions Recommendations Specific safety instructions Responsibilities 1.4.1 User's responsibility 1.4.2 Installer's responsibility 1.4.3 Manufacturer's responsibility Aprovals Directives Certifications Gas categories Warnings General description Main component diagram Characteristics Recommandations générales Water quality Regulations for Installation Installation recommendations General recommendations Boiler and pre-heater technical characteristics Positioning... -
Page 4: Safety Instructions
Never remove or cover the information labels and plates on the unit. The information plates and labels must be legible for the unit's full lifetime. Caution Use Antifreeze mode rather than power down the unit to carry out the following functions: • Pump sticking release • Antifreeze protection •... -
Page 5: Responsibilities
• Flame ionisation electrode The flame detection electrode guarantees safety in the event of gas disconnection or poor burner ignition. In this case it turns off the boiler. • Hydraulic pressure controller This device allows the burner to start only if the water pressure is above 0.5 bars. •... -
Page 6: Directives
APPROVALS Directives This product is manufactured and placed in circulation in accordance with the requirements and standards in the following European directives: • Gas appliance directive (2009/142/EC) applicable until 20 April 2018 Gas appliance regulation (2016/426) applicable from 21 April 2018 •... -
Page 7: Warnings
- The front of the housing is sealed to the combustion products. Annual servicing compulsory: Must be carried out in accordance with decree No. 2009-649 of 9th June 2009 relative to the annual servicing of boilers whose nominal power is between 4 and 400 kilowatts. A certificate must be handed over. -
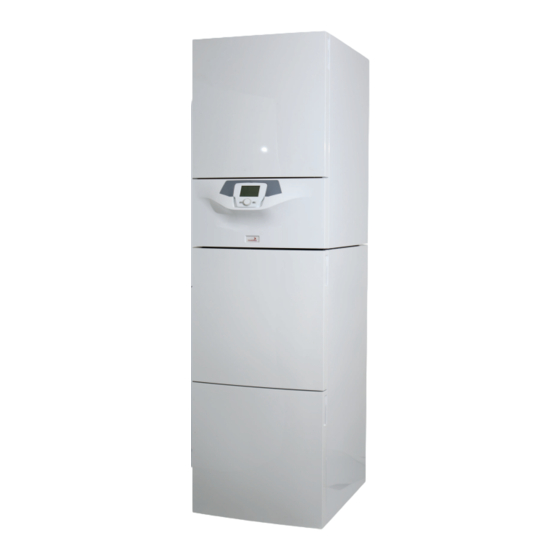
Page 8: Main Component Diagram
MAIN COMPONENT DIAGRAM Heating only Thermal assembly (Body + burner) Hydrobloc Heating outlet Primary DHW outlet Primary DHW return Heating return Valve Pump Expansion tank (heating circuit) DHW domestic hot water outlet DHW domestic hot water inlet Domestic hot water tank DHW exchanger coil Heating + 160 SLV DHW pre-heater By-pass flap... - Page 9 Heating + 220 SHL DHW pre-heater Thermal assembly (Body + burner) Solar circuit manual gas purger Hydrobloc Primary solar coil Heating outlet Filling and drainage mechanism for the Primary DHW outlet primary solar circuit Primary DHW return Glycol tank Heating return Solar expansion tank Valve Solar circuit circulator...
-
Page 10: Characteristics
CHARACTERISTICS Dimensions (mm) POWER 1.32 : Heating only 128,5 55 57 121,5 105,5 Direct heating circuit return Ø 3/4’’ Direct heating circuit outlet Ø 3/4’’ Gas supply Ø 1/2’’ Condensate evacuation Ø 24x19 DHW pre-heater primary return Ø 3/4’’ DHW pre-heater primary outlet Ø... - Page 11 POWER 32 COMBI 160 : Heating + 160 SL type DHW pre-heater placed on top 128,5 121,5 105,5 POWER 32 COMBI 160 : Heating + 160 SL type DHW pre-heater side-mounted 245 70 1 5 6 2 128,5 121,5 105,5 Direct heating circuit return Ø...
- Page 12 POWER 32 SOLAR 220 : Heating + 220 SHL type DHW pre-heater placed on top 128,5 121,5 105,5 POWER 32 SOLAR 220 : Heating + 220 SHL type DHW pre-heater side-mounted 1 5 6 2 128,5 121,5 105,5 Direct heating circuit return Ø...
- Page 13 Maximum service temperature °C Electrical power supply 230 V - 50 Hz Electrical protection IP21 Auxiliary electrical power (Pmin - Pn) 15 - 75 Pump electrical power (min - max) 10 - 52 Pump type Modulating class A (EEI < 0.23)
-
Page 14: Regulations For Installation
0,004 0,004 Other items Standby heat loss 0,081 0,081 0,081 stby Ignition burner power consumption Annual energy consumption Sound power level, indoors Emissions of nitrogen oxides m g/kWh Domestic hot water parameters Declared load profile Daily electricity consum ption 0,287... -
Page 15: Installation Recommendations
This boiler heats the water to a temperature below the boiling point at atmospheric pressure. It must be connected to a heating facility and a hot water distribution network compatible with its performance and power. Before connecting the boiler, proceed as follows: •... - Page 16 Water quality • The unit must be filled with filtered water. The pH must be between 7.5 and 9.5. The water hardness (°tH) must be between 5 and 15°f. Caution Do not add chemicals to the central heating water without consulting a water treatment professional. For example, antifreeze, water softeners, products to increase or reduce the pH value or chemical additives and/or inhibitors.
-
Page 17: Positioning
POSITIONING • Base: the boiler is designed to be installed directly on the boiler room floor. A concrete base is needed only if necessary to correct unevenness, or isolate the base from a wet or inconsistent basement. • Ventilation: comply with the regulations in effect regarding the upper and lower vents. Clearances (mm) •... -
Page 18: Mounting The Boiler / Dhw Pre-Heater
9.3 Mounting the boiler / DHW pre-heater • Put the pre-heater in place (see the pre-heater manual), • Remove the boiler (see chapter 7.2), • Place the boiler on the pre-heater • Put the 2 screws (provided in the accessories packet), at the front to secure the boiler to the pre-heater 9.4 Changing panel position (with 160 SLV - 200 SHL pre-heaters) The panel may be put in low position to improve visibility. -
Page 19: Connecting The Gas Duct
• Lower the panel and position it at the bottom of the boiler in the cut-outs provided, • Put the front back on the upper part. Connecting the Gas Duct • The gas supply is positioned at the rear of the boiler. •... -
Page 20: Heating Circuit Connection Diagram (Only 1 Heating Circuit)
Heating Circuit Connection Diagram (only 1 Heating Circuit) (See governing instructions for settings) Note: If there is only one circuit, electric baseboard hearter or heated floor, connect directly to the circuit. Direct circuit Drain 9.10 Hydraulic scheme with optional 2nd circuit kit on 3-Ways valve (See governing instructions for settings) Direct circuit Option V3V... -
Page 21: Exhaust - Aspiration Ducts
10 EXHAUST - ASPIRATION DUCTS 10.1 Installing Exhaust and Aspiration Ducts • The boiler can be installed easily and flexibly with the accessories Flexible conduct supplied, which we describe later. Originally, the boiler is provided Stiff conduct (possible solution (possible solution to be connected to an exhaust duct / coaxial type suction, vertical in stiff conduit) in flexible conduit) -
Page 22: Installation With Concentric Horizontal Ducts C
10.3 Installation with Concentric Horizontal Ducts C Make sure you do not direct the combustion product evacuation duct outlet towards a living area. Max equivalent straight lenght = 10m L max = 9 m Ø 60/100 mm 24 m Ø 80/125 mm with one 90°... -
Page 23: Boiler Accessories
10.6 Installation with Concentric Pipes in the Boiler Room and Simple Ducts in Vertical Chimney C (formerly C renovation) • Position the flue gas adaptor Ø 60/100 -80/125 • Connect the rigid Ø 80 / 125 boiler duct up the chimney. •... - Page 24 - The recommendations of this manual. - The available power output is 220W (1A with cos j = 0.8). If the load exceeds one of these values you must the control must be relayed using a switch which must in no case be mounted in the control panel. The total current must not exceed 5 A.
- Page 25 • Connecting the • Connecting the power respecting external probe (delivered) the phase-neutral polarity to terminals 9-10 L = live (brown) N = neutral (blue) = Earth (green / yellow) See the installation instructions and regulator configuration according to the installation types.
-
Page 26: Filling The Installation
12 FILLING THE INSTALLATION 12.1 Filling the heating circuit Rinse the heating installation before filling it. Refer to chapter 8.2 for the water quality. 1. Fill the heating installation until you reach a pressure of between 1.5 and 2 bars (0.15 and 0.2 MPa). 2. -
Page 27: Commissioning
13 COMMISSIONING 13.1 General information Commissioning the boiler enables you to review the different settings and verifications to be carried out to start the boiler safely and to ensure it is operating correctly. The boiler is commissioned the first time it is used, after an extended shutdown period or after any major modifications have been made to the installation. - Page 28 Acceptable CO content range (%) CO max (ppm) Model Power < 250 Pn (100%) 8.5 to 9.6 9.2 to 10 During the first commissioning, the system tries to adapt to the composition of the gas and may add CO - CO values outside the ranges defined.
-
Page 29: Gas Change Procedure
13.5 Gas supply pressure check Gas supply pressure tap Burner gas pressure tap Pout 13.6 Gas change procedure This operation must be performed only by a qualified technician. This boiler can be operated with natural gas (G20 - G25) or propane gas (G31). To modify the type of gas on the regulation unit, proceed as follows: - Press key - Press keys... -
Page 30: Adjustment And Safety Device
14 ADJUSTMENT AND SAFETY DEVICES This unit is designed in accordance with European standards and directives and in particular with the following elements: • Safety thermostat A safety thermostat turns off the boiler if the water temperature is too high in the primary circuit. It is imperative to find the cause of overheating before resetting. -
Page 31: Maintenance - Servicing
The professional must deliver a certificate to the end user. Caution The maintenance operations must be carried out by a qualified professional. Danger Disconnect the electrical power supply before carrying out any interventions in the sections concerned. Note We recommend subscribing to a servicing contract. Caution Only original spare parts must be used. -
Page 32: Panel At Maintenance Position
15.3 Panel maintenance position • Pull top forward and lift • Lift the front of the table and rotate to remove it Remove the 2 screws of top fixing Switch «On/Off»> • Put the panel on the boiler housing, engage the •... -
Page 33: Inspection
15.4 Inspection Periodic monitoring • Check la the facility water pressure at the gauge (1 bar minimum cold). Pmax 1.5 bar cold, 2 hot. • Ensure full of water by purging: it is exceptional to add water; if the need to supplement becomes frequent, you may need to search for a leak. -
Page 34: Repair
15.5 Repair If the CO is outside the defined range,check the ionisation current value. This information is available from the regulation housing. To read this value proceed as follows: - Press key - Press keys A and C at the same time for at least 6 seconds. B Select the «specialist»... -
Page 35: Maintenance
15.6 Maintenance Before any intervention, disconnect the power switch on the wall and close the fuel supply cut-off valve. The boiler and burner should be subject to a check and general preventive maintenance at least once a year or every 1500 hours of operation. -
Page 36: Decommissioning
16 DECOMMISSIONING 16.1 Decommissioning procedure Proceed as follows to decommission the boiler temporarily or permanently: Switch off the boiler. Disconnect the boiler's electrical power supply. Close the gas valve. Drain the central heating installation. 16.2 Recommissioning procedure Proceed as follows if you need to recommission the boiler: Restore the boiler's electrical power supply. - Page 40 36061 Bassano del Grappa (VI) - ITALIA Via Trozzetti, 20 Customer service: tel. +39 0424-517800 – Telefax +39 0424-38089 www.baxi.it...
Need help?
Do you have a question about the Power and is the answer not in the manual?
Questions and answers