Table of Contents
Advertisement
Quick Links
Advertisement
Table of Contents

Related Manuals for Baxi POWER


Summary of Contents for Baxi POWER
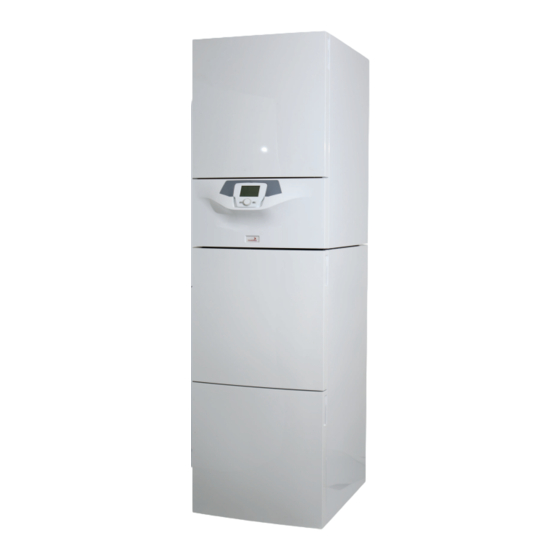
- Page 1 Power Control panel Setting parameters operation 7643483-001-04 2018/02...
-
Page 2: Table Of Contents
CONTENTS Control panel 1.1 Description of the display 1.2 Command unit initialisation Accessing the parameter configuration menu 2.1 Information menu 2.2 Time and date setting 2.3 Modifying the language (user interface menu) 2.4 Temporary temperature setting Functions associated with the QUICK MENU key Operating modes 4.1 Heating 4.2 Holiday programming... -
Page 3: Control Panel
CONTROL PANEL Description of the command unit display SYMBOL DESCRIPTION Burner on (Power %: 1< 70% - 2> 70 %) Operating mode: comfort room temperature Operating mode: reduced room temp (only if installed in the room) 1 2 3 Operating mode in heating:... -
Page 4: Accessing The Parameter Configuration Menu
ACCESSING THE PARAMETER CONFIGURATION MENUS Display key Date: day, month, year Day of the week Boiler pressure / Heating circuit Clock: hour and minute The list of configuration menus is as follows: • Info (chapter 2.1) • Time and date (chapter 2.2) •... -
Page 5: Temporary Temperature Setting
Temporary heating temperature setting The temperature is set by turning the B button to the right to increase the value and to the left to reduce it and B to confirm. The temperature to be set, for the heating circuit, may be: •... - Page 6 CASE 2: the control unit is attached to the wall • B to set the ambient temperature in the room to be heated. OPERATING MODE DESCRIPTION • Comfort : the temperature in the room to be heated corresponds to the comfort temperature; the factory-set value is 20 °C (symbols •...
-
Page 7: Parameter Programming
PARAMETER PROGRAMMING WE RECOMMEND THAT YOU WRITE DOWN ALL THE PARAMETERS YOU CHANGE AT THE BACK OF THIS MANUAL. Menu key End user Specialist Commissioning The procedure for accessing the four menus to program the boiler is as follows: • from the main menu •... -
Page 8: Types Of Heating Installation
TYPES OF HEATING INSTALLATION : 1 3-way valve circuit : 1 Direct circuit Installation possible but not recommended : 1 Direct circuit + 2 3-way valve circuits : 1 Direct circuit + 1 3-way valve circuit Not valid if SHL solar DHW pre-heater : Configuration with Room thermostat... - Page 9 Keys External sensor Motorised 3-way valve Room unit Pump Room sensor Anti-return flap Room thermostat Radiator Heating floor Configurations External sensor Room thermometer unit Room sensor Room thermostat Kit for integration with: - pipes - pump ...
- Page 10 A DIRECT CIRCUIT...
- Page 11 Parameter settings To access the parameters, proceed as follows: A and C (6 seconds) B «commissioning» menu B confirm Parameters to be modified or checked The external sensor must be connected CONFIGURATION WITH ROOM THERMOSTAT CONTROL UNIT* 5 LED (RADIO) OR 3 LED (WIRE) MODULE ON BOILER Value to be configured Menu Line...
- Page 12 B ONE 3-WAY VALVE CIRCUIT...
- Page 13 Attach the AVS75 to the place provided. Connect the communication cable (11) between AHV 75 (terminal X50) and LMS 15 (terminal X41). Establish the power supply between AVS 75 and terminal M1 (Terminals 5-6-7). Connect the flow sensor (10) on terminal BX21 Connect pump (9) to terminal QX23 and the mixing valve (8) to terminals QX21 and QX22.
- Page 14 C ONE DIRECT CIRCUIT AND ONE 3-WAY VALVE CIRCUIT...
- Page 15 Attach the AVS75 to the place provided. Connect the communication cable (11) between AVS 75 (terminal X50) and LMS 15 (terminal X41). Establish the power supply between AVS 75 and terminal M1 (Terminals 5-6-7). Connect the flow sensor (10) on terminal BX21 Connect pump (9) to terminal QX23 and the mixing valve (8) to terminals QX21 and QX22.
- Page 16 CONFIGURATION WITH CONTROL UNIT IN ROOM THERMOSTAT ON HC1 - 5 LED (RADIO) OR 3 LED (WIRE) MODULE ON BOILER Menu Line Parameter Factory value Value to be configured Description HC1 user interface Room thermostat appliance 1 Use of the unit in room thermostat on circuit 1 User interface Assignment to appliance 1...
- Page 18 D ONE DIRECT CIRCUIT AND TWO 3-WAY VALVE CIRCUITS...
- Page 19 Connect the communication cable (11) between AVS 75 (terminal X50) and LMS 15 (terminal X41). Connect the communication cable (11) between the 2 AVS75 (terminal X50 - terminal X50) Establish the power supply between AVS 75 and terminal M1 (Terminals 5-6-7 terminals 8-9-10). Connect the flow sensors (10) on terminal BX21 Connect pumps (9) to terminal QX23 and the mixing valves (8) to terminals QX21 and QX22.
- Page 20 CONFIGURATION WITH ROOM THERMOSTAT...
- Page 21 Attach the AVS75 to the place provided. Connect the communication cable (11) between AVS 75 (terminal X50) and LMS 15 (terminal X41). Establish the power supply between AVS 75 and terminal M1 (Terminals 5-6-7). Connect the flow sensor (10) on terminal BX21.
- Page 22 DOMESTIC HOT WATER (DHW) INSTALLATION TYPES : HL - SL pre-heater : SHL DHW solar pre-heater...
- Page 23 : Td 300 EH thermodynamic tank...
- Page 24 DHW (SL - HL pre-heaters)
- Page 25 SL pre-heater (with coil) Connect the DHW sensor (5) (provided with the tank) Connect the ACI board (12) (cable provided with the tank) Parameter to be configured: Menu Line Param eter Factory value Value to be configured Configuration 6200 Save sensor Yes* * Remark: the display resets to "No"...
- Page 26 SOLAR DHW (SHL pre-heaters)
- Page 27 SOLAR DHW (SHL pre-heaters) with one 3-way valve heating circuit...
- Page 28 Connect the communication cable (11) between AHV 75 (terminal X50) and LMS 15 (terminal X41). or Connect the communication cable (11) between the 2 AVS75 Establish the power supply between AVS 75 and terminal M1 (Terminals 5-6-7). Connect the solar panel sensor* (10a) on terminal BX21.
- Page 29 Solar parameters Menu Line Parameter Factory value alue to be configure Description Δ Difference in temperature Min T betw een the solar sensor probe and the solar 3810 8 °C "x x " DHW tank to run the solar pump Δ...
- Page 30 H Td 300 thermodynamic tank SPC...
- Page 31 The thermodynamic tank is connected using the following operations: Connect the Td 300 EH contact to terminals 7-8 on the M2 terminal strip. Parameter settings To access the parameters, proceed as follows: A and C (6 seconds) B «commissioning» menu B confirm Parameters to be modified or checked Menu...
-
Page 32: Hourly Programming
HOURLY PROGRAMMING Before accessing the programming, you must activate the Automatic operating mode (chapter 4). The hourly heating (CC1 hourly programming) and DHW (Hourly program 4 / DHW) programming is used to program the boiler’s automatic operation during determined daily hourly ranges and during the days of the week. The example in the figure below refers to the daily hourly range 1 (below) where «... - Page 33 Summary table Program line 514 (heating) - 574 (DHW) Groups of days Preset programs Preset programs On 1 - Off 1 On 2 - Off 2 On 3 - Off 3 06:00 - 08:00 11:00 - 13:00 17:00 - 23:00 Mon-Sun 06:00 - 08:00 17:00 - 23:00...
-
Page 34: Unit Locking/Unlocking Function
UNIT LOCKING/UNLOCKING FUNCTION In order to prevent unauthorised people from programming, it is possible to lock all the functions associated with the C key. Locking procedure • User interface B press to confirm. • program line 27 (Programming locking), B to confirm. •... -
Page 35: Errors
11 ERRORS The errors on the display are identified by the symbol, th information displayed is: • An error code (A) • A secondary error code (B) • A brief description of the error (C) ; • The following symbols may appear on the display: their meanings are explained in the table below. -
Page 36: Special Functions
(reduced thermal power), Total heating load (maximum thermal power in heating function). • Regulator shutdown function (304) - Options: from 100 % (maximum thermal power) to 0 % (reduced thermal power). Activate this function to facilitate the gas valve calibration operations. -
Page 37: Adjustment And Safety Device
13 ADJUSTMENT AND SAFETY DEVICES This unit is designed in accordance with European standards and directives and in particular with the following elements: • Safety thermostat A safety thermostat turns off the boiler if the water temperature is too high in the primary circuit. It is imperative to find the cause of overheating before resetting. -
Page 38: List Of Parameters
14 LIST OF PARAMETERS Parameter Lev. INFORMATION Factory value Room temperature Displays if the regulation unit is configured as a room thermostat appliance Min room temperature Max room temperature Boiler temperature Outdoor temperature Min outdoor T° Max outdoor T° DHW temperature Heating circuit 1 state Heating circuit 2 state Displays w hen the heating circuit is activated... - Page 39 Parameter Lev. HOURLY PROGRAM 4 / DHW Factory value 516 536 556 Default values Day selection Selection of days or group of days for the hourly program One of the 3 pre-set programs may be selected. Default program selection? 1st phase 3 ON 1st phase 3 Off 2nd phase 3 ON 2nd phase 3 Off...
- Page 40 Param eter Lev. HEATING CIRCUIT 1 - 2 - 3 Factory value The heating circuit / boiler pump may be shut dow n during an accelerated drop or w hen the room setpoint is reached. Continuous operation of the 809 1109 1409 pumps The heating circuit / boiler pump also remains on during the accelerated drop and w hen the room...
- Page 41 Param eter Lev. SOLAR Factory value Difference in temperature Min T difference betw een the solar sensor and the solar DHW tank to run the 3810 8°C solar pump Difference in temperature Max T difference betw een the solar sensor and the solar DHW tank to stop 3811 4°C the solar pump...
- Page 42 Param eter Lev. CONFIGURATION Factory value Contact to heat the sw imming pool by solar pow er Sol pool pump/valve K18 (if there are several heat exchangers) Consum. circuit pump 3 Cascade pump Q25 Boiler pump common to all the boilers in a cascade. Storage transfer pump DHW mix pump Q35 Interm.
- Page 43 Param eter Lev. CONFIGURATION Factory value HC rate sw itching The heating circuit rates are sw itched on HC1 rate sw itching parameter mode line 900-1200-1500 HC2 rate sw itching HC3 rate sw itching The generator is locked. Generator blocked All HC and DHW temperature requests are ignored.
- Page 44 Parameter Lev. CONFIGURATION Factory value 6030 Relay output QX21 module 1 See relay output QX1 None 6031 Relay output QX22 module 1 See relay output QX1 None 6032 Relay output QX23 module 1 See relay output QX1 None 6033 Relay output QX21 module 2 See relay output QX1 None 6034 Relay output QX22 module 2 See relay output QX1...
- Page 45 Parameter Lev. MAINTENANCE / SPECIAL REGIME Factory value Regulator stop function: 7143 Regulator stop function 100% 7145 Regulator stop setpoint Setpoint pow er during regulator stop function: 0% to 100% Drain function: 7146 Drain function Drain cycle operating mode: None Continuous heating circuit 7147 Drain type...
- Page 48 36061 Bassano del Grappa (VI) - ITALIA Via Trozzetti, 20 Customer service: tel. +39 0424-517800 – Telefax +39 0424-38089 www.baxi.it...
Need help?
Do you have a question about the POWER and is the answer not in the manual?
Questions and answers