Table of Contents
Advertisement
Quick Links
Advertisement
Table of Contents

Related Manuals for TURBO RACING C75


Summary of Contents for TURBO RACING C75
- Page 1 TURBO RACING,TABLE RACING,TOP RACING...
-
Page 2: Safety Information
Please read the manual before using the product and keep the manual for future use. SAFETY INFORMATION ● Movable parts are dangerous, so it is forbidden to put ngers、hair、clothes and other things into the space between the tire and the car body, to avoid being clamped by the rotating parts. ●... -
Page 3: Function Description
FUNCTION DESCRIPTION Right turn lights Left turn lights Front right light Front left light Taillights/Highlighted brake lights/left and right turn signal Tail Recharging hole: connect Type-C line Forward/backward Forward/backward Turn right/turn left Switch power Chassis lights Charging indicator light Chassis lights PREPARE FOR RUN Transmitter battery installation This remote uses AAA battery or Ni MH battery, when the voltage is lower than 4.5V ±... - Page 4 Transmitter battery installation. (Picture A-D) Rotate 90° clockwise A.Turn the coin button clockwise 90° B. Take out the battery box from the bottom of the remote 4x 1.5V (AAA) Rotate 90° counterclockwise C. Install four AAA batteries according to the polarity D.
- Page 5 Use the hidden Type-C port on the remote to charge the car. (Picture A-F) Rotate 90° clockwise B. When the push rod on the bottom, then rotate the A. Push the charging rod forward to the bottom. push rod 90° clockwise D.
- Page 6 2. Insert the attached charging cable into the charging port of the car and connect the power supply for charging. (as picture shows) Tip: When the car is power on, it will not be charged when charging power is inserted. lf need charge the car, the car's power switch must be turned "OFF". The remote control vehicle should be charged by an adult;...
- Page 7 Vehicle battery replacement/peripheral power supply If it is necessary to disassemble or replace the battery, please pay attention to the correct plug position. If the battery is connected to the external power port, the vehicle will be directly powered on, and plugging it in backwards will cause the power switch to be inoperable, and the vehicle will not be able to charge.
-
Page 8: Operation Note
OPERATION NOTE Note: If you’re the rst time to use the 1:76 RC drift car, please take a few minutes to read this statement carefully to get familiar with di erent features of this operation system. Functions Transmitter Multi function indicator LED: The remote control uses AAA or Ni-MH battery. - Page 9 18. Charging indicator: in charging state, press channel 3 key to switch the color of the indicator; Long press the channel 3 key to switch the breathing light (as shown in Figure 3). Type-C port charging push rod (as shown in picture 4) Coin button of battery compartment(as shown in picture 5) Hidden Handle is removable...
- Page 10 Install and remove the remote control handle 1. Press the button. 2. Remove the handle. 3. Press and hold the remove button and. push the handle inside. Tips: Pay attention to the direction of the handle. Note: If the handle of remote is in a wrong direction , it will not be powered on. Please install the handle correctly according to the instructions.
- Page 11 Car running settings Neutral Right Left Forward/speed up Right Left Brake /Backward Neutral Forward/ speed up Brake /Backward Throttle tigger: Control forward / brake /backward. ● Steering wheel: Control left / right steering. ● Linearity ST/TRIM: When the steering wheel in the middle position, if the front wheel is not in a ●...
- Page 12 Three section throttle speed limitswitch: ST-REV 20% / 50% / 100%. TH-D/R TH-TRIM ST-D/R ST-TRIM ● Three section throttle speed limit switch: 20% / 50% / 100%. ● REV Steering REV: It is used to reverse the left and right directions of the car. ●TH/DR Throttle DR is used to adjust the throttle and car speed freely.
-
Page 13: Specification
SPECIFICATION Product name 1:76 RC sports car Model Driving distance 1:76 Scale Slope angel 30° 30min Driving time Drive mode Two-wheel drive Size 67.5x28.8x19.5mm Proportional Proportional steering steering Battery 3.7V、75mAh lithium battery 17.5g Weight LED LIGHT STATUS TABLE Display Status Please check whether the power of remote control The headlights ash every 2 seconds has been turned on, if yes, you need to re-code the... -
Page 14: Troubleshooting
TROUBLESHOOTING Fault symptom Cause of failure Solutions Make sure that the product is in car 1. Distance is too far The tranmitter connection receiving mode.(The headlights ash). failed 2. Multicars pairing at the same time Check the wheels for foreign objects Foreign object between Freeze the wheels... - Page 15 PRECAUTION ● The car contains lithium batteries. Disassembling, striking, squeezing or throwing the car into the re is prohibited. If severe swelling occurs, do not continue to use it. Do not place it in high-temperature environment. ● Due to the special feature of lithium batteries, overly high or low temperature will a ect the battery charge and discharge performance and battery life, so please do not use or store this product under environments such as high temperature, low temperature, high humidity or direct sunlight.
- Page 16 DISASSEMBLING 1. Disassemble The car body shell: 1.Hold the front wheel with one hand , and 2.Then gently push out and take it out other hand hold the head of the car 2. Install the car body shell: 1. An exhaust xture inserted into the tail of 2.
- Page 17 INSTALLATION OF SHELL PARTS GROUP 760184 760185 760186 760190 Material bodyshell *1 car window *1 Front light *1 Tail light parts *1 760188 760192 760189 760209 Front light holder *1 Exhaust pipe *1 Low tail wing *1 Screw *2 760191 Tail light strip *2 CAR SHELL ASSEMBLY Installing car windows...
- Page 18 Install the tail wing Install the taillight (note the direction of installation) Install the screws for exhaust pipe Install exhaust pipe Install the front light holder Installing front lights Install the screws for front light holder Attach...
-
Page 19: General Assembly Drawing
GENERAL ASSEMBLY DRAWING EXPLODED VIEW OF FINAL ASSEMBLY Car shell Screw Screw Machine meter screw battery Spring Steering assembly Secondary drive shaft Steering support Primary drive shaft Picture of Chassis Rear wheel... - Page 20 CAR SHELL EXPLOSION 760185 760189 760186 760190 760191 760188 760192 760209...
- Page 21 UPPER SHELL 760193 760098 760194 760128 760031 Drive motor Steering motor Spring installation position Installation position of steering motor Installation position of drive motor Installation position of primary drive shaft Installation position of secondary drive shaft...
-
Page 22: Transmission Shaft
TRANSMISSION SHAFT 760196 760197 760035 760039 760038 760198 760199 REAR WHEEL 760200 760201 760043 760202... -
Page 23: Steering Assembly
STEERING ASSEMBLY 760149 760203 760204 760200 760205 760206 760207... - Page 24 ORIGINAL SPARE PART 760184 760185 Material bodyshell 2pcs car window 2pcs 760186 760187 Front light 2pcs Material bodyshell suit 2pcs 760188 760189 Front light holder 2pcs Low tail wing 2pcs 760190 760191 Taillights lights 2pcs Tail light strip 4pcs 760192 760209 760210 Exhaust pipe 2pcs...
- Page 25 760208 760193 High tail wing 2pcs Battery 1pcs 760098 760128 Millimeter screw 4pcs Spring 4pcs 760194 760031 Motor 2pcs Switch handle 2pcs 760196 760035 Gear (1st stage drive shaft) 2pcs Axis(Primary drive shaft )2pcs 760197 760038 Axle sleeve(Secondary drive shaft)2pcs Gear(Secondary drive shaft)2pcs...
- Page 26 760039 760198 Axis(Secondary drive shaft)2pcs Gear(Secondary drive shaft)2pcs 760199 760200 Axle sleeve(Secondary drive shaft)4pcs Wheel 4pcs 760201 760043 Axle sleeve(Rear wheel)4pcs Gear(Rear wheel)2pcs 760202 760149 Axis(Rear wheel) 2pcs Shim 8pcs 760203 760204 Rocker arm 2pcs Gear 2pcs...
- Page 27 760205 760206 前轮固定轴 4pcs Fan teeth 2pcs 760021 760207 转向部件 4pcs 充电线+对码针 760075 White 760074 Grey Guardrail Total 50pcs Guardrail Total 50pcs (Straight 45pcs) (Curved 5pcs) (Straight 45pcs) (Curved 5pcs) 760076 Red 760050 Guardrail Total 50pcs Track(1200x800mm) (Straight 45pcs) (Curved 5pcs) 760102 760101 Track(1600x900mm)
- Page 28 760178 Track(1800x800mm) 760141 PU guardrail(5m) 760139 760140 PU guardrail(10m) PU guardrail(13m) 760019 760100 Transparent Box Bolt driver 2pcs...
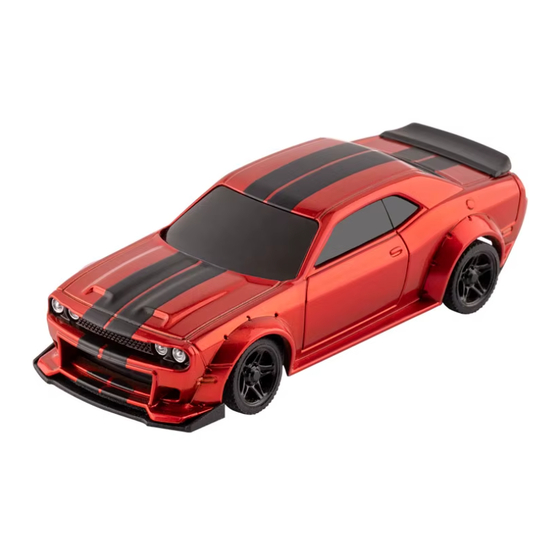
- Page 29 CHOOSE A VARIETY OF STYLES RC car Fluorescent green Fluorescent red Cement gray Dark green Mint green Orange Purple Light yellow Light blue Blue RC Sports car C71-RD C71-YE C71-WH Yellow White C74-BK Violet Cement grey Black C75 (Hell Black) C75 (Caramel red)
- Page 30 O Road RC Car C81-BK C81-YE Black Yellow Drift RC Car C64-BU C64-GN Blue Green...
- Page 31 Shenzhen NewStone Technology Co., Ltd. Manufacturer: Shenzhen NewStone Technology Co., Ltd. Address: Yuhong Industrial Park, No.20 Xingye West Road, ShaJing Town, Bao'an District, Shenzhen, Guangdong Province If this product can not operate normally during the warranty period, please contact the local distributor or manufacturer that sold this product to obtain warranty service.
Need help?
Do you have a question about the C75 and is the answer not in the manual?
Questions and answers