TURBO RACING C61 Instruction Manual

TURBO RACING C61 Instruction Manual

1:76 drift rc car

Advertisement

1:76 DRIFT RC CAR
C61/C62/C63/C64
INSTRUCTION MANUAL

Advertisement

Table of Contents
loading
Need help?

Need help?

Do you have a question about the C61 and is the answer not in the manual?

Questions and answers

Heather
February 21, 2025

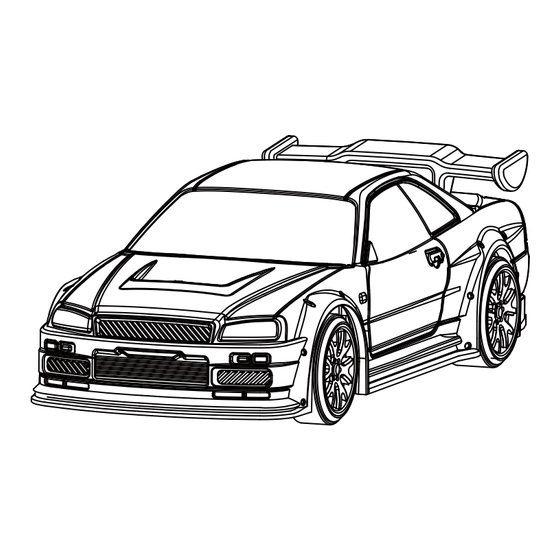
I **** unable to remove the front wheels, they are clogged with fluff, but are too tight to remove.

1 comments:
Mr. Anderson
May 14, 2025

To remove the front wheels of the TURBO RACING C61 if they are clogged with fluff and too tight, check for foreign objects between the wheels and the car. Remove any debris, then tighten the two adjusting screws to ensure the wheels are even. This should help release the clog and allow for easier removal.

This answer is automatically generated

Subscribe to Our Youtube Channel

Summary of Contents for TURBO RACING C61

  • Page 1 1:76 DRIFT RC CAR C61/C62/C63/C64 INSTRUCTION MANUAL...
  • Page 2: Safety Information

    Please read the manual before using the product and keep the manual for future use. SAFETY INFORMATION ● Movable parts are dangerous, so it is forbidden to put ngers、hair、clothes and other things into the space between the tire and the car body, to avoid being clamped by the rotating parts. ●...
  • Page 3: Function Description

    FUNCTION DESCRIPTION Tail Front left light Taillights/Highlighted brake lights Front right light Recharging hole: connect Type-C line Forward/backward Forward/backward Turn right/turn left Switch power Chassis lights Chassis lights PREPARE FOR RUN Transmitter battery installation This remote uses AAA battery or Ni MH battery, when the voltage is lower than 4.5V ± 0.2V, the LED starts ashing.
  • Page 4 Transmitter battery installation. (Picture A-D) Rotate 90° clockwise A.Turn the coin button clockwise 90° B. Take out the battery box from the bottom of the remote 4x 1.5V (AAA) Rotate 90° counterclockwise C. Install four AAA batteries according to the polarity D.
  • Page 5 Use the hidden Type-C port on the remote to charge the car. (Picture A-F) Rotate 90° clockwise B. When the push rod on the bottom, then rotate the A. Push the charging rod forward to the bottom. push rod 90° clockwise D.
  • Page 6 2. Insert the attached charging cable into the charging port of the car and connect the power supply for charging. (as picture shows) Tip: When the car is power on, it will not be charged when charging power is inserted. lf need charge the car, the car's power switch must be turned "OFF". The remote control vehicle should be charged by an adult;...
  • Page 7: Operation Note

    OPERATION NOTE Note: If you’re the rst time to use the 1:76 RC drift car, please take a few minutes to read this statement carefully to get familiar with di erent features of this operation system. Functions Transmitter Multi function indicator LED: The remote control uses AAA or Steering Rev: Ni-MH battery.
  • Page 8 18. Charging indicator: in charging state, press channel 3 key to switch the color of the indicator; Long press the channel 3 key to switch the breathing light (as shown in Figure 3). Type-C port charging push rod (as shown in picture 4) Coin button of battery compartment(as shown in picture 5) Hidden Handle is removable...
  • Page 9 Install and remove the remote control handle 1. Press the button. 2. Remove the handle. 3. Press and hold the remove button and. push the handle inside. Tips: Pay attention to the direction of the handle. Note: If the handle of remote is in a wrong direction , it will not be powered on. Please install the handle correctly according to the instructions.
  • Page 10 Car running settings Neutral Right Left Forward/speed up Left Right Brake /Backward Neutral Forward/ speed up Brake /Backward Throttle tigger: Control forward / brake /backward. ● Steering wheel: Control left / right steering. ● Linearity ST/TRIM: When the steering wheel in the middle position, if the front wheel is not in a ●...
  • Page 11 Three section throttle speed limitswitch: 20% / 50% / 100%. ST-REV TH-D/R ST-D/R ST-TRIM ● Three section throttle speed limit switch: 20% / 50% / 100%. ● REV Steering REV: It is used to reverse the left and right directions of the car. ●TH/DR Throttle DR is used to adjust the throttle and car speed freely.
  • Page 12: Specification

    SPECIFICATION 1:76 Product name 1:76 RC drift car Scale Driving distance Driving time 30min 60x26.5x17.5mm Slope angel 30° 60.9x18.7x24.6mm Size Drive mode Two-wheel drive 61.75x25.4x17.9mm Proportional Proportional steering steering 60x25.6x17.3mm Battery parameter 3.7V, 55mAh, lithium battery Weight LED LIGHT STATUS TABLE Display Status Please check whether the power of remote control...
  • Page 13: Troubleshooting

    COMMISSIONING PARAMETERS OF DRIFT CAR This product has nished the basic commissioning before delivery. Without changing the basic settings, players can adjust the response speed of the car when drifting according to the di erent drift sites and personal control feel: 1.
  • Page 14 TROUBLESHOOTING Fault symptom Cause of failure Solutions Make sure that the product is in car 1. Distance is too far The tranmitter connection receiving mode.(The headlights ash). failed 2. Multicars pairing at the same time Check the wheels for foreign objects Foreign object between Freeze the wheels...
  • Page 15 PRECAUTION ● The car contains lithium batteries. Disassembling, striking, squeezing or throwing the car into the re is prohibited. If severe swelling occurs, do not continue to use it. Do not place it in high-temperature environment. ● Due to the special feature of lithium batteries, overly high or low temperature will a ect the battery charge and discharge performance and battery life, so please do not use or store this product under environments such as high temperature, low temperature, high humidity or direct sunlight.
  • Page 16 1. An exhaust xture inserted into the tail of 2. Then press and hold the head of the car the car chassis. chassis to install it. 1. Disassemble The car body shell:C61 1. Use a cross screwdriver to screw out the 2. Remove the screws. headlight xing parts.
  • Page 17 3. Take out the front lamp fastener. 4. Take out the vehicle body. 2. Install the car body shell:C61 1. When installing the vehicle body, install the 2. Install Front Light Retainer. front lamp rst, and then The vehicle body is inserted into the exhaust fastener at the rear of the vehicle.
  • Page 18 INSTALLATION OF SHELL PARTS GROUP C61-INSTALLATION OF SHELL PARTS GROUP 760051 760150 760151 760029 Left and right Material bodyshell *1 Front light *1 Tail light parts *1 re ective stickers x1 760154 760152 760028 760146 Exhaust pipe *1 Metal headlight xing base *1...
  • Page 19 C63-INSTALLATION OF SHELL PARTS GROUP 760162 760065 760068 Material bodyshell *1 Front light *1 Tail light parts *1 7600165 760163 760146 760067 Exhaust pipe *1 Metal headlight xing base *1 Screw x2 Tail *1 C64-INSTALLATION OF SHELL PARTS GROUP 760138 760122 760125 Material bodyshell *1...
  • Page 20 C62-C63-C64 Car shell assembly Install the tail wing Install the taillight (note the direction of installation) Install the screws for Install exhaust pipe exhaust pipe IInstall the front light Install the front light holder Install the screws for front light holder Attach...
  • Page 21 C61 Car shell assembly Install the tail wing Install the taillight (note the direction of installation) Install the screws for Install exhaust pipe Install exhaust pipe exhaust pipe Paste left and right IInstall the front light re ective stickers...
  • Page 22: General Assembly Drawing

    GENERAL ASSEMBLY DRAWING EXPLODED VIEW OF FINAL ASSEMBLY Car shell Screw 760147 Screw 760146 Battery Machine meter screw Gyro Spring Secondary drive shaft Steering assembly Primary drive shaft Picture of Steering support Rear wheel Chassis...
  • Page 23 CAR SHELL EXPLOSION C61-Car Shell Explosion 760028 760029 760150 760154 760151 760152 760146 C62-Car Shell Explosion 760058 760059 760060 760156 760056 760157 760146...
  • Page 24 C63-Car Shell Explosion 760067 760068 760162 760165 760065 760163 760146 C64-Car Shell Explosion 760138 760124 760122 760125 760166 760126 760052...
  • Page 25 UPPER SHELL C61-C62-C63-C64-Upper Shell 760127 760128 Drive motor 760032 Steering motor 760031 Spring installation position Installation position of drive motor Installation position of Installation position primary drive shaft of steering motor Installation position of secondary drive shaft...
  • Page 26: Transmission Shaft

    TRANSMISSION SHAFT C61-C62-C63-C64-Transmission Shaft 760034 760035 760040 760039 760038 760037 760036...
  • Page 27 REAR WHEEL C61-C63-C64-Rear Wheel 760062 760043 760129 760131 760130 C62-Rear Wheel 760042 760043 760129 760161 760132...
  • Page 28: Steering Assembly

    STEERING ASSEMBLY C61-C62-C63-C64-Steering Assembly 760129 760133 760046 760136 760132 760149 760135 760134...
  • Page 29 ORIGINAL SPARE PART C61-C62-C63-C64-Parts 760034 760035 Axis(Primary drive shaft )2pcs Gear(Primary drive shaft )2pcs 760037 760036 Gear(Secondary drive shaft)2pcs Axle sleeve(Secondary drive shaft)4pcs 760038 760039 Gear(Secondary drive shaft)2pcs Axis(Secondary drive shaft)2pcs 760040 760032 Axle sleeve(Secondary drive shaft)2pcs Motor 2pcs 760031...
  • Page 30 760128 760127 Spring 4pcs Millimeter screw 4pcs 760043 760129 Gear(Rear wheel)2pcs Hub 4pcs 760133 760134 Left and right components 4pcs Fixed shaf 4pcs 760135 760046 Rocker arm 2pcs Gear 2pcs 760136 760137 Fan teeth 2pcs Battery...
  • Page 31 760100 760021 Bolt driver 2pcs Charging line 760075 White 760074 Grey Guardrail Total 50pcs Guardrail Total 50pcs (Straight 45pcs) (Curved 5pcs) (Straight 45pcs) (Curved 5pcs) 760148 760076 Red Drift car racing track mat 1pcs Guardrail Total 50pcs (Straight 45pcs) (Curved 5pcs) 760139 760140 PU guardrail(10m)
  • Page 32 C61-C63-C64-Parts 760130 760132 Rear wheel 2pcs Front wheel 2pcs 760142 760062 Rear wheel set 2pcs Axle sleeve(Rear wheel)4pcs 760131 Axis(Rear wheel) 2pcs C61-C62-C63-Parts 760155 Steering support 2PCS...
  • Page 33 61-Parts 760150 760151 Material bodyshell 2pcs Front light 2pcs 760152 760153 Metal headlight xing base 2pcs Plastic headlight xing seat 2pcs 760029 760028 Taillights lights 2pcs Exhaust pipe 2pcs 760154 760051 Front light holder 2pcs Left and right re ectors 10pcs L(左)...
  • Page 34 62-Parts 760156 760056 Material bodyshell 2pcs Front light 2pcs 760157 760158 Metal headlight xing base 2pcs Plastic headlight xing seat 2pcs 760059 760058 Taillights lights 2pcs Exhaust pipe 2pcs 760060 760042 Front light holder 2pcs Axle sleeve(Rear wheel)4pcs 760160 7600159 Rear wheel set 2pcs wheel 4pcs...
  • Page 35 760161 Axis(Rear wheel) 2pcs 63-Parts 760162 760065 Material bodyshell 2pcs Front light 2pcs 760163 760164 Metal headlight xing base 2pcs Plastic headlight xing seat 2pcs 760068 760067 Taillights lights 2pcs Exhaust pipe 2pcs 760165 Front light holder 2pcs...
  • Page 36 64-Parts 760138 760122 Material bodyshell 2pcs Front light 2pcs 760123 760166 Metal headlight xing base 2pcs Plastic headlight xing seat 2pcs 760125 760124 Taillights lights 2pcs Exhaust pipe 2pcs 760126 760167 Front light holder 2pcs Steering support 2PCS 760173 Steering support + Metal headlight xing base 2PCS 760155 760166 Steering support 2PCS...
  • Page 37 CHOOSE A VARIETY OF STYLES RC car Fluorescent green Fluorescent red Cement gray Dark green Mint green Orange Purple Light yellow Light blue Blue RC Sports car C71-RD C71-YE C71-WH Yellow White C74-BK Violet Cement grey Black...
  • Page 38 O Road RC Car C81-BK C81-YE Black Yellow Drift RC Car C64-BU C64-GN Blue Green...
  • Page 39 Shenzhen NewStone Technology Co., Ltd. Manufacturer: Shenzhen NewStone Technology Co., Ltd. Address: Yuhong Industrial Park, No.20 Xingye West Road, ShaJing Town, Bao'an District, Shenzhen, Guangdong Province If this product can not operate normally during the warranty period, please contact the local distributor or manufacturer that sold this product to obtain warranty service.

This manual is also suitable for:

C62C63C64

Table of Contents

Save PDF