
Related Manuals for eRapta AWX104


Summary of Contents for eRapta AWX104
- Page 1 AWX104 eRapta HD Wireless 10" Backup Camera System (AWX104) Installation and Operation Guide...
- Page 2 FOREWORD: Thanks for your trust in eRapta and it's our honor that you purchased our product. eRapta is committed to providing a high quality product and a pleasant shopping experience. Before operating this backup system, please read these instructions completely.
-
Page 3: Table Of Contents
Table of Contents 1 WHATS IN THE PACKAGE............1 2 Introduction and Specitifications ..........2 3 SYSTEM DESCRIPTION............2 3.1 Monitor................2 4 INSTALL GUIDE...............6 4.1 Make an Installation Plan..........6 4.2 Monitor Installation............6 4.3 Camera Installation............8 4.4 Power Monitor & Camera..........8 5 SYSTEM OPERATION.............9 5.1 Menu Description.............9 5.2 Pairing Operation.............11... -
Page 4: Whats In The Package
Unpack the box carefully and verify that each item shows no signs of shipping damage. The image below provides an overview of all of the items that are part of this system. If any parts appear damaged or are missing, please contact us in time at this email address: sales2@erapta.com... -
Page 5: Introduction And Specitifications
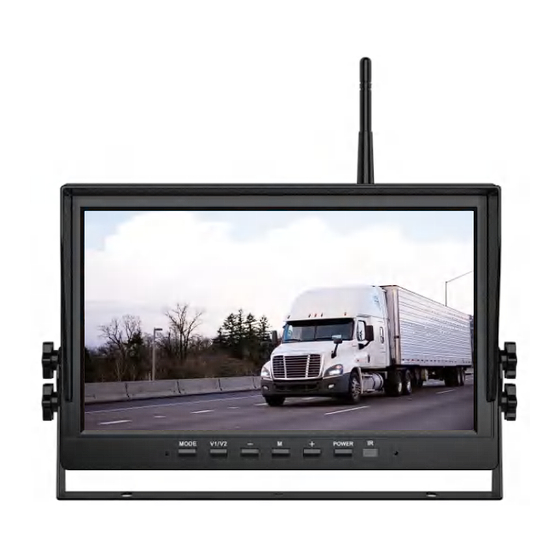
2 Introduction and Specifications This camera system in intended for vehicle surrounding monitoring during driving. It consists of four weather rated cameras and a flat screen panel, as well as related wiring and mounting hardwire. Rear/front mount cameras and side mount cameras are different form factors. It requires the monitor to be connected to a 12-24 Volt Direct Current power source (Current limited 1~2A). - Page 6 ① SD Card Placement ② Sunshade(Unremovable) ③ Select/Confirm Button (Start Recording) ④ Camera/Channel Switch Button ⑤ Function Decrease Button ⑥ Menu Button ⑦ Function Increase Button ⑧ Power ON/OFF Button (power) ⑨ Infrared 3.1.1 SD Card Access Port An SD card access port is located on the top right side of the monitor. The SD card is the primary storage device on the monitor, onto which camera video imagery is captured.
- Page 7 option - and then press MODE button to confirm and enter “PICTURE” option - under “PICTURE” setting, press + / - button to select the Brightness - if you confirm to adjust the Brightness, please press MODE button to confirm and then press + / - button to adjust it; finally press SEL button to confirm and exit this option, and press + / - button to select other parameter.
- Page 8 if you choose to close #1, the camera's image will no longer be displayed. (Path: Menu - CAM-SETUP - Turn ON/OFF the camera.) 2. Turn off or select split screen mode via MODE panel. There are a variety of split screen modes to choose from, and only supports 2 or 4 cameras display at the same time.
-
Page 9: Install Guide
3.1.4 Main Screen Interface Camera 1 : Each display will indicate its CAM# and signal strength in its upper left. REC : Recording video, there will be red REC in upper middle left of display. In the event of SD card issues, re-format the SD card (RECORD menu). -
Page 10: Monitor Installation
Based on our experience, we recommend that you follow this installation sequence: •Assemble Installation Tools •Install the Monitor •Connect Monitor to the Power Supply •Install the Camera(s) •Connect Camera(s)’ Red&Black Wire(s) to the Power Supply •Test and Calibrate the System •Adjust the Camera(s) View •... -
Page 11: Camera Installation
Fan-shaped Bracket Installation: 4.3 Camera Installation 1. Install the Rear Cameras 1.1 Use the original bracket, and install 1.2 Use the updated bracket, and install it to the place you want. it to the place you want. 2. Connect the Power Cord Connect the Power Cord to camera, then power it *Before fix the camera, you can adjust the lens of it. -
Page 12: System Operation
② Connect the power cord ① Mount the antennas to ③ Power the camera and or car charger to camera cameras and monitor monitor and monitor Use Car Charger Use Power Cord Use Power Cord 5 SYSTEM OPERATION The following graphic illustrates the layout of the software management system (SMS) panels and their associated sub-panels. - Page 13 Under the Sub-menu panel: selected items highlight in yellow color. - Use Button or Button to select menu item. - Press MODE Button to to active the selected item. *To return from any selection press MENU button or wait for timeout Software Management System Panels and Sub-panels Main-panels Sub-panels...
-
Page 14: Pairing Operation
NOTE: (1) Menu main-panel won’t bring up while monitor in split screen mode. Please press button to switch it to full screen before use the MENU button to enter menu panel. Otherwise MENU button won’t work. (2) The POWER button no working while playback the video files. (3) Re-start recording the second files when you switching channel. -
Page 15: Picture Operation
4. The screen appears “Pairing Start” and begins to counting down, then please plug in the power of the camera. 5. During this time, you just keep power the system and wait for the countdown clock, system will be pair up automatically (within 20s or more until the countdown ends ). -
Page 16: Mir-Flip Operation
press + / - button to adjust if you need to change it → Press MODE button to confirm and exit, and press + / - button to select the next parameter options and adjust by repeating the above steps, or press MENU button to back to previous panel. Note: Volume has no operational effect. -
Page 17: Cam-Setup Operation
5.6 CAM-SETUP Operation •You can choose from: CAM 1, CAM 2, CAM 3, CAM 4, AUTOSCAN, SCANTIME. •If you want to see the camera from a certain numbered screen, you h ave to make sure it has been turned ON in this menu, so that it can display the image. -
Page 18: Play Operation
press MODE button to confirm it, then press + / - button to choose the numbers(year, month, day, hour, minute, second). After selecting a number, you can press the MODE button to confirm and skip to the next one. Finally, if the time setting is completed, you can press the SEL button to confirm and exit. -
Page 19: Record Operation
5.9 RECORD Operation •Memory card settings: REWRITE, FOTMAT. •REWRITE: It will automatically overwrite the previous videos when the SD card is full. If you turn on it, please remember to save the video file in time if you need it to avoid it being overwritten. •FOTMAT: It will clear all data in the system. - Page 20 A: When driving, signal reception may drop at times. Changing the angle of the antennas may improve it, keep the tip of the antenna as far away from metal objects as possible. Also, other devices also will affect it. If this doesn’t work, please contact us at sales2@erapta.com...
-
Page 21: Troubleshooting
6.12 Q: How to solve the problem of camera’s water-in? A: Please contact us for the replacement camera via sales2@erapta.com. 6.13 Q: Why the screen keep showing the sign of “NO CARD”? A: Please loose the SD card and insert it again, and format the SD card. - Page 22 If the picture does not improve after adjustment, there may be a •problem with the camera, please contact us with the pictures and Amazon order number: sales2@erapta.com 7.3 Monitor No Power •Car engine has not been started, start the car engine;...
-
Page 23: Warranty
Every message will be replied within 24h. Our contact email is: sales2@erapta.com you can write it down or add it to your address book. Thanks for Purchasing We are willing to provide you with an accessory to help you install or use our system easier if you need. - Page 24 Amazon Order ID# : Original Rectangular HD Dash Cam with Original Side Camera Camera 16GB SD card Contact Person: Luis Contact Email: sales2@erapta.com Website: www.eRapta.com...
Need help?
Do you have a question about the AWX104 and is the answer not in the manual?
Questions and answers