Table of Contents
Advertisement
Quick Links
Advertisement
Table of Contents

Subscribe to Our Youtube Channel
Related Manuals for eRapta ATYZX7


Summary of Contents for eRapta ATYZX7
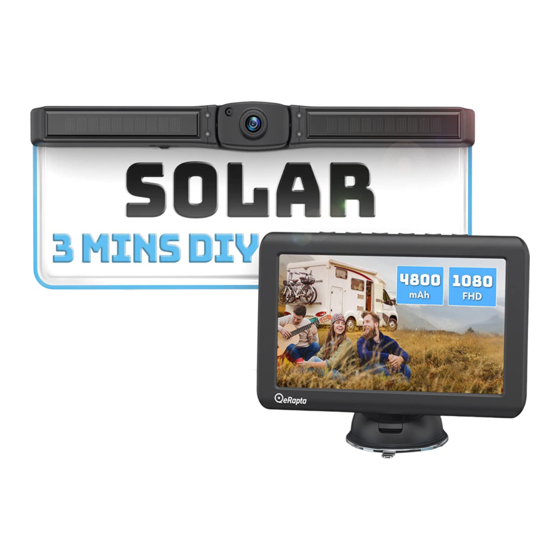
- Page 1 Solar Wireless 7 Camera System (ATYZX7) Installation and Operation Guide...
- Page 2 Foreword Thank you for purchasing our product! eRapta has always been commi�ed to providing high-quality products, and bringing a good experience to our customers. It’s our great honor to have your trust! This manual includes product installa�on guide and system opera�on instruc�ons. To obtain the best performance, please read the manual carefully before installing, and keep the manual properly.
-
Page 3: Table Of Contents
Contents 1. Package List..............2. Introduc�on and Specifica�on........3 2.1 Specifica�on............... 3 2.2 Introduc�on to Camera..........3 2.3 Introduc�on to Monitor..........5 2.4 Introduc�on to Accessories........8 3. Installa�on Guide............11 3.1 Make an Installa�on Plan.......... 11 3.2 Monitor Installa�on..........12 3.3 Camera Installa�on........... -
Page 4: Package List
1. Package Listing Thanks for choosing eRapta solar wireless backup camera system ATYZX7! We are commi�ed to providing you with the best quality products, so our product will serve you for years. Please check the external packaging to see whether there are any signs of rough handling. - Page 5 The image above provides an overview of all the items in the package. If any items are missing or damaged, please contact us at : sales2@erapta.com...
-
Page 6: Introduc�On And Specifica�On
2. Introduction and Specification 2.1 Specifica�on The system is designed to observe surroundings and assist parking, including a monitor, a camera, and other accessories needed to install. It requires 12-24 Volt Direct Current power to work. To avoid damage caused by electricity shock or improper installa�on, we recommend a qualified and experienced engineer to install the system for you. - Page 7 indicator light is off. ④:Indicator Light of Pairing. Usually the camera will pair automa�cally, otherwise select the pair op�on and pair them manually. When Pairing is in progress, the light will be flashing in green. When the pairing is successful, the light will stay in green.
-
Page 8: Introduc�On To Monitor
2.3 Introduc�on to Monitor 2.3.1 Icons on the screen : This camera has signal : Camera ba�ery status : Solar charging is in progress 2.3.2 Bu�ons on the monitor There are 6 bu�ons on the top of the monitor. From le� to right, they are POWER, +, -, CH, M, S. - Page 9 Power on/ off When you are reversing or need to use the reverse system, press to light up the screen and it will automa�cally connect the camera to show the reverse scene. When all se�ngs are exited, including the reversing line se�ng, press when the screen is lit, the screen will turn off...
- Page 10 is used for DIY reversing line. There are four op�ons to adjust the reverse line by pressing , they are height H, width W, posi�on M, and cancel the reverse line. In the H state, the height of the reversing line can be adjusted by pressing +, -.
-
Page 11: Introduc�On To Accessories
2.4 Introduc�on to Accessories 2.4.1 Monitor ac�vate bu�on 1. It’s used to light up the screen when you need to see through camera. 2. It needs to be paired with the monitor before use. Normally, the Pairing is done Before leaving our factory. But you need to re- pair the bu�on if it lost paired. - Page 12 2.4.3 Monitor Mount 1. It’s used to hold the monitor in the desired posi�on. 2. Two types of mounts are available depending on the need. 2.4.4 Camera bracket 1. It’s used to fix the camera to the license plate. 2.4.5 Antenna 1.
- Page 13 2.4.6 Plas�c nut It’s used to fix the monitor and the monitor mount. 2.4.7 USB charging cable 1. It’s used to connect the charger and the camera. 2.4.8 2 Screws It’s used to fix the camera bracket to the license plate.
-
Page 14: Installa�On Guide
3. Installation Guide 3.1 Make an Installa�on Plan Before installa�on, we recommend you spend a li�le �me tes�ng the system. This can help you confirm whether the system works normally before you install it on your vehicle. You can use a 12-24V power supply to power up the monitor and camera. -
Page 15: Monitor Installa�On
3.2 Monitor Installa�on There are two bracket op�ons for screen moun�ng. And it can be mounted to the dashboard or to the windshield. 1. Mount the antenna to the back of the monitor. 2. Select a bracket. Place the plas�c nut behind the bracket gimbal as shown in the picture. - Page 16 has been fixed with the monitor mount. 5. When you use the suc�on cup holder, first open the suc�on cup locking buckle as shown in the posi�on. Wet the suc�on cup with water, fixed in the ideal posi�on, then press the suc�on cup locking buckle.
-
Page 17: Camera Installa�On
3.3 Camera Installa�on 1. Remove the license plate screws. Place the camera bracket in front of the license plate. The bracket direc�on as shown In the picture. The screw holes on both sides correspond to the license plate screw holes. Use the screws to fix the bracket to the license plate. - Page 18 To prevent it from falling off easily, we �ghtened the fixing clips. So when you take it off, you need to use more force. If you encounter any problems in the installa�on, please feel free to contact us: sales2@erapta.com We will provide professional technical support within 24h.
-
Page 19: System Opera�On
4. System Operation This part describes the func�ons of 5 panels in menu page. You can press M to enter the menu page and adjust se�ngs by bu�ons on the monitor. When you move the cursor to a panel or a sub-panel, its icon will become gray. -
Page 20: Secondary Menu
4.2 Secondary Menu 4.2.1 Pairing Se�ng Before leaving our factory, the camera has already been paired with the monitor. Generally, the product is automa�cally paired when the screen is on. But you need to re-pair the camera if it lost paired. We recommend you finish pairing before installing the system on your vehicle, because the monitor and camera needs to be within 3 feet in pairing. - Page 21 (Pairing se�ng). Press to confirm the . Then press the Monitor ac�vate bu�on. It will appear OK under when it is paired successfully. If the system is s�ll not paired, Please feel free e-mail to our a�er-sales team at any �me: sales2@erapta.com...
-
Page 22: Image Parameters
4.2.2 Image Parameters 1. Press to enter menu page. 2. Press to select the (Image se�ng). 3. Select brightness/contrast/satura�on by press 4. Increase the parameters by pressing and decrease it by pressing 5. Press to confirm and exit the Secondary menu. 6. -
Page 23: Image Rota�On
4.2.3 Image Rota�on 1. Press to enter the menu page. 2. Press to select the (Image mirror/Flip se�ng). 3. Select flip or mirror image by press pressing 4. Press to confirm and exit the Secondary menu. 5. Press to exit the menu page. -
Page 24: Screen Timeout
4.2.4 Screen Timeout 1. Press to enter menu page. 2. Press to select the (Display �me se�ng). 3. Select different display �me by press pressing 4. Press to confirm and exit the Secondary menu. 5. Press to exit the menu page. Tips: When you select off... -
Page 25: Parking Guideline: On/Off
4.2.5 Parking Guidelines: ON/OFF 1. Press to enter menu page. 2. Press to select the (Parking guide line se�ng). 3. Select on/off by press pressing 6. Press to confirm and exit the Secondary menu. 7. Press to exit the menu page. -
Page 26: Parking Guideline Adjustment
4.2.6 Parking Guidelines Adjustment 1. Press to enter the three different adjustment states of parking guide line, or turn off the parking guide line. 2. When it appears H, the height of the parking guidelines can be adjusted by pressing 3. -
Page 27: Faq
5. FAQ 1. Q: How to solve the problem of "black screen"? A: Check if the screen and camera are successfully paired. Check if the camera has power, and check if the car charger can power the screen. 2. Q: Why does the monitor ac�vate bu�on not match and not work? A: The monitor ac�vate bu�on needs to be connected to the screen. -
Page 28: Warranty
6. Warranty Each of your messages will be answered within 24 hours. We will help you solve your problems, and provide you with the best a�er-sales service and technical support! Email : sales2@erapta.com Warranty: Life�me Warranty...
Need help?
Do you have a question about the ATYZX7 and is the answer not in the manual?
Questions and answers