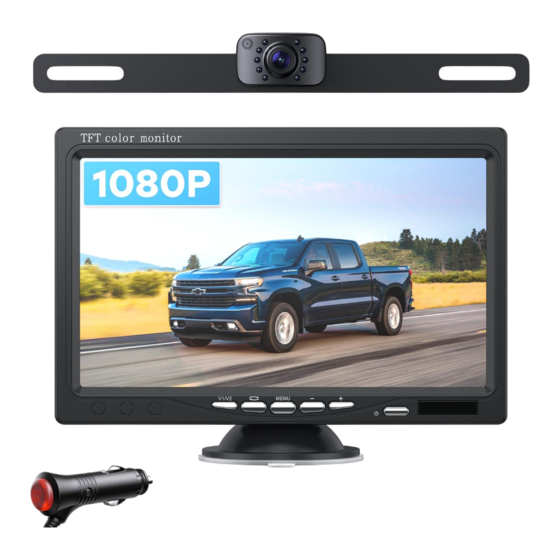
Summary of Contents for eRapta AYYY7
- Page 1 HD Wired 7" Backup Camera System Installation and Operation Guide If you have any issues or needs, please contact us at: (AYYY7) sales2@erapta.com...
- Page 2 We recommend that you retain this guide with the system as a ready reference. If you have any questions, or if you require technical support, please contact us at this email address: sales2@erapta.com We will respond within 24-hours to provide you with the support you require.
-
Page 3: Table Of Contents
INSTRUCTIONS MANUAL Table of Contents 1. WHATS IN THE PACKAGE ..............1 2. SPECIFICATIONS.................2 3. SAFETY PRECAUTIONS ..............2 4. SYSTEM INSTALLATION ..............3 4.1 Installation Diagram ................4 4.2 Installation of the Camera ...............5 4.3 Installation of the Monitor .............. 6 5. -
Page 4: Whats In The Package
Make sure your package includes the following listed items completely. If any item is damaged or missing, contact us at sales2@erapta.com. It would be better if you write down the order number from Amazon, include photos of the damaged or missing part in your email, so that we can handle the problem much more quickly. -
Page 5: Specifications
4pin connector Extension cable 32.8ft 3. SAFETY PRECAUTIONS Incorrect installation might cause personal injury or property damage. Contact eRapta customer service for assistance if needed. NOTE: Handle all components with care. Inspect regularly to avoid damage to components and cabling. -
Page 6: Installation Diagram
INSTRUCTIONS MANUAL NOTE: Do not apply excessive force to any of the components contained within this kit. Otherwise, it might result in damaged or non-functional parts. ● Do not disassemble or attempt to repair any part of the camera system. ●... -
Page 7: Installation Of The Camera
INSTRUCTIONS MANUAL 4.2 Installation of the Camera 4.2.1 Take off your rear license plate. Using a screwdriver, remove each of the screws holding your rear license plate in place. Then, pull the plate off and set it aside. NOTEE : Make sure you place the screws in a safe place so you don’t lose them. -
Page 8: Installation Of The Monitor
INSTRUCTIONS MANUAL Then, create a small hole in the car using a power drill. Line up your hole so it is directly behind where your camera’s power cable will go. NOTEE :The hole doesn't have to be very big, just large enough for the cable. - Page 9 INSTRUCTIONS MANUAL Connect the monitor cable to the 4pin connector. 4.3.2 Via Fixed Bracket Place the locking screw and fixed bracket on the back of the monitor and adjust the monitor to the desired viewing angle. Then tighten the locking screw to secure the monitor.
-
Page 10: Monitoring Operation
INSTRUCTIONS MANUAL 5.OPERATING INSTRUCTION 5.1 Monitoring Operation Screen switch button: Please ignore this button Confirm / Move down/ Parking guidelines button: Turn on/off the parking guidelines. Menu button: Settings for Parking Guidelines/PIC/CAR/MODE/SYS Decrease button/ Move to the left Increase button/ Move to the right Power button: Turn on / off the monitor and standby. -
Page 11: Settings Operation
INSTRUCTIONS MANUAL 5.2 Settings Operation The following graphic illustrates the layout of the software management system (SMS) panels and their associated sub-panels. Please note that you can press the buttons of monitor or use the remote to access or modify the SMS panels. While they may appear to be complicated, they are not. - Page 12 INSTRUCTIONS MANUAL (return to the menu ) CAR LINE : There are 3 styles for chosen: Mode1, Mode2, Mode3, CAR DELAY :This is the reverse delay, you can choose: 3s, 6s, 9s, Off. 5.2.3 MODE MODE Press Press Press Press (on/ off)
-
Page 13: Parking Guidelines Operation
INSTRUCTIONS MANUAL LANGUAGE : There are many language: English/简体中文/繁体中 文/Japanese/Korean, it defaults to English. SCREEN SAVE:1/3/5 minutes Parking Guidelines Operation Press the button to adjust the parking guidelines if guidelines function was on. Note: Setting the parking guidelines’ shape or position when the top right shows H/ V/ M. -
Page 14: Remote Control Operation
If there is still no improvement, maybe the screen has been subjected to some collision during transportation or use, please contact us and we will help you: sales2@erapta.com 6.2 Why is the monitor no signal or blue? Do a hard reset, unplug all cables,leave out for 1 minute and then... - Page 15 If there is still no improvement, maybe the screen has been subjected to some collision during transportation or use, please contact us and we will help you: sales2@erapta.com 6.3 Why does the camera gets blurry or foggy? Check the external lenses. Clean them by simply wiping off the dirt.
- Page 16 INSTRUCTIONS MANUAL If you have any accessory damage or problems with your camera, please feel free to contact us :sales2@erapta.com 6.6 What should I do if the camera is flooded? Some cameras may accidentally enter water due to heavy rain or when washing the car, which will make the screen appear blurry.
-
Page 17: Warranty
INSTRUCTIONS MANUAL 7. Warranty eRapta offers a full 24 months warranty and replacement policy. We also provide lifetime technical support to ensure that you enjoy your modern backup camera for many years to come. To obtain warranty support, or if you are not satisfied in any way, or have any issues with your purchase, please contact us first for help, to instead of return or negative content.


Need help?
Do you have a question about the AYYY7 and is the answer not in the manual?
Questions and answers