
Subscribe to Our Youtube Channel
Related Manuals for Bose PowerShare PS404A


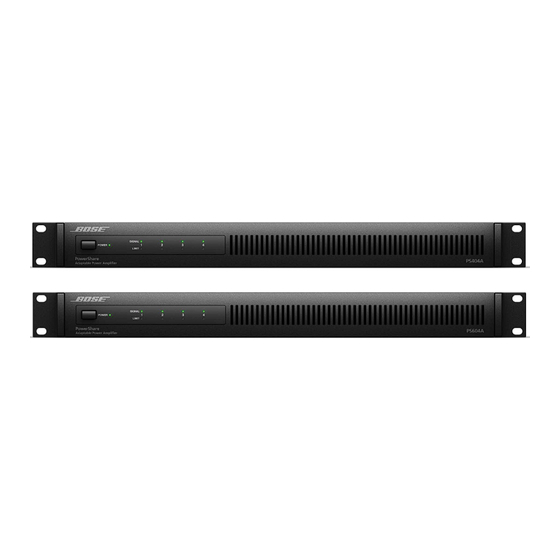
Summary of Contents for Bose PowerShare PS404A
- Page 1 Bose PowerShare PS404A and PS604A ® Adaptable Power Amplifiers (AmpLink Versions) Service Manual ©2018 Bose Corporation Reference Number 791324-SM Revision 00...
-
Page 2: Table Of Contents
Electrostatic Discharge Sensitive (ESDS) Device Handling..................8 PART LIST NOTES...............................8 PACKAGING PART LIST .............................9 Figure 1. Packaging Exploded View ........................9 MAIN PART LIST............................10-11 Figure 2. PowerShare PS404A and PS604A Exploded View ................12 ELECTRICAL PART LISTS..........................13-78 DISASSEMBLY PROCEDURE........................79-82 Figure 3. Chassis View - PCB Locations......................79 TEST PROCEDURE............................83-89 HI-POT AND GROUND BOND TEST........................89... -
Page 3: Safety Information
OF SERVICING THE IDENTIFIED BOSE PRODUCT BY AN AUTHORIZED BOSE SERVICE CENTER, AND SHALL NOT BE REPRODUCED OR USED FOR ANY OTHER PURPOSE. WARRANTY The Bose PowerShare PS404A and PS604A amplifiers are covered by a limited 5-year transferable ® warranty. Accessories ControlCenter Zone Controllers... -
Page 4: Product Description
With the inclusion of AmpLink, up to 24 digital audio channels can be sent to the ® amp from a Bose DSP via a shielded CAT 5 cable. This unique set of features and technologies makes PowerShare one of the most versatile high-performance amplifiers available. - Page 5 AmpLink – INPUT RJ-45 connector that receives up to 24 CHANNEL 1, 2, 3, 4 EQ – Each dial provides loudspeaker digital channels from a Bose AmpLink product. The amp also equalization presets per channel: DS 16, DS 40, DS 100, supports a THRU path for daisy-chaining all 24 digital audio FS3B, 402, 802 , MA12EX, RMU105, and RMU108.
-
Page 6: Specifications
RJ-45 remote input for volume control using the CC-1 ControlCenter zone controllers, or for connection to the CV41. Micro-USB input for configuring the amplifier withowerShare Editor software. Mute input control. For additional specifications and application information, please visit pro.Bose.com. Specifictions subject to change without notice. - Page 7 RJ-45 remote input for volume control using the CC-1 ControlCenter zone controllers, or for connection to the CV41. Micro-USB input for configuring the amplifier with PowerShare Editor software. Mute input control. For additional specifications and application information, please visit pro.Bose.com. Specifications subject to change without notice.
-
Page 8: Electrostatic Discharge Sensitive (Esds) Device Handling
2. This part is referenced for informational purposes only. It is not stocked as a repair part. Refer to the next higher assembly for a replacement part. This part is critical for safety purposes. Failure to use the Bose recommended part may result ®... -
Page 9: Packaging Part List
PACKAGING PART LIST PowerShare PS404A and PS604A (see Figure 1) Item Part Number Description Qty. Note Number 795642-001S CARTON, AMP, PS404A, SVCE 795643-001S CARTON, AMP, PS604A, SVCE 770267-0010 PE FOAM INSERT, REAR 770268-0010 PE FOAM INSERT, FRONT 770269-001S CARTON, LINE CORD AND ACCESSORIES, SVCE... -
Page 10: Main Part List
MAIN PART LIST PowerShare PS404A and PS604A (see Figure 2) Item Description Part Number Qty. Note Number INSULATOR, PC BOARD (USED ON TOP COVER) 748404-001S ASSY, TOP COVER, SVCE (INCLUDES PC SHEET, ITEM 1) 748388-011S SCREW, TOP COVER FOAM, FAN... - Page 11 MAIN PART LIST (CONT.) PowerShare PS404A and PS604A (see Figure 2) Item Description Part Number Qty. Note Number SCREW, AC INLET, IEC CONN, AC INLET, IEC, SERVICE 301396 SCREW, REAR PCB TUBE, H=10MM TUBE, H=3.5MM SCREW, RJ45 CONNECTOR TUBE, H=6.3MM...
- Page 12 EXPLODED VIEW Rear PCB Assy-PS604A/PS404A P/N:797165-001S Figure 2. PowerShare PS404A and PS604A Exploded View...
-
Page 13: Electrical Part Lists
ELECTRICAL PART LIST Amplifier PCB Assembly Resistors Reference Description Part Number Note Designator R100 0603, .1W, 1%, 1K 191465-1001 R101 0603, .1W, 1%, 20K 191465-2002 R102 0603, .1W, 1%, 10K 191465-1002 R103 0603, .1W, 1%, 33.2K 191465-3322 R104 THERMISTOR, 0603, B4480, 5%, 100K 329730-104J R105 0603, .1W, 1%, 2K... - Page 14 ELECTRICAL PART LIST Amplifier PCB Assembly Resistors (continued) Reference Description Part Number Note Designator R142 0603, .1W, 1%, 7.15K 191465-7151 R143 0603, .1W, 1%, 7.15K 191465-7151 R144 0603, .1W, 1%, 200K 191465-2003 R145 0603, .1W, 1%, 200K 191465-2003 R146 0805, .125W, 1%, 100K 133625-1003 R147 0805, .125W, 1%, 100K...
- Page 15 ELECTRICAL PART LIST Amplifier PCB Assembly Resistors (continued) Reference Description Part Number Note Designator R234 0603, 0.1W, 1%, 976 OHMS 191465-9760 R235 0603, .1W, 1%, 1.4K 191465-1401 R236 0603, .1W, 1%, 1.4K 191465-1401 R237 0603, .1W, 1%, 1K 191465-1001 R238 0603, .1W, 1%, 1K 191465-1001 R239...
- Page 16 ELECTRICAL PART LIST Amplifier PCB Assembly Resistors (continued) Reference Description Part Number Note Designator R283 0603, 0.1W, 1%, 66.5 OHMS 191465-66R5 R284 0603, .1W, 1%, 20K 191465-2002 R285 0603, 0.1W, 1%, 66.5 OHMS 191465-66R5 R286 0603, 0.1W, 1%, 1.47K 191465-1471 R287 0603, 0.1W, 1%, 59 OHMS 191465-59R0...
- Page 17 ELECTRICAL PART LIST Amplifier PCB Assembly Resistors (continued) Reference Description Part Number Note Designator R326 0603, 0.1W, 1%, 40.2 OHM 191465-40R2 R327 0603, .1W, 1%, 10K 191465-1002 R328 0603, .1W, 1%, 33.2K 191465-3322 R329 0603, 0.1W, 1%, 40.2 OHM 191465-40R2 R330 0603, 0.1W, 1%, 4.99 OHMS 191465-4R99...
- Page 18 ELECTRICAL PART LIST Amplifier PCB Assembly Resistors (continued) Reference Description Part Number Note Designator R368 0603, .1W, 1%, 267 OHM 191465-2670 R369 0603, 0.1W, 1%, 340 OHMS 191465-3400 R370 0603, 0.1W, 1%, 665 OHMS 191465-6650 R371 0603, .1W, 1%, 7.32K 191465-7321 R372 0603, .1W, 1%, 549 OHM...
- Page 19 ELECTRICAL PART LIST Amplifier PCB Assembly Resistors (continued) Reference Description Part Number Note Designator R428 0603, 0.1W, 1%, 40.2 OHM 191465-40R2 R429 0603, 0.1W, 1%, 4.99 OHMS 191465-4R99 R430 0603, .1W, 1%, 10 OHM 191465-10R0 R431 0603, 0.1W, 1%, 4.99 OHMS 191465-4R99 R432 0603, .1W, 1%, 20 OHM...
- Page 20 ELECTRICAL PART LIST Amplifier PCB Assembly Resistors (continued) Reference Description Part Number Note Designator R470 0603, .1W, 1%, 7.32K 191465-7321 R471 0603, .1W, 1%, 549 OHM 191465-5490 R472 0603, .1W, 1%, 1K 191465-1001 R473 0603, .1W, 1%, 7.32K 191465-7321 R474 0603, .1W, 1%, 88.7K 191465-8872 R475...
- Page 21 ELECTRICAL PART LIST Amplifier PCB Assembly Resistors (continued) Reference Description Part Number Note Designator R2133 0603, 100MW, 1%, 1.33K 191465-1331 R2134 0603, 100MW, 1%, 1.33K 191465-1331 R2135 0603, .1W, 1%, 49.9K 191465-4992 Capacitors Reference Description Part Number Note Designator C100 1206, X7R, 25V, 10%, 4.7uF 262063-475 C101...
- Page 22 ELECTRICAL PART LIST Amplifier PCB Assembly Capacitors (continued) Reference Description Part Number Note Designator C136 X7R, 0603, 10%, 0.1uF, 50V 191470-104 C137 1206, X7R, 25V, 10%, 4.7uF 262063-475 C138 0805, X7R, 50V, 0.1uF 133623-104 C139 C0G, 0603, 50V, 5%, 330pF 188454-331 C141 0805, X7R, 50V, 0.1uF...
- Page 23 ELECTRICAL PART LIST Amplifier PCB Assembly Capacitors (continued) Reference Description Part Number Note Designator C238 C0G, 0603, 50V, 5%, 270pF 188454-271 C239 C0G, 0603, 50V, 5%, 1800pF 188454-182 C240 C0G, 0603, 50V, 5%, 1800pF 188454-182 C241 C0G, 0603, 50V, 5%, 220pF 188454-221 C242 C0G, 0603, 50V, 5%, 270pF...
- Page 24 ELECTRICAL PART LIST Amplifier PCB Assembly Capacitors (continued) Reference Description Part Number Note Designator C304 0603, X7R, 50V, 10%, .033uF 191470-333 C305 C0G, 0603, 50V, 5%, 220pF 188454-221 C306 X7R, 0603, 16V, 5%, 4.7nF 257154-472J16 C307 C0G, 0603, 50V, 5%, 220pF 188454-221 C308 0603, X7R, 5%, 25V, 2.2nF...
- Page 25 ELECTRICAL PART LIST Amplifier PCB Assembly Capacitors (continued) Reference Description Part Number Note Designator C346 0805, C0G, 200V, 10%, 220pF 260668-221K C347 X7R, 1210, 200V, 10%, 220nF 327916-224K C348 0805, C0G, 200V, 10%, 220pF 260668-221K C349 X7R, 1210, 25V, 10%, 22uF, COMM 759068-226K1E C350 0805, C0G, 200V, 10%, 220pF...
- Page 26 ELECTRICAL PART LIST Amplifier PCB Assembly Capacitors (continued) Reference Description Part Number Note Designator C411 EL, SNAP-IN, DISK, 105C, 200V, 20%, 1500uF 629718-152DDBW C412 C0G, 0603, 50V, 5%, 470pF 188454-471 C413 0603, C0G, SMD, 25V, 5%, 10nF 268368-103 C414 X7R, 0603, 10%, 0.1uF, 50V 191470-104 C415 X7R, 1210, 200V, 10%, 220nF...
- Page 27 ELECTRICAL PART LIST Amplifier PCB Assembly Capacitors (continued) Reference Description Part Number Note Designator C453 X7R, 1210, 200V, 10%, 220nF 327916-224K C454 X7R, 1210, 200V, 10%, 220nF 327916-224K C455 C0G, 0603, 50V, 5%, 430pF 188454-431 C456 C0G, 0603, 5%, 25V, 8.2nF 268368-822 C457 X7R, 1210, 200V, 10%, 220nF...
- Page 28 ELECTRICAL PART LIST Amplifier PCB Assembly Capacitors (continued) Reference Description Part Number Note Designator C495 X7R, 1210, 200V, 10%, 220nF 327916-224K C496 X7R, 1210, 200V, 10%, 220nF 327916-224K C497 X7R, 1210, 200V, 10%, 220nF 327916-224K C498 C0G, 0603, 50V, 5%, 430pF 188454-431 Inductors Reference...
- Page 29 ELECTRICAL PART LIST Amplifier PCB Assembly Diodes (continued) Reference Description Part Number Note Designator D310 SCHOTTKY, 1A, 30V, SOD123 317122-001 D311 SCHOTTKY, 1A, 30V, SOD123 317122-001 D312 SCHOTTKY, 1A, 30V, SOD123 317122-001 D313 SCHOTTKY, 1A, 30V, SOD123 317122-001 D314 SCHOTTKY, 1A, 40V, SOD-123 329019-0010 D315 SCHOTTKY, 1A, 30V, SOD123...
- Page 30 ELECTRICAL PART LIST Amplifier PCB Assembly Diodes (continued) Reference Description Part Number Note Designator D423 SCHOTTKY, 1A, 40V, SOD-123 329019-0010 D424 SW, 75V, 0.3A, SOT-323, BAV99W 298763-075 ZR100 ZENER, 10.V, 225MW, 5%, SOT-23 135247-5240 ZR101 ZENER, 10.V, 225MW, 5%, SOT-23 135247-5240 ZR200 ZENER, 5.6V, 250mW, 1%, SOT-23...
- Page 31 ELECTRICAL PART LIST Amplifier PCB Assembly Transistors (continued) Reference Description Part Number Note Designator Q315 PNP, LO SAT, 30V, 5.5A, SOT89 326379-0010 Q316 PNP, LO SAT, 30V, 5.5A, SOT89 326379-0010 Q317 NPN, LO SAT, 30V, 6A, SOT89 326375-0010 Q318 MFET, N-CH, 3.5A, 30V, SOT-23 362339-0010 Q319 NPN, LO SAT, 30V, 6A, SOT89...
- Page 32 ELECTRICAL PART LIST Amplifier PCB Assembly Transistors (continued) Reference Description Part Number Note Designator Q422 PNP, LO SAT, 30V, 5.5A, SOT89 326379-0010 Q423 MFET, N-CH, 60mA, 200V, SOT-23 354011-0010 Q424 MFET, N-CH, 60mA, 200V, SOT-23 354011-0010 Q425 PNP, LO SAT, 30V, 5.5A, SOT89 326379-0010 Q426 PNP, LO SAT, 30V, 5.5A, SOT89...
- Page 33 ELECTRICAL PART LIST Amplifier PCB Assembly Miscellaneous Reference Description Part Number Note Designator HS100 HEAT SINK, DPAK 320438-002 HS300 HEAT SINK, D2PAK 320438-001 J100 CONN, FFC, 0.5mm, T ENTRY, 20POS, WHT 269863-020 J101 CONN, FFC, 0.5mm, T ENTRY, 10POS, WHT 269863-010 J300 CONN, HEADER, INLINE, PCB MNT, 4P...
- Page 34 ELECTRICAL PART LIST SMPS PCB Assembly Resistors Reference Description Vendor Part Number Note Designato r R200 RMG, 1/16W, 0R, 1%, 0603 4723-000A R202 RMG, 1/10W, 3.3K, 1%, 0805 4720-332A R203 RMG, 1/16W, 3K, 1%, 0603 4723-302A R204 RMG, 1/16W, 4.7K, 1%, 0603/1608 4723-472A R205 RMG, 1/16W, 4.99K, 1%, 0603...
- Page 35 ELECTRICAL PART LIST SMPS PCB Assembly Resistors (continued) Reference Description Vendor Part Number Note Designator R242 RMG, 1/8W, 2.2 OHMS, 5%, 1206 4721-2R2J R243 RMG, 1/8W, 330K, 5%, 1206 4721-334J R244 RMG, 1/8W, 330K, 5%, 1206 4721-334J R245 RMG, 1/8W, 330K, 5%, 1206 4721-334J R246 RMG, 1/16W, 0 OHMS, 1%, 0603...
- Page 36 ELECTRICAL PART LIST SMPS PCB Assembly Resistors (continued) Reference Description Vendor Part Number Note Designator R290 RMG, 1/16W, 470K, 1%, 0603 4723-474A R291 RMG, 1/16W, 2K, 1%, 0603/1608 4723-202A R292 RMG, 1/16W, 13K, 1%, 0603 4723-133AR R293 RMG, 1/16W, 12K, 1%, 0603 4723-123AR R294 RMG, 1/16W, 12K, 1%, 0603...
- Page 37 ELECTRICAL PART LIST SMPS PCB Assembly Resistors (continued) Reference Description Vendor Part Number Note Designator R358 RMG, 1/10W, 4.02K, 1%, 0603 4720-4021 R359 RMG, 1/16W, 44.2K, 1%, 0603 4723-4422 R360 RMG, 1/10W, 4.02K, 1%, 0603 4720-4021 R361 RMG, 1/16W, 10K, 1%, 0603 4723-103AR R362 RMG, 1/16W, 1K, 1%, 0603/1608...
- Page 38 ELECTRICAL PART LIST SMPS PCB Assembly Capacitors (continued) Reference Description Vendor Part Number Note Designator C226 CC, 500V, 0.022uF, 10%, 1206 150L-223KCF C227 CC, 630V, 0.1uF, 10%, 1812, X7R 150M-104KHF C232 CC, 100V, 100pF, 10%, 0805, 1.2X2, NPO 150H-101KBD C233 CC, 100V, 100pF, 10%, 0805, 1.2X2, NPO 150H-101KBD C234...
- Page 39 ELECTRICAL PART LIST SMPS PCB Assembly Capacitors (continued) Reference Description Vendor Part Number Note Designator C272 CE, 16V, 470uF, 20%, RLT, 10X12.5, 105C, LOW, ESR 157D-477MSXTR C273 CC, 50V, 0.47uF, 10%, 0805, 1.25X2, X7R 150F-474KBD C274 CC, 500V, 0.022uF, 10%, 1206 150L-223KCF C275 CC, 50V, 100pF, 5%, 0603, C0G...
- Page 40 ELECTRICAL PART LIST SMPS PCB Assembly Capacitors (continued) Reference Description Vendor Part Number Note Designator C318 CC, 50V, 0.1uF, 10%, 0805, 1.2X2.0 150F-104KBD C319 CC, 50V, 0.1uF, 10%, 0805, 1.2X2.0 150F-104KBD C324 CC, 50V, 0.1uF, 5%, 0603 150F-104JAC C325 CC, 50V, 0.1uF, 5%, 0603 150F-104JAC C326 CC, 50V, 0.1uF, 5%, 0603...
- Page 41 ELECTRICAL PART LIST SMPS PCB Assembly Diodes (continued) Reference Description Vendor Part Number Note Designator D217 DIODE, FAST, 75V, 0.5A, BAS316, SOD323, SM 480S-3160 D218 DIODE, FAST, 75V, 0.5A, BAS316, SOD323, SM 480S-3160 D219 DIODE, FAST, 75V, 0.5A, BAS316, SOD323, SM 480S-3160 D222 DIODE, FAST, 75V, 0.5A, BAS316, SOD323, SM...
- Page 42 ELECTRICAL PART LIST SMPS PCB Assembly Integrated Circuits Reference Description Vendor Part Number Note Designator U200 IC, DRIVER, NCP5181DR2G, SOIC-8 3132-8471 U201 IC, LM19, THERMAL, SENSOR, TO-92, NS 3132-2581 U202 IC, LM339, SMD, COMPARATORS 3132-1250 U203 PHOTOCOUPLER, EL817S1, S1 4818-17S1 U204 PHOTOCOUPLER, EL817S1, S1 4818-17S1...
- Page 43 ELECTRICAL PART LIST SMPS PCB Assembly Miscellaneous (continued) Reference Description Vendor Part Number Note Designator L=70 HEATSINK, SMPS, 14X30, L=70, AL-EXT, ANODIZE, BLACK 5401-0702 NTC200 THERMISTOR, NTC, 5R, 20%, 240V, 6A, 200C, RL, THINKING 5202-0045 Silicon PAD INSULATN-SHEET, SIL-PAD, 800, 55X22 3101-0961 T200 TRANS, PWR, 385V/80V, 600W, 4A, ER40...
- Page 44 ELECTRICAL PART LIST Rear Panel PCB Assembly Resistors Reference Description Vendor Part Number Note Designator R840 RMG, 1/16W, 4.7K, 1%., 0603/1608 4723-472A+P R841 RMG, 1/16W, 4.7K, 1%., 0603/1608 4723-472A+P R842 RMG, 1/16W, 4.7K, 1%., 0603/1608 4723-472A+P R843 RMG, 1/16W, 4.7K, 1%., 0603/1608 4723-472A+P R844 RMG, 1/16W, 4.7K, 1%., 0603/1608...
- Page 45 ELECTRICAL PART LIST Rear Panel PCB Assembly Resistors (continued) Reference Description Vendor Part Number Note Designator R880 RCFA, 1/16W, 47RX4, 5%, 0603 4703-470J+P-04 R881 RCFA, 1/16W, 47RX4, 5%, 0603 4703-470J+P-04 R882 RMG, 1/16W, 100R, 1%, 0603 4723-101A+P R883 RMG, 1/16W, 100R, 1%, 0603 4723-101A+P R884 RMG, 1/16W, 100R, 1%, 0603...
- Page 46 ELECTRICAL PART LIST Rear Panel PCB Assembly Capacitors (continued) Reference Description Vendor Part Number Note Designator C863 CC, 50V, 0.01uF, 10%, 0603, X7R 150F-103K+P-AC C864 CC, 50V, 0.01uF, 10%, 0603, X7R 150F-103K+P-AC C865 CC, 50V, 0.01uF, 10%, 0603, X7R 150F-103K+P-AC C866 CC, 50V, 0.01uF, 10%, 0603, X7R 150F-103K+P-AC...
- Page 47 ELECTRICAL PART LIST Rear Panel PCB Assembly Diodes (continued) Reference Description Vendor Part Number Note Designator Z842 DZ, 1/2W, 6.2VB, SMD, LL-34, ROHM (RLZTE-116.2B ) 4837-6V21+3 Z843 DZ, 1/2W, 6.2VB, SMD, LL-34, ROHM (RLZTE-116.2B) 4837-6V21+3 Z844 DZ, 1/2W, 6.2VB, SMD, LL-34, ROHM (RLZTE-116.2B) 4837-6V21+3 Integrated Circuits Reference...
- Page 48 ELECTRICAL PART LIST DSP PCB Assembly Resistors Reference Description Vendor Part Number Note Designator R600 RMG, 1/16W, 4.3K, 1%, 0603/1608 4723-432A+P R601 RMG, 1/16W, 3.9K, 5%, 0603, HK, RESISTOR/SAMSUNG 4723-392J+P-R R602 RMG, 1/16W, 3.9K, 5%, 0603, HK, RESISTOR/SAMSUNG 4723-392J+P-R R603 RMG, 1/16W, 33R, 1%, 0603 4723-330A+P R604...
- Page 49 ELECTRICAL PART LIST DSP PCB Assembly Resistors (continued) Reference Description Vendor Part Number Note Designator R640 RMG, 1/16W, 4.99K, 1%, 0603 4723-4991+P R641 RMG, 1/16W, 4.99K, 1%, 0603 4723-4991+P R642 RMG, 1/16W, 4.99K, 1%, 0603 4723-4991+P R643 RMG, 1/16W, 4.99K, 1%, 0603 4723-4991+P R644 RMG, 1/16W, 4.99K, 1%, 0603...
- Page 50 ELECTRICAL PART LIST DSP PCB Assembly Resistors (continued) Reference Description Vendor Part Number Note Designator R680 RMG, 1/16W, 0R, 1%, 0603 4723-000A+P R681 RMG, 1/16W, 0R, 1%, 0603 4723-000A+P R682 RMG, 1/16W, 0R, 1%, 0603 4723-000A+P R683 RMG, 1/16W, 0R, 1%, 0603 4723-000A+P R684 RMG, 1/16W, 0R, 1%, 0603...
- Page 51 ELECTRICAL PART LIST DSP PCB Assembly Resistors (continued) Reference Description Vendor Part Number Note Designator R720 RMG, 1/16W, 100R, 1%, 0603 4723-101A+P R721 RMG, 1/16W, 100R, 1%, 0603 4723-101A+P R722 RMG, 1/16W, 100R, 1%, 0603 4723-101A+P R723 RMG, 1/16W, 100R, 1%, 0603 4723-101A+P R724 RMG, 1/16W, 100R, 1%, 0603...
- Page 52 ELECTRICAL PART LIST DSP PCB Assembly Resistors (continued) Reference Description Vendor Part Number Note Designator R768 RMG, 1/16W, 1M, 1%, 0603 4723-105A+P R769 RMG, 1/16W, 1M, 1%, 0603 4723-105A+P R770 RMG, 1/16W, 1M, 1%, 0603 4723-105A+P R771 RMG, 1/16W, 1M, 1%, 0603 4723-105A+P R772 RMG, 1/16W, 1M, 1%, 0603...
- Page 53 ELECTRICAL PART LIST DSP PCB Assembly Capacitors (continued) Reference Description Vendor Part Number Note Designator C618 CC, 50V, 0.1U, 5%, 0603 150F-104J+P-AC C619 CC, 50V, 0.1U, 5%, 0603 150F-104J+P-AC C620 CC, 50V, 0.1U, 5%, 0603 150F-104J+P-AC C621 CC, 50V, 0.1U, 5%, 0603 150F-104J+P-AC C622 CC, 50V, 0.1U, 5%, 0603...
- Page 54 ELECTRICAL PART LIST DSP PCB Assembly Capacitors (continued) Reference Description Vendor Part Number Note Designator C658 CC, 50V, 1U, 10%, 0805 150F-105K+J-BD C659 CT, 6.3V, 47U, 10%, SMD, 85C, 1.6X3.2 154B-476K+3-CF C660 CT, 6.3V, 47U, 10%, SMD, 85C, 1.6X3.2 154B-476K+3-CF C661 CC, 16V, 1U, 10%, 0603, 0.8X1.6 150D-105K+P-AC...
- Page 55 ELECTRICAL PART LIST DSP PCB Assembly Capacitors (continued) Reference Description Vendor Part Number Note Designator C698 CE, 16V, 10U, 20%, SM, 3X5.4, 85C-2000H 157D-106M+3-EJ C699 CE, 16V, 10U, 20%, SM, 3X5.4, 85C-2000H 157D-106M+3-EJ C700 CE, 16V, 10U, 20%, SM, 3X5.4, 85C-2000H 157D-106M+3-EJ C701 CE, 16V, 10U, 20%, SM, 3X5.4, 85C-2000H...
- Page 56 ELECTRICAL PART LIST DSP PCB Assembly Capacitors (continued) Reference Description Vendor Part Number Note Designator C738 CC, 50V, 100PF, 5%, 0603, C0G 150F-101J+P-AC C739 CC, 50V, 100PF, 5%, 0603, C0G 150F-101J+P-AC C740 CC, 50V, 100PF, 5%, 0603, C0G 150F-101J+P-AC C741 CC, 50V, 100PF, 5%, 0603, C0G 150F-101J+P-AC C742...
- Page 57 ELECTRICAL PART LIST DSP PCB Assembly Capacitors (continued) Reference Description Vendor Part Number Note Designator C778 CC, 50V, 0.1U, 5%, 0603 150F-104J+P-AC C779 CC, 50V, 0.1U, 5%, 0603 150F-104J+P-AC C780 CC, 50V, 0.1U, 5%, 0603 150F-104J+P-AC C781 CC, 50V, 0.1U, 5%, 0603 150F-104J+P-AC C782 CC, 50V, 0.1U, 5%, 0603...
- Page 58 ELECTRICAL PART LIST DSP PCB Assembly Inductors Reference Description Vendor Part Number Note Designator L600 FERRITE BEAD, CHIP, SEBW201209U121MT, 0805 1808-0872+0 L601 FERRITE BEAD, CHIP, SEBW201209U121MT, 0805 1808-0872+0 L602 FERRITE, CHIP, 0603, BLM18AG102SN1D, MURATA 1808-0878+0 L603 FERRITE, CHIP, 0603, BLM18AG102SN1D, MURATA 1808-0878+0 L604 FERRITE, CHIP, 0603, BLM18AG102SN1D, MURATA...
- Page 59 ELECTRICAL PART LIST DSP PCB Assembly Transistors Reference Description Vendor Part Number Note Designator Q600 TR, PNP, 2SA2058, HFE:125, 2-3S1A, SM 4852-0580+3 Integrated Circuits Reference Description Vendor Part Number Note Designator U600 IC, DG211BDY-T1-E3, ANA, SW, 50OHM, SPST, 4CH, SO16 3133-0661+0 U601 IC, NJM2068M, OPAMP, QUAD, +/-18V, AUD, 27M, 6V/US, DMP8...
- Page 60 ELECTRICAL PART LIST LED PCB Assembly Resistors Reference Description Vendor Part Number Note Designator R900 RMG, 1/16W, 47R, 1%, 0603 4723-470A+P R901 RMG, 1/16W, 47R, 1%, 0603 4723-470A+P R904 RMG, 1/16W, 1.5K, 1%, 0603, HK, RESISTOR/SAMSUNG 4723-152A+P-R R905 RMG, 1/16W, 220R, 1%, 0603/1608 4723-221A+P R906 RMG, 1/16W, 1.5K, 1%, 0603, HK, RESISTOR/SAMSUNG...
- Page 61 ELECTRICAL PART LIST LED PCB Assembly Integrated Circuits Reference Description Vendor Part Number Note Designator U900 IC, CD74HC4094, SHIFT REG, 8 BIT, SIPO, 33NS, SO1 6 3132-4431+0 U901 IC, CD74HC4094, SHIFT REG, 8 BIT, SIPO, 33NS, SO16 3132-4431+0 Miscellaneous Reference Description Vendor Part Number Note...
- Page 62 ELECTRICAL PART LIST EQ Output PCB Assembly Miscellaneous Reference Description Vendor Part Note Designator Number ENCODER840 ENCODER, ROTARY, 10P1T, DC50V, 0.1A, 10X10, COPAL 5200-5097+0-27 ENCODER841 ENCODER, ROTARY, 10P1T, DC50V, 0.1A, 10X10, COPAL 5200-5097+0-27 ENCODER842 ENCODER, ROTARY, 10P1T, DC50V, 0.1A, 10X10, COPAL 5200-5097+0-27 ENCODER843 ENCODER, ROTARY, 10P1T, DC50V, 0.1A, 10X10, COPAL...
- Page 63 ELECTRICAL PART LIST AmpLink PCB Assembly, PS404A Amplifier Resistors Reference Description Vendor Part Number Note Designator R400 RMG, 1/16W, 4.7K, 1%., 0603/1608 4723-472A R401 RMG, 1/16W, 4.7K, 1%., 0603/1608 4723-472A R402 RMG, 1/16W, 4.7K, 1%., 0603/1608 4723-472A R403 RMG, 1/16W, 4.7K, 1%., 0603/1608 4723-472A R404 RMG, 1/16W, 4.7K, 1%., 0603/1608...
- Page 64 ELECTRICAL PART LIST AmpLink PCB Assembly, PS404A Amplifier Resistors (continued) Reference Description Vendor Part Number Note Designator R449 RMG, 1/16W, 0R, 1%, 0603 4723-000A R450 RMG, 1/16W, 0R, 1%, 0603 4723-000A R451 RMG, 1/16W, 0R, 1%, 0603 4723-000A R452 RMG, 1/16W, 0R, 1%, 0603 4723-000A R458 RMG, 1/16W, 0R, 1%, 0603...
- Page 65 ELECTRICAL PART LIST AmpLink PCB Assembly, PS404A Amplifier Resistors (continued) Reference Description Vendor Part Number Note Designator R500 RMG, 1/16W, 4.7K, 1%., 0603/1608 4723-472A R501 RMG, 1/16W, 4.7K, 1%., 0603/1608 4723-472A R502 RMG, 1/16W, 10K, 1%, 0603, HK, RESISTOR/SAMSUNG 4723-103AR R503 RMG, 1/16W, 10K, 1%, 0603, HK, RESISTOR/SAMSUNG 4723-103AR...
- Page 66 ELECTRICAL PART LIST AmpLink PCB Assembly, PS404A Amplifier Resistors (continued) Reference Description Vendor Part Number Note Designator R545 RMG, 1/16W, 33R, 1%, 0603 4723-330A R546 RMG, 1/16W, 33R, 1%, 0603 4723-330A R547 RMG, 1/16W, 33R, 1%, 0603 4723-330A R550 RMG, 1/16W, 47K, 1%, 0603, HK, RESISTOR/, SAMSUNG 4723-473AR R551 RMG, 1/16W, 10K, 1%, 0603, HK, RESISTOR/SAMSUNG...
- Page 67 ELECTRICAL PART LIST AmpLink PCB Assembly, PS404A Amplifier Capacitors (continued) Reference Description Vendor Part Number Note Designator C429 CC, 10V, 4.7U, 10%, 0805, X7R 150C-475KBD C430 CC, 50V, 0.1U, 5%, 0603 150F-104JAC C431 CC, 50V, 0.1U, 5%, 0805, 1.25X2 150F-104JBD C432 CC, 50V, 0.1U, 5%, 0603 150F-104JAC...
- Page 68 ELECTRICAL PART LIST AmpLink PCB Assembly, PS404A Amplifier Capacitors (continued) Reference Description Vendor Part Number Note Designator C471 CC, 50V, 0.1U, 5%, 0603 150F-104JAC C472 CC, 50V, 0.1U, 5%, 0603 150F-104JAC C473 CC, 50V, 0.1U, 5%, 0603 150F-104JAC C474 CC, 50V, 0.1U, 5%, 0603 150F-104JAC C475 CC, 50V, 0.1U, 5%, 0603...
- Page 69 ELECTRICAL PART LIST AmpLink PCB Assembly, PS404A Amplifier Inductors Reference Description Vendor Part Number Note Designator L400 INDUCTOR, 10UH, 20%, 7X7, X4.5, CER7042BA-100M, SM 1803-01523 L401 INDUCTOR, 10UH, 20%, 7X7, X4.5, CER7042BA-100M, SM 1803-01523 L402 FERRITE, BEAD, CHIP, SEBW201209U121MT, 0805 1808-0872 L403 FERRITE, BEAD, CHIP, SEBW201209U121MT, 0805...
- Page 70 ELECTRICAL PART LIST AmpLink PCB Assembly, PS404A Amplifier Integrated Circuits (continued) Reference Description Vendor Part Number Note Designator U410 IC, XL208-256-TQ64-C10, MC, U, 32-BIT, HI, PWR, TQFP64 3133-141164 U411 IC, SN74LVC3G34DCUR, BUFFE, R, TRIPLE, VSSOP8 3133-1431 U412 IC, LM3674MF-ADJ, REG, SW, 5.5V, ADJ, 0.6A, SOT-23 3133-1391 U413 IC, CD74HC4094, SHIFT, REG, 8BIT, SIPO, 33NS, SO16...
- Page 71 ELECTRICAL PART LIST AmpLink PCB Assembly, PS604A Amplifier Resistors Reference Description Vendor Part Number Note Designator R400 RMG, 1/16W, 4.7K, 1%., 0603/1608 4723-472A+P R401 RMG, 1/16W, 4.7K, 1%., 0603/1608 4723-472A+P R402 RMG, 1/16W, 4.7K, 1%., 0603/1608 4723-472A+P R403 RMG, 1/16W, 4.7K, 1%., 0603/1608 4723-472A+P R404 RMG, 1/16W, 4.7K, 1%., 0603/1608...
- Page 72 ELECTRICAL PART LIST AmpLink PCB Assembly, PS604A Amplifier Resistors (continued) Reference Description Vendor Part Number Note Designator R449 RMG, 1/16W, 0R, 1%, 0603 4723-000A+P R450 RMG, 1/16W, 0R, 1%, 0603 4723-000A+P R451 RMG, 1/16W, 0R, 1%, 0603 4723-000A+P R452 RMG, 1/16W, 0R, 1%, 0603 4723-000A+P R458 RMG, 1/16W, 0R, 1%, 0603...
- Page 73 ELECTRICAL PART LIST AmpLink PCB Assembly, PS604A Amplifier Resistors (continued) Reference Description Vendor Part Number Note Designator R500 RMG, 1/16W, 4.7K, 1%., 0603/1608 4723-472A+P R501 RMG, 1/16W, 4.7K, 1%., 0603/1608 4723-472A+P R502 RMG, 1/16W, 10K, 1%, 0603, HK, RESISTOR/SAMSUNG 4723-103A+P-R R503 RMG, 1/16W, 10K, 1%, 0603, HK, RESISTOR/SAMSUNG 4723-103A+P-R...
- Page 74 ELECTRICAL PART LIST AmpLink PCB Assembly, PS604A Amplifier Resistors (continued) Reference Description Vendor Part Number Note Designator R545 RMG, 1/16W, 33R, 1%, 0603 4723-330A+P R546 RMG, 1/16W, 33R, 1%, 0603 4723-330A+P R547 RMG, 1/16W, 33R, 1%, 0603 4723-330A+P R550 RMG, 1/16W, 47K, 1%, 0603, HK, RESISTOR/, SAMSUNG 4723-473A+P-R R551 RMG, 1/16W, 10K, 1%, 0603, HK, RESISTOR/SAMSUNG...
- Page 75 ELECTRICAL PART LIST AmpLink PCB Assembly, PS604A Amplifier Capacitors (continued) Reference Description Vendor Part Number Note Designator C428 CT, 6.3V, 47U, 10%, SMD, 85C, 1.6X3.2 154B-476K+3-CF C429 CC, 10V, 4.7U, 10%, 0805, X7R 150C-475K+J-BD C430 CC, 50V, 0.1U, 5%, 0603 150F-104J+P-AC C431 CC, 50V, 0.1U, 5%, 0805, 1.25X2...
- Page 76 ELECTRICAL PART LIST AmpLink PCB Assembly, PS604A Amplifier Capacitors (continued) Reference Description Vendor Part Number Note Designator C470 CC, 50V, 0.1U, 5%, 0603 150F-104J+P-AC C471 CC, 50V, 0.1U, 5%, 0603 150F-104J+P-AC C472 CC, 50V, 0.1U, 5%, 0603 150F-104J+P-AC C473 CC, 50V, 0.1U, 5%, 0603 150F-104J+P-AC C474 CC, 50V, 0.1U, 5%, 0603...
- Page 77 ELECTRICAL PART LIST AmpLink PCB Assembly, PS604A Amplifier Inductors Reference Description Vendor Part Number Note Designator L400 INDUCTOR, 10UH, +/-20%, 7X7, X4.5, CER7042BA-100M, SM 1803-0152+0-3 L401 INDUCTOR, 10UH, +/-20%, 7X7, X4.5, CER7042BA-100M, SM 1803-0152+0-3 L402 FERRITE, BEAD, CHIP, SEBW201209U121MT, 0805 1808-0872+0 L403 FERRITE, BEAD, CHIP, SEBW201209U121MT, 0805...
- Page 78 ELECTRICAL PART LIST AmpLink PCB Assembly, PS604A Amplifier Integrated Circuits (continued) Reference Description Vendor Part Number Note Designator U410 IC, XL208-256-TQ64-C10, MC, U, 32-BIT, HI, PWR, TQFP64 3133-1411+0-64 U411 IC, SN74LVC3G34DCUR, BUFFE, R, TRIPLE, VSSOP8 3133-1431+0 U412 IC, LM3674MF-ADJ, REG, SW, 5.5V, ADJ, 0.6A, SOT-23 3133-1391+0 U413 IC, CD74HC4094, SHIFT, REG, 8BIT, SIPO, 33NS, SO16...
-
Page 79: Disassembly Procedure
DISASSEMBLY PROCEDURE Figure 3. Chassis View - PCB Locations... - Page 80 DISASSEMBLY PROCEDURE PS404A and PS604A Amplifiers 4.4 Disconnect the AC wiring harness blue and brown wires from the IEC AC inlet. DANGER: SHOCK HAZARD The PowerShare amplifiers have high voltage 4.5 Disconnect the AC wiring harness green/yellow (up to 400 VDC) on the heatsink and much of ground wire from the chassis.
- Page 81 DISASSEMBLY PROCEDURE 7.3 Remove the two screws that secure the AC Re-assembly Note: You will need to re-install power switch to the back of the front bezel. Lift it the air baffle and secure it in place using RTV or straight off.
- Page 82 DISASSEMBLY PROCEDURE 13. Rear Panel PCB Removal 15. IEC AC Input Jack Removal 13.1 Perform procedure 1. 15.1 Perform procedure 1. 13.2 Disconnect the ribbon cable at J406 on the 15.2 Make a note of the wiring configuration, and AmpLink PCB. Disconnect the wiring harness at disconnect the AC wiring harness Faston connectors J300 on the amplifier PCB’s.
-
Page 83: Test Procedure
TEST PROCEDURE PS404A and PS604A (AmpLink Version) Amplifier Tests Analog Input Tests Required Items: • Audio Precision ATS-1 or equivalent • Audio Precision AUX-0025 digital filter or similar • 4 - 4 Ohm, 250W load resistors • 4 - 16 Ohm, 250W load resistors •... - Page 84 TEST PROCEDURE 3.2 Connect 32 Ohm, 250W loads to the channel 1 - 4 outputs. 3.3 Apply a 1 kHz, -19.3 dBV input to the channel 1 - 4 inputs. 3.4 Measure the output level at the channel 1 - 4 outputs. It should be +11 dBV +1 dBV. 3.5 Set the SENSITIVITY switch to the 4 dBu position.
- Page 85 ® ® • Bose ControlCenter CC-1, part number 768932-0110 or similar • Bose ControlSpace ESP-880 digital processor or other AmpLink source, i.e. CS EX-1280C • dB Meter • 4 - 4 Ohm, 250W load resistors • 4 - 16 Ohm, 250W load resistors •...
- Page 86 TEST PROCEDURE Important Note: All measurements for power amp require a AUX-0025 Digital Filter (or equivalent) with a 20Hz-20kHz filter in order to get the correct output noise and level readings. AmpLink Test Setup 1. Open the ControlSpace Designer software. Configure the ESP-880 (or similar) as an AmpLink signal source.
- Page 87 TEST PROCEDURE 9. AmpLink Output Level and Frequency Response Test 9.1 Connect a 32 ohm load to the amplifier output channels. Set the rear panel 70V/100V dip switch to 100V. All other dip switches should be set to the LEFT. On the UUT rear panel, set the Input Select rotary switch to position 3, AmpLink inputs 1-4.
- Page 88 TEST PROCEDURE 13. Input Priority Test 13.1 Using a CAT-5 cable, connect a Bose CC-1 ControlCenter Zone Controller to the ControlCenter ® RJ-45 jack on the rear panel. Refer to the table on page 12 for part numbers for the CC-1 controller.
-
Page 89: Hi-Pot And Ground Bond Test
TEST PROCEDURE Hi-Pot Test THIS IS A MANDATORY TEST Note: If the unit under test requires disassembly as part of the repair, it MUST be Hi-Pot tested before being returned to the customer to ensure that there is no potential shock hazard. This test requires a Hi-Pot tester with a ground bond attachment to perform this test. -
Page 90: Firmware Update Procedure
FIRMWARE UPDATE PROCEDURE Download and install the PowerShare Editor software from the http://pro.bose.com web site. This software is located on the PowerShare product page. Note: The PowerShare Editor software is compatible with Windows PC’s only. Connect the Amplifier The PowerShare Editor software communicates with the amplifier using a standard USB connection and a standard USB-controlled human interface device (HID). - Page 91 If an amplifier is connected to the PowerShare Editor software, the version number of the firmware on the amplifier is displayed to the right of the toolbar. The PowerShare amplifier firmware is stored in the directory C:\Program Files (x86)\Bose\PowerShare Editor\Firmware. Firmware updates are periodically available at pro.Bose.com. When a firmware update is made available online, download the file and place it in the firmware directory.
- Page 92 2. Click Advanced in the Firmware Update dialog: 3. Select the desired firmware version from the list and click Update firmware. By default, the firmware files are stored in the directory C:\Program Files (x86)\Bose\PowerShare Editor\Firmware. Any firmware versions stored in this directory will appear in the list.
-
Page 93: Troubleshooting
TROUBLESHOOTING LED Fault Indications - PS404A and PS604A SIGNAL POWER LIMIT Po werShare POWER LED Solid amber LED indicates an over-temperature fault Solid red LED indicates a power supply fault SIGNAL LED All four LEDs will display solid red if a power supply fault is detected LIMIT LED Each LIMIT LED will individually display solid red if there is an EHF fault on that channel LIMIT LED 1 &... -
Page 94: Block Diagram
BLOCK DIAGRAM... -
Page 95: Service Manual Revision History
SERVICE MANUAL REVISION HISTORY Revision Change Driven Date Description of Change Page(s) Affected Level 1/2018 Document released at revision 00 Initial Release... - Page 96 Bose Corporation 100 The Mountain Road Framingham Massachusetts USA 01701 Reference Number 791324-SM REV 00; 1/2018 http://serviceops.bose.com...
Need help?
Do you have a question about the PowerShare PS404A and is the answer not in the manual?
Questions and answers