Envirovent energiSava 200 Installation Manual
Wall & floor mounted version
Hide thumbs
Also See for energiSava 200:
- Installation manual (25 pages) ,
- User manual (4 pages) ,
- Manual (4 pages)

Related Manuals for Envirovent energiSava 200


Summary of Contents for Envirovent energiSava 200
- Page 1 AFTER INSTALLATION THE END USER SHOULD KEEP THIS GUIDE FOR FUTURE REFERENCE DO NOT THROW AWAY energiSava ® WALL & FLOOR MOUNTED VERSION INSTALLATION GUIDE...
- Page 3 The power cable running into the unit must remain the supplied flexible cable (not a solid core lighting cable]. If the power cable becomes damaged, it must be replaced by EnviroVent, an authorised service agent for your region/country, or a similarly qualified person in order to avoid a hazard.
- Page 4 Location Check there is space for the unit in your chosen location including room for access and future servicing of the unit. The unit must not affect the operation of open-flue appliances. Consider the external vent locations in relation to open-flues from appliances e.g. boilers. You must ensure the external supply grilles are positioned away from open flues to avoid drawing harmful gases into the property.
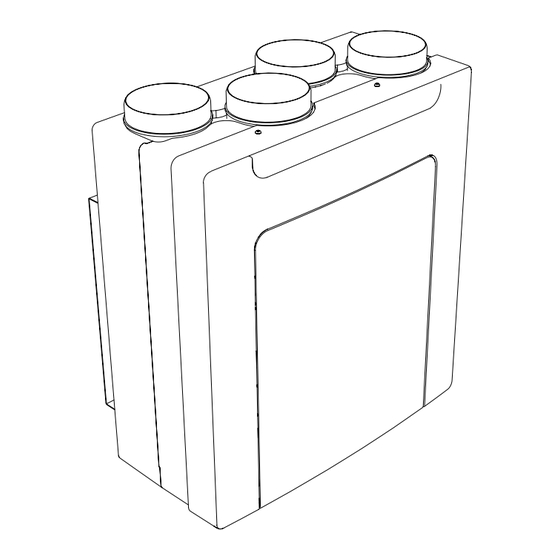
- Page 5 Diagrams Overall unit dimensions and minimum area required for access & maintenance (mm). The energiSava 200 spigots are ® compatible with ø125mm duct. SHOULD YOU ENCOUNTER ANY PROBLEMS 01423 810 810 INSTALLING THIS UNIT, CALL US ON: energiSava ®...
- Page 6 Diagrams WIRING MVHR UNIT LOCAL ISOLATOR MAINS SUPPLY 230V 50/60Hz SWITCH LIVE (OPTIONAL) POWER CABLE The local isolator must be connected to the mains as part of the fixed wiring. Connect the cores of the power cable to the matching terminals on the local isolator (3A fuse spur or similar).
- Page 7 About the energiSava ® The energiSava 200 is an MVHR unit (Mechanical Ventilation with ® Heat Recovery). It is ideal for small to medium sized properties with a kitchen and up to 5 additional wet rooms. The unit is capable of delivering a maximum airflow of 245m /h (68l/s) and a maximum system pressure in excess of 500Pa.
- Page 8 Box Contents EnergiSava EnergiSava 200 App ® ® • 1x energiSava 200 unit • 1x energiSava 200 app unit ® ® • 1x Remote control • 1x Instruction guide • 1x Instruction guide • 1x User guide • 1x User guide •...
- Page 9 Installation - Wall Unit 1. Hold the unit up to the chosen location and check there is space for ducts, condensate drainage, filter and keypad access. 2. Once you are satisfied with the position, fix the wall bracket in place. Use 5 8gx2.0”...
- Page 10 5. Make a water-tight connection to the drainage connector on the unit and the waste water system in the property. A suitable non-return device must be fitted to ensure air and waste water from the drain system do no flow back up into the unit.. 5a.
- Page 11 Installation - Floor Unit 1. Hold the unit in the chosen location and check there is space for ducts, condensate drainage, filter and keypad access. 2. Screw the four mounting brackets to the unit as shown using the screws provided. The two larger brackets are fitted at the spigot end.
- Page 12 DO NOT AFTER INSTALLATION THE END USER SHOULD KEEP THIS GUIDE FOR FUTURE REFERENCE THROW AWAY...
- Page 13 Installation - Wall & Floor Units 1. Fit the external supply and extract terminations. 2. Fit the supply and extract valves inside the property. 3. Fit the ductwork between the external terminations, the MVHR unit and the supply and extract valves. 4.
- Page 14 Supply 1 Extract 1 Extract 2 Supply 2 Ductwork should be fitted in accordance with the Domestic Ventilation Compliance Guide. (Example RH unit configuration shown). Ducts to and from atmosphere and through unheated spaces need to be insulated. For efficiency, all ductwork should be as large a diameter as possible (min.
- Page 15 4a. LH Units 4b. RH Units Extract from Supply from Supply from Extract from property property atmosphere atmosphere Extract to Supply to Extract to Supply to atmosphere property atmosphere property MVHR UNIT LOCAL ISOLATOR MAINS SUPPLY 230V 50/60Hz SWITCH LIVE (OPTIONAL) POWER CABLE SHOULD YOU ENCOUNTER ANY PROBLEMS...
- Page 16 Commissioning All maintenance and building works should be complete before commissioning this MVHR unit. This will avoid any other major disturbance to the installation or high volumes of dust or debris being drawn into the system. Do not commission the MVHR unit until it is fully installed including power, ductwork, internal valves and external vents.
- Page 17 • Now adjust the individual valves to extract at the appropriate rate for each wet room. • Press the SET button once to move on to the next flow rate. The flashing LED indicates which flow rate is being modified. A: Extract Boost B: Supply Boost C: Extract Trickle...
- Page 18 Wi-Fi App myenvirovent App enabled units can be controlled using the myenvirovent app on Apple and Android devices. A separate instruction guide for the myenvirovent app is included in the box. The guide can also be accessed from within the app. Once the unit has been installed, refer to this guide for connection and further settings.
- Page 19 Wireless Remote Control Filter LED Boost LED Button LED 2 Button LED 1 Remote control button Summer Bypass LED Humidity LED Frost LED To view the current status of the unit: • Press any button to wake the remote control and the relevant LEDs will light up according to the current status of the unit.
- Page 20 • Auto = Bypass LED constant, Manual = bypass LED flashing. Filter indicator and reset: • If on waking the remote control the filter LED flashes (green), the filters need to be replaced. Contact EnviroVent to order new filters. • After replacement filters have been installed, wake the remote control.
- Page 21 Fault indication: • If on waking the remote control all LEDs are flashing (red), a fault has occurred with the MVHR unit. If it persists, call EnviroVent on 01423 810 810 for further help. When the remote control battery need to be replaced, remove the two screws then open the remote control.
- Page 22 Technical Specification Spigot diameters 125mm Maximum air flow rate 68l/s (245m Maximum power consumption 130W Electrical Supply 230V Single Phase 50Hz Ingress protection rating IPX2 Filter grade ISO Coarse 45% (G3) Boxed unit weight 16kg Unboxed unit weight 14kg Airflow Performance 600.00 500.00 100%...
- Page 23 Post-Installation Checklist Installation instructions have been understood. Contact EnviroVent on 01423 810 810 if you require further technical help. Ductwork diameter is 125mm or larger throughout the property. Minimal amounts of flexible duct have been used in the installation. All ducts, valves, vents and drainage points are connected, mechanically fixed and sealed.
- Page 24 Filter Maintenance • Filters must be inspected every 6 months and replaced at least every 12 months. If filter maintenance is not carried out, it can invalidate the warranty. • Isolate the unit from the mains supply then slide off the front cover. •...
- Page 25 Spares/Accessories Item Description Order Code Replacement Filter FILTER-ES250 125mm white supply valve 1DIFSUPPLY125WH 125mm white extract valve 1DIFEXTRACT125WH 150mm white supply valve 1DIFSUPPLY150WH 150mm white extract valve 1DIFEXTRACT150WH Spare remote control SWH-W-MVHR SHOULD YOU ENCOUNTER ANY PROBLEMS 01423 810 810 INSTALLING THIS UNIT, CALL US ON: energiSava ®...
- Page 26 Supply Only If your product has been supplied by EnviroVent and installed by a third party it is covered by a two-year parts only warranty. If you detect a fault and the product has been installed in accordance to the fitting/wiring instructions, relevant guidance documents and by a competent and qualified person (proof may be required), please return the product to the place of purchase for a replacement.
- Page 27 • The warranty will be rendered invalid if the system has been serviced, maintained, repaired, taken apart or tampered with by any person not authorized, which in any way contradicts the instruction guide set out by EnviroVent. • The warranty does not cover accidental damage, misuse or abuse.
- Page 28 Your feedback is important to us as we strive to improve our and improvement EnviroVent reserves the products, services, and overall customer experience. Please email right to alter products specification and us to help us serve you better: feedback@envirovent.com appearance without notice.
Need help?
Do you have a question about the energiSava 200 and is the answer not in the manual?
Questions and answers