Table of Contents
Advertisement
English
Representative models:
FV-0511VKS3S
FV-0511VKS3
FV-1115VK3
READ AND SAVE THESE INSTRUCTIONS
Thank you for purchasing this Panasonic product.
Please carefully read the section "IMPORTANT SAFETY INFORMATION".
Failure to comply with instructions could result in personal injury or property damage. Please
explain to users how to operate and maintain the product after installation and present this
manual to users. Please retain this manual for future reference.
INSTALLATION INSTRUCTIONS
Contents
IMPORTANT SAFETY INFORMATION..........................................2-3
PLEASE READ PRIOR TO INSTALLING THIS FAN..........................4
DESCRIPTION..................................................................................4
UNPACKING.....................................................................................4
SUPPLIED ACCESSORIES AND DIMENSIONS............................5-6
WIRING DIAGRAM...........................................................................7
FEATURES........................................................................................7
INDICATIONS (Plug 'N Play™ FUNCTION DEVICES).................8-10
INSTALLATION (Plug 'N Play™ FUNCTION DEVICES).................10
INSTALLATION (CEILING MOUNTING)....................................11-14
INSTALLATION (WALL MOUNTING)........................................14-16
INSTALLATION (RETROFIT).......................................................16-17
MAINTENANCE (CLEANING).....................................................17-18
PRACTICAL GUIDE TO INSTALLATION........................................18
SPECIFICATIONS.......................................................................19-20
PRODUCT SERVICE.......................................................................20
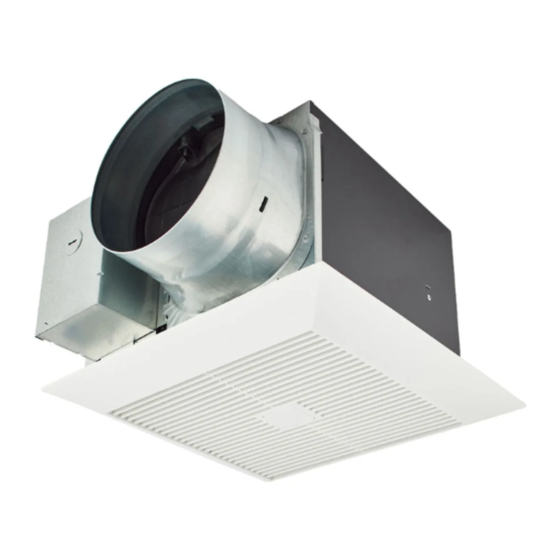
FV-0511VK3
Ventilating Fan
FV-0511VKS3S
Model No.
FV-0511VKS3
FV-0511VK3
FV-1115VK3
Advertisement
Table of Contents

Related Manuals for Panasonic Whisper Green Select FV-0511VKS3S


Summary of Contents for Panasonic Whisper Green Select FV-0511VKS3S
-
Page 1: Table Of Contents
FV-0511VK3 FV-1115VK3 READ AND SAVE THESE INSTRUCTIONS Thank you for purchasing this Panasonic product. Please carefully read the section “IMPORTANT SAFETY INFORMATION”. Failure to comply with instructions could result in personal injury or property damage. Please explain to users how to operate and maintain the product after installation and present this... -
Page 2: Important Safety Information
IMPORTANT SAFETY INFORMATION For your safety To reduce the risk of injury, loss of life, electric shock, fire, malfunction, and damage to equipment or property, always observe the following safety precautions. Explanation of symbol word panels The following symbol word panels are used to classify and describe the level of hazard, injury, and property damage caused when the denotation is disregarded and improper use is performed. - Page 3 IMPORTANT SAFETY INFORMATION Do not disassemble the unit for reconstruction. It may cause fire or electric shock. Install the fan at least 1.5 m (5 feet) above the floor. CAUTION Follow all local electrical and safety codes, as well as the National Electrical Code (NEC) and the Occupation Safety and Health Act (OSHA), using UL approved wire nuts.
-
Page 4: Please Read Prior To Installing This Fan
PLEASE READ PRIOR TO INSTALLING THIS FAN Continuous ventilation: These fans are designed to run continuously ensuring a healthy environment at low CFM levels 24 hours a day. By utilizing the optional Multi-Speed module, the fans are built to run continuously at a pre-set lower level (FV-0511VKS3S, FV-0511VKS3 and FV-0511VK3: 0, 30, 40, 50, 60, 70, 80, 90, 100 CFM;... -
Page 5: Supplied Accessories And Dimensions
SUPPLIED ACCESSORIES AND DIMENSIONS For Models.- FV-0511VKS3, FV-0511VK3, FV-1115VK3 Part name Appearance Quantity Part name Appearance Quantity Warranty sheet & Installation instructions Grille Self-drilling screw ® Flex-Z Fast bracket (with 4 4 inch duct reducer tapping screws (optional part), not included -ST4.2X20) for FV-1115VK3 Unit: inches (mm) - Page 6 SUPPLIED ACCESSORIES AND DIMENSIONS For model.- FV-0511VKS3S Part name Appearance Quantity Part name Appearance Quantity Warranty sheet & Installation instructions Grille Self-drilling screw ® Flex-Z Fast bracket (with 4 4 inch duct reducer tapping screws (optional part) -ST4.2X20) Unit: inches (mm) 1 1/2 (37) 4 1/2 (114) 1 1/4 (30)
-
Page 7: Wiring Diagram
WIRING DIAGRAM Fan body Junction box Power switch Black Live (Fan) DC Motor AC120V 60Hz Neutral White Multi-Speed module (FV-0511VKS3, (Power supply) FV-0511VKS3S only, not included in Signal other models) switch Use signal switch for manual control of high / low CFM mode: ON to use Pick-A-Flow ®... -
Page 8: Indications (Plug 'N Play™ Function Devices)
INDICATIONS (Plug 'N Play™ FUNCTION DEVICES) Plug 'N Play™ Modular Component Accessories Sold Separately, Not Included With Base Model Fan FV-VS15VK1 Multi-Speed module allows the fan to run continuously at lower speeds to maintain ventilation standards to meet Indoor Air Quality and then boost up to high speed to meet intermittent needs for ‘Spot’... - Page 9 WP100PBA Swidget Wi-Fi control module Wi-Fi Plug 'N Play™ features ® • Wireless Plug 'N Play™ control module for Panasonic WhisperGreen Select . • Connect and control Panasonic ventilation products with the Swidget iOS or Android app through 2.4 GHz Wi-Fi.
-
Page 10: Installation (Plug 'N Play™ Function Devices)
INDICATIONS (Plug 'N Play™ FUNCTION DEVICES) The Plug ’N Play™ modules can be used in combination, in order to adapt the fan operation to the user's needs. Please refer to the table below for details. Fan operation with Plug 'N Play™ modules’ combinations Step 2) Sensor trigger detection Step 1) Not detected Step 3) Not detected... -
Page 11: Installation (Ceiling Mounting)
INSTALLATION (CEILING MOUNTING) WARNING ATTENTION Remove the tape and accessory from the adapter, before installation. 1. Disconnect power supply before installing the unit. Damper Adapter 2. Please wear gloves to protect hands during the installation. 4” reducer (Not applicable Duct tape Tape for FV-1115VK3) Remove adapter plate... - Page 12 INSTALLATION (CEILING MOUNTING) CAUTION Wiring diagram 1. Mount junction box cover carefully so that lead wire are not pinched. Live Fan AC 120 V 60 Hz Neutral (Power supply) Earth ground Neutral Live Red wires Signal switch Earth ground wire nuts White Switch box Black...
- Page 13 INSTALLATION (CEILING MOUNTING) Sealing Unit: inches (mm) Ceiling 10 1/2 (266) Finish ceiling work. Ceiling hole should be aligned with the inside edge of flange. Once fan body is mounted and secure, fill gap between flange and ceiling with caulk or other sealant to prevent air leakage.
- Page 14 INSTALLATION (CEILING MOUNTING) b) INSTALL GRILLE FOR MODEL FV-0511VKS3S Pick-A-Flow ® Note: Before installing the grill for model FV-0511VKS3S follow the steps 1 through 8 (P.11 to 13). Ceiling Insert the mounting spring into the slot as shown to mount grille to fan body. Fix the motion sensor into grille.
-
Page 15: Installation (Wall Mounting)
INSTALLATION (WALL MOUNTING) Install Flex-Z Fast bracket The Flex-Z Fast bracket position can be adjusted from 16" to 24" between studs. Align Extend ® Stud Flex-Z Fast bracket Stud Bend down 4 tabs 2 Tapping screws (ST4.2X20) 2 Tapping screws (ST4.2X20) Bend down 4 tabs and align bracket to the stud. -
Page 16: Installation (Retrofit)
INSTALLATION (WALL MOUNTING) Insert the body and slide it into the adapter assembly until you hear a click from the hook. Secure the fan body to Flex-Z Fast bracket by using 2 self-drilling screws. Secure fan body and plug connector to adapter by using machine screw (M4X8). To finish wall work and install grille, please refer to steps 7 and 8 (p. -
Page 17: Maintenance (Cleaning)
INSTALLATION (RETROFIT) Install circular exhaust duct and conduit Screw Knock-out hole Existing duct Junction box cover Existing conduit Junction box Existing Existing ceiling wires Before connecting the circular duct to Before removing knock-out hole and junction box the adapter and conduit to junction box, cover Following step 1 “Remove adapter plate”... -
Page 18: Practical Guide To Installation
MAINTENANCE (CLEANING) Maintenance of unit Drywall Vacuum Gloves cleaner Gloves NOTE : The grille should be dry after cleaning. Clean grille. (Don’t put into hot water. Use non-abrasive kitchen detergent, wipe dry with clean cloth.) Remove dust and dirt from fan body using a vacuum cleaner. Using a cloth dampened with kitchen detergent, remove any dirt from fan body. -
Page 19: Specifications
SPECIFICATIONS Specifications for base model fans Power (W) Duct Air volume Weight Voltage Frequency Noise Speed Model No. diameter at 0.1” WG direction (Hz) (sones) (rpm) (inches) (CFM) <0.3 FV-0511VK3 Exhaust <0.3 9.7 (4.4) FV-0511VKS3 <0.3 <0.3 10.7 FV-0511VKS3S Exhaust <0.3 9.9 (4.5) <0.3... -
Page 20: Product Service
Warning Concerning Removal of Covers. The unit should be serviced by qualified technicians only. Your product is designed and manufactured to ensure a minimum of maintenance. Should your unit require service or parts, call Panasonic Call Center at 1-866-292-7299 (USA) or 1-800-669-5165 (Canada). Panasonic Corporation of North America Panasonic Canada lnc.
Need help?
Do you have a question about the Whisper Green Select FV-0511VKS3S and is the answer not in the manual?
Questions and answers
Hi my name is William Mumma and I **** a building inspector with the city of Moses Lake WA. I have a series of townhouses where they are using your fans as part of the whole house ventilation system using a 4" flexible duct. Prescriptively per the residential code this is not allowed but the manufacturers installation instructions supersede the code. So my question is , Is a 4" flexible duct approved per the manufacturer or is a 4" rigid round duct required? and if a flexible duct is allowed does it require a larger diameter and is there a limitation on length? I also noticed that a 6" duct is recommended as opposed to a 4" and would like a little clarification on why that is exactly. Any assistance you can give me in regard to this would be much appreciated. Thank you and have a great day
A 4" duct is not recommended for the Panasonic Whisper Green Select FV-0511VKS3S fan. A circular 6-inch duct is recommended for best performance and proper installation. Using a smaller duct, such as 4 inches, may reduce airflow and efficiency. If a 4-inch duct must be used, a 4-inch duct reducer is available as an optional part. However, this may negatively impact the fan’s rated performance. A 6-inch duct is recommended because it reduces airflow resistance, minimizes noise, and improves energy efficiency.
This answer is automatically generated
@Mr. Anderson Thank you so much for the response. I have been doing battle over this for awhile this will definitely help
Can this **** be used with a Honeywell HVC0001 Wall control switch