Table of Contents
Advertisement
Quick Links
USER MANUAL - INSTRUCTIONS
MODELS:
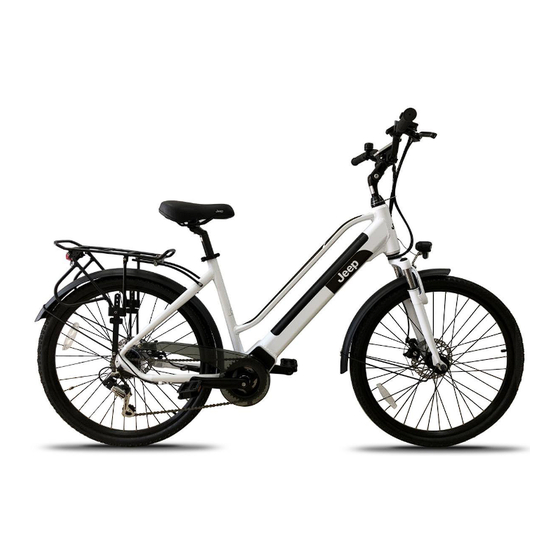
J-T26E LADIES TREKKING / COMMUTER E-BIKE
J-T28E MENS TREKKING / COMMUTER E-BIKE
Thank you for choosing this Jeep e-bike. It has been carefully packed for safe
transportation but will require some customer assembly on delivery. This can be
done by a person familiar with basic bike mechanics. However we do recommend
having a "new bike" set-up and commissioning done at your nearest cycle store. It
is an inexpensive way to ensure correct assembly and that your wheels, brakes,
tyre pressure, gears etc. are all aligned, balanced and functioning properly before
your first ride.
1
Advertisement
Table of Contents

Related Manuals for Jeep J-T26E


Summary of Contents for Jeep J-T26E
- Page 1 J-T26E LADIES TREKKING / COMMUTER E-BIKE J-T28E MENS TREKKING / COMMUTER E-BIKE Thank you for choosing this Jeep e-bike. It has been carefully packed for safe transportation but will require some customer assembly on delivery. This can be done by a person familiar with basic bike mechanics. However we do recommend having a “new bike”...
-
Page 4: Declaration Of Conformity
IMPORTANT Carefully read and follow the instructions in this user manual before using the bike. This is not a toy. Children should not be allowed to ride or play with the bike or battery. The Retailer and the Distributor are not responsible for damage caused by the incorrect use of the bike. The bike’s maximum weight load is 100kg. - Page 5 POWERING YOUR E-BIKE ON/OFF The controller pictured below is mounted on the left side of the handlebars. It allows you to control the electric function of the e-bike and indicates the battery charge level and which of 5 power levels has been selected. ON/OFF or MODE KEY UP KEY DOWN KEY...
- Page 6 6KM/H ASSISTANCE FUNCTION Your Jeep e-bike is also equipped with a “push-assist” function. This can be activated when the bike is stopped, the display is turned on and you have dismounted. Press the DOWN key and keep it pressed. After 2 seconds the bike will move forward at a uniform speed of 6 kilometres per hour and will keep doing so as long as the DOWN key remains pressed.
-
Page 7: Power Settings
POWER SETTINGS When riding, press the UP or DOWN keys on the controller to select the desired power/speed ratio (from 1 to 5). LED 1 is for minimum power. LED 5 Is for the highest power. No LED’s lit means no power assistance. RIDING THE BIKE This e-bike can be ridden as a normal bicycle with the power off. - Page 8 RANGE Under normal circumstances your battery range is between 30 and 35 km (with a fully charged battery). However the battery charge, and therefore maximum distance, can be affected by factors such as: Road conditions. On hilly terrain the discharge is increased and the range decreases. ...
-
Page 9: Battery Information
BATTERY INFORMATION The Jeep e-bike uses lithium-ion batteries for its power supply. In contrast to other lithium batteries, lithium-ion batteries are free of “memory effects” and can be recharged even if the power is not completely exhausted. Battery life is closely related to use and can be extended by….. - Page 10 IMPORTANT: The power button next to the charging port must be off in the “0” position for the charge.
- Page 11 Pull out the protective plastic bung in the charging port as shown above and turn the power switch to “0”. Ensure the charging port is dry. Insert the round charger plug into the bike charging port. Connect the charger to the mains and switch on.
- Page 12 The power button should be switched to “0” when the bike is not used for long time. Excessive charging after the charger light shows green will adversely affect the battery life. The battery can be charged in the frame or away from the bike. For battery removal procedure see below. WARNING ...
-
Page 13: Battery Removal
BATTERY REMOVAL To remove the battery first be sure the display is turned off and the button near charging port is set to “0”. Insert the key in the lock and turn it to unlock the battery box. - Page 14 IMPORTANT: Each lock is unique to your bike. For added security against theft there is NO master key. For this reason consider making a copy and keeping the spare key in a safe place. battery either be charged in the frame or away from the bike.
- Page 15 Error code display If any electronic control system fails, warning lights will indicate the following errors…. Error definition Corresponding indicator lamp Abnormal current The first gear indicator light flickers Abnormal shifter The third gear indicator light flickers Motor phase is missing The first and third gear indicator lights flicker Motor abnormality Fifth gear indicator light flickers...
-
Page 16: Saddle Adjustment
SADDLE ADJUSTMENT... -
Page 17: Brake Adjustment
BRAKE ADJUSTMENT When adjusting the brake, make sure that the brake surface contacts the brake disc tightly when the lever is clenched to the middle. You can use the brake cable tension adjusting screw to adjust the brake stroke. This screw is located at the brake handle (see “A”). Turn the brake cable screw inward to relax it and the brake shoe will be further away from the rim;... -
Page 18: Tire Pressure
PEDAL ATTACHMENT There is a mark on each pedal indicating which crank it is to be threaded to. The two pedals have threads rotating in different directions. “L” is the left pedal, “R” is the right pedal. The non-drive side or left crank has a REVERSE thread, whilst the drive-side or right crank has a STANDARD thread. -
Page 19: After-Sales
“0” position when the bike is not used for long time. Ensure a full charge every 2 months. AFTER-SALES The Jeep e-bike uses industry standard parts that are serviceable at most cycle stores. Please contact your retailer if you encounter any technical problems. WARRANTY Your e-bike is warranted to be free from defects in materials, workmanship and functionality for a period of 1 year starting from the date of purchase. -
Page 20: Correct Disposal Of The Product
CORRECT DISPOSAL OF THE PRODUCT According to the European Directive 2006/66/CE This marking indicates that the batteries in this product should not be disposed of with other household waste at the end of their working life. If batteries are not properly disposed of, these substances can cause harm to human health or the environment.
Need help?
Do you have a question about the J-T26E and is the answer not in the manual?
Questions and answers