Advertisement
Advertisement

Related Manuals for AGame 177377


Summary of Contents for AGame 177377
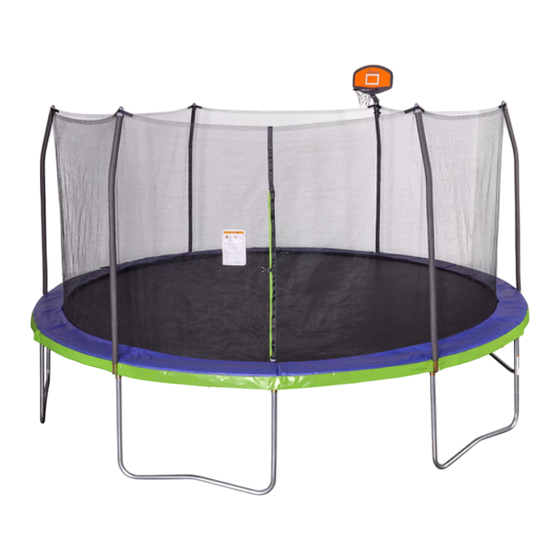
- Page 1 Assembly Instructions & User’s Manual Style #177377 AGame 16' Trampoline with Basketball Goal Please keep this instruction manual for future reference Customer Service: (888) 922-2336 7:00 am to 12:00 am CST (daily) Live Chat at: www.academy.com Email: customerservice@academy.com (Made in China)
-
Page 2: Table Of Contents
Table of Contents Warnings Tools and Parts Assembly Instructions 8-20 Care and Maintenance Warranty Information Note: Before beginning assembly of product, make sure all parts are present. Compare parts with package content list and hardware contents. If any part is missing or damaged, do not attempt to assemble the unit. -
Page 3: Warnings
WARNINGS 275lbs(124kg) Page 3 of 22... - Page 4 WARNINGS Page 4 of 30...
-
Page 5: Tools And Parts
Tools Required Description: Description: Spring Tool Screw Driver Parts List T-joint (may be pre-installed) Socket (may be pre-installed) Top Tube Leg Post Leg Brace Enclosure Net Jump Mat Frame Pad Page 5 of 22... - Page 6 Parts List Spring Curved Tube Straight Tube Foam Pole Cap End Cap M5x44mm Bolt Backboard Rim with net Connecting Part-Straight Connecting Parts-Curved Page 6 of 22...
- Page 7 Parts List Regular Part Connecting Bolt Plastics Nut Basketball Hardware Self-tapping Screw Small Nut Large Nut M10x70mm Bolt Page 7 of 22...
-
Page 8: Assembly Instructions
Assembly Instructions Step 1: Insert the large side of a top tube (C) into a T-joint (A). Then insert the large side of another top tube (C) into a socket (B). Make sure the holes in the tubes face the ground! Now repeat this step with the remaining top tubes, T-joints, and sockets until you have... - Page 9 Assembly Instructions Step 3: Insert a leg brace (E) into two leg posts (D) and tighten with two self-tapping screws (X). Now insert both leg posts into the T-joint and socket of one of the assembled sections at the same time. Tighten with two self-tapping screws.
- Page 10 Assembly Instructions Step 5: Place the jump mat on the ground. The warning label should be on the top, and the ID label should be on the back. Model: XXXXXX Part #: 7028 Description: 16 Foot Mat Made in China Factory address: Wei Jia Tun Village Ligezhuang town Jiaozhou city Qingdao China WARNING...
- Page 11 Assembly Instructions Step 7: Place the jump mat (G) with attached enclosure on clear ground inside the frame. Make sure the 2 warning decals align with 2 T-joints! Step 8: You may want to use gloves for this step! Before you begin, make sure each V-ring has been threaded through the holes on the enclosure net.
- Page 12 Assembly Instructions Step 9: Now, repeat step 8 on the other side of the trampoline placing a spring in the v-ring to the left of the warning label and into the spring hole to the left of the T-joint. You now have attached two springs. Step 10: Locate the remaining T-joints.
- Page 13 Assembly Instructions Step 11: Next, place 6 springs into the V-rings just left of all the sockets, and stretch the springs until they reach the frame holes just left of the sockets. Remember to count! You now have attached 12 V-rings to the frame holes using 12 springs. There should be 7 V-rings and 7 frame holes in between each spring.
- Page 14 Assembly Instructions Step 13: Place the frame pad (H) on top of the springs. Adjust the frame pad so that the slits are directly above the T-sockets. Important: Don’t use the trampoline without the frame pad. It’s designed to protect your little jumpers! Trust us on this one.
- Page 15 Assembly Instructions Step 15: If you want, take a snack break because you’re MORE THAN HALFWAY DONE, and you deserve it. This next step is easy. Just slide all the straight tubes (K) and curved tubes (J) into foam (L). If you’re having trouble getting the foam over the tubes, try adding a small amount of...
- Page 16 Assembly Instructions Step 17: Important: The pole cap (H) has two sides; one with a hexagon hole, and one with a round hole. Insert the pole cap into one strap ring found on the top of the enclosure net. Make sure the hexagon hole is facing the net, and the round hole is facing you.
- Page 17 Assembly Instructions Step 19: Attach the connecting part-straight (R) and connecting part-curves (S). Step 20: Attach the regular part (T) and connecting part-straight (R) and connecting part-curves. Then tighten with a M10x70mm Bolt (a) and large nut (Z) as shown. Pay attention to the direction of the regular part (T).
- Page 18 Assembly Instructions Step 21: Attach the backboard (P) and rim with net (Q), tighten with a plastic nut (V). The regular part (T) can adjust the angle. Step 22: Now install the basket Game to the curved tube (J), attach the regular part (T) to the curved tube (J), tighten with two connecting bolts (U) and four small nuts (Y).
- Page 19 Assembly Instructions Step 23: Starting from the enclosure door, lift one of the assembled poles and insert the straight tube (K) into the socket. Repeat this process to assemble the 5 remain- ing poles. Helpful tip: When inserting the enclosure poles, pull back on the middle of the poles! Step 24: Insert the end caps (N) into the bottom of the sockets.
- Page 20 Assembly Instructions Step 25: Using the included plastic tie, attach the safety plac- ard to the trampoline frame close to the enclo- sure door. Step 26: Congratulations on completing your new trampoline! Page 20 of 22...
-
Page 21: Care And Maintenance
Care and Maintenance 3 ) Deterioration in the stitching or fabric of the bed, CARE frame pad, enclosure mesh. 4) Ruptured or missing springs. Do not allow pets or animals on the trampoline 5)A bent or broken frame, leg, enclosure poles. or inside the enclosure, as claws may snag and 6)A sagging bed, enclosure mesh. -
Page 22: Warranty Information
Warranty Information This product has been manufactured under the highest standards of quality and workmanship. We warrant to the original consumer purchaser that all aspects of this product will be free of defects in material and workmanship for one year from the date of purchase. A replacement for any defective- part will be supplied free pf charge for installation by the consumer.
Need help?
Do you have a question about the 177377 and is the answer not in the manual?
Questions and answers