Advertisement
Version 2.4
Assembly Instructions
& User's Manual
Style #166826
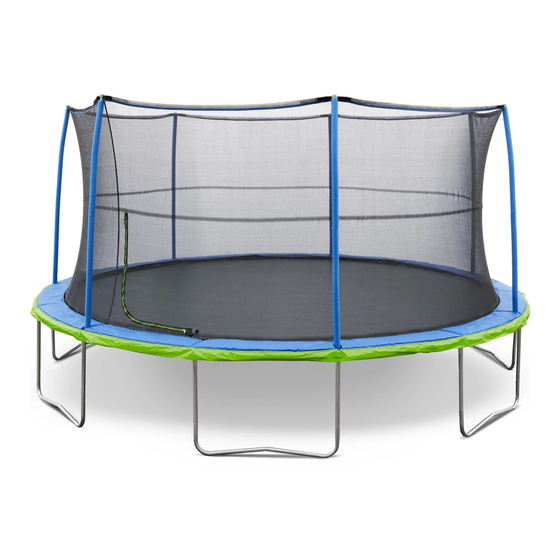
16 Ft Mega Trampoline and Enclosure
Please keep this instruction manual for future reference
Customer Service: (888) 922-2336
7:00 am to 12:00 am CST (daily)
Live Chat at: www.academy.com
Email: customerservice@academy.com
(Made in China)
Advertisement

Related Manuals for AGame 166826


Summary of Contents for AGame 166826
- Page 1 Version 2.4 Assembly Instructions & User’s Manual Style #166826 16 Ft Mega Trampoline and Enclosure Please keep this instruction manual for future reference Customer Service: (888) 922-2336 7:00 am to 12:00 am CST (daily) Live Chat at: www.academy.com Email: customerservice@academy.com...
-
Page 2: Table Of Contents
Table of Contents Warnings Tools and Parts Assembly Instructions Care and Maintenance Warranty Information Note: Before beginning assembly of product, make sure all parts are present. Compare parts with package content list and hardware contents. If any part is missing or damaged, do not attempt to assemble the unit. -
Page 3: Warnings
WARNINGS Page 3 of 30... - Page 4 WARNINGS Page 4 of 30...
- Page 5 Page 5 of 30...
- Page 6 ATTACH TO ENCLOSURE MESH AT DOOR Page 6 of 30 Page 6 of 30...
- Page 7 Page 7 of 30...
- Page 8 Page 8 of 30...
- Page 9 Page 9 of 30...
- Page 10 Page 10 of 30...
-
Page 11: Tools And Parts
Tools Required Description: Cross-head screwdriver Description: Gloves Description: Description: Safety glasses Mallet Stitched mat with 98 V Rings 7.5” length spring Page 11 of 30... - Page 12 Top enclosure poles (Foam Sleeves and Enclosure Cap Pre-inserted) Bottom enclosure poles (Foam Sleeves Pre-inserted) Cord NOTICE: Please review part list and confirm all parts are included. If any parts are dam- aged or missing, please contact customer service at (888)-922-2336 for replacement. (See front cover) for replacements.
- Page 13 STOP! NOTICE: Determine the final setup location for the trampoline before assembly. Assemble the trampoline in the desired area to prevent unnecessary movement during or after the completed assembly. Moving the trampoline during or after assembly may cause damages to the trampoline frame. If it is necessary to move the trampoline, always do so with 2+ people, keep horizontal, and lift slightly.
-
Page 14: Assembly Instructions
Assembly Instructions Step 1: You will need the following parts 7 x Top Tubes with T-Connector A – Part A 7 x Top Tubes with T-Connector B – Part B 14 x Leg Extensions – Part C 7 x Leg Centers– Part D Notice:Must wear gloves and protective Step 2: eyewear during assembly. - Page 15 Assembly Instructions Step 3: Insert the two leg extensions onto one leg center. Step 4: Insert one of the leg extensions of completed assembly into T-Connector (A). Page 15 of 30...
- Page 16 Assembly Instructions Step 5: IMPORTANT: The frame is held together under tension so you will have to use some force to insert certain parts. Secure top tube using your feet and grip other end of the leg extension with both hands.
- Page 17 Assembly Instructions This step will require 2 people who Step 7: must be wearing gloves and protective eyewear. Connect two of the frame sections together as shown in the diagram. While one person holds the assembled sections upright, the other person can connect a third section onto the end of the assembled sections.
- Page 18 Assembly Instructions WARNING : Wear protective eyewear Step 9: and gloves during the assembly of the stitched mat. Layout the stitched mat (with the V-Rings) part E inside the frame of the trampoline with the warning labels Yellow stitched facing upwards. V-ring Locate the 7 V-Rings with yellow stitch- ing.
- Page 19 Assembly Instructions Yellow stitching webbing Step 11: 1 to 7 Springs Instructions Insert the Closed end of one spring Part F, onto one of the webbings yellow stitched V-Rings as shown. IMPORTANT: Correct Spring direction must be utilized to ensure a secure attachment as shown in step 10.
- Page 20 Assembly Instructions Step 12: 8 to 14 Springs Instructions IMPORTANT: It is important to follow the number sequence accordingly to prevent over- stretching the springs. Notice: Next set of 7 springs will be centered between previously attached springs, per sequence shown above. Using spring pulling tool (part G) complete the next 7 springs using the sequence shown above.
- Page 21 Assembly Instructions Step 13: Step 14: 15 to 21 Springs 22 to 28 Springs Instructions Instructions Step 15: Step 16: 29 to 35 Springs 36 to 42 Springs Instructions Instructions IMPORTANT: Follow the number sequence accordingly to prevent the overstretching of springs.
- Page 22 Assembly Instructions Step 17: Step 18: 43 to 49 Springs 50 to 56 Springs Instructions Instructions Step 20: Step 19: 64 to 70 Springs 57 to 63 Springs Instructions Instructions IMPORTANT: Follow the number sequence accordingly to prevent the overstretching of springs.
- Page 23 Assembly Instructions Step 21: Step 22: 71 to 77 Springs 78 to 84 Springs Instructions Instructions Step 23: Step 24: 92 to 98 Springs 85 to 91 Springs Instructions Instructions Attach the remaining springs to the top rail according to the number sequence shown in the above images.
- Page 24 Assembly Instructions Step 25: This step will require two people. Lay the frame pad, Part H, out over the edge of the frame with the ties facing downwards. Align the openings in the frame pad with the T-Connector B’s on the frame. Step 26: Tie the outer elastic straps on the underside of the frame pad around the...
- Page 25 Assembly Instructions Step 28: Align the hole on the bottom enclosure pole with the hole in the top enclosure pole. Screw one of the self tapping screws through the hole in the top enclosure pole and into the hole in the bottom enclosure pole using the crosshead screwdriver.
- Page 26 Assembly Instructions Insert the remaining enclosure poles Step 31: with enclosure caps into the remaining T-connectors (B) on the frame. Enclosure frame is now assembled. Step 32: Place enclosure mesh on the mat inside the enclosure poles. Ensure the opening is aligned with the warning label located on the mat.
- Page 27 Assembly Instructions Tie the end of the cord to one of the Step 34: V-Ring attachments located on the mat. Push the cord through a hole at the bottom of the enclosure mesh and pull tight. IMPORTANT: Keep the cord tight at all times.
- Page 28 Moving Trampoline TWO+ PEOPLE Notice: The trampoline should not be moved. Unnecessary movement of the trampoline may cause damage to the trampoline frame. If moving is required, use at least 2+ people, keep horizontal, and lift the trampoline slightly from the leg extension.
-
Page 29: Care And Maintenance
Care and Maintenance CARE REMOVE AND STORING THE TRAMPOLINE / ENCLO- SURE Do not allow pets or animals on the trampoline or inside the enclosure, as claws may snag and pull the Make sure that the trampoline / enclosure is dry before bed material or damage the frame pad or enclosure removing and storing it. -
Page 30: Warranty Information
Page 30 of 30...
Need help?
Do you have a question about the 166826 and is the answer not in the manual?
Questions and answers