Table of Contents
Advertisement
Quick Links
Advertisement
Table of Contents

Subscribe to Our Youtube Channel
Related Manuals for KStar NBG-12K-US


Summary of Contents for KStar NBG-12K-US
- Page 1 NBG-12K-US KSG-12K Solar Inverter Solar Inverter User Manual 201807 Ver 1.1...
-
Page 2: Table Of Contents
Table of Contents 1. Introduction for Signs................ 4 2. Introduction..................5 2.1 Preface..................5 2.2 PV Grid-connected Generating System........5 2.3 How to Use This Manual..............6 3. Safety Instructions................7 4. Overall Introduction................8 4.1 Circuit Structure................8 4.2 Description for External Interface..........9 5. - Page 3 7.4.4 Working parameters.............23 7.4.5 485 address................29 7.4.6 485 baudrate................29 7.4.7 485 protocol................30 7.4.8 Display language..............30 7.4.9 LCD backlight..............30 7.4.10 Date/time................31 7.4.11 History clearing..............31 7.4.12 Password setting..............31 7.4.13 Maintenance..............32 7.4.14 Factory Reset..............32 7.4.15 Array detection..............32 7.5 Inquiry..................33 7.5.1 INV MODEL...............34 7.5.2 MODEL SN................34 7.5.3 Firmware................
- Page 4 8.2.1 Installation introductions.............41 8.2.2 Mechanical dimension............41 8.2.3 Packing................42 8.2.4 Installation of Inverter............42 8.2.5 Installation Location............43 8.2.6 Installation Procedure............43 8.2.7 Ambient requirement............44 8.3 Electric connection..............45 8.3.1 Requirement for electric installation........45 8.3.2 Wire for alternating current connection.......46 8.3.3 Wire for direct current connection........46 8.3.4 Wire for communication connection........47 8.4 Starting and closing..............
-
Page 5: Introduction For Signs
1. Introduction for Signs In order to make a better use of this manual, please read the following sign explanation carefully. Warning! This sign indicates that it may cause danger to safety of users and/or attentions or instructions for possible serious damage to hardware. -
Page 6: Introduction
2. Introduction 2.1 Preface Dear users, thank you for using photovoltaic grid-connected inverter products manufactured by our company which is experienced in development of photovoltaic grid-connected generating sets. We hope this product can meet your demands and welcome you to put forward more suggestions on performance and functions of this product. -
Page 7: How To Use This Manual
2.3 How to Use This Manual This manual aims to provide detailed product information and installation & use instructions for users of photovoltaic grid-connected inverter manufactured by this company. Please read this manual carefully prior to use of this product and store it properly in a place where it is convenient for installation, operation and available for maintenance personnel. -
Page 8: Safety Instructions
3. Safety Instructions ﹡ Please read this manual carefully prior to installation. This company assumes no responsibility for quality assurance upon equipment damage due to installation failing to follow instructions in this manual. ﹡ All operations and wiring shall be conducted by professional electrical or mechanical engineer. -
Page 9: Overall Introduction
4. Overall Introduction 4.1 Circuit Structure Figure 2 shows main circuit of inverter by which the direct current is input via three-phase full-bridge circuit and transformed into sine-wave current through filter and output to power grid. To make the photovoltaic array generate in maximum power, the new type power devices are adopted for this machine and the advanced MPPT algorithm is used at the DC side. -
Page 10: Description For External Interface
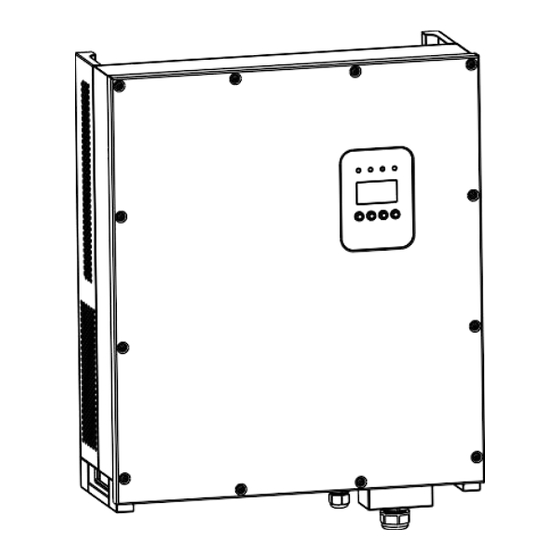
4.2 Description for External Interface Figure 3: Interface of Inverter Instructions for Interface █ 1: DC Input: DC input terminal, connected to positive and negative ﹡ electrode input of photovoltaic array respectively. 2: Communication Interface RS232: connected with PC via joint ﹡... -
Page 11: System Operation
5. System Operation 5.1 System Mode The operation modes of grid-connected type inverter include the initialization, waiting, self-checking, grid-connected operating and error modes. Initialization mode: the internal data will be initialized upon power ﹡ on of controller. ﹡ Waiting mode: the inverter will be under waiting mode if the output voltage of PV battery board is low and it has not detected any fault. - Page 12 ﹡ Independent input mode: two groups of different PV arrays may be connected to input end of inverter and independent MPPT controller is available for each group of PV arrays to control grid- connected operation. Figure 4: Independent Input Mode Parallel input mode: only one group of PV arrays is connected ﹡...
-
Page 13: System Shutdown
after delayed for T . Manual setting is available for both V and T through LCD panel. 5.3 System Shutdown If grid-connected power of inverter is smaller than 100W continuously, the alarm of “zero power” will emerge. After alarming for one minute, the inverter will cut away from the grid and reenter waiting mode. - Page 14 AC Voltage High AC Voltage is too high. AC Frequency Low AC frequency is too low. AC Frequency High AC frequency is too high. Bus Voltage Low Bus voltage is too low. Bus Voltage High Bus voltage is too high. Positive voltage or negative voltage is too Bus Voltage Abnormal high or too low on bus.
-
Page 15: Type Of System Fault And Troubleshooting
5.5 Type of system fault and troubleshooting Table 5.3 Type of system fault and trouble shooting Trouble Shooting Alarm Message Solution Pease check mains voltage whether it is complied with local safety standard. AC voltage & Please check the AC output line is properly connected. Make frequency are too sure its output voltage to see if it is normal. - Page 16 Disconnect PV input and cool down the inverter then restart the Ambient inverter to see if it is back to normal operation. Temperature High Please check environmental temperature whether out of (F12) working temperature. Contact with your local distributor if the fault still exists. Disconnect PV input and cool down the inverter then restart the Heatsink inverter to see if it is back to normal operation.
-
Page 17: Human-Machine Interface
6. Human-machine Interface 6.1 LCD controlled panel There are 4 buttons and 4 LEDs installed on the panel of inverter, as shown in Figure 6. Figure 6: LCD Controlled Panel Table 6.1 Description for LED light LED light Definition Indicator light for waiting of paralleling in WAIT NORMAL Indicator light for normal operation (generating electricity) ALARM... -
Page 18: Networking For Monitoring
6.2 Networking for monitoring The inverter is provided with various kinds of communication odes, when the user requires to monitor the running information of photovoltaic power generation system, we will offer the following design scheme for monitoring system. ■ Intelligent cluster controller: Figure 7: Data collector conducts monitoring through RS485 ■... -
Page 19: Dry Contact
Signal Pins of Inverter RS485 terminal block are defined as follow: Figure 10: RS485 Port 6.3 Dry contact Interface (optional). 6.4 Remote control The inverter can realize the remote SHUTDOWN and ON and power limit regulatory function by the associated monitoring software. Installation and Operation Manual... -
Page 20: Lcd Operation Menu
7. LCD Operation Menu 7.1 Initialization Interface Explanation After starting-up of inverter, LCD will firstly enter this interface, and deliver During initialization… parameters required by operation of the please wait! machine to DSP. 7.2 Major cycle menu After initialization, LCD will enter a major cycle menu to display running information of the inverter in a circulating mode, including 10 interfaces for network voltage, frequency of electric network, etc. - Page 21 Figure 11: Interface of recycling display When the menu is in an automatic cycling display mode, if error (fault) or warning alarm occurs, it will skip into system interface immediately and lock to it, and this will make convenience for the user to determine its cause based on codes on the interface.
-
Page 22: User Interface
7.3 User interface Interface Description Select corresponding options by pressing UP or DOWN button, enter “setting”, -----USER----- “inquiry” and “statistics” menus by →1:Setting pressing ENTER button. Press ESC to 2:Inquire return major circulating menu. 3:Statistics 7.4 Setting Interface Description After entering into the setup interface, the system will prompt to input -----PASSWORD----- password, the default... -
Page 23: Input Mode
7.4.1 Input mode Interface Description Press UP/DOWN button move corresponding option. Then confirm the ----- INPUT MODE ----- selected option and enter interface of please →1:INDEPENDENT restart (refer to 7.4.4.11) by pressing 2:PARALLEL ENTER button. Press ESC button to cancel choice and return back setup interface (refer 7.4). -
Page 24: Working Parameters
7.4.4 Working parameters Interface Description Press UP/DOWN button move corresponding options, press ENTER to -- RUN SETTING-- enter into the selected menu; return back →1: VPV-START setup interface (refer to 7.4) by pressing 2: DELAY-START ESC, there are 6 options in total, including 3: VAC-MIN VPV-START, DELAY-START, VAC-MIN, VAC-MAX,... - Page 25 7.4.4.3 Low voltage of electric network Interface Description Press UP/ DOWN to increase or decrease the input figure, confirm input --GRID VOLT LOW-- and enter into interface of please restart INPUT: (refer to 7.4.4.11) by pressing ENTER UNIT: button; press ESC to cancel input and return back working interface (refer to 7.4.4), input figure is between 150 and 210.
- Page 26 7.4.4.6 High frequency of electric network Interface Description Press UP/ DOWN to increase or decrease the input figure, confirm input and enter into -- GRID FREQ HIGH-- interface of please restart (refer to 7.4.4.11) INPUT: 50.5 by pressing ENTER button; press ESC to UNIT: cancel input and return back working interface (refer to 7.4.4), the input figure is...
- Page 27 7.4.4.7.2 Power Value Interface Description Press UP/ DOWN to increase or decrease the input figure, confirm input and enter into ---- POWER VALUE ---- interface of Active power (refer to 7.4.4.7) by INPUT : 013KW pressing ENTER button; press ESC to cancel input and return back Active power (refer to 7.4.4.7), the input figure is between 0 and 7.4.4.8 Reactive power...
- Page 28 7.4.4.8.2 Power factor Interface Description Press UP/ DOWN to increase or decrease the input figure, confirm input and --POWER FACTOR-- return back Reactive power (refer to 7.4.4.8) INPUT : 0.000 by pressing ENTER button, press ESC button to cancel input and return back Reactive power (refer to 7.4.4.8);...
- Page 29 7.4.4.9.1 Over frequency derating enable Interface Description Press UP/DOWN button move corresponding options, press ENTER --FREQ POWER--- enter into the Over frequency derating → 1.ENABLE interface (refer to 7.4.4.9); return back Over 2.DISABLE frequency derating interface (refer to 7.4.4.9) by pressing ESC, there are 2 options in total, including enable and disable.
-
Page 30: 485 Address
7.4.4.11 Please restart Interface Description A prompt that it is required to start the machine once again, so that the setup Please Restart! relevant to working will be effective, and it will return back operational parameter interface (refer to 7.4.4) within 2 seconds. 7.4.5 485 address Interface Description... -
Page 31: 485 Protocol
7.4.7 485 protocol Interface Description Press UP/DOWN button move corresponding options. confirm ------SELECT------ selected option and return back the setup →1: FACTORY interface by pressing ENTER button 2:MODBUS (refer to 7.4), press ESC button to cancel choice and return back setup interface(refer to 7.4). -
Page 32: Date/Time
7.4.10 Date/time Interface Description Press UP/ DOWN to increase or decrease the input figure; press ENTER -----DATE/TIME----- button to move the cursor backwards, DATE:2000-01-01 confirm input and return back setup TIME: 02:43:03 interface (refer to 7.4); and move the WEEK: 6 cursor frontward and return back setup interface (refer to 7.4) by pressing ESC button. -
Page 33: Maintenance
7.4.13 Maintenance Interface Description This interface will used f o r f a c t o r y testing, and be protected by -----PASSWORD----- password. INPUT: XXXXX 7.4.14 Factory reset Interface Description This interface will be used to reset inverter parameter to default. -
Page 34: Inquiry
7.4.15.1 ARRAY Interface Description Press UP/DOWN button move corresponding options. confirm ----ARRAY--- selected option and return back Array detection by pressing ENTER button 1: ENABLE (refer to 7.4.15), press ESC button to cancel 2: DISABLE choice and return back Array detection (refer to 7.4.15). -
Page 35: Inv Model
7.5.1 INV MODEL Interface Description This interface displays product Model. of the inverter. UP/DOWN button is invalid, -----INVERTER----- ENTER button is invalid; and press ESC XXXXX button to return back the inquiry interface (refer to 7.5). 7.5.2 MODEL SN Interface Description This interface displays product series No. -
Page 36: Record
7.5.4 RECORD Interface Description This interface displays record and its occurring time, including two types of -----REC( 35)----- fault and warning alarm, its content will 1:F01-1 be described in codes, with total number DATE: 2011-10-21 of 500 at utmost, after exceeding this TIME: 16:35:26 extent, the one with earliest time will be covered. -
Page 37: Error Event
7.5.5 ERROR EVENT Interface Description Press UP/DOWN button to look over record backwards or frontward, and press -----EVE( 20)----- ENTER to enter into explanation interface 1:F01-1 for corresponding record content, as Date: 2011-10-21 shown in the following Figure. Press Time: 16:35:26 ESC to return back inquiry interface (refer to 7.5). -
Page 38: Statistics
7.6 Statistics Interface Description This interface is used to select various options for statistics. UP/DOWN button ----- STAT. ----- is used to move corresponding options, →1:TIME STAT. press ENTER button to enter the selected 2:CONNE.TIMES menu; and press ESC to return back the 3:PEAK POWER user interface (refer to7.3), there are 8 options,... -
Page 39: Power Peak
7.6.3 Power peak Interface Description This interface displays history power peak and today power peak of the inverter. -----PEAK POWER----- UP/DOWN button is invalid, and ENTER is HISTORY: 10645 also invalid; press ESC button to return back TODAY: 9600 statistics interface (refer to 7.6). UNIT: 7.6.4 Generated energy of that day Interface... -
Page 40: Generated Energy Of That Year
7.6.7 Generated energy of that year Interface Description This interface displays generated energy of that year. UP/DOWN button is -----E-YEAR----- invalid, and ENTER is also invalid; press NUM: 30000 ESC button to return back statistics UNIT: interface (refer to 7.6). 7.6.8 Gross generation Interface Description... -
Page 41: Installation
8. Installation 8.1 Overview The installation introduction of inverter is as follows. Please read this chapter carefully to help you install the photovoltaic grid- connected inverter correctly. Inspection of damage during transportation The inverter may be damaged during transportation even if we have conducted the test and detection for it before transportation. -
Page 42: Mechanical Installation
8.2 Mechanical installation 8.2.1 Installation introductions For any live part of electronic product, the deadly dangerous may happen due to touch of it. For this product, the voltage of direct current is 1000V and the voltage of alternating current is 400V. Attention! The professional electrician must be invited to install this inverter. -
Page 43: Packing
8.2.3 Packing Please check carefully before opening the package of the equipment. It may cause the inverter damage in case the packing material is found damage, please contact with forwarder for claim. If necessary, Please feel free to contact us. 8.2.4 Installation of Inverter Please read the following installation instruction before you start your work so as to achieve best effect of the inverter. -
Page 44: Installation Location
8.2.5 Installation Location Figure 13 1. The inverter is suitable to be installed on vertical or backwards tilt wall as shown above, the tilt angle should be less 15°. 2. Don’t install inverter on forward tilt wall. 3. Don’t install inverter on horizontal wall. 4. -
Page 45: Ambient Requirement
Hang the inverter to formwork form the top to bottom, check both sides and keep the inverter in the right position, and tighten screw. Hang and fix the inverter Figure 15 8.2.7 Ambient requirement Attention! The scope of ambient is -25°C to +60°C. Meanwhile, no direct sunlight for inverter should be satisfied, or the high temperature can influence the generated energy. -
Page 46: Electric Connection
8.3 Electric connection 8.3.1 Requirement for electric installation ● Photovoltaic array The open-circuit voltage for photovoltaic array cannot exceed 1000V with allocated power for it of 13KW. Recommended maximum power for photovoltaic array: 13KW Maximum open-circuit voltage for array: 1000V ●... -
Page 47: Wire For Alternating Current Connection
8.3.2 Wire for alternating current connection ﹡ The breaker of alternating current is cut off when wiring to assure that there is no electricity at the terminal of alternating current wire. And then, confirm it after measuring of multimeter. ﹡ Connect the “L1” of alternating current output with “L1” of grid; ﹡... -
Page 48: Wire For Communication Connection
﹡ Confirm the positive and negative pole with multimeter. ﹡ The positive pole of photovoltaic array is connected with “PV+” of direct current input ﹡ The negative pole of photovoltaic array is connected with “PV-” of direct current input. ﹡ Confirm that the wiring is firm. 8.3.4 Wire for communication connection The communication method of RS485 bus is adopted for this machine when PC is used for monitoring of signal or multiple grid-connected... - Page 49 Figure 17: RS485/ RS232 Converter Figure 18: RS485 Port When the GPRS/WIFI data controller monitor the PV inverter, the pin definition of GPRS/WIFI as shown in the figure19 below. Figure 19 Installation and Operation Manual...
-
Page 50: Starting And Closing
8.4 Starting and closing Starting process: 1. Connect the photovoltaic array, inverter and alternating current grid correctly according to the above- mentioned installation process. 2. Measure whether the voltage of alternating and direct current meets the starting condition of machine with multimeter before starting. 3. -
Page 51: Technical Data
9. Technical Data Table 9.1 Technical Data Model NBG-12K-US Input Data Maximum power of PV 13KW Maximum voltage of direct current 1000V Rated operational voltage 580V Tracking scope of voltage 250V~950V Full load MPP voltage 480V~800V Maximum input current 13A/13A... - Page 52 Table 9.2 Grid Specification(3W+N+PE/LN) Grid Output Voltage Output Frequency Boot wait Error recovery specification Range(Vac) Range (Hz) time (S) time (S) 60Hz 102- 153 58 - 62 Table 9.3 Grid Specification(3W+PE/LL) Grid Output Voltage Output Frequency Boot wait Error recovery Range(Vac) Range (Hz) time (S)
-
Page 53: Appendix
10. Appendix 10.1 Quality assurance The quality assurance for product of Our company can be conducted only on the condition that invoice and date when customer purchases the product should be presented and the trade on the product is clear during quality assurance period.
Need help?
Do you have a question about the NBG-12K-US and is the answer not in the manual?
Questions and answers