Venta AeroStyle LW73, LW74 - Air Humidifier Manual
- Operating manual (176 pages) ,
- Instructions for use manual (60 pages) ,
- Operating manual (108 pages)
Advertisement
- 1 Introduction
- 2 SCOPE OF DELIVERY
- 3 SYMBOLS
- 4 INTENDED USE
- 5 OVERVIEW
- 6 BEFORE FIRST USE
- 7 PUTTING INTO OPERATION
- 8 DISPLAYS, FUNCTIONS & SETTINGS
- 9 CLEANING & MAINTENANCE
- 10 CLEANING THE UPPER HOUSING
- 11 ACCESSORIES
- 12 TECHNICAL DATA
- 13 VENTA-SERVICE-TEAM
- 14 WHAT TO DO IF...
- 15 SERVICE AND SUPPORT
- 16 SAFETY INSTRUCTIONS
- 17 Documents / Resources
Introduction
We are confident that the Venta Airwasher will exceed your expectations, and we hope you enjoy it.
Please register your Venta: www.venta-luftwaescher.de/produktregistrierung-deutschland

Please read this operating manual in its entirety, keep it for later reference and note all safety instructions as well as instructions for the proper use of the device.
The most current version of the operating manual can be found on our website at www.venta-luftwaescher.de
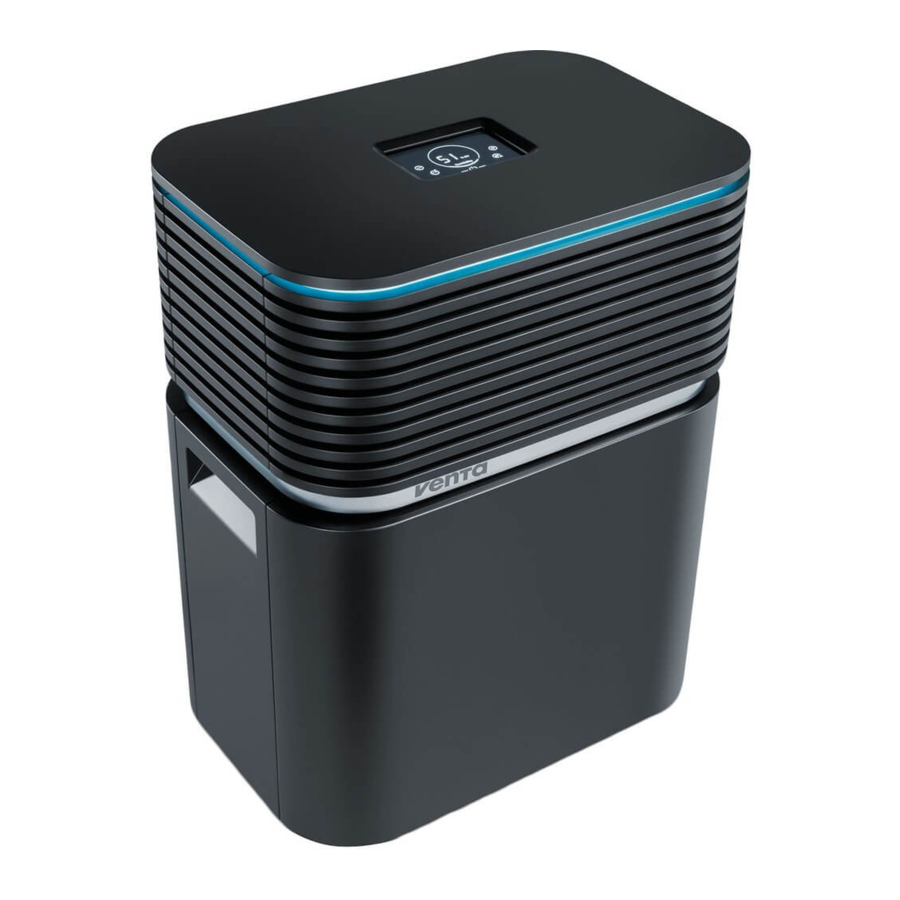
With the Venta AeroStyle Airwasher LW73 or LW74, you have purchased a high-performing premium product. The AeroStyle promotes healthy humidity and naturally reduces harmful substances in the air.
Here's how the Venta principle works
A fan directs the ambient air into the water-filled Airwasher, where it travels through specially arrayed disk stacks. Hygienically clean air evaporates from their surfaces into the room. Simultaneously, the stacks trap harmful substances such as dust or pollen, which are then washed off in the water and collected in the Airwasher.
SCOPE OF DELIVERY
1 × Venta Airwasher
1 × Hygiene disk (pre-assembled)
1 × operating manual
If parts are missing or damaged, please contact the VENTA service team or your local dealer.
SYMBOLS
 Safety instructions: Read and adhere to these instructions carefully, in order to avoid personal and material damages.
 Supplementary information
 Helpful tips
INTENDED USE
The Venta Airwasher is a domestic appliance for moistening and cleansing the air. The appliance is not suitable for outdoor areas.
Any other use or modification of the appliance is considered to be improper use. The manufacturer is not liable for any damage or injuries resulting from improper use.
Using the appliance for something other than the intended purpose can endanger health and lives. This includes use under the following conditions:
- in rooms or locations where there is risk of explosion and/or where there is an aggressive atmosphere.
- in rooms where there is a high concentration of solvents.
- in the vicinity of swimming pools or other wet areas.
- In the outdoors.
OVERVIEW


- Upper housing (technical unit)
- Power cable
- Evaporation unit (incl. hygiene disk, drive wheel, disk stacks)
- Removable water tray
- Lower housing
- Removable cover for retrofitting Venta WiFi/WLAN module
BEFORE FIRST USE
- Unpack the appliance and set it up.
- Remove upper housing1.
- Remove evaporation unit3 from water tray 4
PUTTING INTO OPERATION
- Fill water tray in lower housing with fresh tap water (approx. 9 litres) until it is no more than half full.

- Place evaporation unit B into the water tray of the lower housing A and place upper housing C onto lower housing A, making sure it is the right way round.

- Plug power plug D into a mains socket and switch appliance on by tapping the Power button
![]() .
.
![information]() The Power button
The Power button ![]() for switching the appliance on and off only lights up when the appliance is plugged in.
for switching the appliance on and off only lights up when the appliance is plugged in.


DISPLAYS, FUNCTIONS & SETTINGS

| Display | Function | |
| 1 | Speed | Displays speed levels 1 - 2 - 3 - 4.The speeds are represented in the form of ring segments. At a higher speed, the next ring segment in a clockwise direction becomes thicker. This starts with Level 1 as a thin ring segment at the bottom and progresses to Level 4 with the thickest ring segment on the right. The illustration shows Level 4. |
| 2 | Humidity | Displays ambient humidity (0 - 99%). |
| 3 |  and and  | Set the speed by tapping: reduces and increases the speed. |
| 4 |  | Tap to switch sleep mode on or off. ON: Appliance dims the display illumination, reduces the speed to 1 and switches off LED strip 7.You can change the speed 1 manually using button 3 with + or -. Automatic operation 6 is not possible. LED strip 7 can not be switched on. OFF: Display lit up, LED strip 7 switched on and appliance operates at selected speed 1 - 4. LED strip 7 does not switch on if it has been separately switched off previously. Touch and hold the sleep mode button 4 for approx. 3 seconds to switch it on again. |
| 5 |  | Switch the appliance off or on by tapping the power button. The Power button for switching on or off only lights up when the appliance is plugged in. |
| 6 |  | Switch automatic mode on or off by tapping the button. ON: Indicator on display flashes continuously and appliance automatically adjusts the speed to the ambient humidity. iWhen you switch on automatic mode, the humidity indicator 2 displays the desired humidity (50% pre-set), which flashes twice, then the measured ambient humidity again.OFF: Indicator on display lights up continuously and appliance operates at selected speed 1 - 4. Set desired humidity to 30 - 70%: Touch -button 6 and hold for approx. 3 seconds until humidity indicator 2 flashes. Set the humidity you want using button 3 with - or + (in 5% increments).Touch -button 6 again and hold for approx. 3 seconds until humidity indicator 2 stops flashing and again indicates the measured ambient humidity. Please ensure that automatic mode is switched on. The indicator on the display flashes continuously. |
| 7 | LED strip | Continuous illumination signals that the appliance is operating. Continuous flashing signals that the appliance has automatically switched off due to lack of water. You can separately switch the LED strip 7 on and off during operation by touching the sleep mode button 4 and holding for 3 seconds. |
CLEANING & MAINTENANCE

Attention! Ensure that the device is switched off during any measures and the switching power supply is disconnected from the outlet!
| Display | Measures | |
| 8 | WATER | Remove upper housing. Fill water tray in lower housing with tap water up to maximum level indicated by the WATERLINE marker. Place upper housing onto lower housing and switch appliance on again.As soon as there is not enough water in the water tray, the appliance switches off automatically, LED 7 flashes continuously, and the WATER indicator appears on the display. In the humidity indicator 2, two dashes flash and the ambient humidity is not displayed. In order to continuously humidify the ambient air and reduce harmful substances (particles down to 10 µm), we recommend topping up the water daily. |
| 9 | SERVICE | Remove upper housing. Empty the residual water out of the water tray. Rinse out water tray and evaporation unit thoroughly. Fill water tray in lower housing with tap water up to maximum level indicated by the WATERLINE marker. Reassemble appliance and switch it on. Touch SERVICE indicator 9 on the display and hold for approx. 3 seconds until it goes out. For perfectly hygienic constant operation, the SERVICE indicator reminds you to carry out servicing every 14 days (also in standby mode). |
| 10 | CLEANING | Remove upper housing. Empty residual water from water tray, fill up with tap water to maximum level indicated by the WA- TERLINE marker and add 250 ml of Venta cleaner. Re-assemble appliance and let it run for approx. 2 hours at low speed. We recommend that you ventilate the room during this washing procedure to avoid any odors which can occur if the appliance is very dirty. Then remove upper housing and empty out dirty water. Rinse out water tray and evaporation unit thoroughly. Fill water tray in lower housing with tap water up to maximum level indicated by the WATERLINE marker, re-assemble appliance and switch it on. Touch CLEANING indicator 10 on the display and hold for approx. 3 seconds until it goes out. Every 6 months (in case of 24-hour constant operation), the CLEANING indicator reminds you to carry out this action |
| 11 | DISK |
The service life of the hygiene disk is approx. 4 months (in the case of 24-hour constant operation). The service life depends on the water hardness, water quality, daily evaporation performance and number of operating hours. The DISK indicator reminds you to carry out this action every 4 months (in the case of 24-hour constant operation). You can use the Venta ReNew recycling program to return the hygiene disk to us. |


You can carry out care actions 9, 10 and 11 at any time, even if they are not indicated on the display. When you are finished, simply activate the RESET function for CLEANING, DISK, SERVICE: Touch the Power button  and hold for approx. 4 seconds until it flashes and SERVICE, CLEANING and DISK appear on the display. Now touch the actions you have performed and hold for approx. 3 seconds until they go out. Finally, touch the flashing Power button and hold for approx. 4 seconds until it lights up constantly. The next reminders for the actions performed will be indicated at the normal intervals. Any residues in the water tray and on the evaporation unit (white, greenish-yellow or brown deposits/discoloration) do NOT impair the function of the appliance.
CLEANING THE UPPER HOUSING
Attention! Ensure that the device is switched off during any measures and the switching power supply is disconnected from the outlet!
Clean the upper housing with a dry cloth/cleaning brush or a slightly damp cloth.
Do not clean the upper housing under running water!
Only clean the display with a dry cloth or a display cleaning cloth.
Do not clean the display with a wet or too-damp cloth!
ACCESSORIES
- Venta hygiene disk for perfectly hygienic constant operation
- Venta cleaner for six-monthly cleaning
- Optional: Venta WLAN/WiFi module in combination with the free app from Venta for perfect control and easy remote control, even on the go
Additional AeroStyle accessories available online: www.venta-luftwaescher.de
TECHNICAL DATA
| Model | AeroStyle LW73 | AeroStyle LW74 |
| Colors | Signal white / Signal black | |
| Suitable for room size | Up to 70 m² | Up to 90 m² |
| LED status display | blue light strip | |
| Interactive touch display | Standard | |
| App control | WiFi/WLAN module (optional) | |
| Measurement sensors | Humidity | |
| Water hygiene | Standard | |
| Performance levels | 4 + automatic | |
| Noise emission (Speeds 1–4) | 24 / 36 / 44 / 50 dB(A) | 27 / 35 / 41 / 47 dB(A) |
| Power consumption (Speeds 1–4) | 7 / 9 / 13 / 18 Watt | 11 / 14 / 17 / 24 Watt |
| Mains voltage | 220-240 V / 50-60 Hz | |
| Water capacity (max.) | 9 liters | |
| Dimensions (L x W x H) | 42 × 29 × 54 cm | |
| Weight | 9,5 kg | 10,5 kg |
May be subject to change/error
VENTA-SERVICE-TEAM
Do you need additional information about the Venta Airwasher or do you want to order accessories? No problem: the VENTA service team will take care of it! Call the team directly or visit the Venta website.
+49 751 5008 88, www.venta-luftwaescher.de
WHAT TO DO IF...
Ensure that the device is switched off during any measures and the power plug is disconnected from the mains socket.
... the Power button for switching the appliance on does not appear on the display?
Please check whether the appliance is plugged in to the mains.
... "Water" is indicated on the display although there is water in the water tray?
Please check that there is enough water in the water tray and/or that the upper housing is on the lower housing the right way round.
Action: Remove upper housing. Fill water tray in lower housing with tap water up to maximum level indicated by the WATERLINE marker. Place upper housing onto the lower housing, ensuring it is the right way round, and switch the appliance on again.
... white spots show up in the background when you touch the display?
In dry rooms, electrostatic charging can cause white areas to appear in the background on the display. These do not affect the functioning or ability to control the appliance and do not constitute a defect.
... LED strip does not light up although the appliance is in operation? Check whether the LED strip has been switched off separately. Touch the sleep mode button on the appliance and hold for approx. 3 seconds to switch the LED strip on again. You can also use the Venta app for this function.
The LED strip can not be switched on in sleep mode.
SERVICE AND SUPPORT
GERMANY
Venta-Luftwäscher GmbH
Weltestraße 5
88250 Weingarten
Tel.: +49 751 50 08 0 Fax: +49 751 50 08 20 info@venta-air.com www.venta-air.com
AUSTRIA
Stromayer Elektro Service GmbH
Strohmayergasse 8
1060 Wien Österreich Tel.: +43 1 5961706 office@stromayer.at
CHILE
Venta Air Technologies Inc.
US Headquarters
300 North Elizabeth Street
Suite 220 B
Chicago, Il 60607
United States of America
Tel.: +1-888-333-8218 Fax: +1-224-567-8349 info@venta-usa.com www.venta-air.com
CZECH REPUBLIC
LetMeRepair GmbH
Fichtestrasse 1a 02625 Bautzen service-cz@venta-air.com www.letmerepair.com
FINLAND
Suomen Allergiakauppa
Länsiportintie 14
13430 HÄMEENLINNA
Finnland Tel.: +358400855000 myynti@allergiakauppa.fi www.allergiakauppa.fi
FRANCE
LetMeRepair GmbH
Fichtestrasse 1a 02625 Bautzen service-fr@venta-air.com www.letmerepair.com
SERVICE AND SUPPORT BENELUX
Venta Benelux B.V.
Van Heemstraweg Oost 8
5301 KE Zaltbommel
Niederlande Tel.: +31 4 18 54 13 43 info-nl@venta-air.com www.venta-air.com
HUNGARY
LetMeRepair GmbH
Fichtestrasse 1a 02625 Bautzen service-hu@venta-air.com www.letmerepair.com
ITALY
LetMeRepair GmbH
Fichtestrasse 1a 02625 Bautzen service-it@venta-air.com www.letmerepair.com
JAPAN
Address Service Co., Ltd.
17-9, Shinoda, Togane-shi,
Chiba, 283-0013 Japan Tel.: 0120-407-554 venta_support@adservice. co.jp
LATVIA / LITHUANIA
SIA „BALTIJAS
TIRDZNIECĪBAS
UZŅĒMUMS"
Dārzaugļu iela 1-201,
Riga LV-1012, Latvia Tel.: +371 67790720 info@btu.lv
MALAYSIA / SINGAPORE / PHILLIPINES / VIETNAM
GA MAKMUR SDN BHD
No. 27, Jalan PP 11/4, Alam Perdana Industrial Park, Taman Putra Perdana, 47130 Puchong,
Selangor, Malaysia
Tel.: +603-8322 6628 Fax: +603-8322 6066 info@gasales.com.my
SWITZERLAND
Venta-Luftwäscher AG
Bösch 65
6331 Hünenberg
Schweiz
Tel.: +41 41 781 15 15 Fax: +41 41 781 15 50 info-ch@venta-air.com www.venta-air.com
MONGOLIA
AERIS LLC
SUITE 316, Barilga Architecture Building, Chinggis Avenue, Oron Suuts Street, 2nd horoo, Khan-Uul district, Ulaanbaatar,
Mongolia 17032
Tel.: +976-99101185, +976-99096696 sales@aeris.mn www.aeris.mn
PORTUGAL
LetMeRepair GmbH
Fichtestrasse 1a 02625 Bautzen service-pt@venta-air.com www.letmerepair.com
RUSSIA
Venta Russia TSK IMPORT
(offizieller Importeur) 124683, Moskau, Selenograd, 1505, Raum III Russland
Tel.: +7 499 733 10 10 Fax: +7 499 733 10 10 venta@venta.ru
SCOTLAND, UK
LetMeRepair UK Ltd
1 Langlands Court
Kelvin South Business
Park, East Kilbride, G75
0YB, Scotland, UK Tel.: +44 (0) 1355 241 222 service-uk@venta-air.com Fax +44 1355 246575
SLOVAKIA
LetMeRepair GmbH
Fichtestrasse 1a 02625 Bautzen service-sk@venta-air.com www.letmerepair.com
USA
Venta Air Technologies Inc.
US Headquarters
1005 N Commons Dr
Aurora, IL 60504
United States of America
Tel.: +1-888-333-8218 Fax: +1-224-567-8349 info-us@venta-air.com www.venta-air.com
SPAIN
LetMeRepair GmbH
Fichtestrasse 1a 02625 Bautzen service-es@venta-air.com www.letmerepair.com
SOUTH AFRICA
EUROCARE Wellness
5 Star Business Park,
Unit 2, Persimmon Close, Honeydew, Johannesburg
Südafrika
Tel.: +27 11 888 3255 Fax: +27 11 888 9874 info@eurocarewellness. co.za
SOUTH KOREA
VENTA KOREA CO., LTD.
3/F., Seojin Bldg., 754,
Seolleung-ro, GangnamGu, Seoul 135-948, Korea
Tel.: +82 22 03 40 114 Fax: +82 22 03 40 119
UKRAINE
Venta-Centre Ukrein
Schlichtera, 11
Kharkov, Ukraine
Tel.: +38 057 752 72 72 Fax: +38 057 768 01 57 venta@venta.com.ua
UNITED KINGDOM
Noima Level Up UK
LG11 Belvedere House
Basing View
Basingstoke RG21 4HG www.noima.co.uk
SAFETY INSTRUCTIONS
- This appliance is not suitable for use by children over the age of 8 years and people with restricted physical, sensory, or mental capacities or lack of experience and knowledge unless they are supervised or have received instructions on the use of the appliance and understand the existing hazards.
- Read the operating instructions completely before putting the appliance into operation and keep them for later reference.
- The appliance is not a toy for children.
- Cleaning and user maintenance may not be performed by children under the age of 8 years or without supervision.
- Keep the appliance and its power cable out of the reach of children under the age of 8 years.
- Improper use can damage the appliance and cause physical injuries.
- Plug the appliance into suitable power outlets only – the mains voltage must correspond to the nameplate data on the appliance.
- Only use the appliance with the following power cable: low-heat device socket with IEC 320 C5 cloverleaf connector.
- Never use the appliance if it has a damaged power cable.
- Disconnect the power plug before every cleaning or maintenance operation and before transportation of the appliance.
- Never use the Airwasher if it has been dropped or damaged in any other way.
- Electrical appliances should only be repaired by professional specialists. Amateur repairs could result in considerable danger to the user.
- Do not sit on the appliance and do not place any objects on it.
- Do not put any foreign objects into the appliance.
- Do not immerse the upper housing in water or any other liquid.
- Never overfill the Airwasher.
- Never transport or overbalance the Airwasher with a filled lower housing.
- Never disconnect the power plug by pulling on the cable or with wet hands.
- The Airwasher should only be operated when it is completely assembled.
- Place the Airwasher on a stable surface which is flat and dry.
- Set up the appliance so that it cannot be knocked over, and so that no one can trip over it or the cable.
- Leave at least the following distances to other objects and walls:
- In front and above: 50 cm
- On the left and right sides: 20 cm
- At the rear: 5 cm
- Maximum installation altitude: 2000 m
- Never cover or block the vents to prevent overheating/damage to the appliance.
- A persistent relative ambient humidity of more than 60%, especially in winter, can enable the formation of biological organisms.
- The design of the appliance and the cold evaporation technology make it impossible for water to leak directly from the Airwasher in the form of droplets, vapor, mist or lime deposits, providing you use it correctly.
- Only operate the appliance with original Venta accessories designed for the purpose. Do not use aromatic oils or other additives. Venta-Luftwäscher GmbH accepts no liability for damage due to aromatic oils or other unsuitable additives.
- If you do not use the Airwasher for several days or put it into storage for a longer period, empty the water tray completely, clean it and dry thoroughly to prevent odors or biological organisms from developing in standing water or water residues.
- Disconnect the power plug from the power supply outlet when the appliance is not in use.
www.venta-air.com/Service/Service-Support/
VENTA WORLD WIDE www.venta-air.com/en_de/Venta-worldwide/
Documents / Resources
References
![www.venta-luftwaescher.de]() http://www.venta-luftwaescher.de
http://www.venta-luftwaescher.de![www.venta-air.com]() http://www.venta-air.com
http://www.venta-air.com![www.letmerepair.com]() LetMeRepair
LetMeRepair![www.allergiakauppa.fi]() http://www.allergiakauppa.fi
http://www.allergiakauppa.fi![www.aeris.mn]() Home
Home![www.noima.co.uk]() Home | Noima Consultancy
Home | Noima Consultancy![www.venta-air.com]() http://www.venta-air.com/Service/Service-Support/
http://www.venta-air.com/Service/Service-Support/![www.venta-air.com]() http://www.venta-air.com/en_de/Venta-worldwide/
http://www.venta-air.com/en_de/Venta-worldwide/
Download manual
Here you can download full pdf version of manual, it may contain additional safety instructions, warranty information, FCC rules, etc.
Advertisement


Need help?
Do you have a question about the AeroStyle LW73 and is the answer not in the manual?
Questions and answers