
Related Manuals for ECOWAY LUX PRO ST2300


Summary of Contents for ECOWAY LUX PRO ST2300
- Page 1 LUX PRO INTEGRATED SMART TOILET WITH BIDET FUNCTION TOILETTES INTELLIGENTES INTÉGRÉES AVEC FONCTION BIDET USER MANUAL MANUEL D’UTILISATION Model Number: ST2300 Numéro de modèle: ST 2300 Version: 20220405-1 www.eco-way.ca 1-833-332-6929...
-
Page 2: Table Of Contents
TABLE OF CONTENTS TABLE DES MATIÈRES IMPORTANT SAFEGUARDS GARANTIES....................1 WARNING ATTENTION....................2 GROUNDING INSTRUCTIONS INSTRUCTIONS DE MISE À LA TERRE............OPEN THE BOX OUVRIR LA BOITE..................4 PARTS AND NAMES PIÈCES ET NOMS..................5 INSTALLATION REQUIREMENTS EXIGENCES D’INSTALLATION..............6 INSTALLATION GUIDE GUIDE D’INSTALLATION................ -
Page 3: Important Safeguards Garanties
IMPORTANT SAFEGUARDS GARANTIES When using electrical products, especially when children are present, basic safety precautions should always be followed. PLEASE READ ALL INSTRUCTIONS BEFORE USING. DANGER: Risk of electric shock. Connect only to a circuit protected by a Ground-Fault Circuit-Interrupter (GFCI)*. WARNING: Risk of personal injury. -
Page 4: Warning Attention
émet de la fumée ou tout autre dysfonctionnement. Dans tous ces cas, arrêtez immédiatement d'utiliser le produit, coupez l'alimentation en eau et débranchez le cordon d'alimentation, contactez le service client Ecoway pour une inspection, réparation ou remplacement. -
Page 5: Grounding Instructions Instructions De Mise À La Terre
N'insérez, ne laissez tomber ou ne versez aucun objet ou liquide dans les pièces électriques ou le tuyau d'alimentation de l'appareil. Ce produit est destiné à une utilisation en intérieur uniquement, ne pas l'utiliser à l'extérieur ou tenter de l'installer sur des véhicules en mouvement, y compris, mais sans s'y limiter : camping-cars, mobil-homes, yachts. -
Page 6: Open The Box Ouvrir La Boite
* The above pictures are for demonstration only, please refer to the actual product. * If any of the part is missing from the package, please contact Ecoway customer service team at service@eco-way.ca. *Refer to page 8 for (B) bolt and page 9 for (A) bolt. -
Page 7: Parts And Names Pièces Et Noms
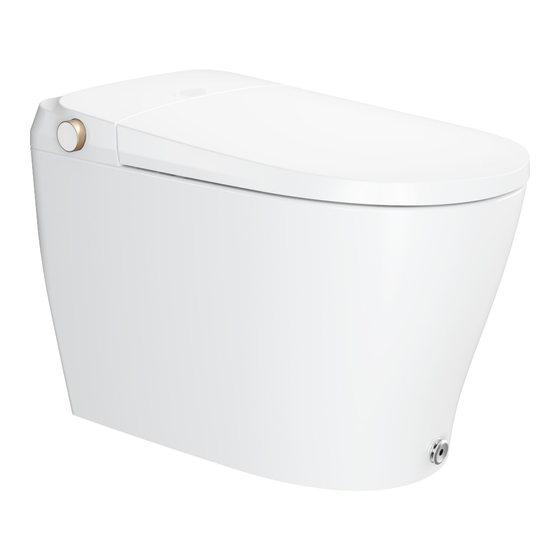
PARTS AND NAMES PIÈCES ET NOMS COVER CAUTION LABEL ÉTIQUETTE DE MISE EN GARDE COUVERCLE WARM AIR DRYER KNOB INFINITE BOUTON INFINI SÉCHOIR À AIR CHAUD POWER PLUG BIDET NOZZLE FICHE D’ALIMENTATION BUSE DE BIDET SEAT/SEAT SENSOR T-VALVE T-VALVE SIÈGE/SIEGE CAPTEUR CERAMIC BOWL SHUT-OFF VALVE VANNE D’ARRÊT... -
Page 8: Installation Requirements Exigences D'installation
INSTALLATION REQUIREMENTS EXIGENCES D’INSTALLATION LUX-PRO smart toilet can operate normally only when the following conditions are met, please ensure that: A 120V~ Ground-Fault Circuit-Interrupter (GFCI) receptacle is within 2 feet of the designated installation location. A 15 amps circuit breaker and 14 gauge wires are recommended. -
Page 9: Installation Guide Guide D'installation
INSTALLATION GUIDE GUIDE D’INSTALLATION INSTALLATION DIAGRAM SCHÉMA D’INSTALLATION unit: inches/mm unité : pouces/mm 15.50 / 394 12 / 300 FRONT VIEW TOP VIEW SIDE VIEW OPEN VIEW VUE DE DEVANT VUE DE DESSUS VUE DE CÔTÉ VUE DÉGAGÉE WATER SUPPLY AND ELECTRICAL SOCKET PLANNING PLANIFICATION DE L’ALIMENTATION EN EAU ET DES PRISES ÉLECTRIQUES unit: inches unité... - Page 10 INSTALLING THE FLANGE (IF A FLANGE IS ALREADY IN PLACE, IGNORE THIS STEP) INSTALLATION DE LA BRIDE (SI UNE BRIDE EST DÉJÀ EN PLACE, IGNOREZ CETTE ÉTAPE) Align the flange with the drain hole and mark the Put the flange on the drain hole, and fix it on the positions of the four mounting holes of the flange ground with four bolts.
- Page 11 6. Put the screw through the fixing sleeve and then install 8. Before connecting the water hoses, turn on the shut off valve and run water into a bucket to ensure it through the holes (on both sides of the toilet ceramic) there is no residual dirt in the pipeline.
- Page 12 *The battery case has a water-proof seal, please make sure the set screws are screwed into place to achieve a good sealing effect. Contactez le service client d’ecoway pour acheter de nouvelles batteries. BACKUP BATTERY Desserrez les vis de réglage du couvercle de la batterie, retirez la batterie usagée et BATTERIE DE SECOURS recyclez-la.
- Page 13 A trail run of all the functions right after installation is highly recommended. Please follow the operations manual for the complete list of functions and how to operate them. *In case of malfunction or if you have any questions about a function, feel free to contact Ecoway customer service at service@eco-way.ca Un parcours de toutes les fonctions juste après l’installation est fortement recommandé.
- Page 14 WATERWAY DIAGRAM SCHÉMA DE LA VOIE NAVIGABLE SHUT OFF VALVE VANNE D’ARRÊT T-VALVE T-VALVE CLEAN WATER HOSE FLUSH WATER HOSE TUYAU D’EAU PROPRE TUYAU D’EAU DE RINÇAGE BUILT-IN TANK SOLENOID VALVE OVERFLOW TO TOILET DÉBORDEMENT AUX TOILETTES RÉSERVOIR INTÉGRÉ ÉLECTROVANNE WATER PUMP INSTANT HEATER POMPE À...
-
Page 15: List Of Features
LIST OF FEATURES LUX GOLD LUX PRO INSTANT WARM WATER ● ● ● REAR WASH ● ● ● FRONT WASH ● ● ● AIR INFUSED WATER ● ● ● AUTOMATIC WASH ● ● ● OSCILLATING WASH ● ● ● COLD/HOT MASSAGE WASH ●... -
Page 16: Liste Des Fonctionnalités
LISTE DES FONCTIONNALITÉES LUX GOLD LUX PRO EAU CHAUDE INSTANTANÉE ● ● ● LAVAGE ARRIÈRE ● ● ● LAVAGE AVANT ● ● ● EAU INFUSÉE À L’ A IR ● ● ● LAVAGE AUTOMATIQUE ● ● ● LAVAGE OSCILLANT ● ●... -
Page 17: Remote Control Télécommande
REMOTE CONTROL TÉLÉCOMMANDE OPEN/CLOSE COVER OPEN/CLOSE SEAT OPEN/CLOSE SEAT COVER OPEN/CLOSE SEAT OUVRIR/FERMER LA HOUSSE DE SIÈGE OUVRIR/FERMER LE SIÈGE STOP FRONT REAR DRYER FLUSH START FRONT WASH START AIR DRYER INITIATE FLUSH STOP CURRENT FUNCTION START REAR WASH ACTIVER LE LAVAGE AVANT ACTIVER LE SÉCHEUR D’AIR LANCER LA CHASSE D’EAU ARRÊTER LA FONCTION EN COURS... - Page 18 3. With the remote control near the toilet, connect the toilet to the power socket. 4. Pairing is successful when the indicator lights stop flickering, then red lights are on. 5. If the pairing process is not successful, try the above steps again, or contact Ecoway customer service at service@eco-way.ca for further assistance.
- Page 19 FUNCTIONS OPERATION - INFINITE KNOB EXPLICATIONS DE FONCTIONS - BOUTON INFINI FUNCTION / ACTION FUNCTION DESCRIPTION FONCTION / ACTION DESCRIPTION DE LA FONCTION When the unit is powered OFF, press once to turn power ON. When the unit is powered ON, press once to flush. When there is an operating function, press once to stop the function.
- Page 20 FUNCTIONS OPERATION - AUTOMATIC FUNCTIONS EXPLICATIONS DES FONCTIONS - FONCTIONS AUTOMATIQUES Function / Action Function Description Fonction / Action Description de la fonction The lid will automatically open when the user is 1 meter (3ft) from the unit. To turn off automatic open lid: When not seated, press and hold NOZZLE CLEAN and H/C MASSAGE to- gether for 3 seconds.
- Page 21 To turn on/off auto flush, press and hold “FLUSH BUTTON” for three seconds, TURN ON/OFF AUTO FLUSH the unit will beep once for ON, and beep twice for OFF. Pour activer/désactiver le rinçage automatique, appuyez et maintenez ALLUMER/ETEINDRE LA CHASSE D‘EAU enfoncé...
-
Page 22: Maintenance Maintenance
Retirez délicatement le filtre avec une paire de pinces. Rincer délicatement à l’eau claire et nettoyer avec une brosse douce. Si le filtre est obstrué, il est recommandé de le remplacer par un neuf. Contactez l’équipe de service Ecoway pour commander de nouveaux filtres. -
Page 23: Troubleshooting Résolution Des Problèmes
Warning: Do not attempt to repair the product. Turn off the shut-off valve and unplug the power cord immediately if an issue cannot be solved by this troubleshooting manual. Contact Ecoway customer service for further assistance. Avertissement : N’essayez pas de réparer le produit. Éteignez la vanne d’arrêt et débranchez le cordon d’alimentation immédiatement si un problème ne peut pas être résolu par ce manuel de dépannage. - Page 24 WATER KEEPS LEAKING FROM Solenoid valve malfunction. Contact Ecoway customer service. THE NOZZLE Dysfonctionnement de L’EAU CONTINUE DE FUIR DE LA Contactez le service client d’Ecoway. l’électrovanne. BUSE Seat sensor system CLEANSING FUNCTIONS DO NOT malfunction. WORK Contact Ecoway customer service.
- Page 25 Aucune eau ne remplit la Vérifiez si la vanne d’arrêt est ouverte. cuvette, aucun bruit de Contactez le service client d’Ecoway si le problème UNIT DOES NOT FLUSH OR REQUIRES chasse d’eau. existe après l’ouverture de la vanne d’arrêt.
-
Page 26: Specifications Caractéristiques
SPECIFICATIONS CARACTÉRISTIQUES 120V~ POWER RATING / PUISSANCE NOMINALE 60Hz FREQUENCY / LA FRÉQUENCE 1050W RATED POWER INPUT / PUISSANCE D’ENTRÉE NOMINALE 39.4 °F ~ 95 °F / 4 °C ~ 35 °C TEMPERATURE RANGE / ÉCART DE TEMPÉRATURE DN15(G1/2”) with pre-installed 3/8” adapter WATER HOSE CONNECTION / WATER INLET CONNEXION DU TUYAU D’EAU...
Need help?
Do you have a question about the LUX PRO ST2300 and is the answer not in the manual?
Questions and answers