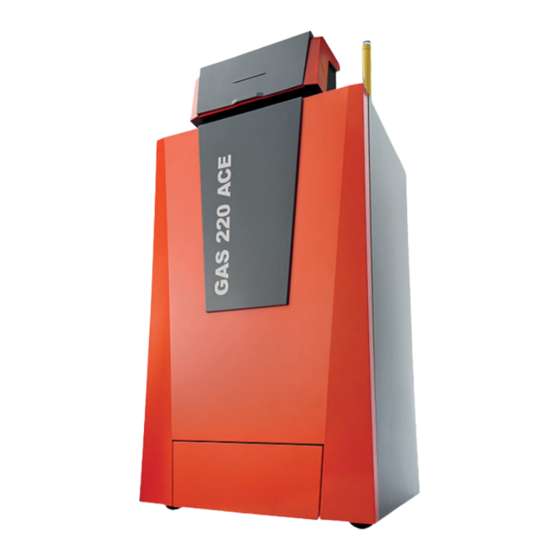
REMEHA Gas 220 Ace 160 Service Manual
High-efficiency floor-standing gas boiler
Hide thumbs
Also See for Gas 220 Ace 160:
- Installation, user and service manual (92 pages) ,
- Installation and user manual (100 pages) ,
- Service manual (60 pages)

Related Manuals for REMEHA Gas 220 Ace 160


Summary of Contents for REMEHA Gas 220 Ace 160
- Page 1 United Kingdom Service Manual High-efficiency floor-standing gas boiler Gas 220 Ace 160 - 200 - 250 - 300 HMI S-control...
- Page 2 Dear Customer, Thank you very much for buying this appliance. Please read through the manual carefully before using the product, and keep it in a safe place for later reference. In order to ensure continued safe and efficient operation we recommend that the product is serviced regularly. Our service and customer service organisation can assist with this.
-
Page 3: Table Of Contents
Contents Contents About this manual ................. . . 5 Additional documentation . - Page 4 Contents 7.3.3 Checking the ionisation current ............33 7.3.4 Check the flue gas outlet/air supply connections .
-
Page 5: About This Manual
Limited emissions of polluted substances. Has transport wheels as standard. The following boiler types are available: Tab.1 Boiler types Name Output Gas 220 Ace 160 162 kW Gas 220 Ace 200 210 kW Gas 220 Ace 250 261 kW Gas 220 Ace 300... -
Page 6: Operating Principle
2 Description of the product Operating principle 2.2.1 Gas/air regulation The boiler is equipped with a casing that also serves as an air box. The fan draws in the combustion air. The gas is injected into the venturi and mixed with the combustion air. The fan speed is controlled on the basis of the settings, the heat demand and the prevailing temperatures measured by the temperature sensors. -
Page 7: Protection Against Shortage Of Water
2 Description of the product 2.2.6 Protection against shortage of water The boiler is fitted with low water level protection based on temperature measurements. By modulating back when the water flow threatens to become insufficient, the boiler remains operational as long as possible. The boiler issues a warning in the event of no or too little water. -
Page 8: Calorifier Connection
2 Description of the product Caution Maximum power consumption may be 300 VA. Use an auxiliary relay for a pump with greater power. 2.2.11 Calorifier connection A calorifier can be connected to the boiler. Our range includes various calorifiers. Important Contact us for more information. - Page 9 2 Description of the product Fig.4 Generic example R-Bus L-Bus S-Bus AD-3001366-02 Tab.2 Components in the example Item Description Function Control Unit: Control unit The control unit handles all basic functionality of the appli ance. Connection Board: Connection PCB The connection PCB provides easy access to all connectors of the control unit.
-
Page 10: Use Of The Control Panel
3 Use of the control panel Use of the control panel What each key means Fig.5 Control panel Escape Back to the previous level. Reset Manual reset. CH flow temperature Access to set central heating tem perature. Minus Lowering the value or previous menu item. -
Page 11: Meaning Of The Symbols On The Display
3 Use of the control panel Fig.9 Step 4 4. Press the key to move the cursor to the left. MW-3000301-02 Fig.10 Step 5 5. Press the key to confirm selection of the required menu or parameter. MW-3000302-01 Fig.11 Step 6 6. -
Page 12: Installer Instructions
4 Installer instructions Three-way valve indicator. The circulation pump is running. ECO mode is active. Switch the appliance off then on again. Installer instructions Changing user parameters The parameters in the user menu can be changed by the end user or the installer. -
Page 13: Changing Installer Parameters
4 Installer instructions Fig.21 Step 9 9. Press the key multiple times to go back to the home screen. MW-3000311-01 Changing installer parameters The parameters in the Installer menu must only be changed by a qualified professional. Code 0012 must be entered in order to change the parameters. -
Page 14: Adjusting Advanced Parameters
4 Installer instructions Fig.30 Step 10 10. Press the key to confirm the value. MW-3000338-01 Fig.31 Step 11 11. Press the key multiple times to go back to the home screen. MW-3000316-01 Adjusting advanced parameters The advanced parameters at installer level may only be changed by a qualified professional. -
Page 15: Commissioning The Installation
4 Installer instructions Fig.39 Step 9 9. Press the key to modify the value. MW-3000337-01 Fig.40 Step 10 10. Press the key to confirm the value. MW-3000338-01 Fig.41 Step 11 11. Press the key multiple times to go back to the home screen. MW-3000316-01 Commissioning the installation 4.4.1... -
Page 16: Reading Out Measured Values
4 Installer instructions 1. Navigate to the Counter menu. Fig.48 Step 2 2. Press the key to open the menu. MW-3000320-01 Fig.49 Step 3 3. Press the key to confirm the selection. MW-3000422-01 Fig.50 Step 4 4. Keep pressing the key until the required device, control PCB or zone is displayed. - Page 17 4 Installer instructions Fig.58 Step 3 3. Press the key to confirm the selection. The text CODE flashes in the display. MW-3000422-01 Fig.59 Step 4 4. Press the key to confirm the selection. MW-3000453-01 Fig.60 Step 5 5. Keep pressing the key until the code 0012 is displayed.
-
Page 18: Activating The Manual Mode Menu
4 Installer instructions 4.6.3 Activating the manual mode menu In some cases, it may be necessary to set the device to manual mode, for example when the controller has not yet been connected. 1. Navigate to the manual mode menu. Fig.68 Step 2 2. -
Page 19: Restoring To Factory Settings
4 Installer instructions Fig.77 Step 7 7. Keep pressing the key until AD is displayed. MW-3000412-01 Fig.78 Step 8 8. Press the key to carry out the auto-detect. 9. After a while, the home screen is shown; auto-detect is complete. MW-3000413-01 4.7.2 Restoring to factory settings... -
Page 20: Installation Examples
5 Installation examples Fig.88 Step 11 11. Press the keys to modify the value. The data plate for the CN2 value. MW-3000346-01 Fig.89 Step 12 12. Press the key to confirm the value. The factory settings are reset. The display shows various information and returns to the home screen after 3 minutes. -
Page 21: List Of Parameters
6 Settings List of parameters 6.2.1 HMI S-control control panel parameters Tab.6 Factory settings - > HMI Code Description Adjustment range Default set ting AP067 Brightness setting; Eco disabled 0 = Normal brightness high, Eco enabled after 1 = Economic 3 min at brightness low AP082 Enable daylight saving for the sys... - Page 22 6 Settings Code Description Adjustment range Submenu CP570 Time Program of the zone selec 0 = Schedule 1 ted by the user 1 = Schedule 2 2 = Schedule 3 CP660 Choice icon to display this zone 0 = None 1 = All Tab.9 Navigation for installer level...
- Page 23 6 Settings Code Description Adjustment range Submenu CP210 Comfort footpoint of the tempera 15 - 90 °C ture of heat curve of the circuit CP220 Reduced footpoint of the tempera 15 - 90 °C ture of heat curve of the circuit CP230 Heating curve temperature gradi...
-
Page 24: Scb-01 Expansion Pcb Parameters
6 Settings Code Description Adjustment range Submenu PP018 Minimum central heating pump 20 - 100 % CU-GH-06 speed (%) PP023 Temperature hysteresis for the 1 - 25 °C CU-GH-06 generator to start on central heat Tab.11 Navigation for advanced installer level Level Menu path Advanced installer... -
Page 25: List Of Measured Values
6 Settings Tab.13 Navigation for installer level Level Menu path Installer > Submenu (1) See the column "Submenu" in the following table for the correct navigation. The parameters are grouped in specific functionalities. Tab.14 Factory settings at installer level Code Description Adjustment range Submenu... -
Page 26: Scb-01 Expansion Pcb Counters
6 Settings Tab.16 Counters at user level Code Description Range AC001 Number of hours that the appliance has been on mains 0 - 65534Hours power DC002 Numbers of Domestic Hot Water diverting valve cycles 0 - 4294967295 DC003 Number of hours during which the diverting valve is in 0 - 4294967295Hours DHW position DC004... -
Page 27: Cu-Gh06C Control Unit Signals
6 Settings 6.3.3 CU-GH06c control unit signals Tab.23 Navigation for user level Level Menu path User > FSB-WHB-HE-150-300 Tab.24 Signals at user level Code Description Range AM001 Is the appliance currently in domestic hot water production 0 = Off mode? 1 = On AM010 The current pump speed... - Page 28 6 Settings Tab.26 Signals at installer level Code Description Range AM011 Is service currently required? 0 = No 1 = Yes AM033 Next service indication 0 = None 1 = A 2 = B 3 = C 4 = Custom AM036 Temperature of the exhaust gas leaving the appliance 0 - 250°C...
- Page 29 6 Settings Code Description Range GM044 Possible reason for Controlled Stop 0 = None 1 = CH Blocking 2 = DHW Blocking 3 = Wait for burner 4 = TFlow > absolute max 5 = TFlow > start temp. 6 = Theat exch > Tstart 7 = Avg Tflow >...
-
Page 30: Scb-01 Expansion Pcb Signals
6 Settings 6.3.4 SCB-01 expansion PCB signals Tab.29 Navigation for user level Level Menu path User > SCB-01 Tab.30 Signals at user level Code Description Range AM010 The current pump speed 0 - 100% AM012 Current main status of the appliance. Status and sub-status, page 30 AM014 Current sub status of the appliance. - Page 31 6 Settings Code Display text Explanation Control unit Cooling The fan runs to cool the inside of the appliance. Reset In Progress The appliance resets. Auto Filling The appliance fills the installation. Halted The appliance has stopped. It must be reset manually. Device Mode The service tool interface controls the functions of the appliance.
-
Page 32: Maintenance
These service kits contain all parts and gaskets that are required for the relevant service. These service kits (A, B or C) put together by Remeha are available from spare parts suppliers. Important Maintenance messages must be followed up within 2 months. -
Page 33: Standard Inspection And Maintenance Operations
7 Maintenance Standard inspection and maintenance operations For a service, always perform the following standard inspection and maintenance operations. 7.3.1 Checking the water pressure 1. Check the water pressure. Important The water pressure is shown on the display of the control panel. The water pressure must be at least 0.8 bar 2. - Page 34 2. Compare the measured value with the checking values in the table. Tab.35 Checking/setting values for O at full load for G20 (H gas) Values at full load for G20 (H gas) Gas 220 Ace 160 4.8 - 5.2 - 9.0 Gas 220 Ace 200 4.8 - 5.2 - 9.0 Gas 220 Ace 250 4.8 - 5.2...
- Page 35 7 Maintenance Tab.37 Checking/setting values for O at full load for G30/G31 (butane/propane) Values at full load for G30/G31 (butane/ propane) Gas 220 Ace 160 5.1 - 5.4 10.2 - 10.4 Gas 220 Ace 200 5.2 - 5.5 10.1 - 10.3 Gas 220 Ace 250 5.2 - 5.5...
- Page 36 2. Compare the measured value with the checking values in the table. Tab.39 Checking/setting values for O at low load for G20 (H gas) Values at low load for G20 (H gas) Gas 220 Ace 160 - 5.6 8.6 - 8.8 Gas 220 Ace 200 - 5.6 8.6 - 8.8 Gas 220 Ace 250 - 5.6...
- Page 37 Tab.41 Checking/setting values for O at low load for G30/G31 (butane/propane) Values at low load for G30/31 (butane/ propane) Gas 220 Ace 160 - 5.7 10.0 - 10.2 Gas 220 Ace 200 - 5.8 9.9 - 10.1 Gas 220 Ace 250 - 5.8...
-
Page 38: Checking The Air Pressure Differential Switch
7 Maintenance Fig.99 Location of adjusting screw B 4. Use adjusting screw B to set the percentage of O to the nominal value, for the gas type being used. This must always be between the highest and lowest setting limit. Important The gas control valve differs per boiler type. - Page 39 7 Maintenance Checking the air pressure differential switch – side Fig.101 – side of the air pressure differential 1. Disconnect the short, coloured silicon hose on the – side (P2) of the switch air pressure differential switch. 2. Connect the – side of the air pressure differential switch to one end of the T piece with a hose.
-
Page 40: Checking The Gas Leakage Control (Vps)
7 Maintenance 7.3.7 Checking the gas leakage control (VPS) Checking the VPS for leaks Fig.102 Checking the VPS for leaks 1. Switch off the boiler. 2. Close the boiler gas tap. 3. Remove the pressure from the gas pipe by unscrewing the screw in measuring point P1. - Page 41 7 Maintenance Checking the VPS switch value Fig.103 Checking the VPS switch value 1. Remove the pressure from the gas valve unit; first remove the hose that is attached to measuring point 3 of the gas valve unit (on the other side of the VPS pressure switch).
-
Page 42: Checking The Minimum Gas Pressure Switch Gps
If the measured pressure is lower, set the gas pressure switch to the correct value or replace it. Tab.43 Minimum gas pressure switch value Minimum value (mbar) Gas 220 Ace 160 Gas 220 Ace 200 Gas 220 Ace 250 Gas 220 Ace 300 X mbar ≤... -
Page 43: Checking The Burner And Cleaning The Heat Exchanger
7 Maintenance 7.3.9 Checking the burner and cleaning the heat exchanger Fig.105 Checking the burner 1. Disconnect the plug of the ionisation/ignition electrode from the ignition transformer. 5 3x Caution The ignition cable is fixed to the ionisation/ignition electrode and therefore may not be removed. -
Page 44: Cleaning The Condensate Trap
7 Maintenance Fig.106 Clean the connection nipple 1. Remove the air intake silencer. 2. Disconnect the silicon hose of the air pressure differential switch from the connection nipple on the condensate collector. 3. Clean the opening of the connection nipple thoroughly (by blowing air or pushing an object through it). -
Page 45: Replacing The Ionisation/Ignition Electrode
7 Maintenance 7.4.1 Replacing the ionisation/ignition electrode Fig.109 Replacing the ionisation/ignition The ionisation/ignition electrode must be replaced if: electrode The ionisation current is < 4 µA. The electrode is damaged or worn. The electrode is included in the service kit. 1. -
Page 46: Finalising Work
7 Maintenance Fig.110 Checking the non-return valve 1. Undo the 3 bolts from the adapter on the non-return valve holder (15 Nm torque). 2. Remove the ionisation/ignition electrode. 3. Undo the 3 nuts from the adapter on the heat exchanger (15 Nm torque). -
Page 47: Troubleshooting
The meaning of the code can be found in the various error code tables. Important The error code is needed to find the cause of the error quickly and correctly and for any support from Remeha. 8.1.1 Display of error codes... -
Page 48: Blocking
8 Troubleshooting Code Description Solution A.02.18 Object Dictionary Error Configuration error: Reset CN1 and CN2 The data plate for the CN1 and CN2 values. A.02.37 Uncritical device has been disconnected SCB not found: Bad connection: check the wiring and connectors Faulty SCB: Replace SCB A.02.45 Full Can Connection Matrix... - Page 49 8 Troubleshooting Code Description Solution H.01.07 Maximum difference between heat exchanger Maximum difference between heat exchanger and return tem temperature and return temperature perature exceeded: No flow or insufficient flow: Check the circulation (direction, pump, valves). Check the water pressure. Check the cleanliness of the heat exchanger.
- Page 50 8 Troubleshooting Code Description Solution H.02.09 Partial blocking of the device recognized Blocking input active or frost protection active: External cause: remove external cause Wrong parameter set: check the parameters Bad connection: check the connection H.02.10 Full blocking of the device recognized Blocking input is active (without frost protection): External cause: remove external cause Wrong parameter set: check the parameters...
-
Page 51: Locking Codes
8 Troubleshooting 8.1.4 Locking codes Tab.47 Locking codes Code Description Solution E.00.00 Flow temperature sensor is either removed or Zone flow temperature sensor open: measures a temperature below range Sensor is not present. Wrong Zone Function setting: check the setting of parame ter CP02x. - Page 52 8 Troubleshooting Code Description Solution E.01.04 5x Error of unintended Flame Loss occurance Flame loss occurs 5 times: Vent the gas supply to remove air Check that the gas valve is fully opened Check the gas supply pressure Check the operation and setting of the gas valve unit Check that the air supply inlet and flue gas outlet are not blocked Check that there is no recirculation of flue gases...
- Page 53 8 Troubleshooting Code Description Solution E.04.04 Flue temperature sensor is either shorted or Flue gas temperature sensor short-circuited: measuring a temperature above range Bad connection: check the wiring and connectors Incorrectly fitted sensor: check that the sensor has been correctly fitted Faulty sensor: replace the sensor E.04.05 Flue temperature sensor is either removed or...
-
Page 54: Error History
8 Troubleshooting Code Description Solution E.04.12 False flame detected before burner start False flame signal: The burner remains very hot: Set the O Ionisation current measured but no flame should be present: check the ionisation/ignition electrode Faulty gas valve: replace the gas valve Faulty ignition transformer: replace the ignition transformer E.04.13 Fan speed has exceeded normal operating... -
Page 55: Clearing The Error Memory
8 Troubleshooting Fig.115 Step 5 5. Press the key to view the error messages. XX is the number of stored error messages. MW-3000372-01 Fig.116 Step 6 6. Press the key to scroll through the list of messages. MW-3000318-01 Fig.117 Step 7 7. -
Page 56: Technical Specifications
9 Technical specifications Technical specifications Electrical diagram Fig.126 Electrical diagram CU-GH & HMI X04 / X05 1 - 4 1 - 4 1 - 4 X012 X013 X022 X021 X041 X051 X053 X054 X055 X081 X071 X083 X101 X111 X121 X122 X04 / X05 X011... -
Page 57: 10 Spare Parts
Only replace defective or worn boiler parts with original parts or recommended parts. Send the part to be replaced to the Remeha Quality Control department if the relevant part is covered by the guarantee (see the General Terms of Sale and Delivery). -
Page 58: Parts
10 Spare parts 10.2 Parts Fig.127 Gas 220 Ace 160 4024 4023 4025 4029 4028 4037 4022 4036 4027 4018 4033 4012 4034 4021 4009 1011 4014 4021 1012 4015 4026 1010 1009 1011 4017 4013 4016 4010 2041 1008... - Page 59 10 Spare parts Fig.128 Gas 220 Ace 200 - 250 - 300 4024 4023 4029 4025 4028 4022 4037 4036 4027 4018 4012 4033 4034 4021 4014 4009 4015 4021 4026 2041 4016 4010 4005 4035 4017 1011 4013 2023 2018 2040 1012...
- Page 60 10 Spare parts 7699084 - v.06 - 14122022...
- Page 61 10 Spare parts 7699084 - v.06 - 14122022...
- Page 62 10 Spare parts 7699084 - v.06 - 14122022...
- Page 63 Original instructions - © Copyright All technical and technological information contained in these technical instructions, as well as any drawings and technical descriptions supplied, remain our property and shall not be multiplied without our prior consent in writing. Subject to alterations.
- Page 64 T +44 (0)330 678 0140 E technical@remeha.co.uk W www.remeha.co.uk Remeha Commercial UK Brooks House Coventry Road Warwick CV34 4LL 7699084 - v.06 - 14122022 7699084...
Need help?
Do you have a question about the Gas 220 Ace 160 and is the answer not in the manual?
Questions and answers