
Related Manuals for Grimani Systems Rixos-W


Summary of Contents for Grimani Systems Rixos-W
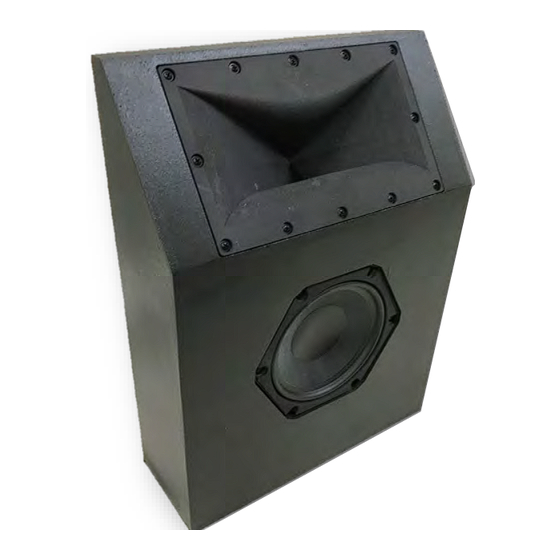
- Page 1 Rixos-W Speaker Installation and Operation Manual August 17, 2021 61 Galli Drive, Suite B Novato, CA 94949, USA +1.415.883.1476 info@grimanisystems.com www.grimanisystems.com Rixos- S Installation and Operation Manual...
- Page 2 100 Watts of available AC power in the range from 100V to 250V. We recommend prewiring one 120V-20A circuit, or a 220 / 240V – 15A for each group of ten Rixos-W speakers, with a quad outlet box near the rack-mount DSP amplifiers.
- Page 3 It is also possible to use Cat5 or Cat 6 cabling to feed a balanced signal to the Rixos-W amplifier, terminating the signal pairs at the Phoenix input connector. A few manufacturers, including MuxLab (model 500028) and Audio Control (BLD-10) make unbalanced to Cat5 converters which can be used for unbalanced feeds (see Appendix 2).
- Page 4 Please see the section below and diagrams in Appendix 3,4 and 5 for details on the mounting hardware and instructions. b. On-Ceiling, concealed behind screen or fabric: For this product format, the Rixos-W is installed on a ceiling using the three supplied resilient shock-mount brackets, as shown in Appendix 3 below. The speaker comes with pilot holes for the three brackets, but you can install them at other locations if you need.
- Page 5 The diagram below is a layout for a Cinema Five ensemble, including acoustical tuning modules, and is for use as an example only. 61 Galli Drive, Suite B Novato, CA 94949, USA +1.415.883.1476 info@grimanisystems.com www.grimanisystems.com Rixos- S Installation and Operation Manual p.
- Page 6 Analog Audio In IP Network a. Power: The Rixos-W DSP Rack Amplifier ships with a detachable power cable. The receptacle is on the back panel. Plug the cable there, then to the mains outlet. The amplifier will auto-detect the input voltage. After powering up the amplifier, it will go through a few seconds of start-up sequence.
- Page 7 Grimani Systems factory technician. 8. Limited Warranty The Rixos-W is warrantied to be free of manufacturing defects for a period of two years from the date of purchase. This limited warranty does not apply to failures due to misuse, excessive sound pressure, damage from handling and carriage, or any other defects that are outside the control of Grimani Systems, LLC.
- Page 8 Appendix Balanced Wire connection 2 channel input connectors are placed on the back of the amplifier. Use inputs 1and 3. Do NOT connect inputs 2 and 4 Use Inputs 1 and 3 + G - + G - Amplifier Input Amplifier Input Unbalanced to Balanced Analog Wire connection 61 Galli Drive, Suite B...
- Page 9 61 Galli Drive, Suite B Novato, CA 94949, USA +1.415.883.1476 info@grimanisystems.com www.grimanisystems.com Rixos- S Installation and Operation Manual p. 9...
- Page 10 Appendix MuxLab 500028 Wiring Diagram For use in driving unbalanced signals to Phoenix inputs of DSP amplifiers One Balun can be used to drive two channels From White From Red RCA Input RCA Input Cat5 Cable - Pin - Pin + Pin + Pin Phoenix...
- Page 11 Appendix 3 Rixos-W Installation Dimension Details On-Ceiling-Concealed Installation Concealed by stretched fabric or acoustically transparent video display screen 61 Galli Drive, Suite B Novato, CA 94949, USA +1.415.883.1476 info@grimanisystems.com www.grimanisystems.com Rixos- S Installation and Operation Manual p. 11...
- Page 12 Appendix 4 Rixos-WD Installation Dimension Details In-Ceiling Installation 61 Galli Drive, Suite B Novato, CA 94949, USA +1.415.883.1476 info@grimanisystems.com www.grimanisystems.com Rixos- S Installation and Operation Manual p. 12...
- Page 13 In-Ceiling Installation In-Ceiling – Fastening detail 61 Galli Drive, Suite B Novato, CA 94949, USA +1.415.883.1476 info@grimanisystems.com www.grimanisystems.com Rixos- S Installation and Operation Manual p. 13...
- Page 14 Appendix 5 Rixos-WMD Installation Dimension Details In-Ceiling Installation 61 Galli Drive, Suite B Novato, CA 94949, USA +1.415.883.1476 info@grimanisystems.com www.grimanisystems.com Rixos- S Installation and Operation Manual p. 14...
- Page 15 In-Ceiling Installation In-Ceiling – Fastening detail 61 Galli Drive, Suite B Novato, CA 94949, USA +1.415.883.1476 info@grimanisystems.com www.grimanisystems.com Rixos- S Installation and Operation Manual p. 15...
- Page 16 Appendix 6 – Sample System Wiring Diagram 61 Galli Drive, Suite B Novato, CA 94949, USA +1.415.883.1476 info@grimanisystems.com www.grimanisystems.com Rixos- S Installation and Operation Manual p. 16...
- Page 17 Analog Balanced & EQ Over LF EQ & Amp Lo Out EQ/Amp/Spkr Block Diagram Two Cabinet Configurations Rixos-W 2~4 Channel DSP Power Amp 2 channels per speaker Mounting Kit Options: 13” 4.5” On-ceiling – Concealed by stretched fabric: Three shock-mount L Brackets Rixos-WD Recessed in-ceiling –...
Need help?
Do you have a question about the Rixos-W and is the answer not in the manual?
Questions and answers