Table of Contents
Advertisement
Quick Links
Advertisement
Table of Contents

Related Manuals for DeDietrich DKC7340BB


Summary of Contents for DeDietrich DKC7340BB
- Page 1 MICROWAVE USER GUIDE COMBI OVEN...
- Page 2 The label "Origine France Garantie" assures the consumer the traceability of a product by giving a clear and objective indication of the source. The DE DIETRICH brand is proud to affix this label on products from our French factories based in Orléans and Vendôme. www.dedietrich-electromenager.com...
-
Page 3: Table Of Contents
CONTENTS IMPORTANT SAFETY ADVICE AND PRECAUTIONS .........4 1 / INSTALLATION ..................7 2 / ENVIRONMENT ..................9 3 / DESCRIPTION OF THE OVEN • Presentation of your oven ...............10 • Description of controls................11 • Description of accessories ...............12 4 / SETTING • Setting the clock ..................14 •... -
Page 4: Important Safety Advice And Precautions
IMPORTANT SAFETY ADVICE AND PRECAUTIONS INSTRUCTIONS DE SÉCURITÉ IMPORTANTES - LIRE AVEC ATTENTION ET GARDER POUR DE FUTURES UTILISATIONS. Cette notice est disponible en téléchargement sur le site internet de la marque. When you receive the appliance, maged, it should be replaced by unpack it or have it unpacked the manufacturer, its after-sales immediately. - Page 5 IMPORTANT SAFETY ADVICE AND PRECAUTIONS the appliance safely and have or fire. understood the risks involved. — Children must not be al- WARNING: lowed to play with the appliance. Liquids and other foods Cleaning and maintenance ope- must not be heated in sealed rations must not be carried out containers, as they may explode.
- Page 6 IMPORTANT SAFETY ADVICE AND PRECAUTIONS fecting the appliance’s lifespan and possibly causing a safety hazard. WARNING: If the door or door seal is damaged, the oven should not be used until it has been re- paired by an authorised person. —...
- Page 7 CHOICE OF LOCATION AND BUILDING IN moving it from a cold location to a hot location, as the condensation may cause a malfunction. Centre the oven in the unit so as to ensure a minimum distance of 10 mm between the appliance and the surrounding unit.
-
Page 8: Installation
ELECTRICAL CONNECTION Warning: blue Installation should only be performed by Neutral installers and qualified technicians. The appliance must be recess-fitted cor- rectly to ensure electrical safety. The elec- Phase trical connections should be made before the appliance is installed in its housing. The oven must be connected via a stan- dardised power cable with 3 conductors of B l a c k , b ro w n... -
Page 9: Environment
• ENVIRONMENT CARING FOR THE ENVIRONMENT Appliance recycling organised by your manufacturer is carried out under optimum This appliance’s packaging can be recy- conditions, in accordance with European cled. Recycle and help protect the envi- Directive 2002/96/EC on the disposal of ronment by disposing of packaging in waste electrical and electronic equipment. -
Page 10: Description Of The Oven
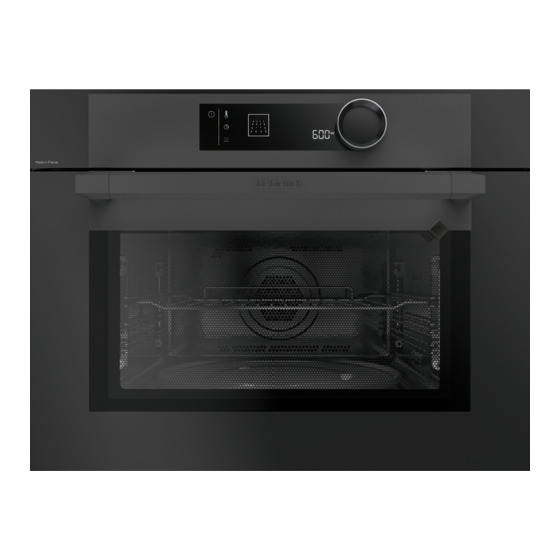
• DESCRIPTION OF THE OVEN PRESENTATION OF YOUR OVEN Control panel Lamp Wire tiers (3 heights available) - Page 11 • DESCRIPTION OF THE OVEN CONTROL PANEL THE DISPLAY 1- Cooking modes display Control locking indicator 2- Oven temperature and clock display “Recipes” function indicator 3- End of cooking time indicator Cooking time indicator 4- Cooking time indicator Minute minder indicator 5-Stopping the turntable Cooking end indicator 6- Power/weight indicator...
- Page 12 • DESCRIPTION OF THE OVEN ACCESSORIES Anti-tip safety rack This allows you to toast, brown or grill. The rack should never be used with other metal cookware on the microwave, grill + microwave or forced air + microwave modes. However, you can reheat food in an alumi- nium tray providing this is isolated from the rack using a plate.
- Page 13 • DESCRIPTION OF THE OVEN THE TURNTABLE The turntable ensures equal cooking of food throughout with no need to intervene. It rotates in both directions. If it does not turn, verify that all components are properly posi- tioned. It may be used as a cooking dish. For easy removal, wells are provided on either side. Rotation is controlled by the drive shaft and the wheel support.
-
Page 14: Setting
• SETTINGS SETTING THE CLOCK contrast, sounds and demo mode. To do this, press for a few seconds to When switching on, the display flashes at access the settings menu. 12:00. See the table below: Adjust the time by turning the dial then press to validate. -
Page 15: Use
• COOKING This oven allows you to access 4 different types of cooking mode: - The Microwave function - The combined microwave functions (microwave + Traditional cooking). - The traditional cooking functions. - The Automatic cooking functions. Caution : Do not use the enamelled dish. - Page 16 • Note: In combination with the microwave you can use the enamelled lechefrite dish with the grill. COMBINED MICROWAVE FUNCTIONS Recommended T°C Position and power mini - maxi 200°C 50°C - 200°C 300W 100W - 300W Medium grill This function lets you use the grill and the micro-wave simultaneously, which makes microwave cooking very quick.
-
Page 17: Cooking Modes
• IMMEDIATE COOKING end time by turning the knob. The cooking The programmer must only display the end time is automatically saved after a few time. It should not be flashing. seconds. The cooking end time display Turn the control knob until you get to the stops flashing. -
Page 18: º Memorise A Cooking Mode
• - Confirm by pressing the knob once. Select a cooking mode, its power or its -The icon of the cooking mode used and the temperature and then press the knob until time calculated automatically are displayed. you get to «MEM 1». Choose one of the 3 The oven starts. -
Page 19: Anomalies And Solutions
• ANOMALIES AND SOLUTIONS You may resolve certain little problems your- tly connected. self: The cooling fan continues to operate after The oven is not heating. Check that the oven the oven stops. This is normal; the fan may is correctly connected and that your installa- continue running until a maximum of 1 hour tion’s fuse is not out of service. -
Page 20: Function Suitability Tests
• FUNCTION SUITABILITY TESTS Functional suitability tests in accordance with IEC/EN/NF EN 60705 standards. The International Electrotechnical Commission, SC.59K, has established a standard for comparative performance tests conducted on various micro-wave ovens. We recommend the following for this appliance: Approx. Power level Test Load...
Need help?
Do you have a question about the DKC7340BB and is the answer not in the manual?
Questions and answers