Smeg SAP306X-9 Manual
Hide thumbs Also See for SAP306X-9:
Table of Contents

Advertisement

1. INSTRUCTIONS FOR USE ................................................................ 4
2. SAFETY PRECAUTIONS ................................................................... 6
3. ENVIRONMENTAL RESPONSIBILITY ............................................... 8
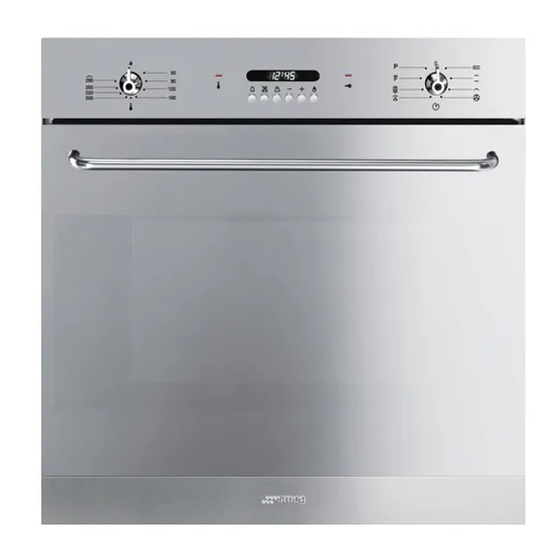
4. GET TO KNOW YOUR OVEN............................................................. 9
5. AVAILABLE ACCESSORIES ............................................................ 10
6. USING THE OVEN ........................................................................... 12
7. COOKING WITH THE OVEN............................................................ 20
8. CLEANING AND MAINTENANCE.................................................... 28
9. EXTRAORDINARY MAINTENANCE ................................................ 33
10. INSTALLING THE APPLIANCE ........................................................ 37
INSTRUCTIONS FOR THE USER: these contain user advice, description of
the commands and the correct procedures for cleaning and maintenance
of the appliance.
Instructions For The Installer: these instructions are intended for
the authorised person who must perform the installation, put it into
operation and test the appliance.
@
Further information about the products can be found at www.smeg.com
Contents
3

Advertisement

Table of Contents
loading
Need help?

Need help?

Do you have a question about the SAP306X-9 and is the answer not in the manual?

Questions and answers

Summary of Contents for Smeg SAP306X-9

  • Page 1 INSTRUCTIONS FOR THE INSTALLER: these instructions are intended for the authorised person who must perform the installation, put it into operation and test the appliance. Further information about the products can be found at www.smeg.com...
  • Page 2: Instructions For Use

    General instructions 1. INSTRUCTIONS FOR USE THIS MANUAL IS AN INTEGRAL PART OF THE APPLIANCE. IT MUST BE KEPT IN ITS ENTIRETY AND IN AN ACCESSIBLE PLACE FOR THE WHOLE WORKING LIFE OF THE APPLIANCE. CAREFUL READING OF THIS MANUAL AND ALL THE INSTRUCTIONS THEREIN BEFORE USING THE APPLIANCE IS ESSENTIAL.
  • Page 3: General Instructions

    FATS AND OILS MAY CATCH FIRE. DO NOT COVER THE BOTTOM OF THE OVEN WITH ALUMINIUM OR TINFOIL SHEETS DURING COOKING AND DO NOT PLACE PANS OR TRAYS ON IT TO AVOID DAMAGE TO THE ENAMELLED SURFACE. IF THE SURFACES ARE STILL VERY HOT DURING COOKING, DO NOT POUR WATER DIRECTLY ONTO THE TRAYS.
  • Page 4: Safety Precautions

    BEFORE CARRYING OUT INSTALLATION / MAINTENANCE WORK, MAKE SURE THAT THE APPLIANCE IS NOT CONNECTED TO THE POWER GRID. THE PLUG TO BE CONNECTED TO THE POWER SUPPLY CABLE AND ITS SOCKET MUST BE OF THE SAME TYPE AND CONFORM TO THE REGULATIONS IN FORCE.
  • Page 5 General instructions DO NOT LET CHILDREN GO NEAR THE APPLIANCE WHEN IT IS IN OPERATION OR PLAY WITH IT AT ANY TIME. DO NOT INSERT POINTED METAL OBJECTS (CUTLERY OR UTENSILS) INTO THE SLITS IN THE APPLIANCE. IF THE APPLIANCE IS INSTALLED ON CARAVANS OR BOATS, IT MUST NOT BE USED TO HEAT ROOMS.
  • Page 6: Environmental Responsibility

    You can obtain the addresses of collection, recycling and disposal centres from your retailer or from the competent local organisations. Do not discard the packaging or any part of it, or leave it unattended. It can constitute a suffocation hazard for children, especially the plastic bags.
  • Page 7: Get To Know Your Oven

    Instructions for the User 4. GET TO KNOW YOUR OVEN Control panel Roof liner Inside lights Rack and tray support frames (on some models only) Insert for the rotisserie rod (on some models only) Bottom plate (on some models only)
  • Page 8: Available Accessories

    For use in ovens with frames. Rack: useful for holding cooking containers. For use in ovens with moulded runners. Tray rack: to be placed over the top of the oven tray; for cooking foods which may drip. Oven tray: for collecting fat from foods placed on the rack above.
  • Page 9: Instructions For The User

    The mechanical lock must always face the back of the oven. Insert racks and trays fully into the oven until they come to a stop. Using the support rack The support rack is inserted into the tray (as shown in the illustration).
  • Page 10: Using The Oven

    • Before using the appliance for the first time, remove all accessories from the oven compartment and wash them as indicated in “8. CLEANING AND MAINTENANCE”.
  • Page 11 6.2.3 Oven inside lights The oven lights come on when the door is opened or any function or recipe is selected, except for (where present).
  • Page 12 During cooking, do not cover the bottom of the oven with aluminium or tin foil and do not place pans or oven trays on it as this may damage the enamel coating. If you wish to use greaseproof paper, place it so that it will not interfere with the hot air circulation inside the oven.
  • Page 13 OVEN THERMOSTAT KNOB This knob can be used to select the cooking temperature. Turn the knob clockwise to the desired value, between 50°C and 250°C / 280°C (depending on the model). THERMOSTAT INDICATOR LIGHT When it flashes, it indicates that the oven is in the preheating phase prior to reaching the preset temperature.
  • Page 14 This device activates during the automatic cleaning cycle only. FUNCTION KNOB Turn the knob clockwise or anti-clockwise to select a function from the following options (see 7. COOKING WITH THE OVEN): Some functions are not present on all models.
  • Page 15 6.5.2 Using the timer Warning: the timer does not stop the cooking process. It only warns the user that the preset number of minutes have passed. The timer can be activated at any time.
  • Page 16 6.5.5 Automatic cooking Automatic cooking is the function which allows a cooking operation to be started at a set time and then ended after a specific length of time set by the user. Having selected a function, press and hold ;...
  • Page 17 The programmer will interpret the cancellation of the program as terminating the cooking process. 6.5.8 Modifying the set data The set cooking data can be modified at any time by holding down the function button and at the same time pressing the buttons to change the value.
  • Page 18: Cooking With The Oven

    STATIC: As the heat comes from above and below at the same time, this system is particularly suitable for certain types of food. Traditional cooking, also known as static or thermal radiation cooking, is suitable for cooking just one dish at a time.
  • Page 19 Instructions for the User TURBO: The combination of fan-assisted cooking and traditional cooking enables different foods to be cooked on several levels extremely quickly and efficiently, without any transfer of smells and flavours. Perfect for large volumes that call for intense cooking.
  • Page 20 We recommend using a meat thermometer for meat when roasting it. Alternatively, simply press on the roast with a spoon: if it is hard, it is ready; if not, it needs another few minutes cooking.
  • Page 21 When defrosting meat, we recommend using a rack positioned on the second runner with the food on it and a tray positioned on the first runner. In this way, the liquid from the defrosting food drains away from the food.
  • Page 22 Instructions for the User Cooking process information table TYPES OF FOOD WEIGHT FUNCTION FIRST COURSES LASAGNE 3 kg Static OVEN-BAKED PASTA Static MEAT ROAST VEAL 1 kg Circular LOIN OF PORK 1 kg Circular SHOULDER OF PORK 1 kg Turbo / Circular...
  • Page 23 Instructions for the User RUNNER POSITION TEMPERATURE TIME IN MINUTES FROM BOTTOM °C 220 - 230 40 - 50 220 - 230 180 - 190 70 - 80 180 - 190 70 - 80 180 - 190 90 - 100...
  • Page 24 Static CROISSANTS Circular APPLE PIE Static The times indicated in the following tables do not include the preheating times and are provided as a guide only. Always preheat the oven first and put food inside when the oven is hot.
  • Page 25 Instructions for the User RUNNER POSITION TEMPERATURE TIME IN MINUTES FROM BOTTOM °C 190 - 200 30 -35 180 - 190 15 -20 160 - 170 50 - 55 160 - 170 30 - 35 35 - 40 160 - 170...
  • Page 26: Cleaning And Maintenance

    To clean and preserve the stainless steel surfaces, always use only specific products that do not contain abrasives or chlorine-based acids. How to use: pour the product onto a damp cloth and wipe the surface, rinse thoroughly and dry with a soft cloth or a microfibre cloth.
  • Page 27 Instructions for the User Cleaning the inside of the oven For the best oven upkeep, clean it regularly after having allowed it to cool. • Take out all removable parts. • Clean the oven racks with hot water and non-abrasive detergent. Rinse and dry.
  • Page 28 (on some models only) Pyrolysis is an automatic high-temperature cleaning procedure which causes dirt to dissolve. Thanks to this process, it is possible to clean the inside of the oven very easily. During the first automatic cleaning cycle, unpleasant smells may occur due to the normal evaporation of oil y manufacturing substances.
  • Page 29 Instructions for the User 8.6.1 Before starting the automatic cleaning cycle Pyrolysis may be carried out at any time of the day or night (if you wish to benefit from the lower cost of electricity overnight). • Completely remove all accessories from inside the oven and the roof lining, as shown in the illustration.
  • Page 30 Press and hold , and press to set the time at which you wish to terminate the cleaning cycle. It is not possible to select any functions once the door locking device has been activated. Wait for to go out.
  • Page 31: Extraordinary Maintenance

    Replace the bulb with one of the same type. Replace the cover correctly, so that the moulded part of the glass is facing the door. Press the cover down as far as it will go so that it attaches completely to the bulb support.
  • Page 32 Removing the door Open the door completely. Insert two pins into the holes indicated A in the two hinges towards the back of them until they engage. Grasp the door on both sides with both hands, lift it forming an angle of around 30°...
  • Page 33 The glass in the door should always be kept thoroughly clean. To facilitate cleaning, it is possible to remove the door (see 9.2 Removing the door) and place it on a canvas, or open it and lock the hinges in order to extract the glass panels.
  • Page 34 Then pull the front of the glass panel upwards (2). • Doing this detaches the 4 pins attached to the glass from their slots in the oven door. Removing the middle glass panels: (pyrolytic models) • There are two middle glass panels in pyrolytic models, attached using 4 small locks.
  • Page 35: Installing The Appliance

    The appliance must be connected to earth in compliance with electrical system safety regulations. If a fixed connection is being used, fit the power line with an omnipolar circuit- breaker in accordance with the installation rules, located in a position which is easy to reach and near the appliance.
  • Page 36: Instructions For The Installer

    To fasten the appliance correctly to the unit, insert the bushings provided onto the front (as shown in the figure). Once the appliance is in place, fasten it to the unit using the screws. The bushing enables the screw to be angled by approximately 30°.
  • Page 37 Instructions for the installer 10.4 Positioning the oven Never use the oven door to lever the oven into place when fitting. Avoid exerting too much pressure on the oven door when open. It is recommended to install the oven with the help of a second person.
  • Page 38 Instructions for the installer 10.4.1 Positioning under a work top 490-500 10.4.2 Installing in tall units 35-40...
  • Page 40 914774399/ A...

This manual is also suitable for:

Sap578x-9

Table of Contents

Save PDF