
Subscribe to Our Youtube Channel
Related Manuals for Bluetti D40


Summary of Contents for Bluetti D40
- Page 1 DC-DC Battery Charger User Manual V2.0 Please read this manual carefully before use and keep it for future reference.
- Page 3 Thank You! Thank you for making BLUETTI a part of your family. From the very beginning, BLUETTI has tried to stay true to a sustainable future through green energy storage solutions while delivering an exceptional eco-friendly experience for our homes and our world.
- Page 4 About the Manual Introduction This manual provides information on the functionality, basic operation and safety instructions of the D40 DC-DC Battery Charger ((hereinafter referred to as D40). Please read and understand all instructions in this manual before use. Symbol Conventions...
-
Page 5: Table Of Contents
Product Overview Mounting Location Requirements Mount the D40 Applications Supported House Batteries Charge the House Batteries (Battery Mode) 6.2.1 Charge via BLUETTI Portable Power Station 6.2.2 Charge via Solar Panels 6.2.3 Charge via Starter Battery Replace the House Battery 6.3.1 Preparation 6.3.2... -
Page 6: Safety Instructions
1. Safety Instructions This manual contains important safety and operating instructions for D40 battery charger. Before using battery charger, read all instructions and cautionary markings on battery charger, battery, and product using battery. 1.1. Statement To ensure a safe operation, it's crucial to observe and adhere to the following conditions: •... - Page 7 Make sure the area where you are using the product is well ventilated and spacious. • In case of malfunction, turn off the product immediately and contact BLUETTI support or your local BLUETTI dealers if this manual cannot adequately explain the malfunction to you.
-
Page 8: Packing List
Anderson Connector Accessory Mounting Screws Anderson Connector 1 Gray, 1 Red Product Documentation Optional Accessory (Available on the official BLUETTI website: https://www.bluettipower.com) Item Picture Connection Cable (3m or 5m, for connecting solar panels, starter batteries, and house batteries) JUST POWER ON... -
Page 9: Product Introduction
3. Product Introduction The D40 is a 400W DC-DC battery charger designed for charging various types of RV house batteries, including LiFePO , AGM / gel, lead-acid, and calcium batteries. It's compatible with BLUETTI portable power stations (via the 48V port), solar panels (12V-36V), and starter batteries, providing a comprehensive solution for battery charging needs. -
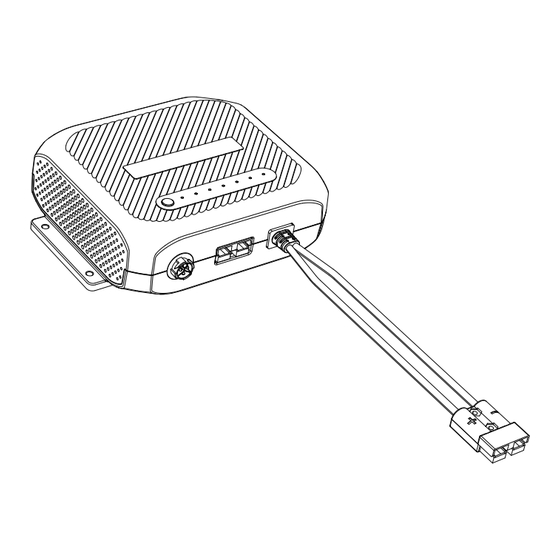
Page 10: Product Overview
4. Product Overview Item Item Power Button Calcium Indicator 48V DC Input PV / ENGINE Indicator Lead-acid Indicator DC Output LiFePO Indicator Charging Indicator Alarm Indicator AGM / GEL Indicator PV / ENGINE Input JUST POWER ON... -
Page 11: Mounting
1. Select an appropriate location. Provide at least 5cm (1.97in) of clearance above, to the left, and to the right of the D40, with a minimum of 20cm (7.87in) clearance below it. Note: Adequate ventilation is necessary for D40's optimal performance. -
Page 12: Applications
Refer to the battery manufacturer's specifications when selecting the appropriate battery type for charging. 6.2 Charge the House Batteries (Battery Mode) 6.2.1 Charge via BLUETTI Portable Power Station With the D40, you can charge the house battery via BLUETTI portable power station. Fuse / Breaker (Optional) 12V House Battery... -
Page 13: Charge Via Solar Panels
Wiring & Operations 1. Connect the AC200L and D40 via the DC Input Power Cable. 2. Turn on the AC200L and activate the DC output; this will automatically activate the D40. 3. Select the battery type for charging: a. Press and hold ( ) for more than 3 seconds, and when the CHARGE PROFILE indicator flashes, you can select the battery type. - Page 14 Preparation • Check that the solar panels and D40 are in good condition, and that the PV input voltage is in the 12V-36V range. The PV input activates automatically when the voltage reaches 13V. • Make sure that the house battery is compatible with the D40.
-
Page 15: Charge Via Starter Battery
12V Starter Battery 12V House Battery Preparation • Check that the starter battery has a voltage of 11.7V or higher and that the D40 is in good condition. • Make sure that the house battery is compatible with the D40. -
Page 16: Replace The House Battery
Wiring & Operations 1. Connect the Anderson connector (red) on the starter battery to the PV / starter battery input. The D40 will activate when the voltage of the starter battery reaches or exceeds 11.7V. 2. Press ( ) to navigate until the PV/ENGINE indicator in CHARGE STATUS section flashes. -
Page 17: Power Rv Appliances (Load Mode)
) for more than 3 seconds, the D40 will resume charging using the previously selected battery type and charging mode. Attention: Match the selected battery type with the one being charged. BLUETTI shall not be liable for any damages resulting from incorrect selections. 6.5 Power RV Appliances (Load Mode) With the D40, you can also power your RV appliances via BLUETTI portable power stations like the AC200L. - Page 18 Wiring & Operations 1. Connect the AC200L and D40 via the DC Input Power Cable. 2. Connect the RV appliances to the D40's DC output, and make sure to match the positive and negative terminals. 3. Turn on the AC200L and activate the DC output; this will automatically activate the D40.
-
Page 19: Specifications
14.4V Max. Voltage AGM / gel 14.7V Max. Calcium 15.4V Max. Load Mode 12V / 20A (AC200L and other BLUETTI portable power stations) DC Input 48V DC 45V to 60VDC PV / ENGINE 12V to 36VDC, 20A Max. JUST POWER ON... -
Page 20: Indicator Instructions
The polarity of All indicators correct polarity. Polarity your off. Protection 2. Fix the connections, and check if the D40 PV / ENGINE (Input) functions properly. If the symptom persists, please INPUT is reversed. contact BLUETTI support for assistance. Reverse... - Page 21 BLUETTI support for assistance. When the unit's temperature reaches 70°C / 158°F, the fan 1. Wait for 5 minutes. If the D40 resumes operation automatically after cooling down, it suggests inadequate activates; when it Charging ventilation in the current location.
- Page 22 Protection Battery indicator blinks slowly (@ approx. 3Hz). When the unit's temperature 1. Wait for 5 minutes. If the D40 resumes operation reaches 70°C / after cooling down, it suggests inadequate 158°F, the fan Charging ventilation in the current location.
-
Page 23: Appx. 1 Faq
Regularly inspect the connections. b. Keep it clean and dry. c. Ensure proper ventilation. What kind of solar panels are compatible with the D40 charger? Before connecting the solar panels, please make sure they meet the following requirements: a. Open circuit voltage: 13V-36V b. - Page 25 DC-DC-Batterieladegerät Benutzerhandbuch V2.0 Lesen Sie dieses Handbuch vor Gebrauch sorgfältig durch und bewahren Sie es zum späteren Nachschlagen auf.
- Page 27 BLUETTI engagiert sich von jeher für eine nachhaltige Zukunft – mit außergewöhnlich umweltfreundlichen Energiespeicherlösungen, von denen nicht nur Haushalte, sondern wir alle profitieren. Aus diesem Grund wird BLUETTI in mehr als 100 Ländern gerne genutzt und genießt das Vertrauen von Millionen Kunden auf der ganzen Welt. Schweden Niederlande Österreich...
- Page 28 Einleitung Dieses Handbuch enthält Informationen über die Funktionsweise, den grundlegenden Betrieb und die Sicherheit des DC-DC-Ladegeräts D40 (im Folgenden als D40 bezeichnet). Bitte lesen Sie vor der Benutzung alle Anweisungen in dieser Anleitung. Gebräuchliche Symbole In diesem Handbuch werden die folgenden Symbole verwendet, um wichtige...
- Page 29 Aufladen über Solarpaneele 6.2.3 Aufladen über Starterbatterie Austauschen der Hausbatterie 6.3.1 Vorbereitung 6.3.2 Austausch Pause / Wiederaufnahme des Ladevorgangs BLUETTI tragbares Kraftwerk versorgt Wohnmobilgeräte über D40 Technische Daten Anweisungen zur Anzeige Fehlerbehebung Anhang 1 Häufig gestellte Fragen Anhang 2 Abkürzungen...
-
Page 30: Sicherheitshinweise
1. Sicherheitshinweise Dieses Handbuch enthält wichtige Sicherheits- und Betriebsanweisungen für das Batterieladegerät D40. Lesen Sie vor der Verwendung des Ladegeräts alle Anweisungen und Warnhinweise auf dem Ladegerät, der Batterie und dem Produkt, in dem die Batterie verwendet wird. 1.1. Erklärung Zur Gewährleistung eines sicheren Betriebs müssen die folgenden Bedingungen... - Page 31 Verschleißerscheinungen. • Wenn das Gehäuse des Produkts beim Transport oder im Betrieb bricht, nehmen Sie das Gerät nicht in Gebrauch. Wenden Sie sich an den BLUETTI Support oder an Ihren BLUETTI Händler. • Die Verwendung von Zubehörteilen, die nicht vom Hersteller empfohlen oder verkauft werden, kann zu Brand-, Stromschlag- oder Verletzungsgefahr führen.
-
Page 32: Packliste
über den Wohnmobilanschluss der tragbaren Powerstation) Anderson-Kontakt Montageschrauben Anderson-Anschluss 1 Grau, 1 Rot Produktdokumentation Optionales Zubehör (Auf der offiziellen BLUETTI Website verfügbar: https://www.bluettipower.com) Artikel Bild Anschlusskabel (3 m oder 5 m, für den Anschluss von Solarmodulen, Starter- und Hausbatterien) JUST POWER ON... -
Page 33: Produkteinführung
Bei gleichzeitigem Anschluss an Solarmodule und das AC200L gibt das D40 der Solareinspeisung den Vorrang, wenn die Leerlaufspannung der Solarmodule im Bereich von 13 V bis 36 V liegt. Fällt die Solareinspeisung jedoch unter etwa 40 W, schaltet das D40 automatisch auf das AC200L um, um eine unterbrechungsfreie Aufladung zu gewährleisten. -
Page 34: Produktübersicht
4. Produktübersicht Artikel Artikel Ein-/Ausschalttaste Kalzium-Indikator DC-Eingang Anzeige PV/ENGINE Blei-Säure-Indikator DC-Ausgang LiFePO Ladeanzeige Alarmanzeige AGM/Gel PV/ENGINE INPUT JUST POWER ON... -
Page 35: Montage
5. Montage 5.1 Standortanforderungen Stellen Sie das D40 in der Kabine oder im Kofferraum des Fahrzeugs in der Nähe der Hausbatterie auf. Vergewissern Sie sich, dass der Bereich nicht anfällig für Feuchtigkeit, andere Substanzen oder hohe Temperaturen ist. Befestigen Sie das D40 sicher auf einer stabilen Oberfläche, entweder horizontal oder vertikal. -
Page 36: Anwendungen
(optional) 12-V-Hausbatterie-Bank AC200L Vorbereitung • Überprüfen Sie, ob die tragbare Station und das D40 in einwandfreiem Zustand sind. • Stellen Sie sicher, dass die Ersatzbatterie mit dem D40 kompatibel ist. • Bereiten Sie die erforderlichen Anschlusskabel und den Anderson-Stecker vor. -
Page 37: Aufladen Über Solarpaneele
Ladeanzeige leuchtet weiter, wenn der Ladevorgang erfolgreich ist. Hinweis: • Beim Anschluss an Stromstationen wie die AC200L schaltet sich das D40 automatisch ein, wenn der Strom eingeschaltet und der Gleichstromausgang aktiviert ist. Um dies zu vermeiden, schalten Sie den Gleichstromausgang des AC200L aus. - Page 38 Vorbereitung • Prüfen Sie, ob die Solarmodule und das D40 in einwandfreiem Zustand sind und ob die PV-Eingangsspannung im Bereich von 12 bis 36 V liegt. Der PV-Eingang wird automatisch aktiviert, wenn die Spannung 13 V erreicht. • Stellen Sie sicher, dass die Ersatzbatterie mit dem D40 kompatibel ist.
-
Page 39: Aufladen Über Starterbatterie
Stecker korrekt. Verdrahtung und Betrieb 1. Schließen Sie den Anderson-Stecker der Starterbatterie an den Eingang PV/Starterbat- terie an. Das D40 wird aktiviert, wenn die Spannung der Starterbatterie 11,7 V erreicht oder überschreitet. 2. Verwenden Sie ( ) für die Navigation, bis die Anzeige PV/ENGINE im Abschnitt CHARGE STATUS (Ladestatus) blinkt. -
Page 40: Austauschen Der Hausbatterie
) mehr als 3 Sekunden lang gedrückt, bis das Licht der Anzeige durchgehend leuchtet. 6. Schließen Sie den Gleichstromausgang des D40 über den Anderson-Anschluss an die Batterie an und achten Sie darauf, die richtigen Plus- und Minuspole zu verwenden. Die Ladeanzeige leuchtet weiter, wenn der Ladevorgang erfolgreich ist. -
Page 41: Bluetti Tragbares Kraftwerk Versorgt Wohnmobilgeräte Über D40
6.5 BLUETTI tragbares Kraftwerk versorgt Wohnmobilgeräte über D40 Mit dem D40 können Sie Ihre Geräte im Wohnmobil auch über tragbare BLUETTI-Stationen wie die AC200L mit Strom versorgen. Sicherung/ Trennschalter (optional) 12V DC Panel AC200L Hinweis: Installieren Sie beim Anschluss von Wohnmobilgeräten einen Schutzschalter (40A) an der oben gezeigten Stelle. - Page 42 Verdrahtung und Betrieb 1. Verbinden Sie den AC200L und den D40 über das DC-Eingangsstromkabel. 2. Schließen Sie die Geräte des Wohnmobils an den Gleichstromausgang des D40 an und achten Sie darauf, dass die richtigen Plus- und Minuspole verwendet werden. 3. Schalten Sie den AC200L ein und aktivieren Sie den DC-Ausgang; dadurch wird der D40 automatisch aktiviert.
-
Page 43: Technische Daten
2.000 m / 6.561 ft max. Schutzgrad-Bewertung IP20 (Ingress Protection, IP) DC-Ausgang 20 A max. (AC200L und andere tragbare Kraftwerke von BLUETTI) Max. Ausgangsstrom 30 A max. (Solarpaneel) Blei-Säure: Max. Ausgangsspannung: 14,4 V, Batteriekapazität: >100 Ah LiFePO : Max. Ausgangsspannung: 14,4 V, Batteriekapazität: >100 Ah AGM / Gel: Max. -
Page 44: Anweisungen Zur Anzeige
Die Anzeige leuchtet auf, wenn die 48-V-DC-Eingangsspannung 36 V oder die Anzeige des PV-/Starter-Eingangsspannung 12 V übersteigt und Stromversorgungsstatus zeigt damit an, dass sich das D40 im Standby-Modus befindet. Andernfalls leuchtet die Anzeige nicht. Die Anzeige leuchtet auf, wenn eine Blei-Säure Blei-Säure-Hausbatterie geladen wird. -
Page 45: Fehlerbehebung
38 V, was zu blinkt langsam 4. Stellen Sie die Verbindung wieder her und prüfen Geräteschäden (mit ca. 3 Hz). Sie, ob das D40 ordnungsgemäß funktioniert. Wenn führen kann. das Problem weiterhin auftritt, kontaktieren Sie bitte den BLUETTI Support. Überprüfen Sie die Batteriespannung. - Page 46 Störung Symptom Grund Lösung 1. Warten Sie 5 Minuten lang. Wenn das D40 nach dem Abkühlen wieder in Betrieb geht, deutet dies Wenn die auf eine unzureichende Belüftung am aktuellen Temperatur des Standort hin. Geräts 70 °C 2. Schalten Sie das D40 und alle zugehörigen erreicht, schaltet Geräte aus.
- Page 47 2. Schalten Sie den D40 und die zugehörigen wenn die Peripheriegeräte aus; Ladeanzeige Temperatur 70°C 3. Ziehen Sie alle Kabel ab und entfernen Sie den D40 erreicht. Der Übertempe von seinem ursprünglichen Aufstellungsort; Alarmanzeige Überhitzungssch -raturschutz 4.
-
Page 48: Anhang 1 Häufig Gestellte Fragen
Kontrollieren Sie regelmäßig die Anschlüsse. b. Halten Sie das Gerät sauber und trocken. c. Sorgen Sie für ausreichende Belüftung. Welche Arten von Solarmodulen sind mit dem D40-Ladegerät kompatibel? Bevor Sie die Solarmodule anschließen, vergewissern Sie sich bitte, dass sie die folgenden Anforderungen erfüllen: a. - Page 50 For more information, please visit: @ BLUETTI Support @ BLUETTI Official @ bluetti.inc @bluetti_official @ bluetti_inc sale-eu@bluettipower.com Company: POWEROAK GmbH Company: POWEROAK ENERGY UK CO.,LTD Address: Lise-Meitner-Str. 14 28816 Address: Unit 2 NorthGate, Bolsover Business Park, Stuhr Germany Woodhouse Lane Chesterfield England, S44 6BD Email: sale-de@bluettipower.com...
- Page 51 Warranty Card Manufacture Date Sale Date File No. Manufacturer Warranty Instructions 1. 12-months warranty 2. After-Sale-Service mailbox:service@ bluettipower.com 3. Following situations will go against the warranty terms: A. Any problems, malfunction or damages due to incorrect using methods or caused by unauthorized disassembly or repair. B.
- Page 52 Cer t ifi ca te Inspector: Q C : P/N:17.0303.0708-01A1...
Need help?
Do you have a question about the D40 and is the answer not in the manual?
Questions and answers