Table of Contents
Advertisement
Available languages
Available languages
Quick Links
Technical Support and E-Warranty Certificate www.vevor.com/support
POOL GATE USER MANUAL
We continue to be committed to provide you tools with competitive price.
"Save Half", "Half Price" or any other similar expressions used by us only represents an
estimate of savings you might benefit from buying certain tools with us compared to the major
top brands and does not necessarily mean to cover all categories of tools offered by us. You
are kindly reminded to verify carefully when you are placing an order with us if you are
actually saving half in comparison with the top major brands.
Advertisement
Table of Contents

Subscribe to Our Youtube Channel
Related Manuals for VEVOR NLSSHLM01


Summary of Contents for VEVOR NLSSHLM01
- Page 1 Technical Support and E-Warranty Certificate www.vevor.com/support POOL GATE USER MANUAL We continue to be committed to provide you tools with competitive price. "Save Half", "Half Price" or any other similar expressions used by us only represents an estimate of savings you might benefit from buying certain tools with us compared to the major top brands and does not necessarily mean to cover all categories of tools offered by us.
- Page 3 This is the original instruction, please read all manual instructions carefully before operating. VEVOR reserves a clear interpretation of our user manual. The appearance of the product shall be subject to the product you received. Please forgive us that we won't inform you again if...
-
Page 4: Before You Start
BEFORE YOU START: Please read the instructions in their entirety prior to installation to ensure a smooth and proper installation. Retain the manual for future reference. SPECIFICATIONS NLSSHLM01 Model Product Size 4*2.5ft Color Black Required tools 1.Utility knife 2.Rotary hammer drill 3.5/8"... -
Page 5: Parts List
PARTS LIST Left gate post ×1 Gate ×1 Right gate post ×1 Peg ×4 Post reinforcement Pin ×4 Peg cover ×4 Hinge ×2 Screw ×8 bracket ×2 Template for hole placement ×1... -
Page 6: Installation
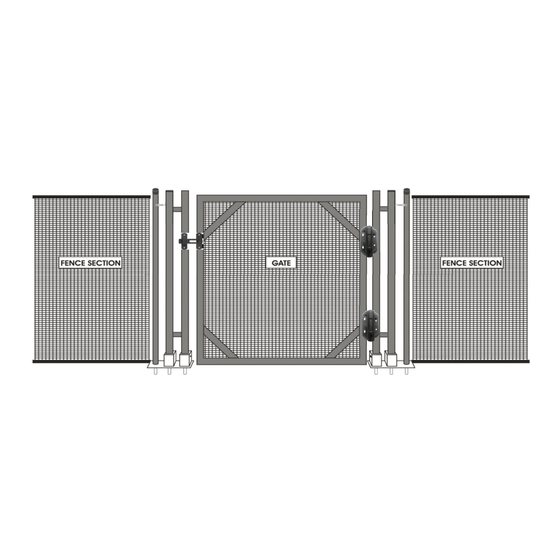
Installation Step 1: Install the pin Step 2: Install the hinge Step 3: Mark the position of the mounting holes with the template for hole placement. NOTE:The two holes on the left and right sides are used to install the fence adjacent to the door. - Page 7 Step 5:Install the peg Sleeving: Once drilling is completed, flush out the debris from the holes using a garden hose. Next insert the plastic sleeves in the holes and tap down completely . Step 6:Install the post reinforcement brackets Step 7:Insert the left and right gate post into the pegs to complete the installation. Note:This product does not include the fence part, which needs to be purchased and installed separately.
- Page 8 WARNING: THE POLE CANNOT BE REMOVED IF YOU SIMPLY PULL WITHOUT TURNING IT AT THE SAME TIME. IT IS IMPERATIVE THAT ACCESS POINTS ARE CLOSED AT THE END OF THE SEASON OF SUPERVISED SWIMMING. 1. Maintenance Try to regularly monitor all safety fence components. If any of the components should be damaged, especially those relating to closing, please contact the shop where you purchased the barrier immediately in order to obtain a replacement part.
- Page 9 LEARN RESCUE TECHNIQUES (CARDIOPULMONARY RESUSCITATION) AND UPDATE YOUR KNOWLEDGE PERIODICALLY. IT COULD SAVE A LIFE IN AN EMERGENCY. THE PRESENCE OF PARENTS AND/OR OTHER RESPONSIBLE ADULTS IS REQUIRED WHEN THE POOL IS ACCESSIBLE. MEMORIZE AND DISPLAY NEAR THE POOL THE FIRST AID NUMBERS. FIREFIGHTERS EMERGENCY MEDICAL SERVICES POISON CONTROL CENTER...
- Page 12 Technical Support and E-Warranty Certificate www.vevor.com/support...
- Page 13 Teknisk Support och e-garanticertifikat www.vevor.com/support POOL GATE ANVÄNDARMANUAL We continue to be committed to provide you tools with competitive price. "Save Half", "Half Price" or any other similar expressions used by us only represents an estimate of savings you might benefit from buying certain tools with us compared to the major top brands and does not necessarily mean to cover all categories of tools offered by us.
- Page 15 This is the original instruction, please read all manual instructions carefully before operating. VEVOR reserves a clear interpretation of our user manual. The appearance of the product shall be subject to the product you received. Please forgive us that we won't inform you again if...
-
Page 16: Innan Du Börjar
INNAN DU BÖRJAR: Vänligen läs instruktionerna i sin helhet före installationen för att säkerställa en smidig och korrekt installation. Spara bruksanvisningen för framtida referens. SPECIFIKATIONER NLSSHLM01 Modell Produktstorlek 4*2,5 fot Färg Svart Nödvändiga verktyg 1. Brukskniv 2. Borrhammare 3. 5/8 " SDS-murborr 4. - Page 17 DELAR LISTA Vänster Höger grind posta Port ×1 grindstolpe ×1 ×1 Pinne × 4 ostförstärknings Stift × 4 Pinnskydd × 4 Gångjärn × 2 Skruva × 8 fäste × 2...
- Page 18 Mall för hålplacering × 1 Installation Steg 1: Installera stiftet Steg 2: Installera gångjärnet Steg 3: Markera placeringen av monteringshålen med t- mallen för hålplacering . OBS: De två hålen på vänster och höger sida används för att installera staketet intill dörren. Steg 4: Borrning...
- Page 19 Steg 5: Installera stiftet Sleeving: När borrningen är klar, spola ut skräpet från hålen med en trädgårdsslang. Sätt sedan in plasthylsorna i hålen och knacka ner helt. Steg 6 : Installera stolpförstärkningsfästet Steg 7: Sätt in den vänstra och högra grindstolpen i pinnarna för att slutföra installationen. Obs: Denna produkt inkluderar inte stängseldelen, som måste köpas och installeras separat.
- Page 20 VARNING: STÅNGEN KAN INTE BORTTAGAS OM DU BARA DRAR UT UTAN ATT VÄNDA DEN SAMTIDIGT. DET ÄR OBLIGATORISKT ATT ÅTGÄRDSPUNKTER ÄR STÄNGDA I SLUTET AV SÄSONGEN FÖR ÖVERVAKAD SIM. 2. Underhåll Försök att regelbundet övervaka alla säkerhetsstängselkomponenter. Om någon av komponenterna skulle vara skadad, särskilt de som rör stängning, kontakta omedelbart butiken där du köpte barriären för att få...
- Page 21 LÄR DIG RÄDDNINGSTEKNIKER (HJÄRT-LUL-ÅTERUPPASSNING) OCH UPPDATERA DIN KUNSKAP PERIODISKAT. DET KAN RÄDDA ETT LIV I EN NÖDSKRIFT. NÄRVARO AV FÖRÄLDRAR OCH/ELLER ANDRA ANSVARIGA VUXNA KRÄVS NÄR PASSEN ÄR TILLGÄNGLIG. MEMORISERA OCH VISA NÄRA POOLEN FÖRSTA HJÄLPEN-NUMRERNA. BRANDMÄN SJUKSKRIFTSTJÄNSTER GIFTKONTROLLCENTER Adress: Baoshanqu Shuangchenglu 803long 11hao 1602A-1609shi Shanghai Importerad till AUS: SIHAO PTY LTD, 1 ROKEVA STREETEASTWOOD NSW 2122...
- Page 24 Teknisk Support och e-garanticertifikat www.vevor.com/support...
- Page 25 Técnico Soporte y certificado de garantía electrónica www.vevor.com/support PUERTA DE LA PISCINA MANUAL DE USUARIO We continue to be committed to provide you tools with competitive price. "Save Half", "Half Price" or any other similar expressions used by us only represents an estimate of savings you might benefit from buying certain tools with us compared to the major top brands and does not necessarily mean to cover all categories of tools offered by us.
- Page 27 This is the original instruction, please read all manual instructions carefully before operating. VEVOR reserves a clear interpretation of our user manual. The appearance of the product shall be subject to the product you received. Please forgive us that we won't inform you again if...
-
Page 28: Especificaciones
ANTES DE QUE EMPIECES: Lea las instrucciones en su totalidad antes de la instalación para garantizar un instalación suave y adecuada. Conserve el manual para consultarlo en el futuro. ESPECIFICACIONES NLSSHLM01 Modelo Tamaño del producto 4*2,5 pies Color Negro Herramientas necesarias 1. - Page 29 PARTES LISTA Izquierda poste de Puerta derecha Puerta ×1 la puerta ×1 correo ×1 Clavija × 4 Soporte de Cubierta de refuerzo de Alfiler × 4 Bisagra × 2 Tornillo × 8 clavija × 4 poste × 2...
-
Page 30: Instalación
Plantilla para colocación de agujeros. × 1 Instalación Paso 1: instale el pasador Paso 2: instale la bisagra Paso 3: Marque la posición de los orificios de montaje con la plantilla para colocar los orificios . NOTA: Los dos orificios de los lados izquierdo y derecho se utilizan para instalar la guía adyacente a la puerta. - Page 31 Paso 5: instale la clavija Funda: Una vez completada la perforación, elimine los residuos de los agujeros con una manguera de jardín. Luego inserte las fundas de plástico en los orificios y golpéelas completamente. Paso 6: Instale los soportes de refuerzo del poste...
- Page 32 Paso 7: Inserte el poste de la puerta izquierdo y derecho en las clavijas para completar la instalación. Nota: Este producto no incluye la pieza de la cerca, que debe comprarse e instalarse por separado. ADVERTENCIA: EL POSTE NO SE PUEDE QUITAR SI SIMPLEMENTE TIRA SIN GIRARLO AL MISMO TIEMPO.
- Page 33 ¡ADVERTENCIA! LA SEGURIDAD ESTÁ GARANTIZADA SÓLO CUANDO LOS PUNTOS DE ACCESO ESTÁN BLOQUEADOS. COMPROBAR SI EXISTEN ELEMENTOS CERCA DE LA BARRERA QUE PODRÍAN PERMITIR O FACILITAR LA SUBIDA DE LA VALLA. LOS PUNTOS DE CIERRE DE ACCESO MEDIANTE SISTEMAS DE CIERRE AUTOMATIZADOS DEBEN VERIFICARSE SISTEMÁTICAMENTE.
- Page 34 Hecho en china...
- Page 37 Técnico Certificado de soporte y garantía electrónica www.vevor.com/support...
- Page 38 Tecnico Supporto e certificato di garanzia elettronica www.vevor.com/support CANCELLO DELLA PISCINA MANUALE D'USO We continue to be committed to provide you tools with competitive price. "Save Half", "Half Price" or any other similar expressions used by us only represents an estimate of savings you might benefit from buying certain tools with us compared to the major top brands and does not necessarily mean to cover all categories of tools offered by us.
- Page 40 This is the original instruction, please read all manual instructions carefully before operating. VEVOR reserves a clear interpretation of our user manual. The appearance of the product shall be subject to the product you received. Please forgive us that we won't inform you again if...
-
Page 41: Strumenti Richiesti
PRIMA CHE INIZI: Si prega di leggere le istruzioni nella loro interezza prima dell'installazione per garantire a installazione regolare e corretta. Conservare il manuale per riferimento futuro. SPECIFICHE NLSSHLM01 Modello Taglia del prodotto 4*2,5 piedi Colore Nero Strumenti richiesti 1. Coltello multiuso 2. - Page 42 PARTI ELENCO Sinistra palo del Cancello destro Cancello ×1 cancello ×1 inviare ×1 Piolo × 4 Staffa di Copertura per rinforzo del Spillo × 4 Cerniera × 2 Vite × 8 pioli × 4 montante × 2...
-
Page 43: Installazione
Modello per il posizionamento dei fori × 1 Installazione Passaggio 1: installare il Passaggio 2: installare la cerniera perno Passaggio 3: contrassegnare la posizione dei fori di montaggio con la dima per il posizionamento dei fori . NOTA: i due fori sui lati sinistro e destro vengono utilizzati per installare la recinzione adiacente alla porta. - Page 44 Passaggio 5: installare il piolo Guaina: una volta completata la perforazione, eliminare i detriti dai fori utilizzando un tubo da giardino. Successivamente inserire i manicotti di plastica nei fori e picchiettarli completamente. Passaggio 6: installare le staffe di rinforzo del montante...
- Page 45 Passaggio 7: inserire i montanti del cancello sinistro e destro nei picchetti per completare l'installazione. Nota: questo prodotto non include la parte della recinzione, che deve essere acquistata e installata separatamente. ATTENZIONE: IL PALO NON PUÒ ESSERE RIMOSSO SE SEMPLICEMENTE TIRARE SENZA CONTEMPORANEAMENTE GIRARE.
- Page 46 I PUNTI DI ACCESSO DEVONO ESSERE CHIUSI SISTEMATICAMENTE QUANDO NO UNO È A CASA, ANCHE SE PER UN BREVE PERIODO DI TEMPO. AVVERTIMENTO! LA SICUREZZA È GARANTITA SOLO QUANDO I PUNTI DI ACCESSO SONO BLOCCATI. VERIFICARE SE VI SONO ELEMENTI IN PROSSIMITÀ DELLA BARRIERA CHE POTREBBERO CONSENTIRE O FACILITARE LA SALITA SULLA RECINZIONE.
- Page 47 Made in China...
- Page 50 Tecnico Supporto e certificato di garanzia elettronica www.vevor.com/support...
- Page 51 Techniczny Certyfikat wsparcia i e-gwarancji www.vevor.com/support BRAMA BASENOWA INSTRUKCJA OBSŁUGI We continue to be committed to provide you tools with competitive price. "Save Half", "Half Price" or any other similar expressions used by us only represents an estimate of savings you might benefit from buying certain tools with us compared to the major top brands and does not necessarily mean to cover all categories of tools offered by us.
- Page 53 This is the original instruction, please read all manual instructions carefully before operating. VEVOR reserves a clear interpretation of our user manual. The appearance of the product shall be subject to the product you received. Please forgive us that we won't inform you again if...
-
Page 54: Zanim Zaczniesz
ZANIM ZACZNIESZ: Przed instalacją należy przeczytać całą instrukcję, aby mieć pewność, że: płynny i prawidłowy montaż. Zachowaj instrukcję do wykorzystania w przyszłości. SPECYFIKACJE NLSSHLM01 Model Rozmiar produktu 4*2,5 stopy Kolor Czarny Wymagane narzędzia 1. Nóż uniwersalny 2. Wiertarka udarowa 3. Wiertło do muru SDS 5/8 "... - Page 55 CZĘŚCI LISTA Lewy słupek Prawa brama post Brama ×1 bramy ×1 ×1 Kołek × 4 Wspornik Osłona kołka × wzmacniający Szpilka × 4 Zawias × 2 Śruba × 8 słupek × 2...
- Page 56 Szablon rozmieszczenia otworów × 1 Instalacja Krok 1: Zainstaluj kołek Krok 2: Zainstaluj zawias Krok 3: Zaznacz położenie otworów montażowych za pomocą szablonu rozmieszczenia otworów . UWAGA: Dwa otwory po lewej i prawej stronie służą do montażu płotka przylegającego do drzwi.
- Page 57 Krok 5: Zainstaluj kołek Opróżnianie: Po zakończeniu wiercenia wypłucz zanieczyszczenia z otworów za pomocą węża ogrodowego. Następnie włóż plastikowe tulejki w otwory i wbij je całkowicie. Krok 6: Zamontuj wsporniki wzmacniające słupek Krok 7: Włóż lewy i prawy słupek bramy do kołków , aby zakończyć montaż.
- Page 58 Uwaga: ten produkt nie zawiera części ogrodzeniowej, którą należy kupić i zainstalować osobno. OSTRZEŻENIE: SŁUPKA NIE MOŻNA USUNĄĆ, JEŻELI PO PROSTU CIĄGNĄSZ, NIE OBRĘCAJĄC JEGO W TYM SAMYM CZASIE. KONIECZNIE ABY PUNKTY DOSTĘPOWE BYŁY ZAMKNIĘTE PO ZAKOŃCZENIU SEZONU PŁYWANIA POD NADZOREM.
- Page 59 SPRAWDŹ, CZY W POBLIŻU BARIERY ZNAJDUJĄ SIĘ ELEMENTY, KTÓRE MOGĄ UŁATWIĆ LUB UŁATWIĆ WCIĄGNIĘCIE PRZEZ PŁOT. ZAMYKANIE PUNKTÓW DOSTĘPU POPRZEZ ZAUTOMATYZOWANE SYSTEMY ZAMYKANIA NALEŻY BYĆ SYSTEMATYCZNIE KONTROLOWANY. JEŚLI BARIERKA JEST ZŁAMANA LUB USZKODZONA I WYMAGA NAPRAWY, BARDZO WAŻNE JEST, ABY ZWIĘKSZYĆ NADZÓR, ABY Uniemożliwić MAŁYM DZIECIOM DOSTĘP DO BASENU.
- Page 60 Wyprodukowano w Chinach...
- Page 63 Techniczny Certyfikat wsparcia i e-gwarancji www.vevor.com/support...
- Page 64 Technisch Support- und E-Garantie-Zertifikat www.vevor.com/support POOLTOR BENUTZERHANDBUCH We continue to be committed to provide you tools with competitive price. "Save Half", "Half Price" or any other similar expressions used by us only represents an estimate of savings you might benefit from buying certain tools with us compared to the major top brands and does not necessarily mean to cover all categories of tools offered by us.
- Page 66 This is the original instruction, please read all manual instructions carefully before operating. VEVOR reserves a clear interpretation of our user manual. The appearance of the product shall be subject to the product you received. Please forgive us that we won't inform you again if...
-
Page 67: Spezifikationen
BEVOR DU ANFÄNGST: Bitte lesen Sie die Anweisungen vor der Installation vollständig durch, um sicherzustellen, dass a reibungslose und ordnungsgemäße Installation. Bewahren Sie das Handbuch zum späteren Nachschlagen auf. SPEZIFIKATIONEN NLSSHLM01 Modell Produktgröße 4 * 2,5 Fuß Farbe Schwarz Notwendige Werkzeuge 1. - Page 68 TEILE AUFFÜHREN Links Torpfosten Rechtes Tor Post Tor ×1 ×1 ×1 Pflock × 4 Pfostenverstärk Peg-Abdeckun ungshalterung Stift × 4 Scharnier × 2 Schrauben × 8 g × 4 _ × 2...
-
Page 69: Installation
Schablone zur Lochplatzierung × 1 Installation Schritt 1: Installieren Sie den Schritt 2: Installieren Sie das Scharnier Stift Schritt 3: Markieren Sie die Position der Befestigungslöcher mit der Schablone für die Lochplatzierung . HINWEIS: Die beiden Löcher auf der linken und rechten Seite dienen zur Installation des Zauns neben der Tür. - Page 70 Schritt 5: Installieren Sie den Stift Schlauchverlegung: Sobald das Bohren abgeschlossen ist, spülen Sie den Schmutz mit einem Gartenschlauch aus den Löchern. Als nächstes stecken Sie die Kunststoffhülsen in die Löcher und klopfen sie vollständig fest. Schritt 6: Installieren Sie die Pfostenverstärkungshalterungen...
- Page 71 Schritt 7: Setzen Sie den linken und rechten Torpfosten in die Stifte ein , um die Installation abzuschließen. Hinweis: Dieses Produkt enthält nicht das Zaunteil, das separat erworben und installiert werden muss. ACHTUNG: DER STANGE KANN NICHT ENTFERNT WERDEN, WENN SIE EINFACH ZIEHEN, OHNE GLEICHZEITIG DREHEN.
- Page 72 WARNUNG! SICHERHEIT IST NUR GEWÄHRLEISTUNG, WENN ZUGANGSPUNKTE VERSCHLOSSEN SIND. PRÜFEN SIE, OB SICH IN DER NÄHE DER BARRIERE ELEMENTE SIND, DIE DAS KLETTERN DES ZAUNS ERMÖGLICHEN ODER ERLEICHTERN KÖNNEN. VERSCHLUSSPUNKTE DES ZUGANGS DURCH AUTOMATISIERTE VERSCHLUSSSYSTEME SOLLTEN SYSTEMATISCH ÜBERPRÜFT WERDEN. ...
- Page 73 In China hergestellt...
- Page 76 Technisch Support- und E-Garantiezertifikat www.vevor.com/support...
- Page 77 Technique Assistance et certificat de garantie électronique www.vevor.com/support PORTAIL DE PISCINE MANUEL DE L'UTILISATEUR We continue to be committed to provide you tools with competitive price. "Save Half", "Half Price" or any other similar expressions used by us only represents an estimate of savings you might benefit from buying certain tools with us compared to the major top brands and does not necessarily mean to cover all categories of tools offered by us.
- Page 79 This is the original instruction, please read all manual instructions carefully before operating. VEVOR reserves a clear interpretation of our user manual. The appearance of the product shall be subject to the product you received. Please forgive us that we won't inform you again if...
-
Page 80: Avant De Commencer
AVANT DE COMMENCER: Veuillez lire les instructions dans leur intégralité avant l'installation pour garantir une installation fluide et correcte. Conservez le manuel pour référence future. CARACTÉRISTIQUES NLSSHLM01 Modèle Taille du produit 4*2,5 pieds Couleur Noir Outils requis 1. Couteau utilitaire 2. - Page 81 LES PIÈCES LISTE Gauche poteau de Portail droit poste Grille ×1 porte ×1 ×1 Cheville × 4 Support de Couvre-cheville renfort de Épingle × 4 Charnière × 2 Vis × 8 s × 4 poteau × 2...
- Page 82 Gabarit pour le placement des trous × 1 Installation Étape 1 : Installez la broche Étape 2 : Installez la charnière Étape 3 : Marquez la position des trous de montage avec la plaque en T pour le placement des trous . REMARQUE : Les deux trous sur les côtés gauche et droit sont utilisés pour installer la clôture adjacente à...
- Page 83 Étape 5 : Installez la cheville Gainage : Une fois le forage terminé, éliminez les débris des trous à l'aide d'un tuyau d'arrosage. Insérez ensuite les manchons en plastique dans les trous et tapotez complètement. Étape 6 : Installez les supports de renforcement du poteau...
- Page 84 Étape 7 : Insérez les poteaux de portail gauche et droit dans les piquets pour terminer l'installation . Remarque : ce produit n'inclut pas la partie clôture, qui doit être achetée et installée séparément. ATTENTION : LE PERCHE NE PEUT PAS ÊTRE RETIRER SI VOUS TIREZ SIMPLEMENT SANS LE TOURNER EN MÊME TEMPS.
- Page 85 LES POINTS D'ACCÈS DOIVENT ÊTRE FERMÉS SYSTÉMATIQUEMENT EN CAS DE NON ON EST À LA MAISON, MÊME SI C'EST POUR UNE COURTE PÉRIODE. AVERTISSEMENT! LA SÉCURITÉ EST GARANTIE UNIQUEMENT LORSQUE LES POINTS D'ACCÈS SONT VERROUILLÉS. VÉRIFIEZ SI IL EXISTE DES ÉLÉMENTS À PROXIMITÉ DE LA BARRIÈRE QUI POURRAIENT PERMETTRE OU FACILITER LA GRADUATION DE LA CLÔTURE.
- Page 86 SHUNSHUN GmbH Römeräcker 9 Z2021,76351 Linkenheim-Hochstetten,Germany Pooledas Group Ltd Unit 5 Albert Edward House, The Pavilions Preston, United Kingdom Fabriqué en Chine...
- Page 89 Technique Assistance et certificat de garantie électronique www.vevor.com/support...
- Page 90 Technisch Ondersteuning en e-garantiecertificaat www.vevor.com/support ZWEMBAD POORT HANDLEIDING We continue to be committed to provide you tools with competitive price. "Save Half", "Half Price" or any other similar expressions used by us only represents an estimate of savings you might benefit from buying certain tools with us compared to the major top brands and does not necessarily mean to cover all categories of tools offered by us.
- Page 92 This is the original instruction, please read all manual instructions carefully before operating. VEVOR reserves a clear interpretation of our user manual. The appearance of the product shall be subject to the product you received. Please forgive us that we won't inform you again if...
-
Page 93: Benodigd Gereedschap
VOORDAT JE START: Lees de instructies volledig door voordat u met de installatie begint, om er zeker van te zijn dat: vlotte en correcte montage. Bewaar de handleiding voor toekomstig gebruik. SPECIFICATIES NLSSHLM01 Model Product grootte 4*2.5ft Kleur Zwart Benodigd gereedschap 1. - Page 94 ONDERDELEN LIJST Rechter poort na Links poortpaal ×1 Hek ×1 ×1 Pin × 4 Verstevigingsbe Pinnen deksel ugel voor paal Pin × 4 Scharnier × 2 Schroef × 8 × 4 × 2...
- Page 95 Sjabloon voor plaatsing van gaten × 1 Installatie Stap 1: Installeer de pin Stap 2: Installeer het scharnier Stap 3: Markeer de positie van de montagegaten met het sjabloon voor het plaatsen van de gaten . OPMERKING: De twee gaten aan de linker- en rechterkant worden gebruikt om het hek naast de deur te installeren.
- Page 96 Stap 5: Installeer de pin Hoezen: Zodra het boren is voltooid, spoelt u het vuil uit de gaten met een tuinslang. Steek vervolgens de plastic hulzen in de gaten en tik ze volledig aan. Stap 6: Installeer de paalverstevigingsbeugels Stap 7: Steek de linker en rechter poortpaal in de haringen om de installatie te voltooien .
- Page 97 Opmerking: dit product bevat niet het hekgedeelte, dat apart moet worden aangeschaft en geïnstalleerd. WAARSCHUWING: DE PAAL KAN NIET WORDEN VERWIJDERD ALS U EENVOUDIG TREKT ZONDER DEZE TEGELIJKERTIJD TE DRAAIEN. HET IS VERPLICHT DAT DE TOEGANGSPUNTEN AAN HET EINDE VAN HET SEIZOEN VAN ZWEMMEN MET BEGELEIDING GESLOTEN ZIJN.
- Page 98 WAARSCHUWING! DE VEILIGHEID WORDT ALLEEN GEGARANDEERD WANNEER DE TOEGANGSPUNTEN VERGRENDELD ZIJN. CONTROLEER OF ER ELEMENTEN IN DE BUURT VAN DE BARRIÈRE ZIJN DIE HET BEKLIMMEN VAN HET HEK KUNNEN MOGELIJK MAKEN OF VERGEMAKKELIJKEN. SLUITINGSPUNTEN VAN TOEGANG VIA GEAUTOMATISEERDE SLUITSYSTEMEN MOETEN SYSTEMATISCH WORDEN GECONTROLEERD.
- Page 99 Gemaakt in China...
- Page 102 Technisch Ondersteuning en e-garantiecertificaat www.vevor.com/support...
Need help?
Do you have a question about the NLSSHLM01 and is the answer not in the manual?
Questions and answers